
Portrait Bokeh AI is a set of tools in Luminar AI that can blur the background of any photo with people in the composition.
It's an incredibly useful tool for removing distracting backgrounds or simply make your subjects stand out more. However you choose to use it, you're going to be impressed with how quickly you can turn a cluttered image into something beautiful.
In this tutorial, we'll walk you through all the features in Portrait Bokeh AI as well as how to use other tools in Luminar AI to make the background even more appealing. Then we'll save the images back into Photoshop for further enhancements.
Getting Started
Portrait Bokeh AI is a set of tools found in Skylum's Luminar AI. You can download a free 30-day trial or purchase Luminar AI if you'd like to follow along in this tutorial.
For this tutorial, you'll also need Photoshop. You can download a free 7-day trial of Adobe Photoshop if you don't already own it.
If you're new to Luminar AI or need a refresher, check out our guide to everything you need to know about Luminar AI Photo Editor and discover how you can use it as both a standalone or a third-party plugin for photo editors like Photoshop.
How to Use Portrait Bokeh AI With Photoshop

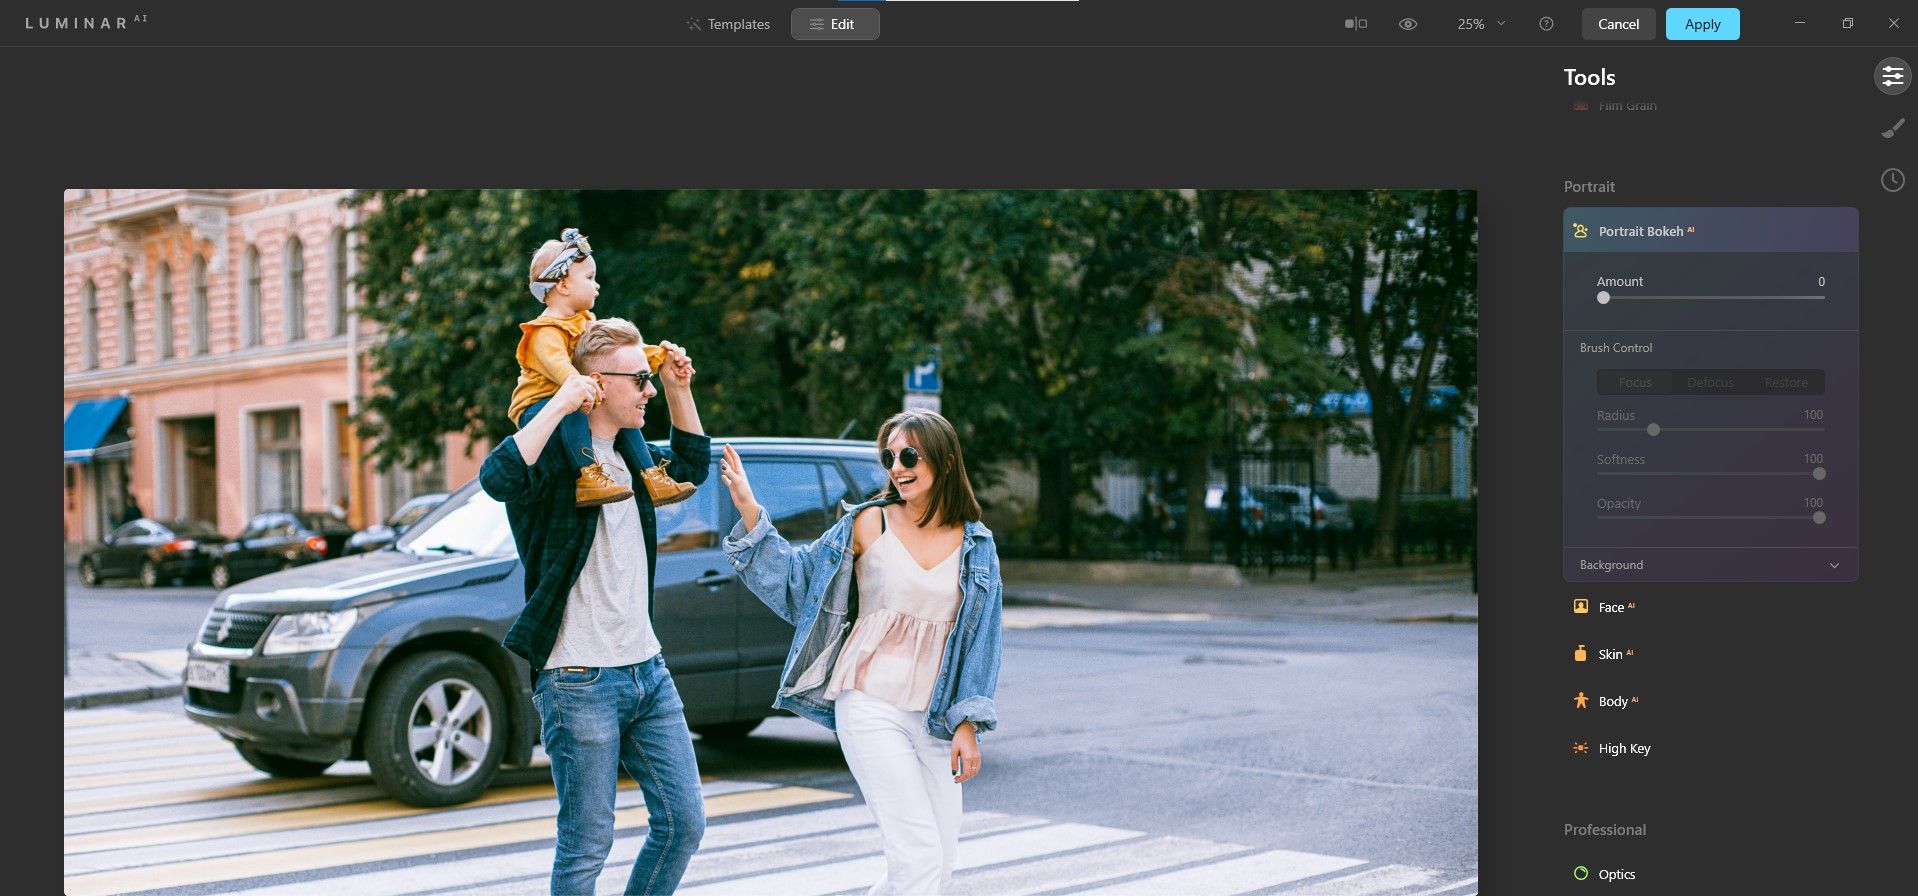
Portrait Bokeh AI is located in the Edit section of Luminar AI, and you'll find it in the Tools section on the right-side after scrolling down a bit. With roughly a dozen tools to work with, Portrait Bokeh AI is pretty simple to navigate and use.
Let's take a look at how to prepare an image in Photoshop before bringing it into Luminar AI. If you'd like to follow along, you can download the above image on Pexels for free.
- With the image already in Photoshop, press Ctrl + J to duplicate the background layer. This is necessary if you want to work non-destructively or if you prefer to edit effects on separate layers.
- Go to Filter > Skylum Software > Luminar AI.
- Click on the Edit tab at the top (next to Templates).
-
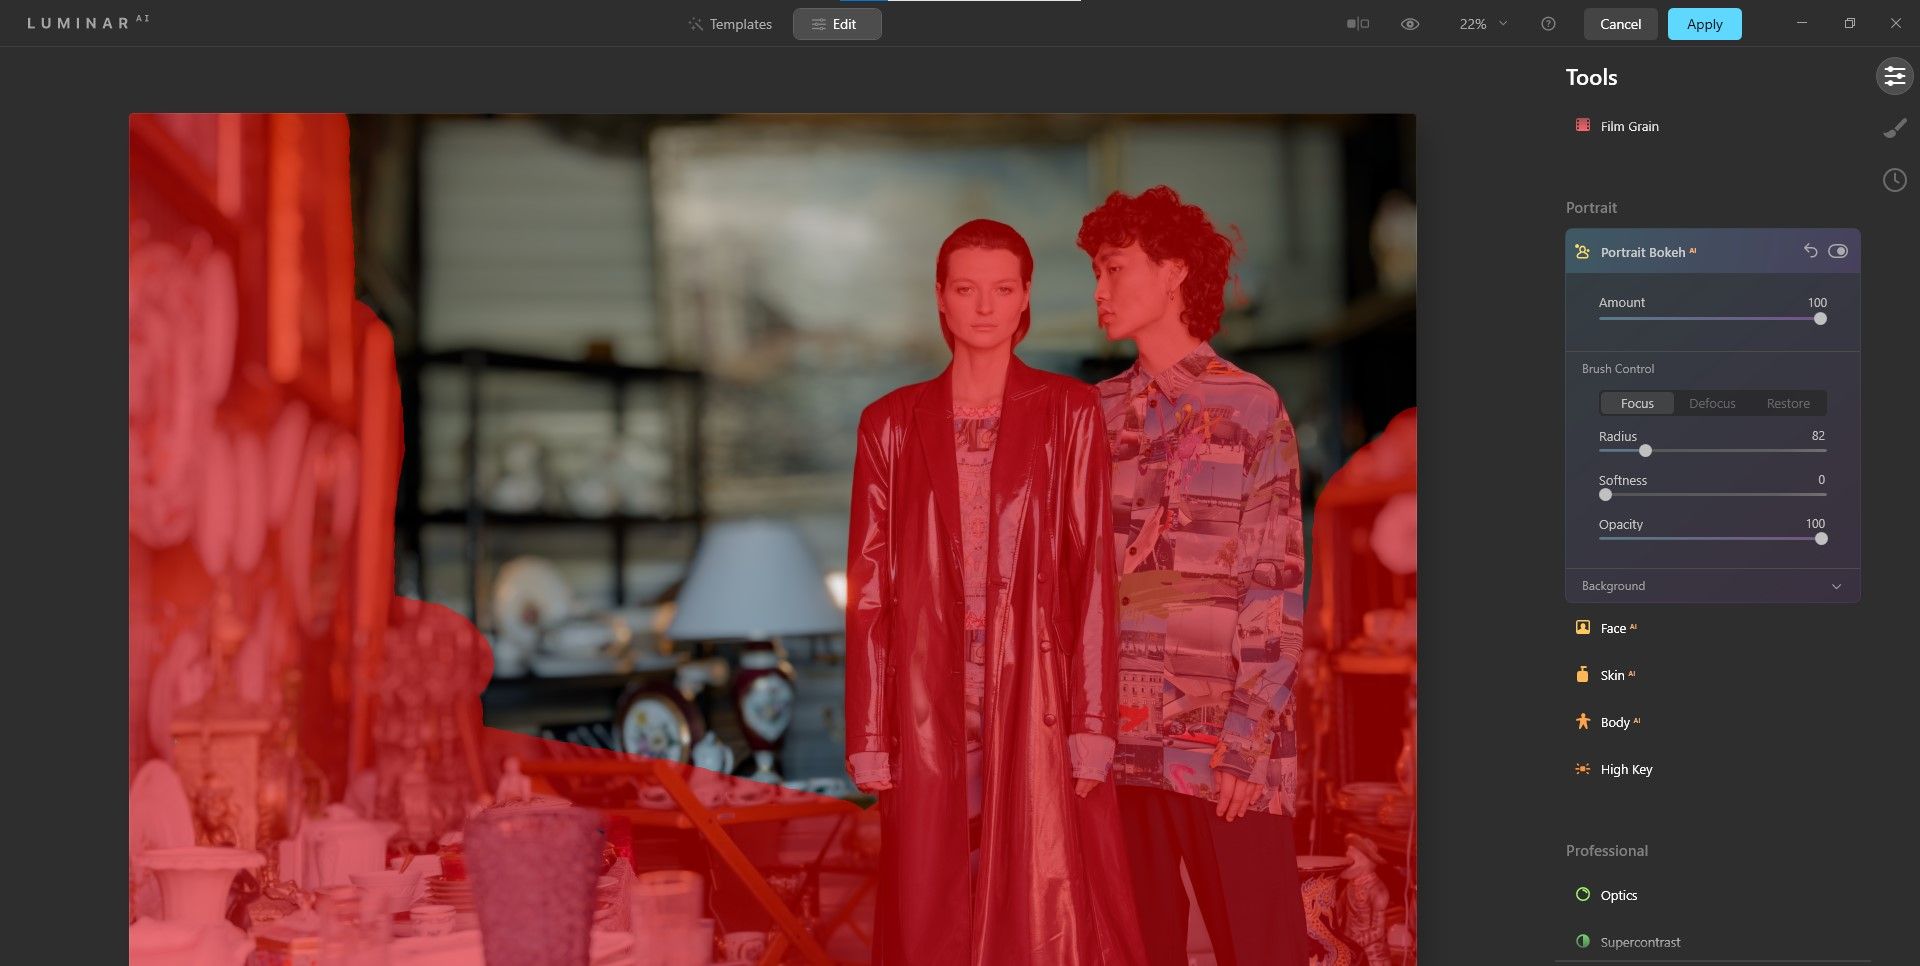
Under Tools, scroll all the way down until you see Portrait Bokeh AI. Click to open the menu.
-
Change the Amount slider to 100.

-
Notice that the blur effect didn't do much to the vehicle's front tire? We'll fix this now. Click on Background to open the submenu, and change the Depth Correction to -30.
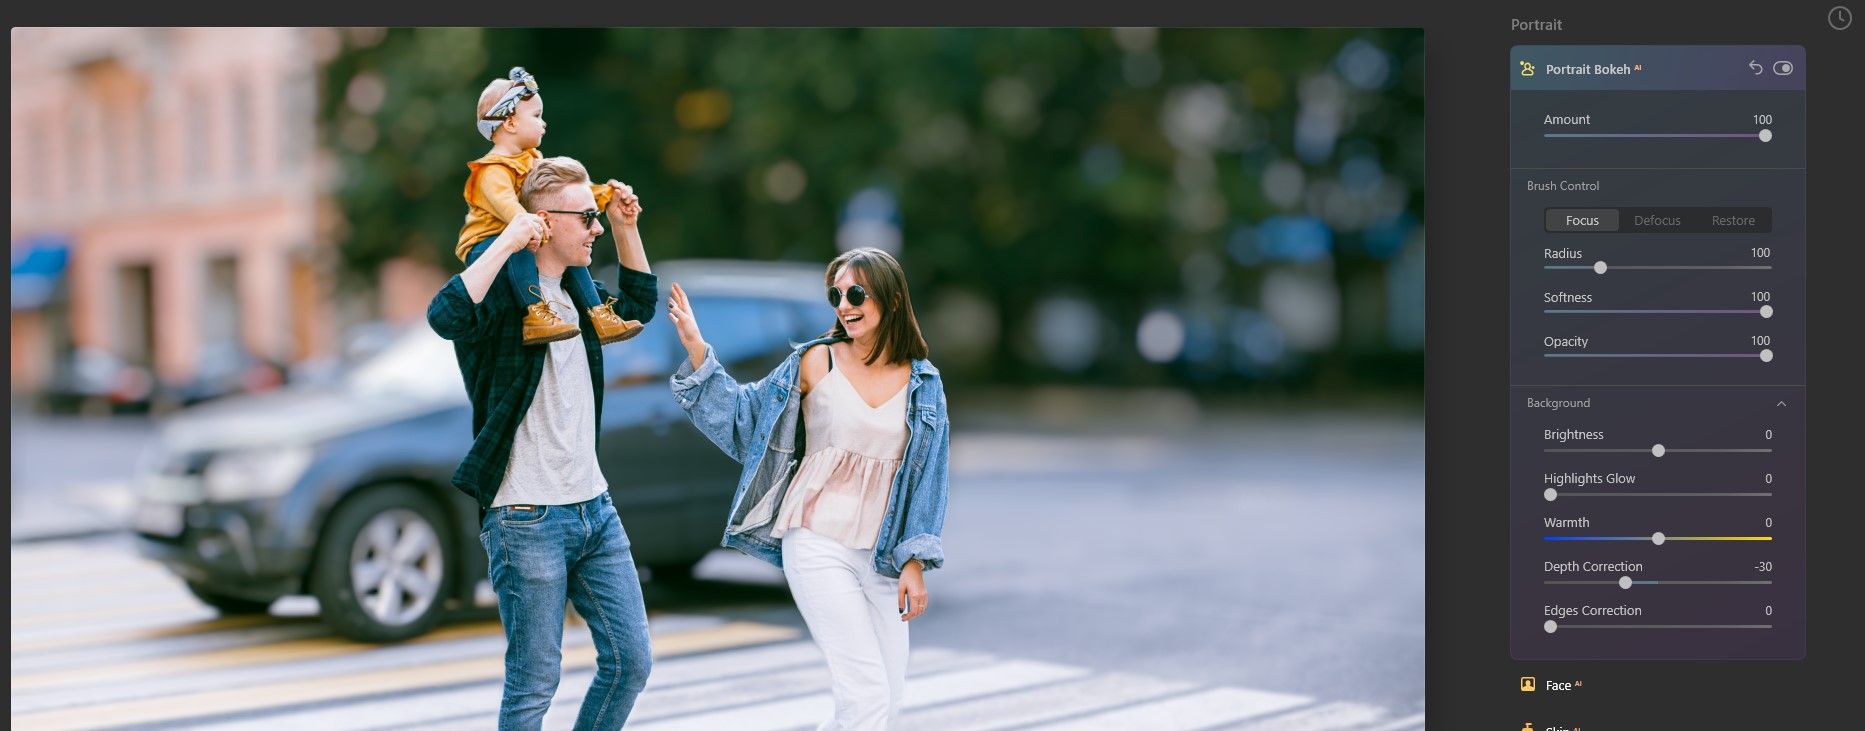


With the Depth Correction adjustment made, there's now a more realistic blur on the entire vehicle, leaving only the people in perfect focus.
Make Other Enhancements in Portrait Bokeh AI
Since we're already in the Portrait Bokeh AI menu, let's make one more adjustment. We're also going to look at a few other tools in Luminar to further improve the image.
-
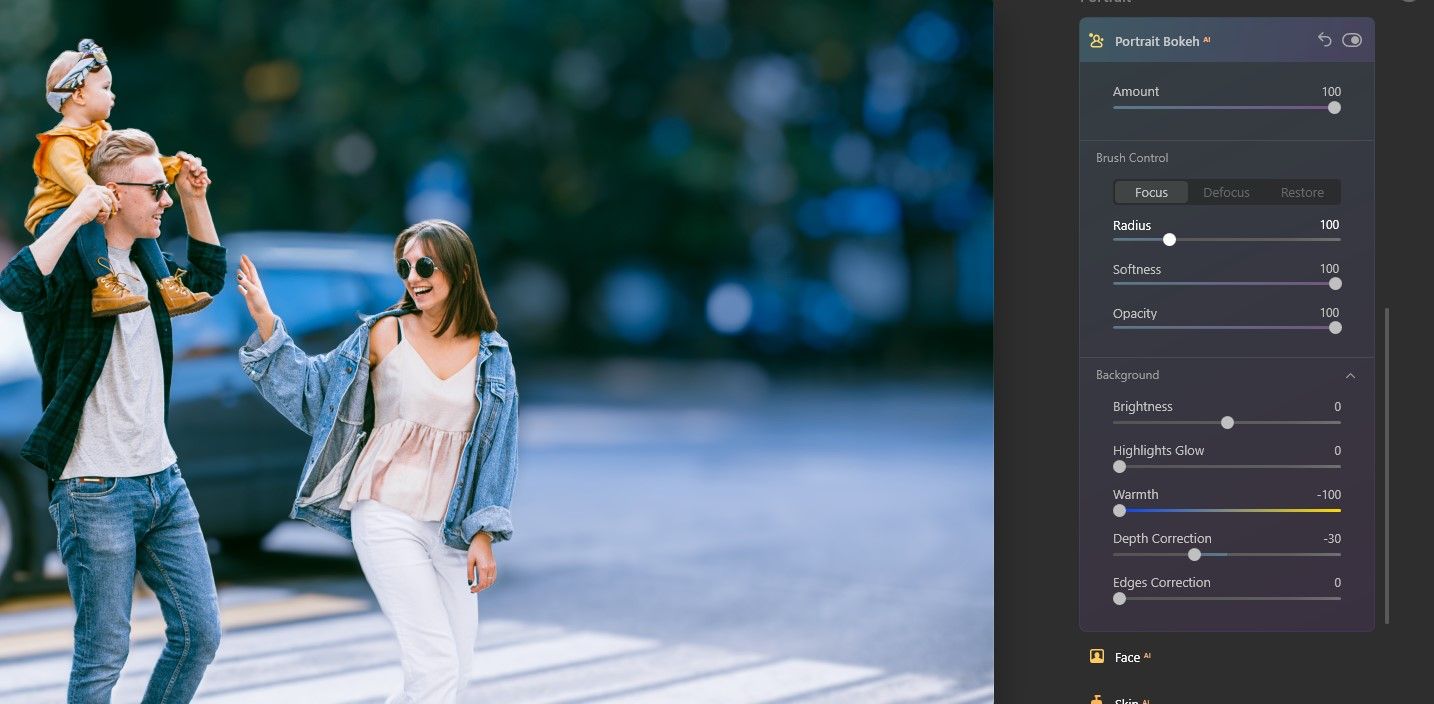
Under Background, change the Warmth slider to -100.
-
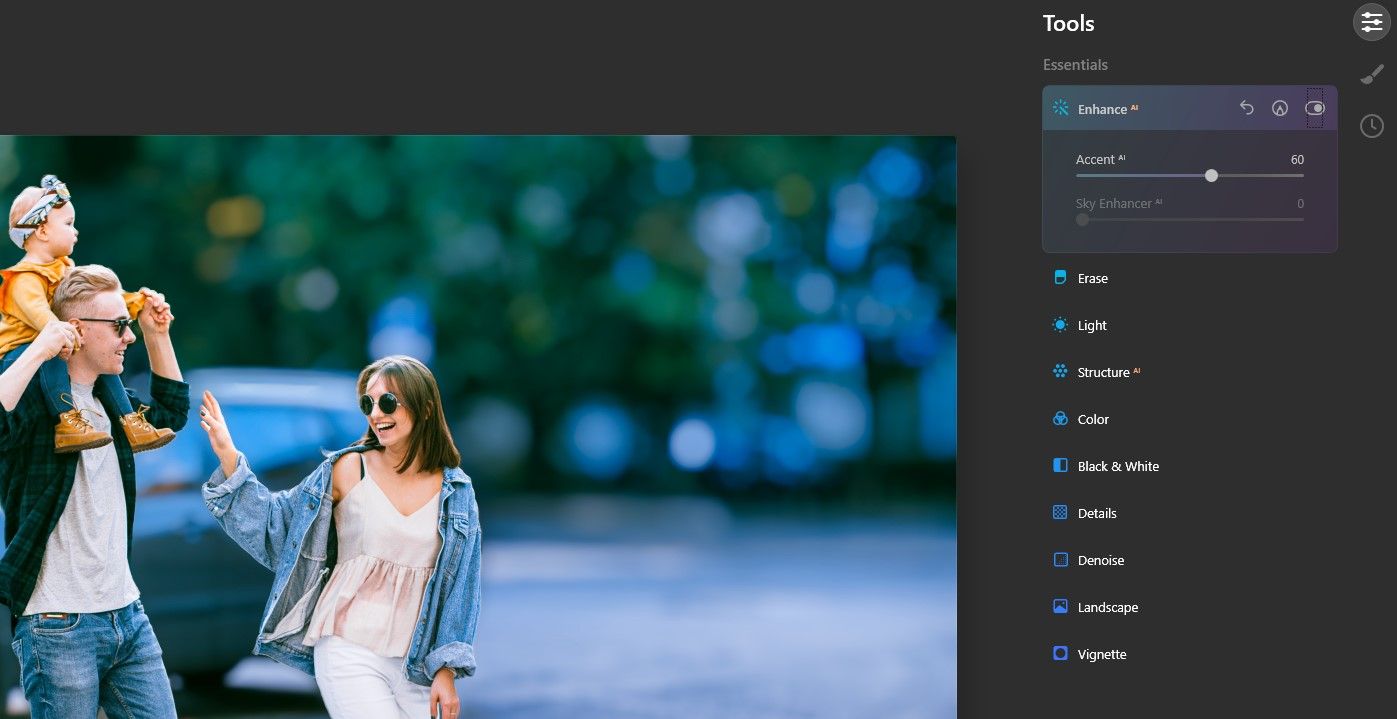
Scroll to the top in Tools. Under Enhance AI, change the Accent AI slider to 60 to brighten the background bokeh.
-
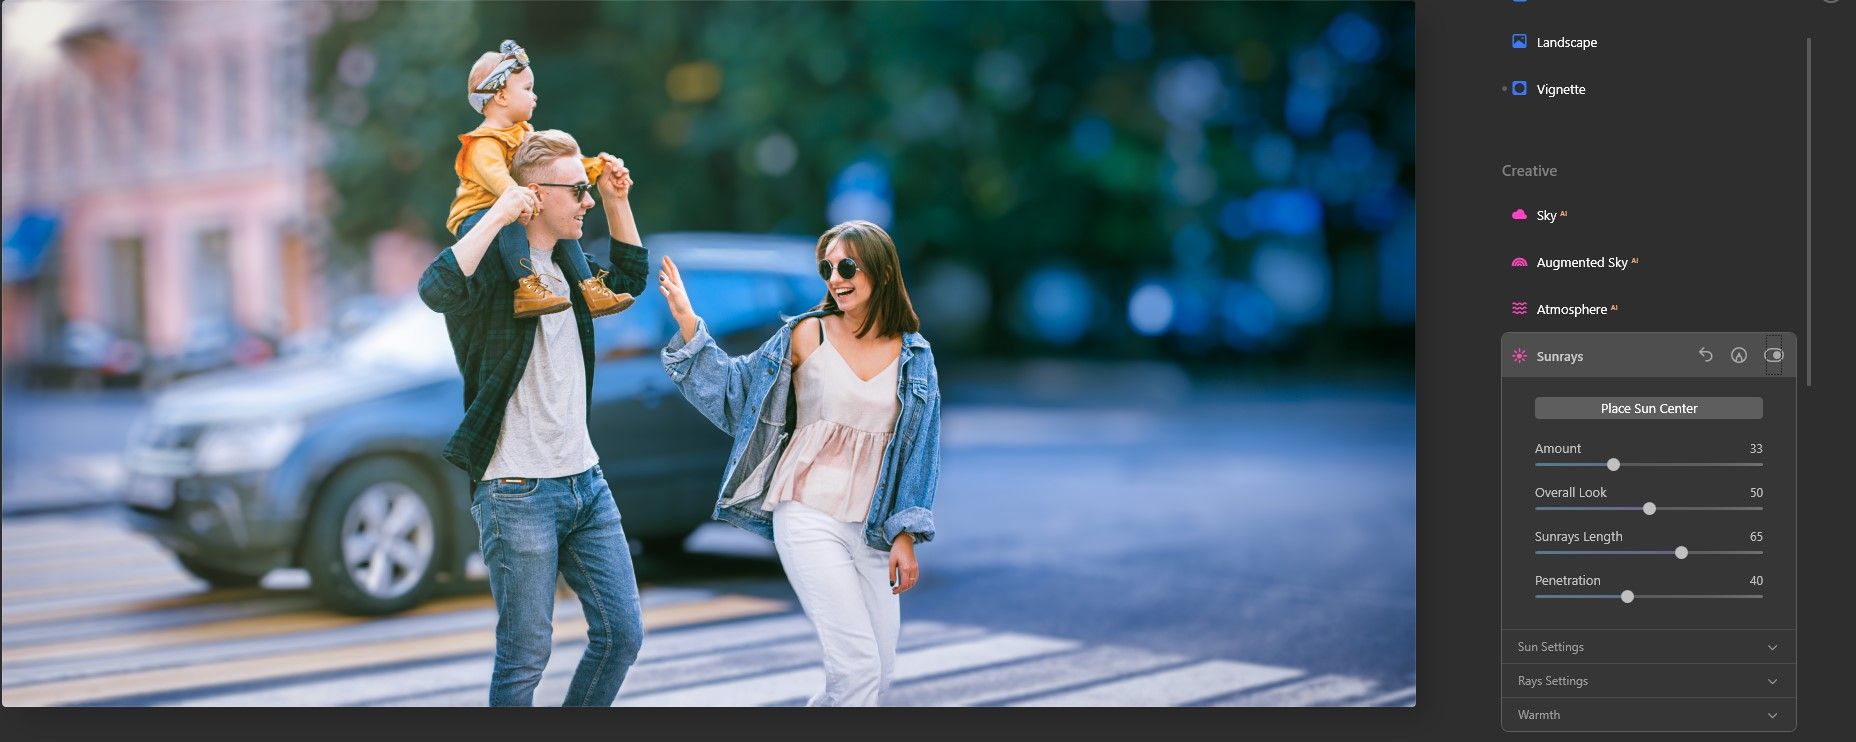
Scroll down to Vignette. Change Amount to -58 and Size to 40.

-
Scroll down to Sunrays. Click on Place Sun Center and move the white dot to the upper left corner. Experiment with the sliders for the most appealing effect.
- Click on Apply to save the image back to Photoshop.


The image has been dramatically transformed. Have a look at the before and after below.
Before:

After:

For images with skies, you can add the sun as we did above. You can also completely replace the skies in Luminar AI.
How to Fix the Blur in Complicated Backgrounds
Let's take a look at one more example where the background is cluttered and there are several focus points that will potentially confuse Portrait Bokeh AI. We'll make use of the other sliders to fix the blur issues.
You can download the below image on Pexels for free if you want to follow along.

Notice if we simply push the Amount slider to 100 (as we did in the previous example) that Portrait Bokeh AI misses some of the background blur behind our subjects and added blur where it doesn't belong on the left wall?
This can be fixed using the Focus and Defocus tabs and sliders. Let's show you how.
-
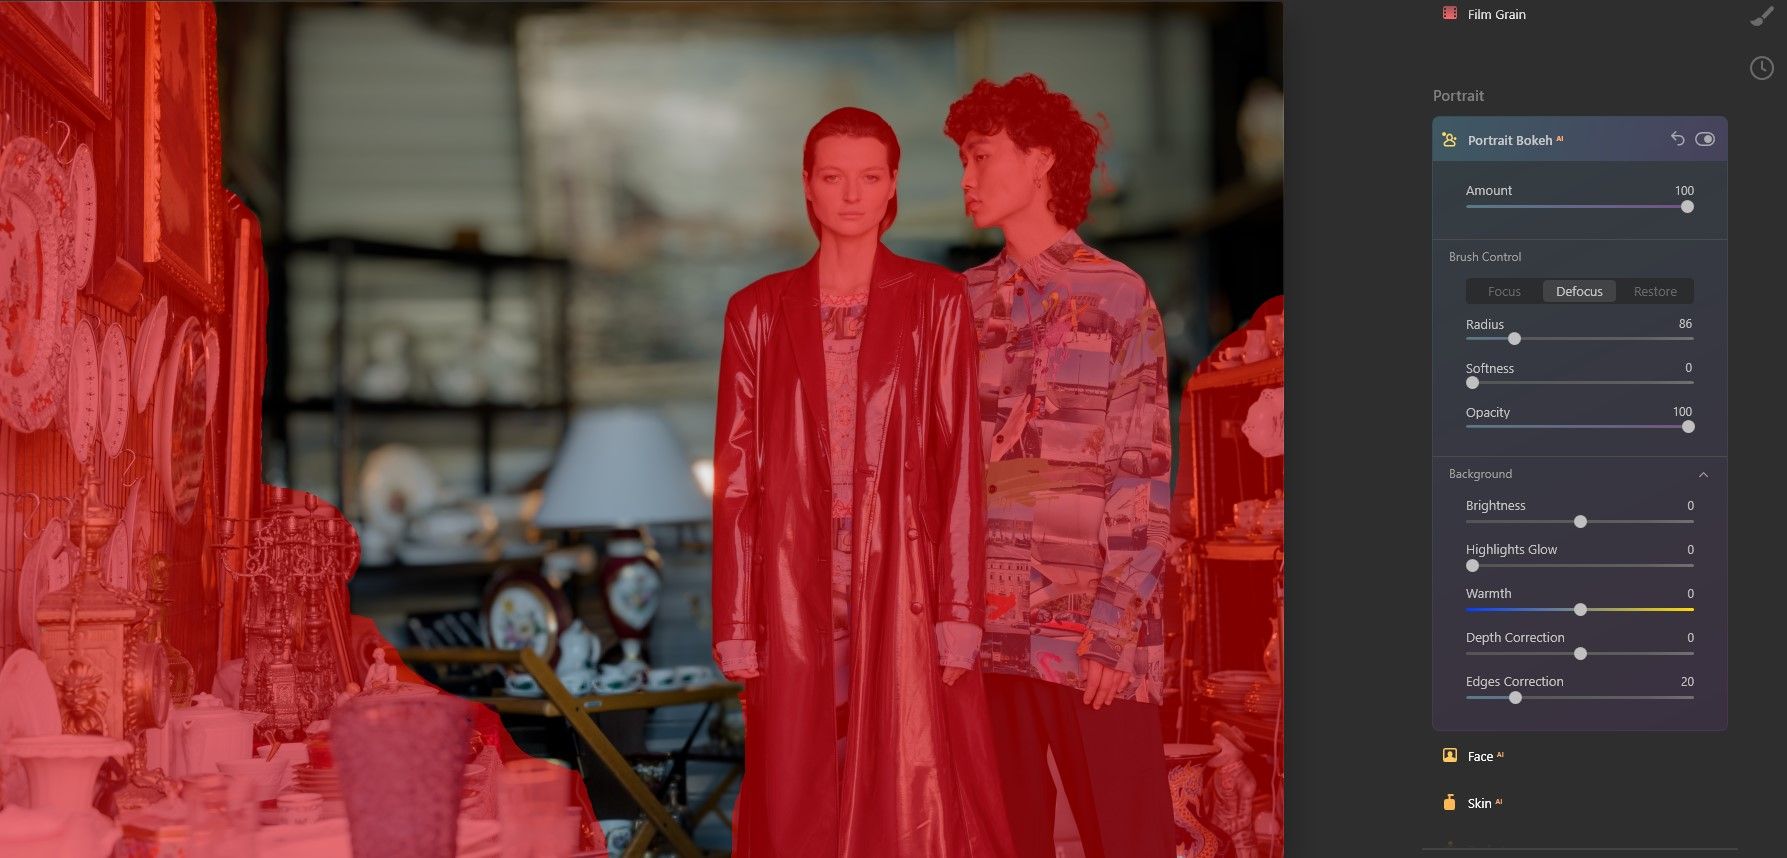
Click on the Focus tab. Adjust the Brush Control sliders as needed and paint the red mask over all the areas you want to be in focus.
-
Likewise, click on the Defocus tab. Paint the red mask over the areas that you want to be blurred.
- Experiment with the Depth Correction and Edges Correction sliders. Also, try reducing the Amount slider to make for a smoother transition between foreground, midground, and background elements. It might not be perfect, but we'll fix it in Photoshop.
- Click Apply to save to Photoshop if you're using Luminar AI as a plugin.


Make Final Corrections in Photoshop
There are several approaches we can take to fix any visible issues in the blurring process. If you zoom in closely around the image, you'll likely see various areas that need attention. In the below close-up, you can see the border between the blurred and unblurred areas near the candlestick holders.

These can be masked out using the Brush tool on the layer with Luminar AI (layer 1) as well as various other Photoshop tools like Heal, Spot Healing, Clone Stamp, and Patch.
The Patch tool is by far the most helpful tool to correct almost all of the blur issues. But since we used a layer mask first, it's best to paint out the blur effect where it doesn't belong. Then, in order to use the Patch tool, create a Stamp Visible Layer (Shift + Ctrl + Alt + E) and make the corrections.
Create Fantastic Background Blur With This Powerful Tool
Portrait Bokeh AI is just one of a number of powerful tools found in Luminar AI, which is the world's first entirely artificial intelligence-based photo editing software.
When used along with Photoshop as a plugin, you're getting two powerful photo editing applications that use the latest in AI which makes traditionally time-consuming tasks attainable in mere seconds.
Follow this tutorial to create background blur with the Portrait Bokeh AI tool, and you'll see what we mean.