A photographer's first time in a studio can be a scary experience. But it doesn't have to be. Here, we'll give you some very helpful tips that will make your first time in the studio a hassle-free experience.
1. Have a Plan

Having a plan should always be the very first thing that should be on the photographer's list when it comes to shooting in the studio.
Unlike shooting outdoors in natural light or in other locations without studio lighting, it's difficult to improvise in the studio if you don't have everything planned out in advance. That's because it's very much like shooting a movie; the photographer must be the director at all times.
All questions must be answered; every who, what, when, where, and why you're doing the studio shoot in the first place. Here are some important considerations:
- Do you need to rent a studio space? And will the location be easily accessible for you and everyone else involved?
- Have a mood board that you share with models (if you're using any) in advance. Everyone should be consulted.
- It's absolutely crucial to know how much time you'll need, especially if you're renting a studio or paying a model.
The above tips are just the starting point. Everything needs to be thought out carefully. This will ensure a smoother experience, and you'll come off as a professional photographer.
A weekly planner will help you stay organized for the week of the shoot and make sure that you don't forget something vital.
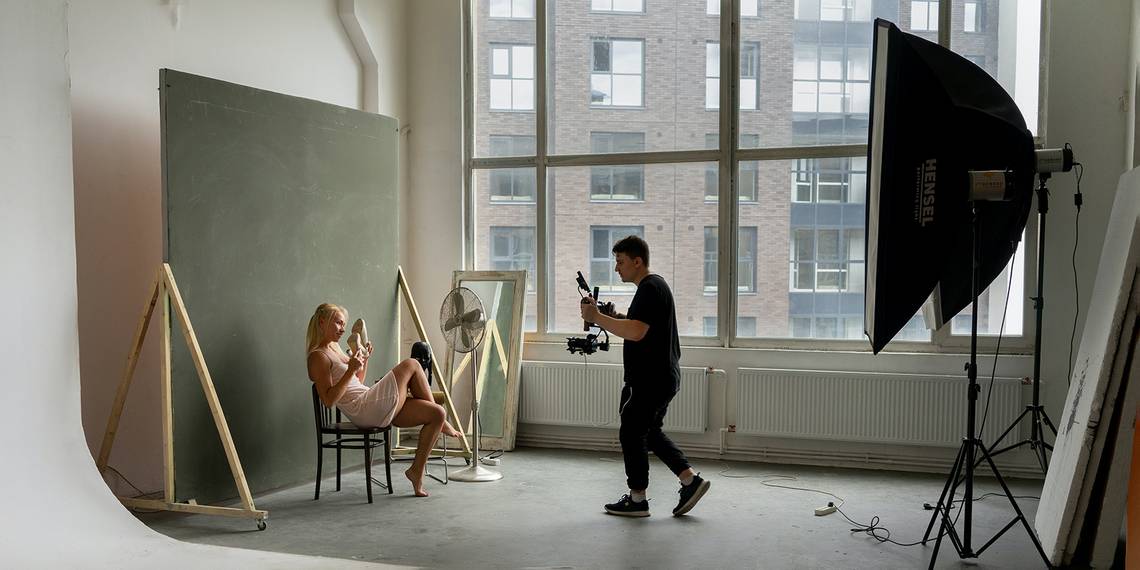
2. Know What Lighting to Use

Lighting is the king in studio photography. How you choose to light your subject will ultimately determine if you'll achieve your overall vision for the shoot.
When you're first starting out, it's probably best to keep things simple. Consider using a single-light setup. Many portrait photographers make use of just one main strobe light for their shoots. A reflector can be used as well to fill in light where you don't want any shadows.
See our studio lighting guide for photographers that will help you make important creative decisions for your shoot.
3. Perspective Is Important

Perspective overlaps with studio lighting and posing (which we'll talk about next), so it should be taken into consideration during the planning phase.
For portraiture and other genres like beauty, it's always worth noting where you'll be holding the camera in relation to your model or subject. Because the eyes are important in so many circumstances in portraiture, determine whether most of your shots will be at eye level or if you intend on changing up the perspective.
This is important because your lighting will always change as soon as you move the model or your camera. The shadows and highlights will fall in different places as soon as the perspective changes. Even if you don't have all the poses worked out, double-check to see how the light is interacting with your model to see if a reflector is needed or if any changes would be required before taking the shot.
4. Plan the Poses in Advance

Apart from the studio lighting, posing is one of the biggest stumbling blocks for beginner photographers, whether they're in the studio or not. But in the studio, it's even more crucial because there are usually no additional backgrounds and foregrounds to play with like an outdoor natural light shoot.
Save some posing inspiration on your phone so that you don't run out of ideas. Sites like Pinterest are great for discovering how photographers pose models. See how to save pictures from Pinterest to your Android or iOS phone so that these photos will be easily accessible on the day of the shoot.
5. The Best Camera Settings to Use

Camera settings aren't as complicated as they might first seem. When you're shooting with speed lights, your shutter speed will typically be what your camera's sync speed is, something like 1/200 or 1/250 of a second.
Your ISO will be set to the lowest, usually around 100. This leaves the aperture, which will vary depending on the subject and how much of the subject you want to be in focus. Common apertures range from f/2.8 for portraiture all the way up to f/11 or higher for beauty and product photography.
It's worth knowing the basics of depth of field because your shoot may depend on including or excluding certain details for creative effect.
6. Consider Using a Neutral Background

When you're just starting out in the studio, it's best to keep it simple and use a neutral background to photograph your subject against. Something like a neutral gray background would be ideal. There are a few reasons for this:
- Light doesn't reflect as much nor is it completely absorbed by neutral backgrounds, making for a more flexible shoot.
- It's easier to cut your subjects out from the background if you need to for composites or to swap out the background for something different.
- Extremely bright and dark backgrounds should only be used intentionally for specific reasons.
A neutral background doesn't have to be gray. Any solid background (avoid patterns) that isn't too bright or too dark will work fine.
7. An Assistant Can Be Very Helpful

An assistant can come in very handy, especially if they've worked in a studio before or have experience as a photographer in the studio. Regardless of experience, an assistant can help out with tasks that would normally take away time from the photographer when shooting.
It's also worth considering whether the model would require a hairstylist, makeup artist, or even a clothing stylist. But if you're just starting out, it's best to see if the model can apply their own makeup and wardrobe to keep things simple.
8. Bring Fun Props

Props like sunglasses, hats, jewelry, scarves, canes, umbrellas, or anything else relatively small and easy to pack may be worth taking to the shoot. Props can come in handy if you run out of ideas or just want to experiment.
If you do use props, we recommend using them after your planned shots. This will help reduce the risk of worn accessories ruining the model's hair and makeup. You may also want to consult with your model in advance to let them know about any props that you may bring; you can also ask the model to bring any props that they might want to try.
9. Limit the Number of Wardrobe Changes

It may be tempting to ask the model to bring many outfits, but we highly recommend limiting your first shoot to just one or two outfits. That's because each wardrobe change takes time and may require new makeup and additional attention to the model's hair.
Also, if you do have your model change wardrobes, make sure there's a private space in the studio where they can change, preferably a changing room with proper lights and a mirror.
10. Keep It Simple

On your first studio photoshoot, don't plan an elaborate affair with multiple lights, multiple wardrobes, multiple lens changes, and lots of special effect gels and modifiers. Keep it simple.
Remember that time is money if you're renting a space. Your main mission is to get the shoot completed according to your plan, nothing more and nothing less. Plan to keep your out-of-pocket expenses low and aim for keeping the shoot on schedule.
Keeping it simple is more than planning, it's a mindset that covers all areas of your studio shoot and will ultimately help you complete it with fewer unforeseen hurdles.
Make Your First Studio Shoot a Smooth and Memorable Experience
Every studio photoshoot session should be a joyful experience and not something to fear. Hopefully, you'll put these tips to good use to make your first studio shoot a fun and rewarding experience.