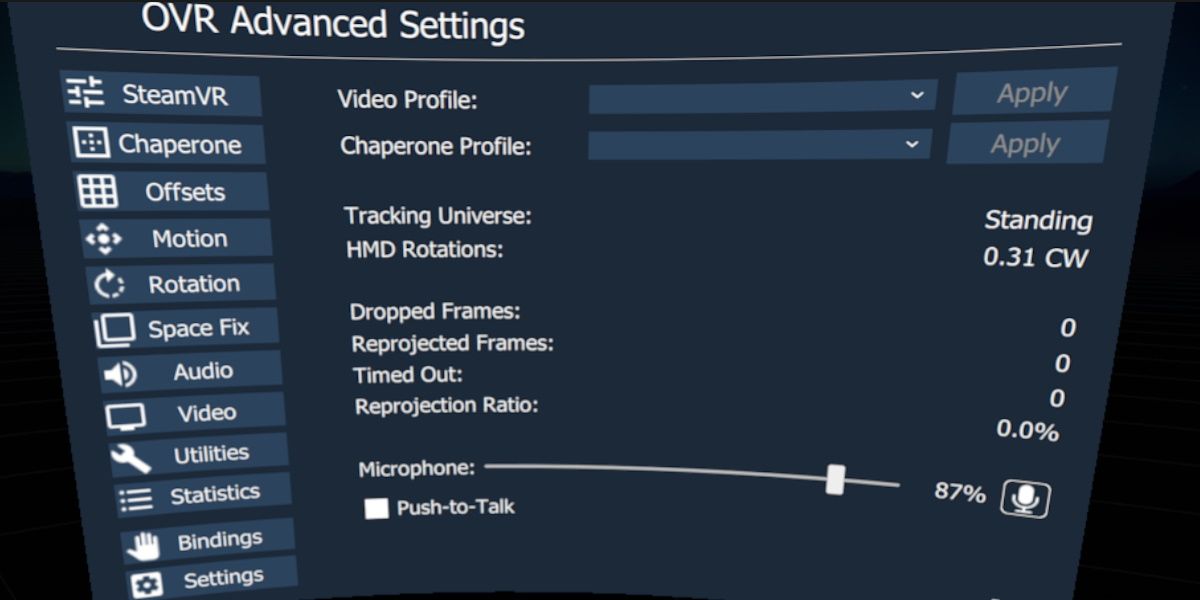
OpenVR Advanced Settings is a freeware addon for SteamVR that adds a new overlay to your VR dashboard. Within this overlay is a host of powerful new options to fine-tune your VR experience.
Frustrated with your chaperone settings shifting? Wondering where the Push-to-Talk function is? Maybe you need better warning systems in place to prevent you from hitting furniture?
OpenVR Advanced Settings sets out to solve these problems.
What is OpenVR Advanced Settings?
Put simply, the addon enables a series of configurable options that you can access from within your SteamVR menu.
These options range from simple bindings to entirely new features like Push-to-Talk or more advanced chaperone warnings. Further information (including default bindings for many of these features) can be found on the dedicated GitHub page.
What Can I Do With OpenVR Advanced Settings?
Once you get into the program, the amount of options may seem daunting. OpenVR covers options from controller bindings, to artificial locomotion, to chaperone customization.
If you don't know where to start, that's okay. Here are 5 things you can do with this program that will have you never going back.
1. Fine-Tune Your Chaperone Settings
No matter how much time you put into getting your play space just right, one bump of the base stations can set your chaperone slightly off to where it should be. This can be a frustrating experience that usually results in the headset coming off, and the setup process being repeated.
Wouldn't it be much nicer if you could just fix this issue immediately, from within your SteamVR menu?
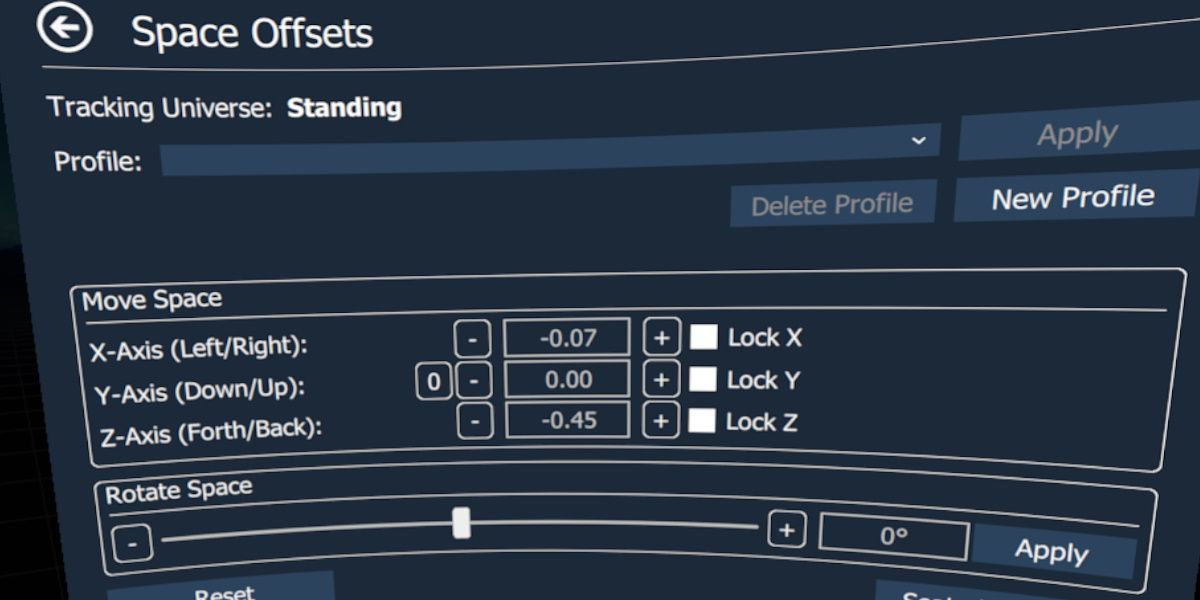
Head into the Offsets menu. Under the Move Space submenu, you'll see configurable variables for your X, Y, and Z axis. Using the Plus or Minus icons, you can quickly inch your space in any direction you please.
The icons move the play space by set increments, and clicking into the number box allows you to set a specific value.
This menu even features a Rotate Space slider, allowing you to quickly reorient your view
2. Use the Space Fix
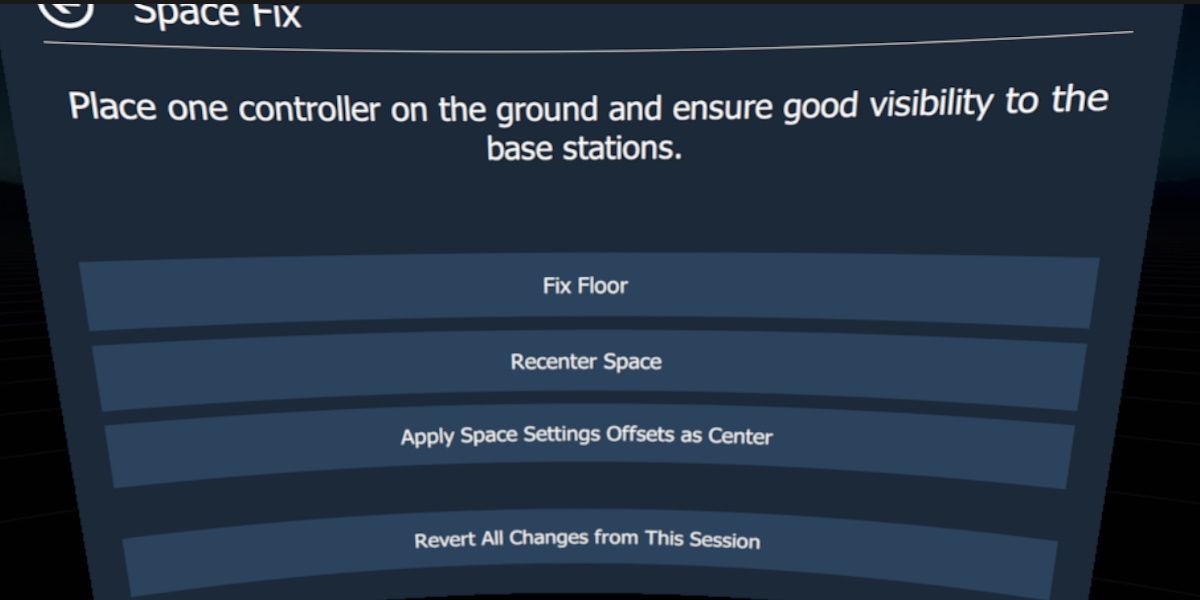
In the Space Fix heading, you'll find one of the most useful functions of OpenVR Advanced Settings. Space Fix is a quick, effortless way to correct play space errors with almost no manual input.
As the on-screen instructions state, place one of your controllers on the floor, well within view of your basestation or headset camera.
Hitting Fix Floor will align the virtual floor with that controller, useful for when your floor becomes misaligned and the Offsets menu isn't specific enough.
Recenter Space alters your chaperone to be centered around where your controller currently is. Especially useful for wider play areas.
Apply Space Settings Offsets as Center does as the above, but it also remembers any changes you've made in the Offsets menu.
Finally, Revert All Changes From This Session simply undoes any play space changes, reverting back to the default as SteamVR has set it.
3. Chaperone Proximity Warning
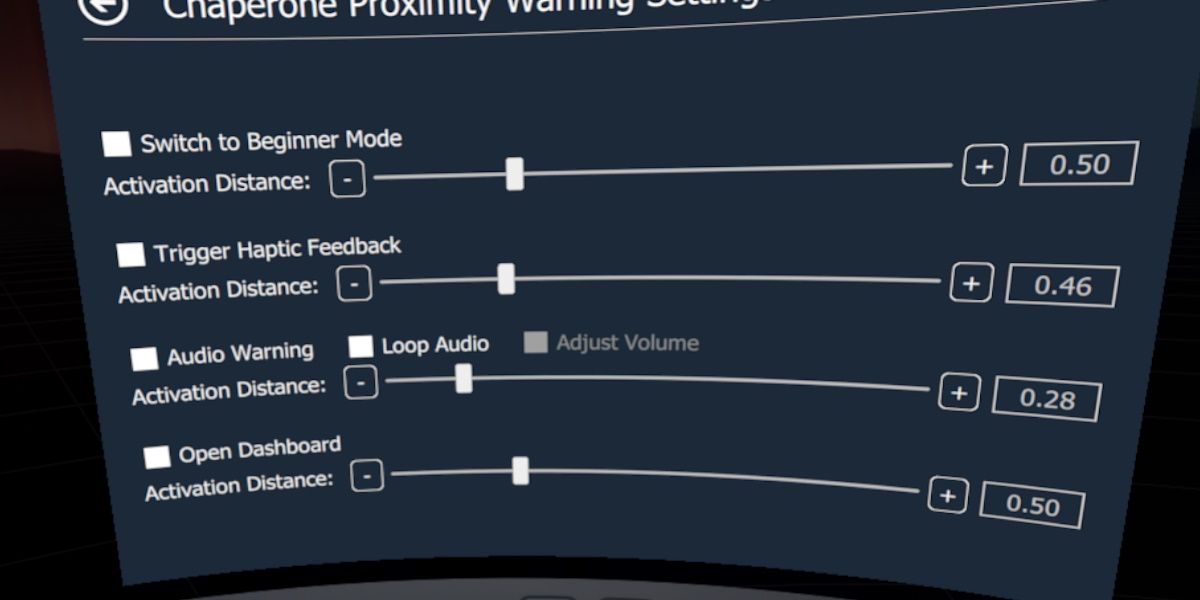
One of OpenVR Advanced Setting's more developed features, the Chaperone Proximity Warning Settings Page allows you to set additional warnings and safety measures on your chaperone.
To access this feature, head into the Chaperone Settings page, and then hit the Proximity Warning Settings button.
OpenVR Advanced Settings offers 4 warning systems for your chaperone.
Enabling Switch to Beginner Mode will cause SteamVR's default chaperone to display in full whenever you cross a certain threshold defined by the user.
Trigger Haptic Feedback causes both controllers to vibrate when the user's distance to the chaperone falls below the set limit.
The more immediate warning is the Audio Warning. Set an activation distance and, whenever you cross it, an alarm sound will play. Toggle Loop Audio to have the alarm sound loop and Adjust Volume to have the sound play louder the closer you get.
Open Dashboard will cause the SteamVR dashboard to open. The idea here is to pause the game and give the player a moment to center themselves.
All of these features are useful if you're showing off your headset to guests who are new to VR, or to prevent yourself from causing any damage to your surroundings.
4. Rotate Your Play Space
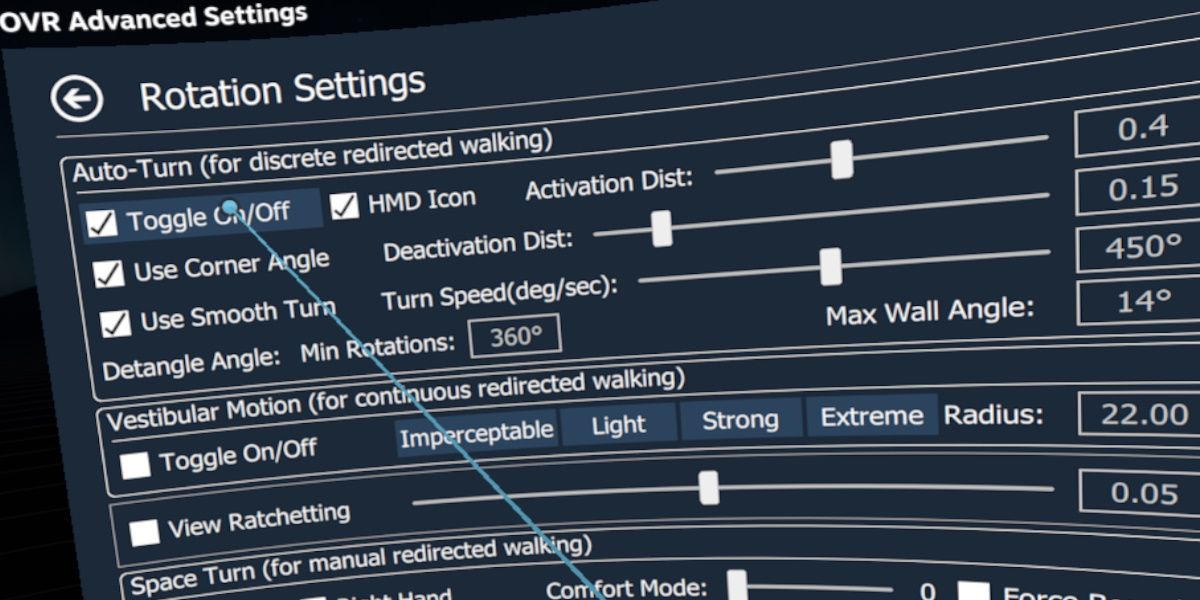
With so many different games drawing from the same SteamVR chaperone setting, you're bound to run into one game that faces you in a direction you'd rather not face. In situations like these, OpenVR Advanced Setting's Rotation Settings can save the day.
The Rotation Settings page has a huge amount of options. Auto Turn enables a function that automatically rotates your play space when you get near a wall. The thinking here being that you can rotate along with your play space, essentially allowing you to walk to one direction infinitely by going in a circle.
Vestibular Motion does much the same, but consistently. Basically, any step you take forward will rotate your play space, prompting your next step to be away from your chaperone.
They're fun settings to play with, but come with a very steep learning curve. The setting we're most interested in is Space Turn.
By enabling the toggle next to either Left Hand, Right Hand, or both, you'll enable a feature that allows you to rotate your play space on the fly, manually. By pressing a button and dragging your controller, you can rotate your play space while in game. This puts the power of the above two options directly in your hands.
5. Using Push-to-Talk
Seeing as VR is a highly physical activity, having an always-on microphone during multiplayer games can be as inconvenient as it is embarrassing.
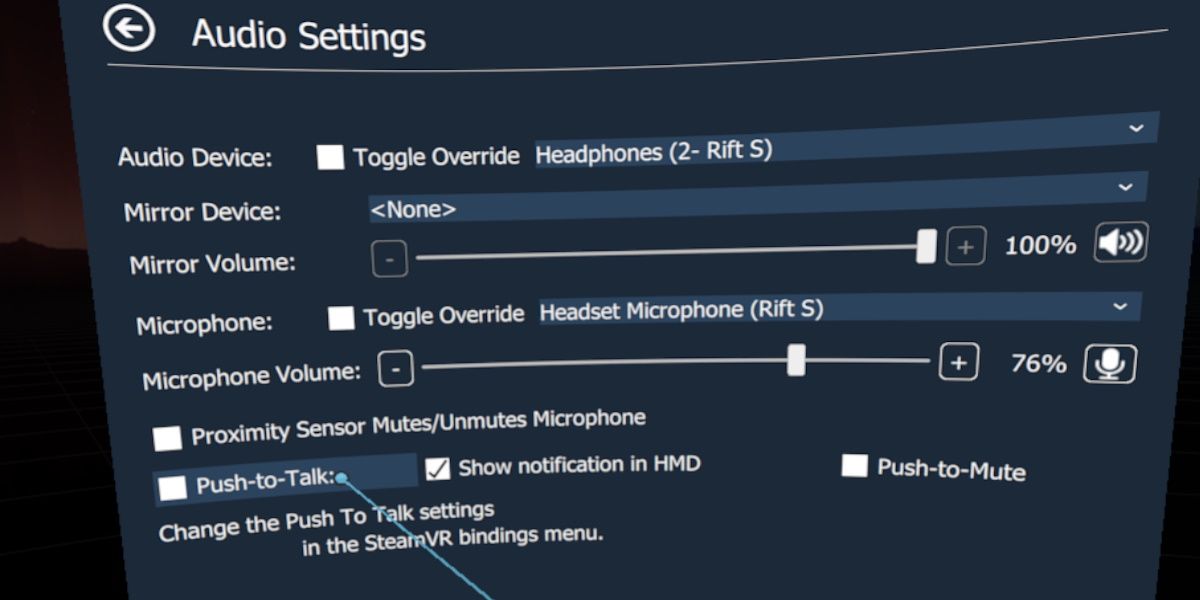
Both Oculus and SteamVR handle Push-to-Talk on a game-by-game basis, meaning that if the game doesn't natively support the feature, you're usually out of luck. Thankfully, OpenVR Advanced Settings has this covered, too.
In the Audio page, toggle the Push-to-Talk function. It's that easy. Pressing a button will now toggle your microphone on to receive audio. Enabling Show Notification in HMD will display an icon when this happens. Alternatively, Push-to-Mute can be enabled to mute the microphone when the button is pressed.
Immense Customization Without Leaving VR
There are countless additional options available in OpenVR Advanced Settings. Many of which can be read about further at the GitHub page. The 5 features listed above are just the tip of the iceberg when it comes to what this addon can do.
Whether you're a VR power user or a casual gamer, functions like Push-to-Talk or quickly fixing your play space are hard to go without, making OpenVR Advanced Settings a crucial part of any SteamVR set up.
Many of the features bundled into the addon work great as tools to help assist you in showing VR to new people. Features like the Proximity Warning Sensor can make both you and the player you're showing VR feel safer. Games are more fun when you're less worried about smashing your TV.

