Windows display settings help you get the best out of your screen – be it the laptop display or an external monitor. You can adjust the resolution, change the display scaling (a feature necessary for big monitors), and pick between multiple displays.
The revamped Settings app in Windows 11 offers more options in the Display section; namely HDR, refresh rate adjustment, and Night Light. Apart from the usual Settings app route, there are multiple methods to open the Settings app on Windows 11. Curious? Let’s begin.
1. Using the Start Menu
The Start menu is the easiest and most widely used method to access any application. You can even search for applications and files directly from the Start menu. Here’s how:
- Press the Win key to launch the Start menu.
- Type Display settings and click on the Open option in the right pane to go to the Display settings section.
2. Using the Desktop Context Menu
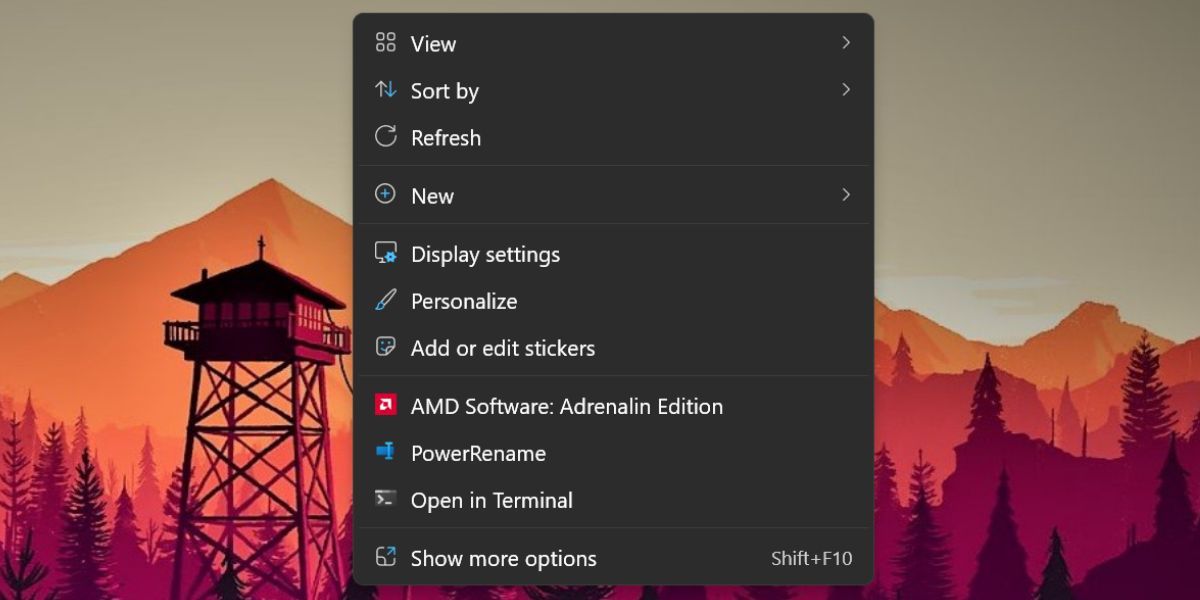
Like the previous version of Windows, this one also includes the option to launch the Display settings section from the Desktop. Microsoft hid many options to offer a more concise context menu in Windows 11, but you don’t have to struggle much to launch the Display settings. Repeat the following steps:
- Press Win + D to switch to the desktop.
-
Right-click on the desktop to open the context menu. Click on the Display settings option in the context menu.

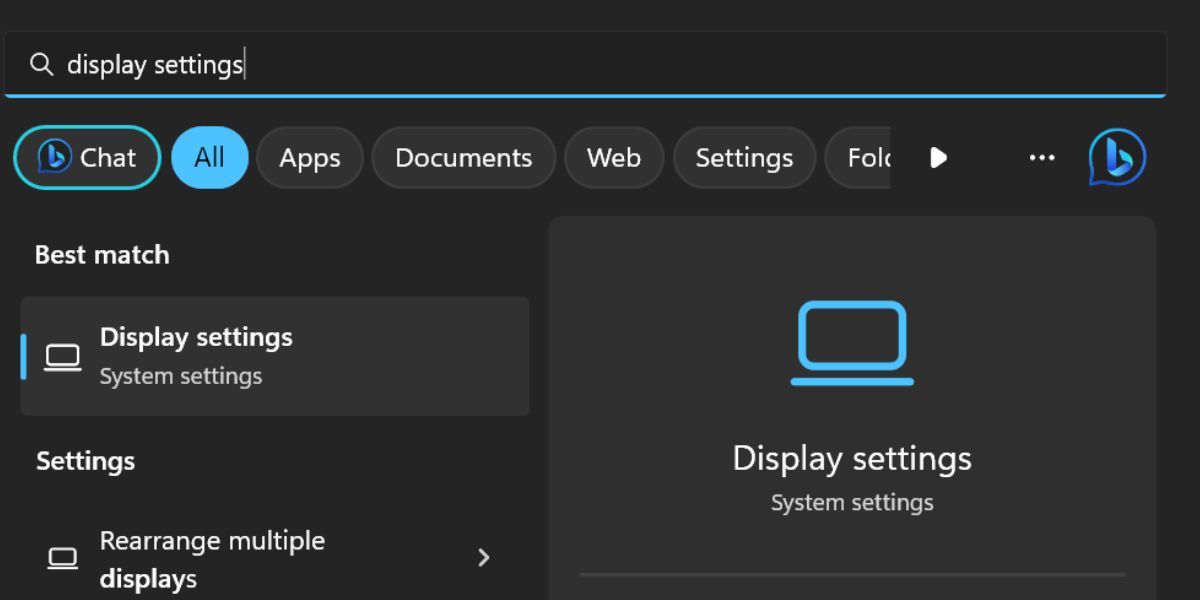
3. Using Windows Search
Windows 11 has a powerful search app that now integrates Bing AI with it. You can use it to find and launch programs installed on your system or search the web for it.
- Press Win + S to launch Windows Search.
-
Type Display settings in the search bar. Press Enter to launch the Display settings section within the settings app.

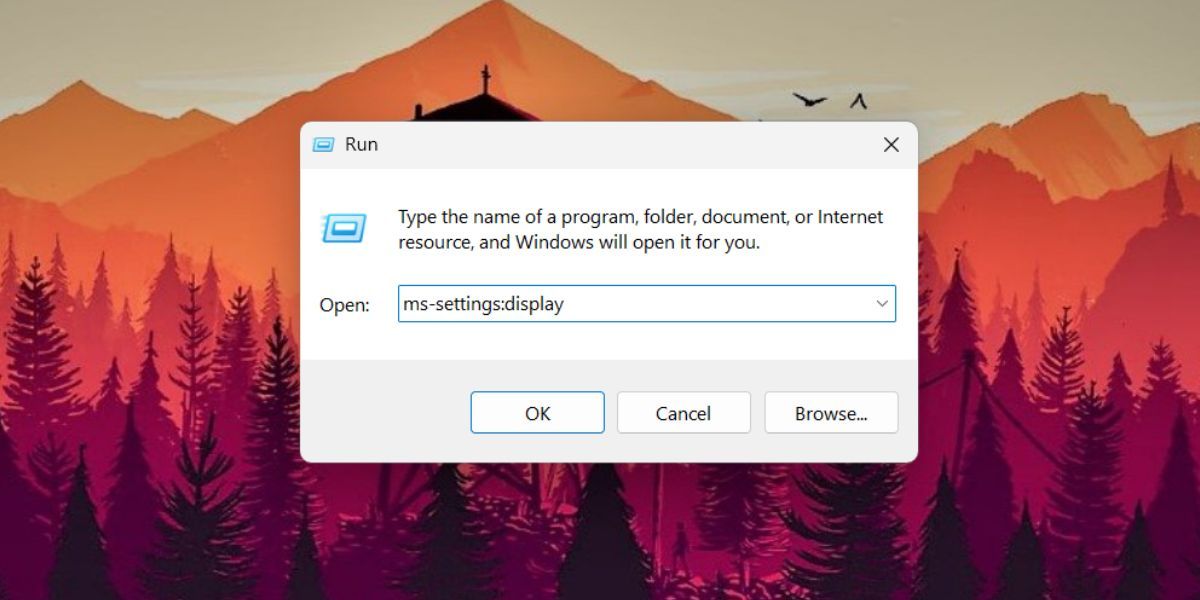
4. Using the Run Dialog Box
Run dialog box in Windows OS offers a faster way to access any app or file location. You can launch any app, or a subsection of the Settings app or Control Panel if you know the correct short code. Retrace the following steps:
- Press the Win + R key to launch the Run dialog Box.
-
Type ms-settings:display in the text input box. Click on the Open button to launch the display settings on Windows 11.

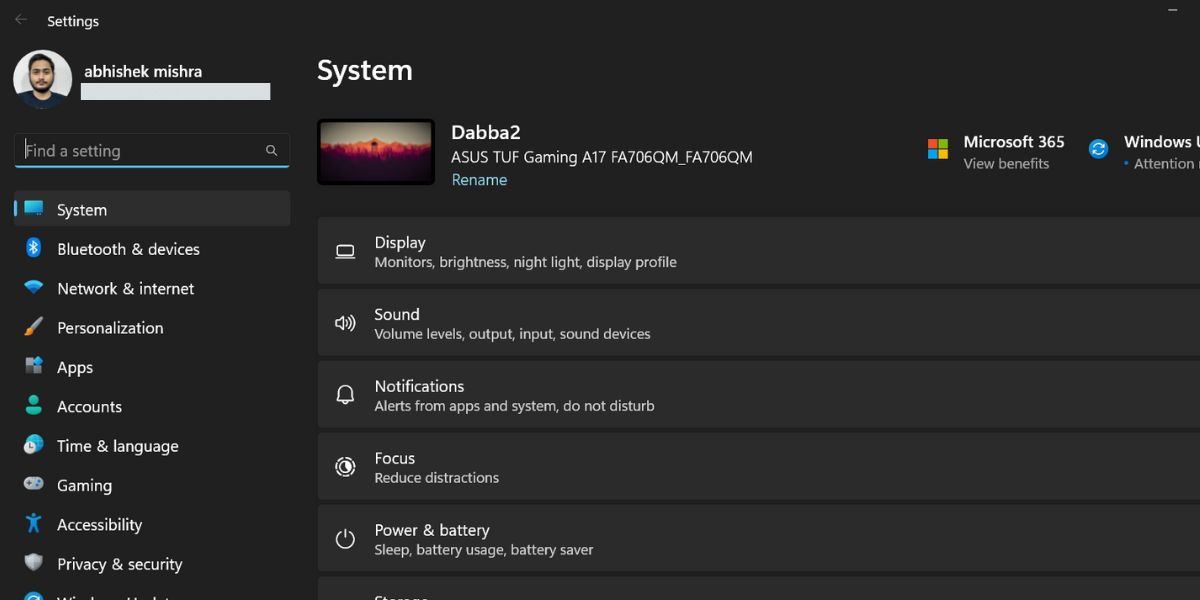
5. Using Settings App
The old version of display Settings appeared in the Control Panel. But most customization options are migrating to the Settings app in Windows 11. So, you can adjust the display resolution using the Settings app too.
- Right-click on the Start button to launch the Power User menu. Click on the Settings option.
-
Go to the right pane in the Settings app and click on the Display option.

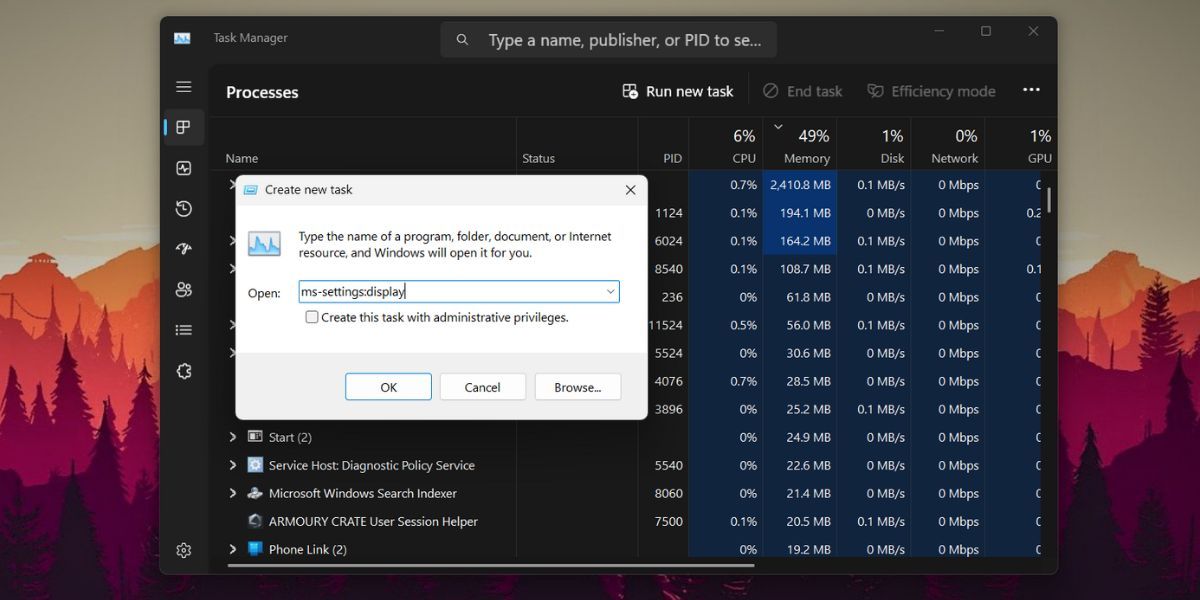
6. Using the Task Manager
It is possible to launch the Settings app and its subsections using the Task Manager. Windows 11 Task Manager can now search for processes using both the name and PID. So, you can use the Run new task feature to launch display settings. Repeat the following steps:
- Press Ctrl + Shift + Esc keys at the same time to launch Task Manager.
- Click on the Run new task button and type ms-settings:display in the text box.
-
Click on the OK button to launch the Display settings window.

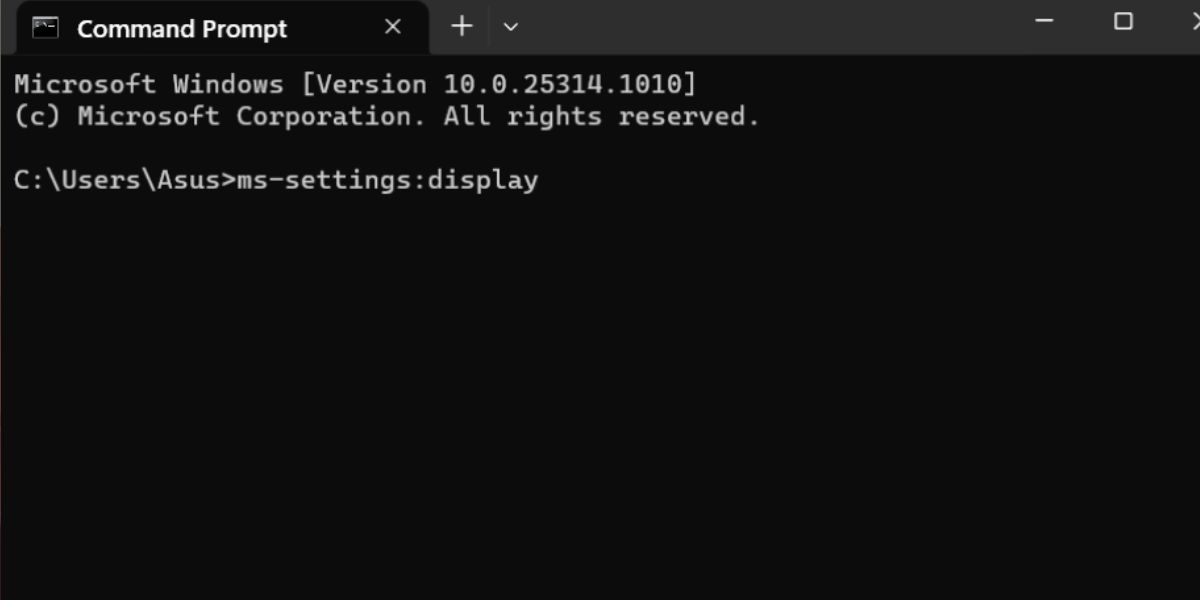
7. Using the Command Prompt
If you prefer the terminal route for opening files and folder locations, you can open the display settings without exiting the Command Prompt. Here’s how to do it:
- Press Win + R to launch the Run dialog box. Type CMD and press the Enter key to launch the command prompt. No need to run the Command Prompt with administrator privileges.
-
Type the start ms-settings:display command in the terminal and press the Enter key to launch the Display section in the Settings app.

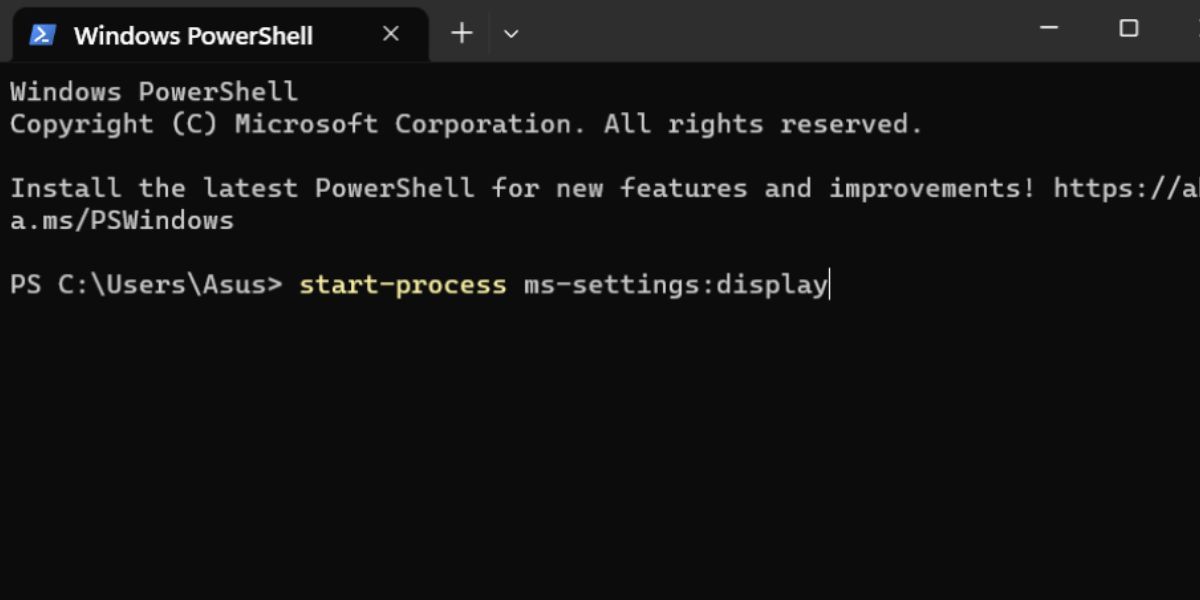
8. Using the PowerShell
Like the Command Prompt method, you can access Display settings using the Start-process cmdlet in PowerShell. Repeat the following steps:
- Press Win + X to open the Power User menu. Click on the Terminal option from the list.
-
The Terminal app will open the PowerShell in a new tab by default. Type start-process ms-settings:display command in the Terminal and press Enter key.
- The display settings page will launch.

9. Using a Desktop Shortcut
Unfortunately, there is no direct application file to launch the Display settings. So, you have to manually create a desktop shortcut and use the short code to launch this specific page in the Settings app. Repeat the following steps:
- Press Win + D to open the Desktop. Alternatively, you can click on the Show Desktop icon on the right side end of the Taskbar.
- Right-click on the empty space on the Desktop and select the New > Shortcut option.
- A new desktop will appear on the Desktop and the Create Shortcut window will open.
-
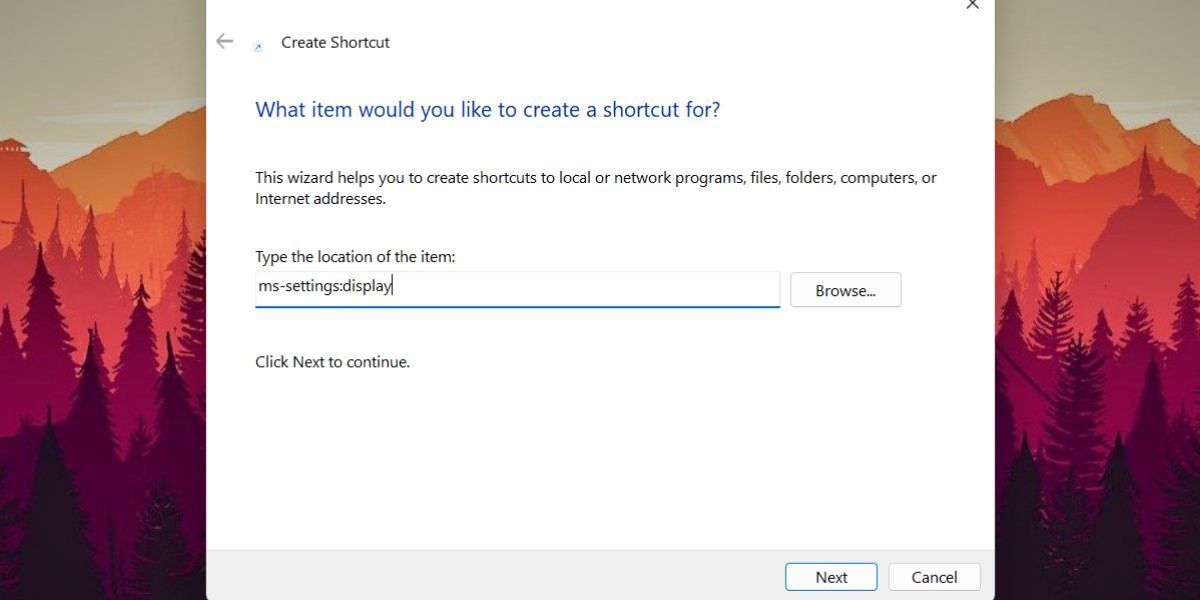
Go to the Type the location of the item: text box. Type ms-settings:display in the text box and click on the Next button.
- Now, you must name the shortcut. Type Display Settings in the text box and click on the Finish button.
- Press Win + D to switch to the desktop. Double-click on the newly created Display Settings shortcut to tweak related settings.

10. Using a Keyboard Shortcut
If you frequently switch between multiple screens of different resolutions and orientations, you can map a shortcut key combination to the shortcut you created in the above method. That way, you don’t need to even switch to the desktop to run the shortcut. Here’s how to do it:
- Press Win + D to switch to the desktop.
- Right-click on the Display Settings shortcut you created before. Select the Properties option from the context menu.
-
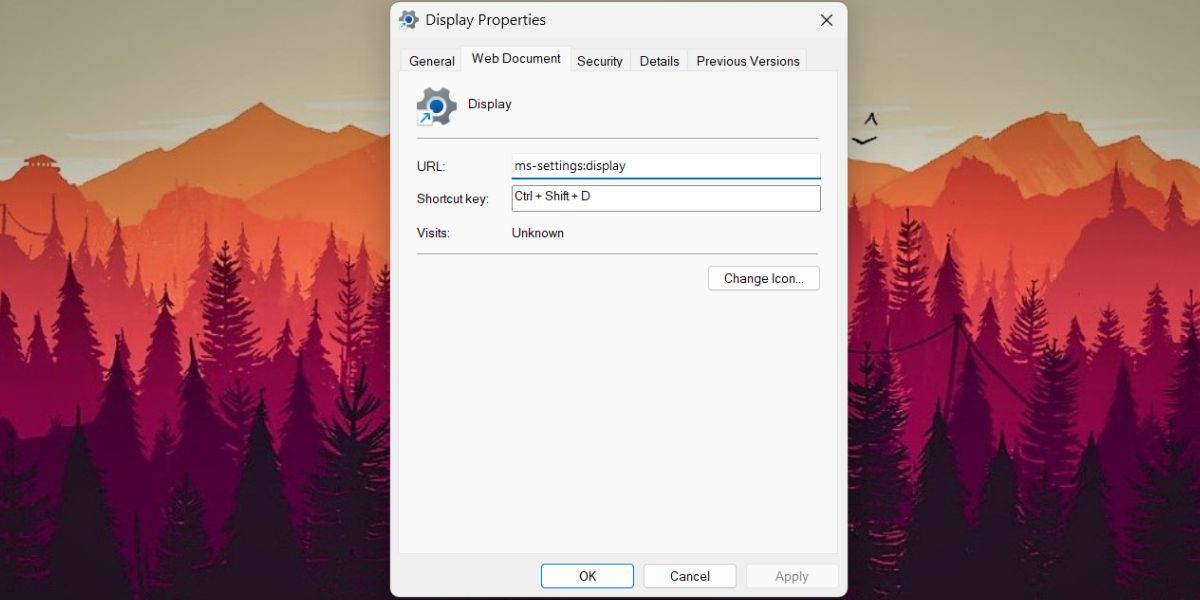
In the Properties window, go to the Shortcut Keys option and click on it. Press the Ctrl + Shift + D keys simultaneously. Now, this becomes your new custom keyboard shortcut to launch display settings.
- Click on the Apply button and then click on the OK button. Close the Properties window. Try out the shortcut key combination to test it.

Tweak Your Display Settings Easily on Windows
Managing multiple monitors, and adjusting refresh rates and resolutions is impossible without the dedicated Display settings section. Older Windows versions had different-looking display settings windows which significantly changed in Windows 11. If you want the fastest way to launch the display settings, create a shortcut as described above and map a shortcut key to it.