
Bluetooth is an immensely popular connection medium to pair two devices. You can use Bluetooth to connect audio accessories and other peripherals wirelessly with your computer. However, you can also send and receive files using the Bluetooth File Transfer utility in Windows 11.
You may wonder why use such a slow medium to transfer files. Well, Bluetooth works great for sending and receiving small sizes files, especially for users who cannot use Wi-Fi direct or a wired connection. We will list out multiple methods using which you can launch the Bluetooth File Transfer utility on Windows 11. Let's dive into the post.
1. Using the Start Menu
The easiest method is to use the start menu to access and launch the Bluetooth File Transfer utility. Repeat the following steps:
- Press the Win key to launch the Start menu.
- Type Bluetooth and click on the Bluetooth and other devices settings option.
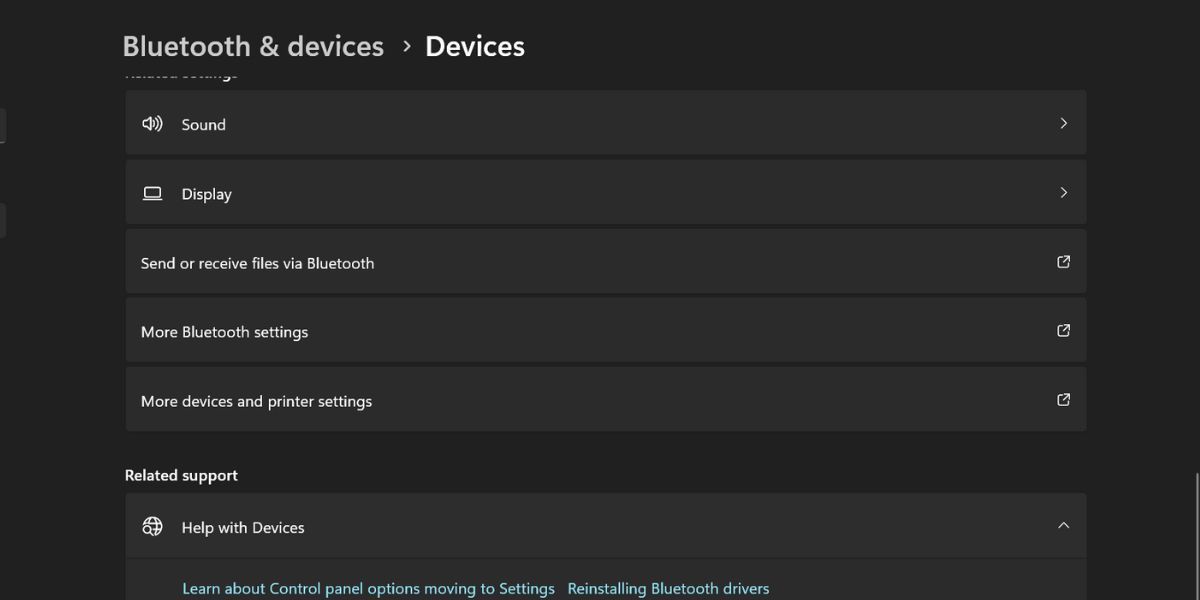
- The Settings app will launch. Scroll down and click on the Send or receive files via Bluetooth option.
- Once the Bluetooth File Transfer utility pops up, click on Send files or Receive files option to initiate the file-sharing process.
2. Using the Settings App
Windows 11 moved many control panel features to the Settings app. You can add and manage all devices including Bluetooth devices via the Settings app. Here’s how:
- Press Win + I to launch the settings app.
- Navigate to the left-hand side menu and click on Bluetooth and devices option.
-
Scroll down and click on the Device option. Then, click on the Send or receive files via Bluetooth option.
- Now, start a file transfer session with any paired device.

3. Using the Windows Search
Windows 11 has a brand-new search app that even fetches results from the web. Here’s how to launch the Bluetooth File Transfer utility using Windows search:
- Press Win + S to launch Windows search.
-
Type Bluetooth and other devices settings and click on the relevant search result.
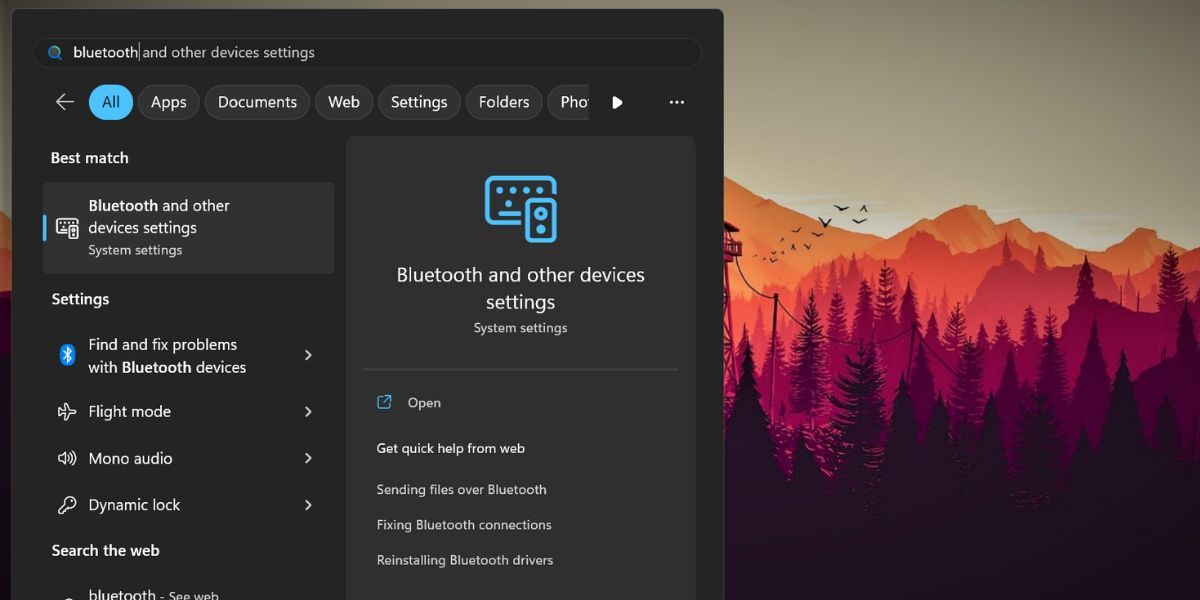
- Bluetooth and devices page will launch. Locate the Send or receive files via Bluetooth option and click on it.
- Bluetooth File Transfer utility will launch on your system.

4. Using the Run Command Box
If you don’t want to use the Settings app, you can launch the Bluetooth File Transfer tool using the Run dialog box. Here’s how:
-
Press Win + R to launch the Run command box.
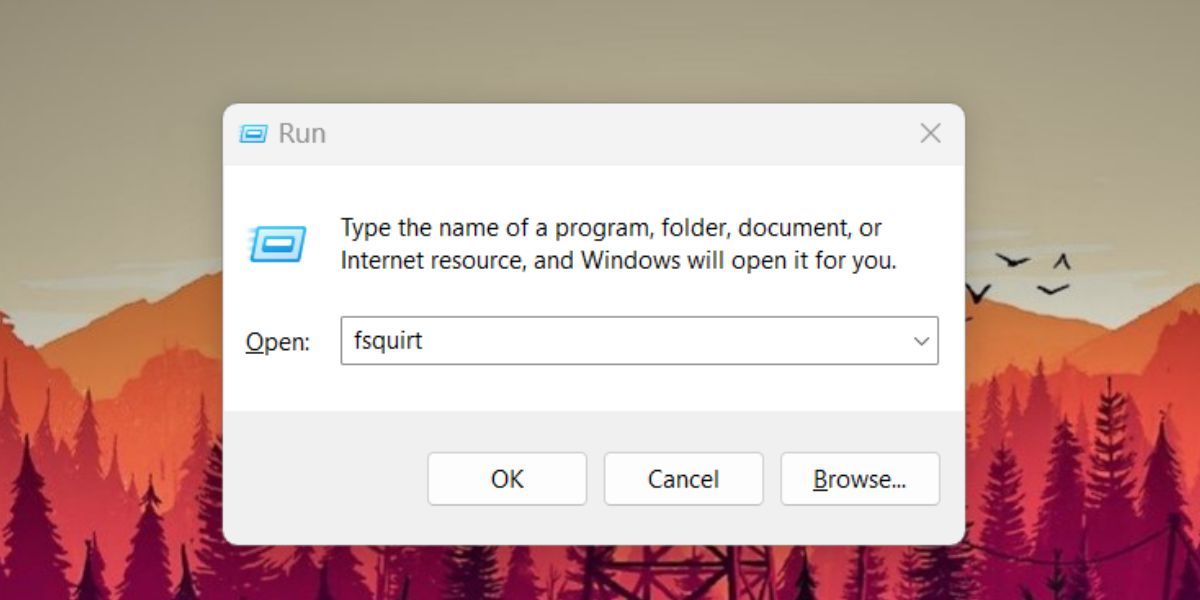
- Type fsquirt and press the Enter key to open the Bluetooth File Transfer tool.

5. Using the Action Center
Windows 10 and 11 have an Action Center which serves as a quick-access area for useful Windows features. Repeat the following steps:
- Press Win + A to launch the Action Center.
- Click on the arrow icon next to the Bluetooth tile.
-
Now, click on the More Bluetooth settings option. Bluetooth and devices page will launch.

- Navigate to the Devices section and click on the Send or receive files via Bluetooth option.
- Start a file transfer session with a paired device.

6. Using CMD
You can invoke the Bluetooth File Transfer utility from the command prompt app. This method comes in handy if you cannot access the Action Center or the Settings app on your system. Here’s how:
- Press Win + R to launch the Run command box. Type cmd and press the Enter key.
-
In the command prompts window, type fsquirt.exe and press the Enter key.
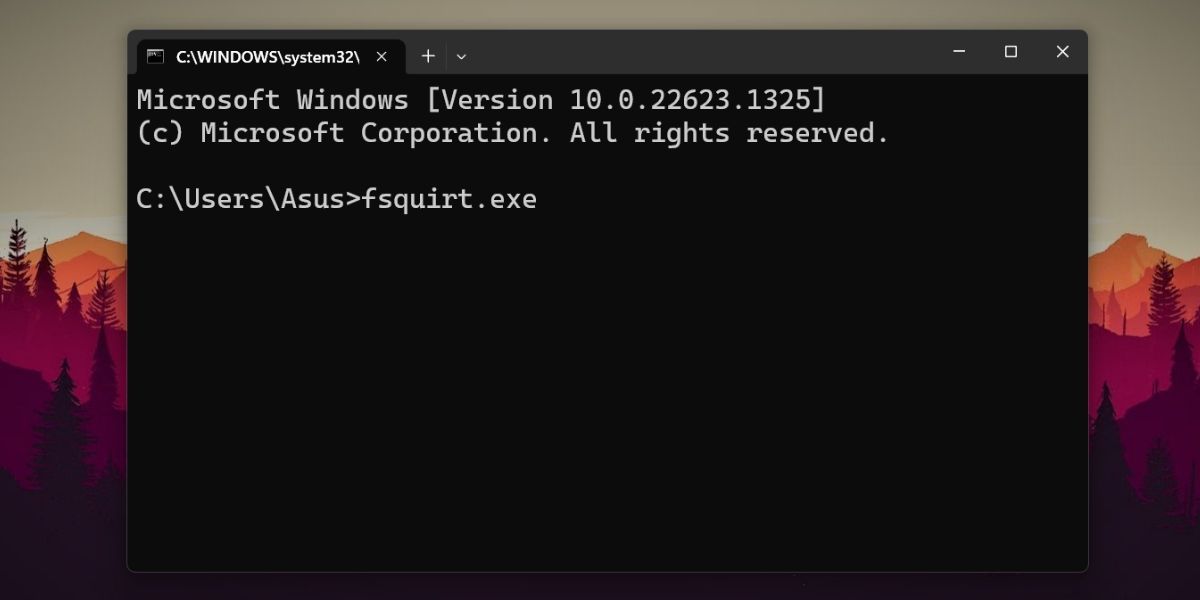
- Bluetooth File Transfer tool will automatically launch on your system.
- Close the command prompt window and begin the file transfer session.

7. Using the File Explorer App
Like all Windows tools, Bluetooth File Transfer is also present in the SysWOW64 folder. You can access it directly from the C: drive using the File Explorer app. Make sure to have administrator privileges to access the SysWOW64 folder. Retrace the following steps:
- Press Win + E to launch the File Explorer. Move to the navigation window and click on the C: drive.
-
Now, go to the address bar and type the following path: C:\Windows\SysWOW64.
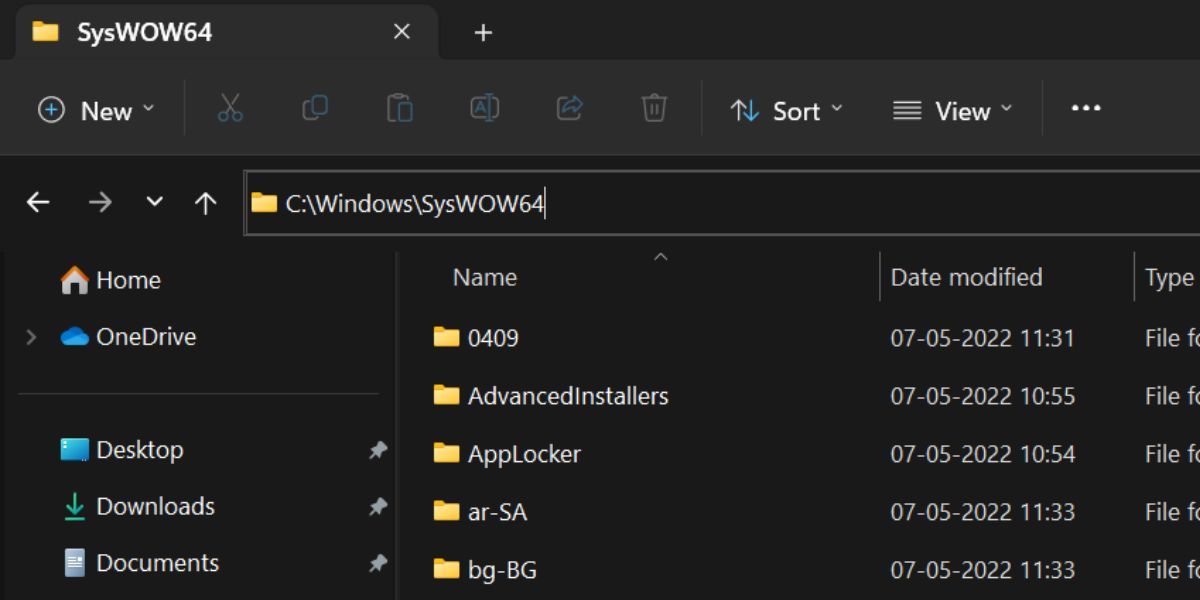
- Press the Enter key to access the SysWOW64 folder.
- Now locate the fsquirt.exe file and click on it to launch the Bluetooth File Transfer utility.
- Close the File Explorer.

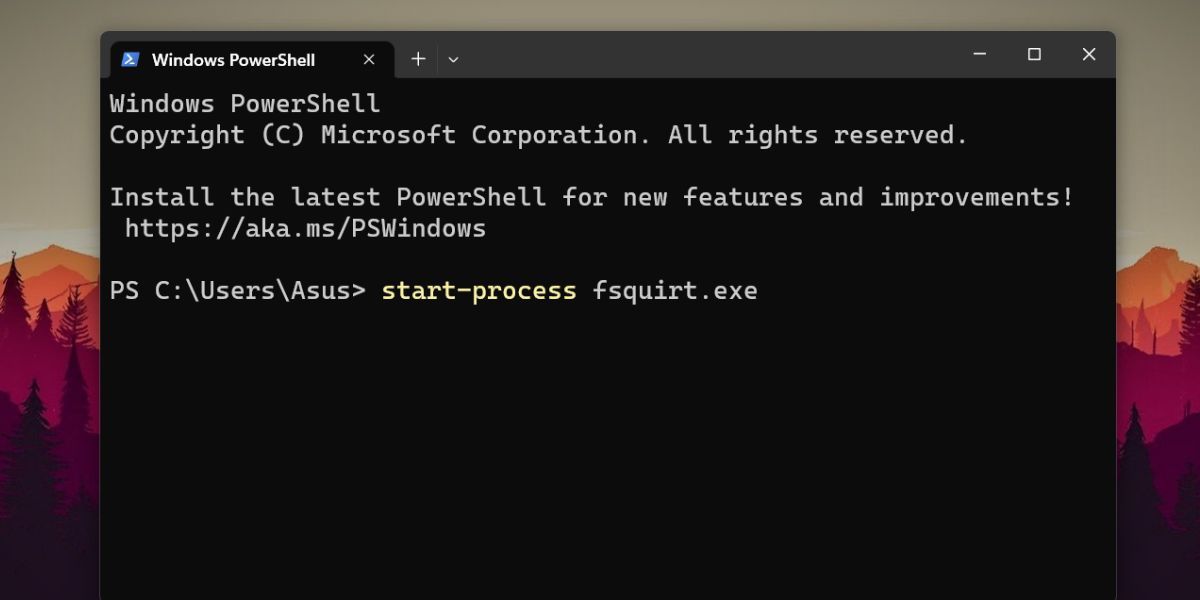
8. Using PowerShell
Like CMD, you can use PowerShell to start the Bluetooth File Transfer utility. You can use the start-process command to launch the tool. Here’s how:
- Press Win + S to launch Windows search.
- Type PowerShell and click on the Run as administrator option in the right pane.
- UAC will pop up. Click on the Yes button.
-
In the PowerShell window, type start-process fsquirt.exe command and press the Enter key.
- After the Bluetooth File Transfer utility window launches, type exit in PowerShell to close it.

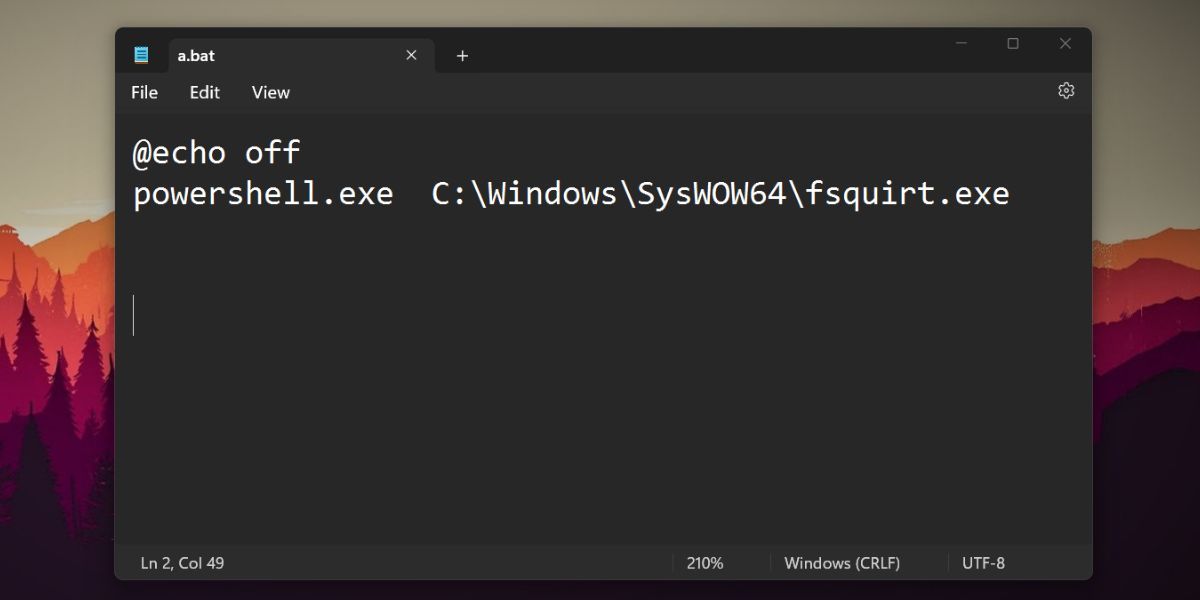
9. Using a Batch Script
A batch script can save you a lot of time that you would otherwise spend trying to search or browse for the Bluetooth sharing app. Repeat the following steps to create a batch file:
- Press Win + D to go to the desktop. Right-click on the desktop and select New > Text Document.
- Double-click on the newly created file to open it in Notepad.
-
Now, Enter the following code snippet in the Notepad file:
@echo off powershell.exe C:\Windows\SysWOW64\fsquirt.exe -
After that, press Ctrl + Shift + S to open the Save as windows. Type bfs.bat and keep the type as All Files.
- Click on the Save button and close the notepad.
- Now, go to the desktop and right-click on the saved .bat file. Select the Run as administrator option from the context menu.
- Accept the UAC prompt and click on the Yes button. The batch file will launch PowerShell, run the command to launch the Bluetooth File Transfer tool, and close the PowerShell window automatically.

10. Using a Desktop Shortcut
The desktop shortcut is a fairly easy way to launch the utility. Like the File Explorer method, you need to locate the file in the C drive and then create a desktop shortcut. Here’s how to do it:
- Press Win + E to launch the File Explorer.
- Navigate to C: drive and click on the address bar. Type C:\Windows\SysWOW64 and press the Enter key.
- Now, find the fsquirt.exe file and right-click on it.
-
Select the Show more options and click on the Send to option. Then, click on the Desktop (create shortcut) option.
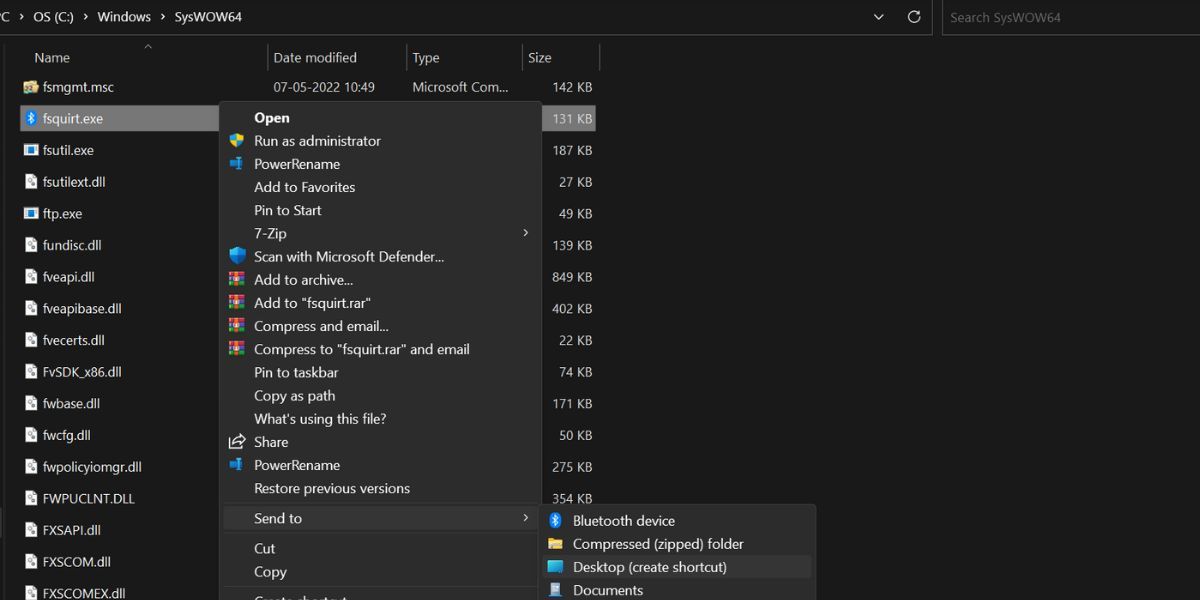
- Press Win + D to switch to the desktop. Double-click on the fsquirt.exe shortcut to launch the Bluetooth File Transfer tool.

You can also pin the tool to the Start menu or the Taskbar using the desktop shortcut.
Send or Receive Files Using the Bluetooth Transfer Utility on Windows
The Bluetooth File Transfer Utility hasn’t received a major facelift in Windows 11. Some options are scattered in the Settings app while the rest open in another app window. If you want to access the tool quickly, use the desktop shortcut or batch file method. For bigger files, use a wired connection, file-sharing app, or Wi-Fi direct.