
When Windows fails to establish a network connection, it will likely display that you aren't connected to any network. You may encounter this error in the network adapter status dialog or on the Network tab in the Settings app.
This error is often triggered due to temporary glitches, bad network adapter drivers, and issues with your Wi-Fi router or modem. Even a loose Ethernet connection can trigger this error, so make sure your Ethernet cable is firmly connected. If the issue persists, try the additional steps described below.
1. Disable Airplane Mode on Windows
The Airplane mode in Windows 10 and 11 works similarly to your cellular devices. When enabled, Airplane mode disables all the connectivity options, including Bluetooth and Wi-Fi. To fix it, check and disable Airplane mode to restore your Wi-Fi connectivity.
To disable Airplane mode on Windows:
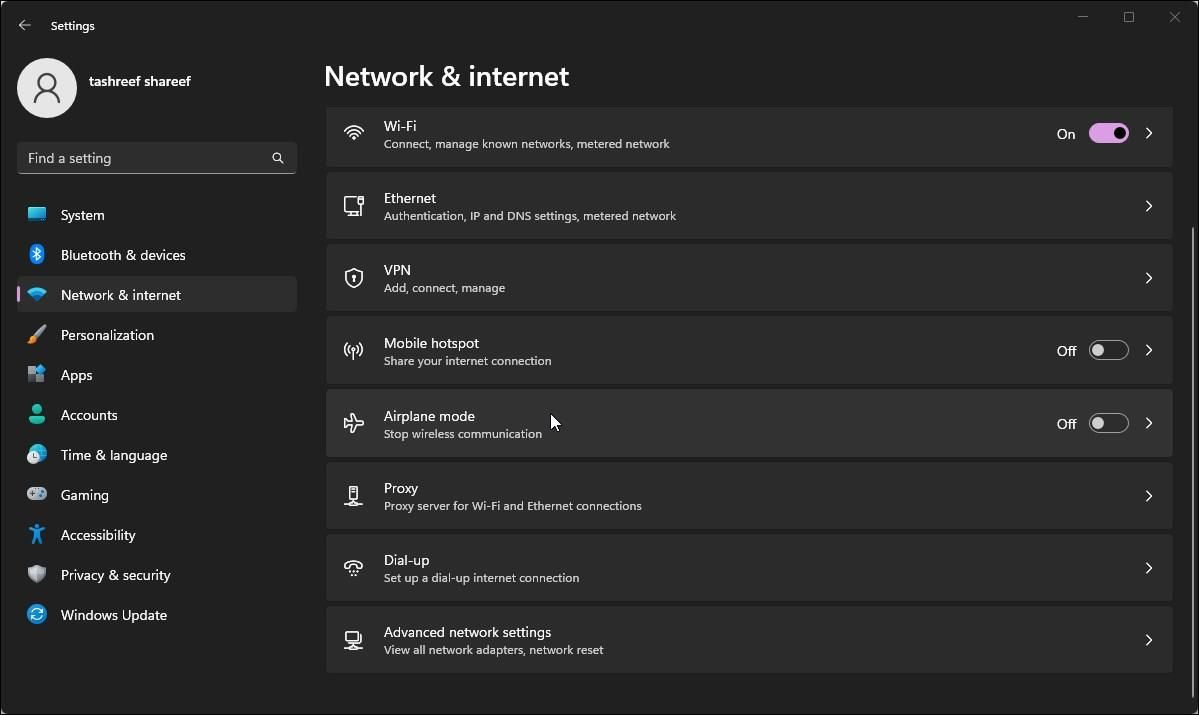
- Press Win + I to open Settings.
-
In the left pane, open the Network & internet tab.
-
Click on Airplane mode.
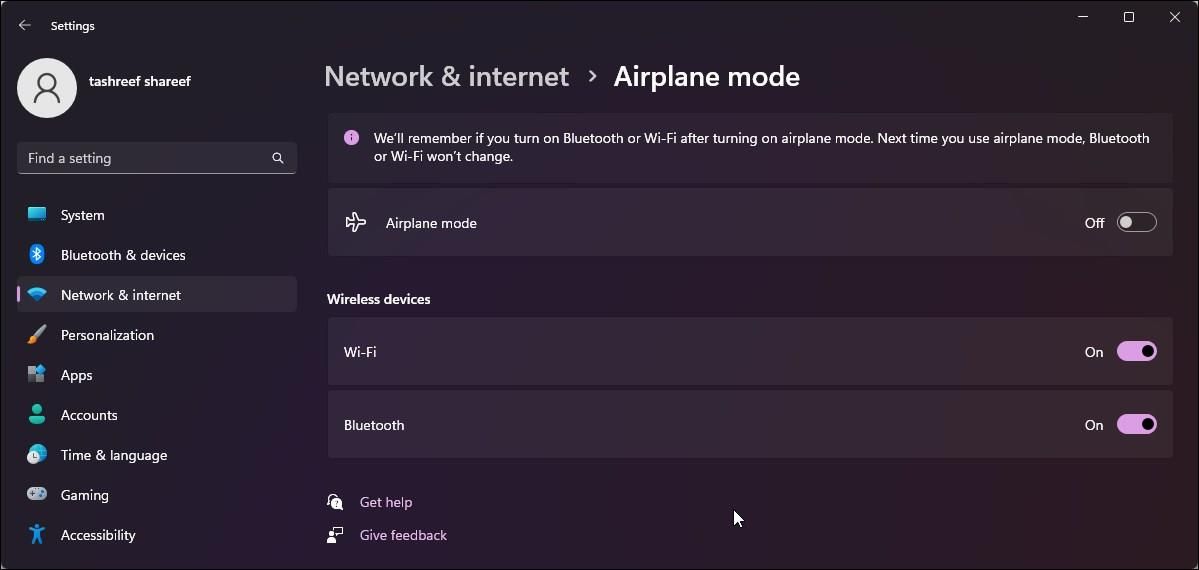
- Toggle the switch to turn off Airplane mode.
- Make sure to set Wi-Fi and Bluetooth to On under Wireless devices.
- Connect to your network and check if the error is resolved.


Another issue you may face is that Airplane mode gets stuck with no option to enable or disable it. To fix Airplane mode stuck in Windows 11, check the Radio Management Service status, run the network adapter troubleshooter, or use a registry hack to turn off the feature completely.
2. Run the Windows Network Adapter Troubleshooter
Windows 10 and 11 versions feature a built-in troubleshooter to find and fix common issues with the network adapter. It scans the network adapter and applies the necessary fix to restore Internet connectivity.
To run the Network Adapter troubleshooter:
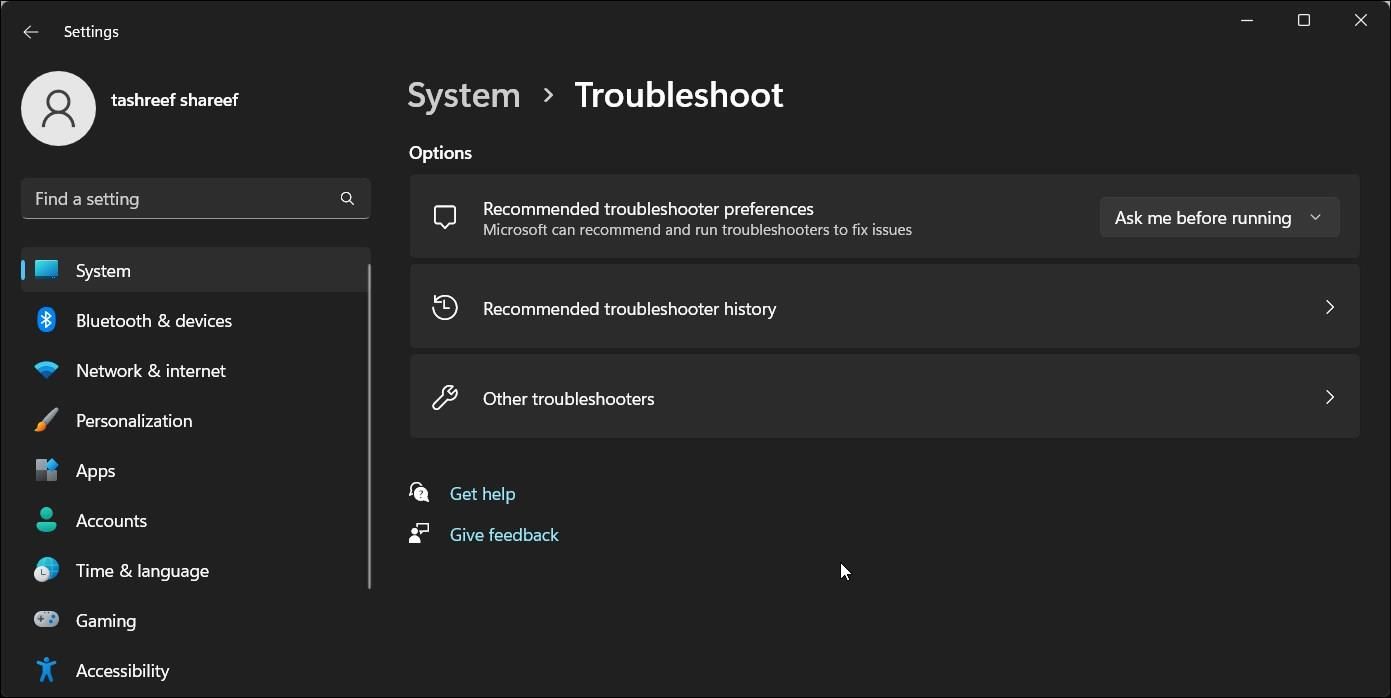
- Press Win + I to open Settings.
-
In the System tab, scroll down and click on Troubleshoot.
-
Next, click on Other troubleshooters to view all the available troubleshooters.
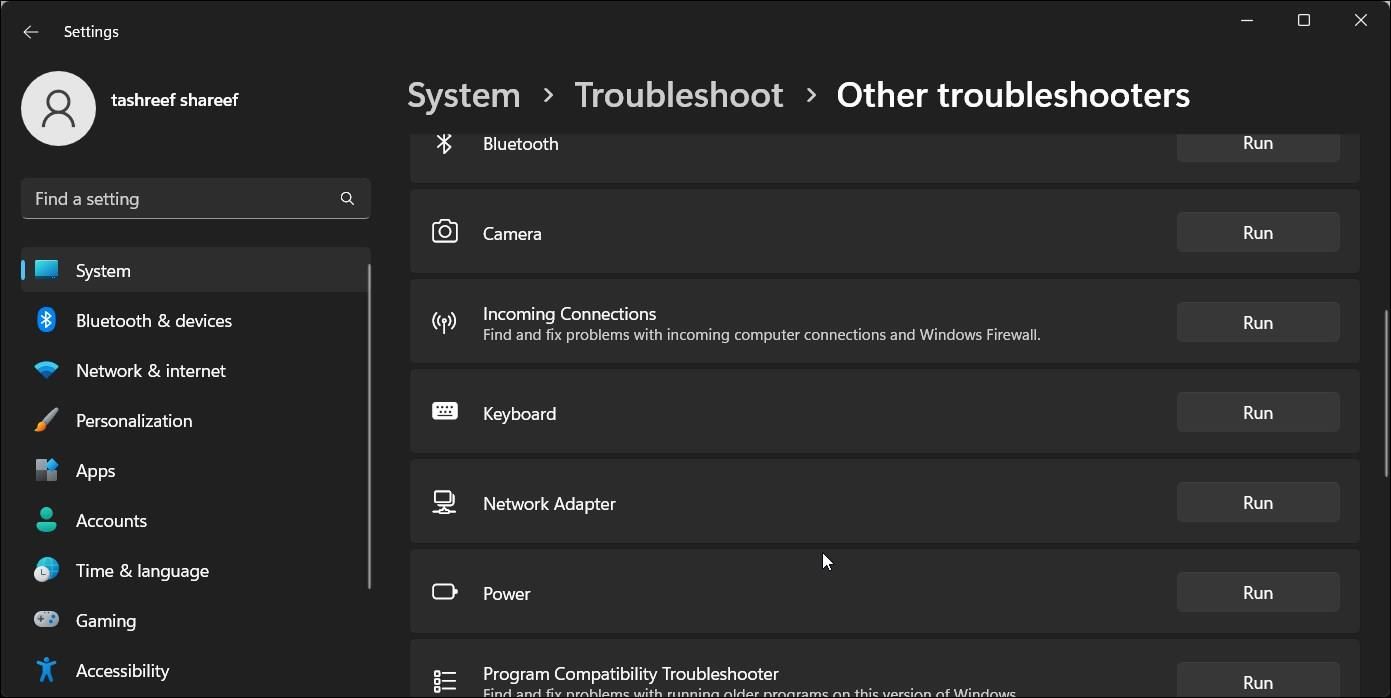
- Locate the Network Adapter option and click the Run button.
- After the initial scan, select the affected network adapter and click Next.
- Apply any recommended fixes and check for any improvements.


3. Reinstall Your Network Adapter Driver
You can reinstall the existing network driver to fix temporary issues with the network device. Windows saves a list of available drivers and lets you reinstall them via Device Manager.
To reinstall the network driver:
- Press Win + R to open Run.
- Type devmgmt.msc and click OK to open Device Manager.
-
In Device Manager, expand the Network Adapters section.
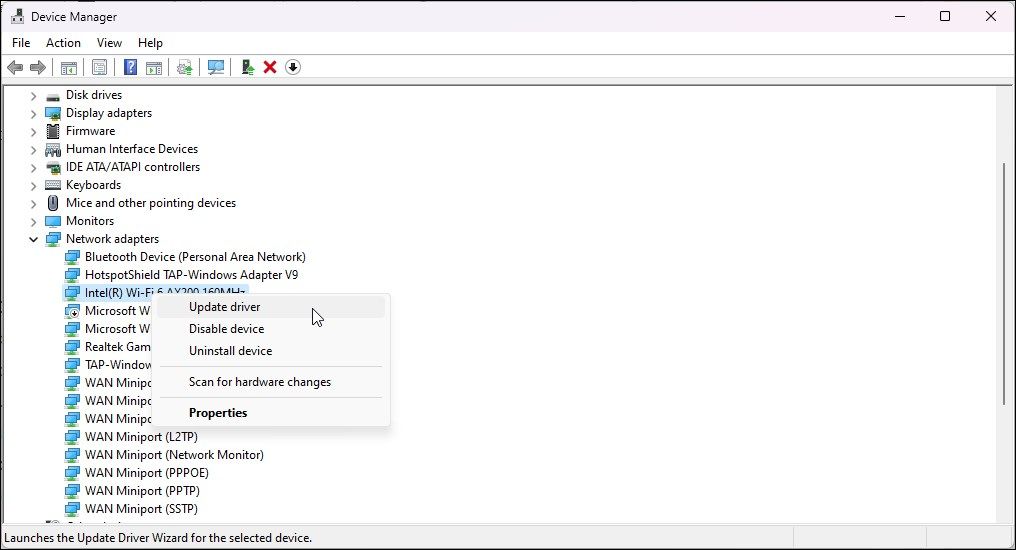
-
Right-click on your network device and select Update driver.
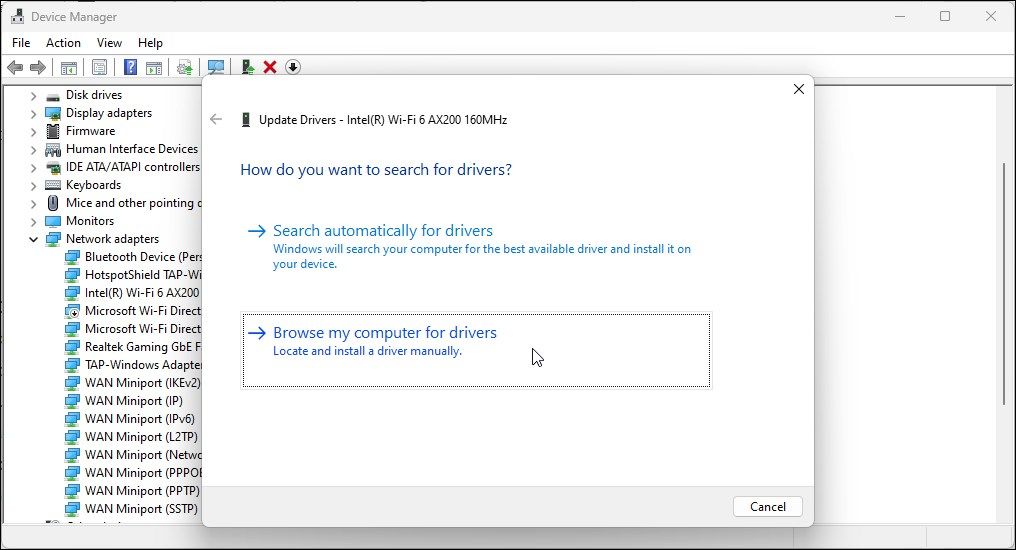
-
Click on Browse my computer for drivers.
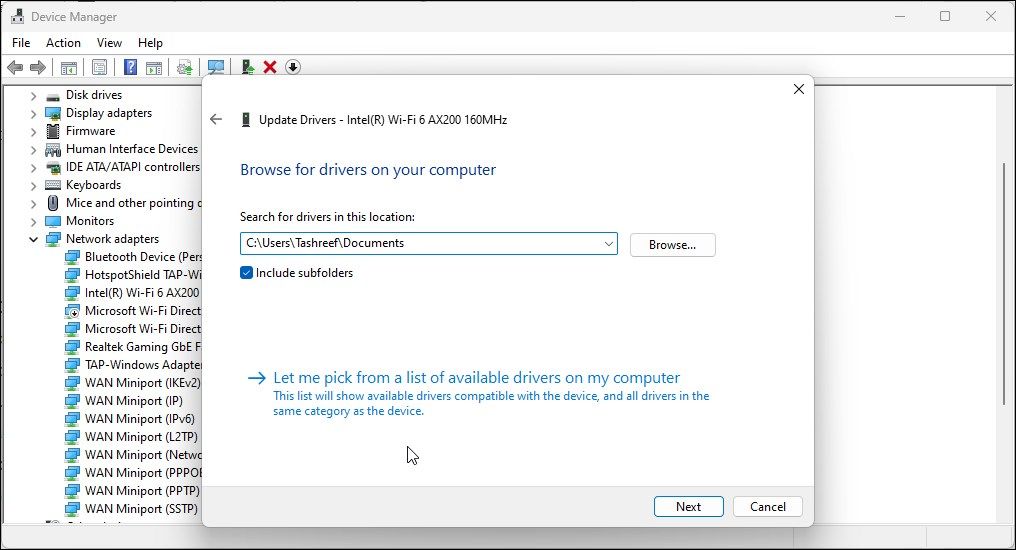
-
Next, click Let me pick from my list of available drivers on my computer.
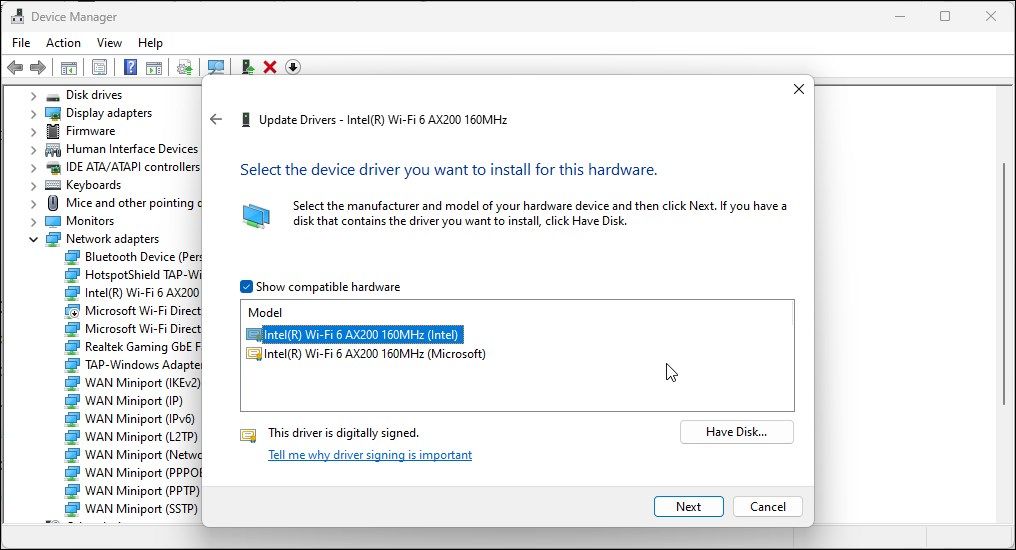
- In the Select the device driver you want to install for this hardware dialog, select the top driver for your network device and click Next.
- Windows will start to install the driver. When the success message appears, close Device Manager.


Check if the issue is resolved. If not, repeat the steps but with a different available driver. Usually, a generic driver from Microsoft is available. So, select a different driver from the one you installed earlier and click Next to finish the installation.
4. Update Your Adapter's Network Driver

If a reinstall didn't help, try to update your network adapter driver. An outdated or buggy driver can create compatibility issues. Also, if you have upgraded your OS to a newer version, your system may be missing newer driver updates.
Try to update the network device driver using Device Manager. Alternatively, you can also directly download it from the manufacturer's website.
To update network drivers using Device Manager:
- Press Win + X to open the WinX menu.
- Click on Device Manager.
- In Device Manager, expand the Network adapters section.
- Right-click on your network adapter and select Update driver.
- Click on Search automatically for drivers. Windows will look for new drivers. If available, download and install the drivers.
- Once installed, restart your PC and check for any improvements.
Often Device Manager fails to find the latest drivers for the network adapter. To remedy this issue, check your computer manufacturer's website for new device drivers.
To download the drivers:
- Visit your computer manufacturer's website and enter your product details.
- In the download center, look for network driver updates.
- Download and complete the driver installation to see if the error is resolved.
Additionally, use the built-in system management utility offered by your computer manufacturer. For example, HP laptops come with an HP Support Assistant utility. You can use it to find new drivers for networking and other devices on your PC.
5. Perform a Windows Network Reset
Windows features a network reset feature as part of advanced network settings. When you perform a network reset, it removes and reinstalls the network drivers and resets other networking components to their factory default.
A network reset can help if the error is triggered due to issues with your network configuration. Here's how to perform a network reset.
- Click on Start and then select Settings.
-
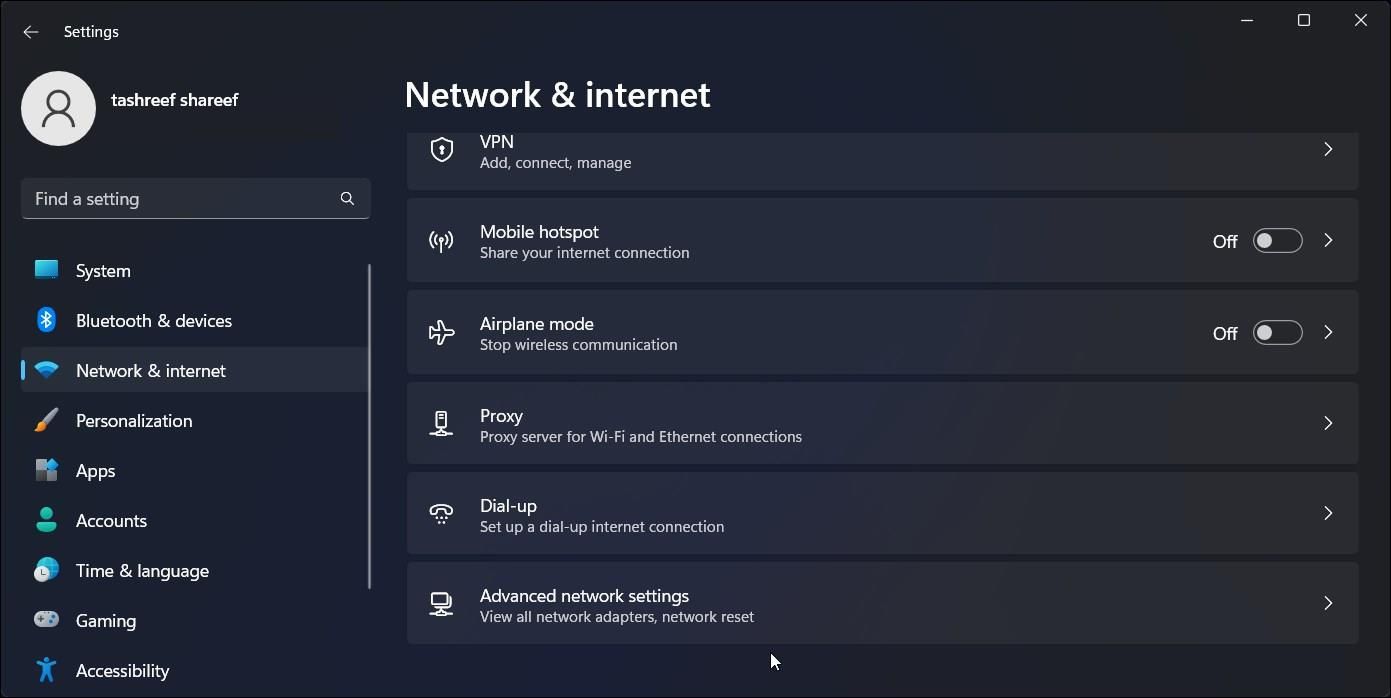
Open the Network & internet tab in the left pane.
-
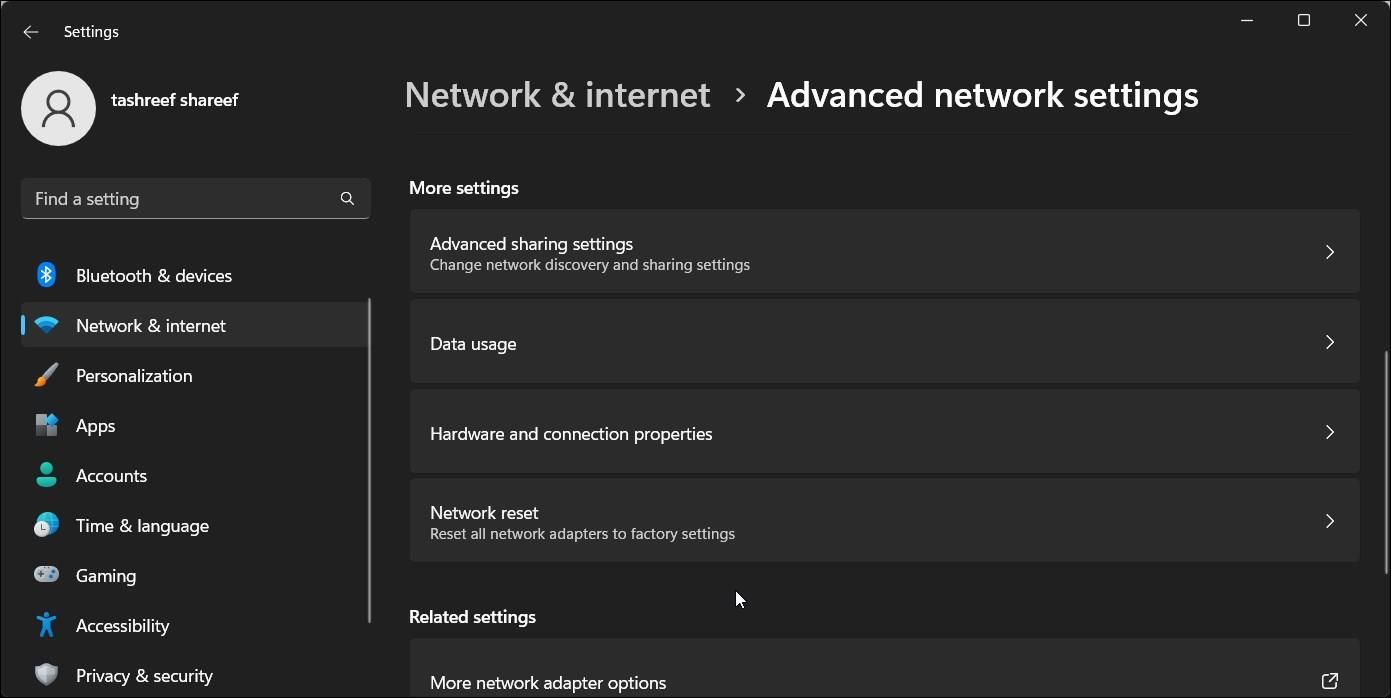
Scroll down and click on Advanced network settings.
-
Next, click on Network reset.
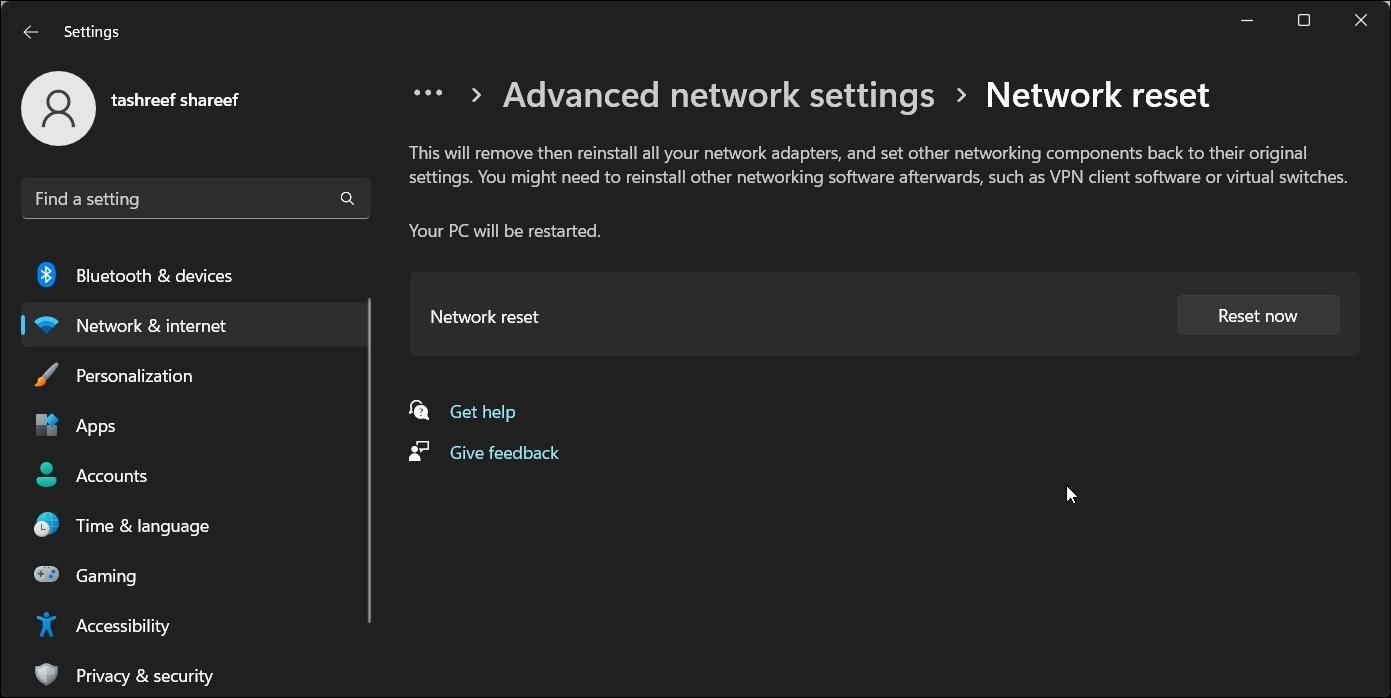
- Click the Reset now button for Network reset.
- Click Yes to confirm the action.


Windows will reset your network adapters and other components and restart your PC. After the restart, check if you can connect to the Internet.
6. Check Your Modem and/or Router for Issues
This error can occur if your computer is not receiving any communication from the modem. Try connecting another device, such as your mobile device, to the network to check your network status.
If the issue exists on all devices, troubleshoot your router for issues. Start by performing a quick power restart for the router. If that does not help, try performing a factory reset.
To reset your Wi-Fi router:
- Make sure the router is powered on.
- Locate the small Reset button on the rear panel.
- Use a paper clip to press and hold the reset button for 10 seconds. Release the button and wait for the router to restart.
7. Perform a System Restore
If you suspect a Windows update to have triggered the error, try a system restore using a restore point. A restore point helps you undo any recently made changes by updates and individuals without affecting your files and folders.
To perform a system restore using the restore point:
- Press Win + R to open Run.
- Type rstrui.exe and click OK.
-
In the System Restore dialog, click Next.
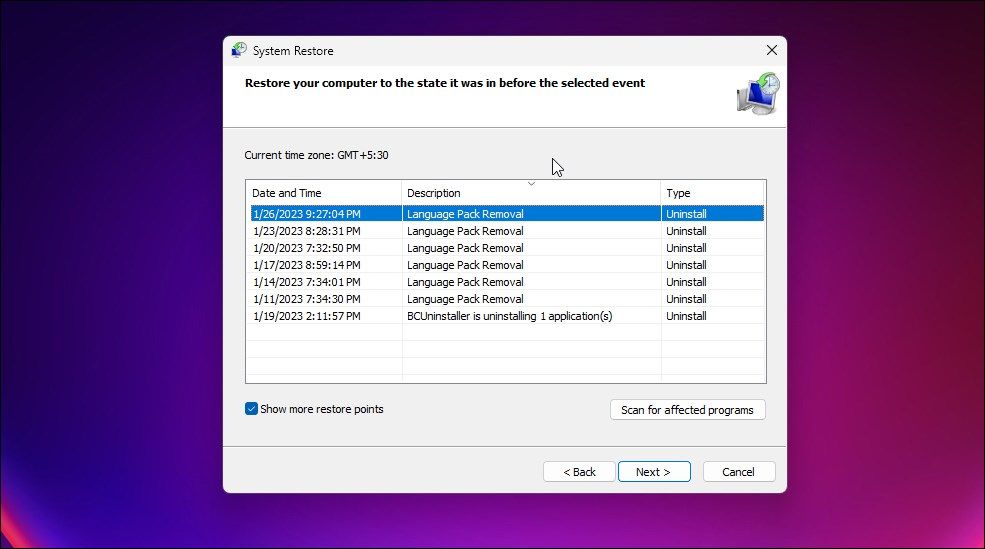
- Check the Show more restore points option to view all the available restore points on your computer.
-
Select the most recent restore point and click Next.
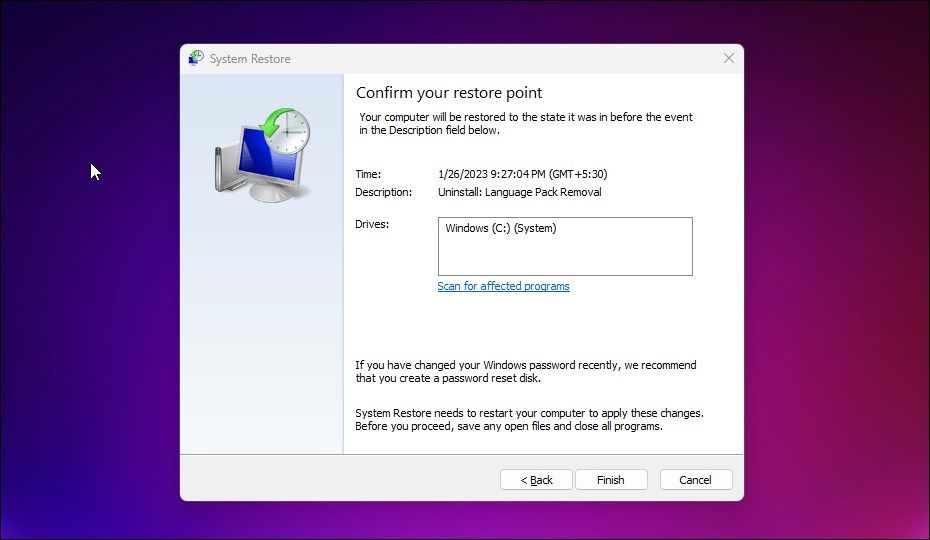
- Read the description and click Finish to begin the restore process. This process can take several minutes, and your computer may restart multiple times. Wait for the process to complete and check for any improvements.


Fixing the "You Are Not Connected to Any Networks" Error on Windows
You can fix this error using the built-in network adapter troubleshooter. Alternatively, reinstall a generic network adapter driver, update your driver or perform a network reset. As a last resort, use a recent restore point to restore your PC to its last working state.