Beginner penetration testers, in particular, place less emphasis on database security in general. An application without a database configuration and security tests can't be secure. You might already be using MySQL software, a database management system, so how can you make it more secure? Here are seven steps you need to follow.
1. Use SSH Tunneling Instead of Remote Connection
The MySQL service runs on port 3306 by default. When you install MySQL, you will see that port 3306 is in listening mode for all connections. As it stands, the MySQL port is open to the outside world. That's why you should set the MySQL service to listen only to the local address.
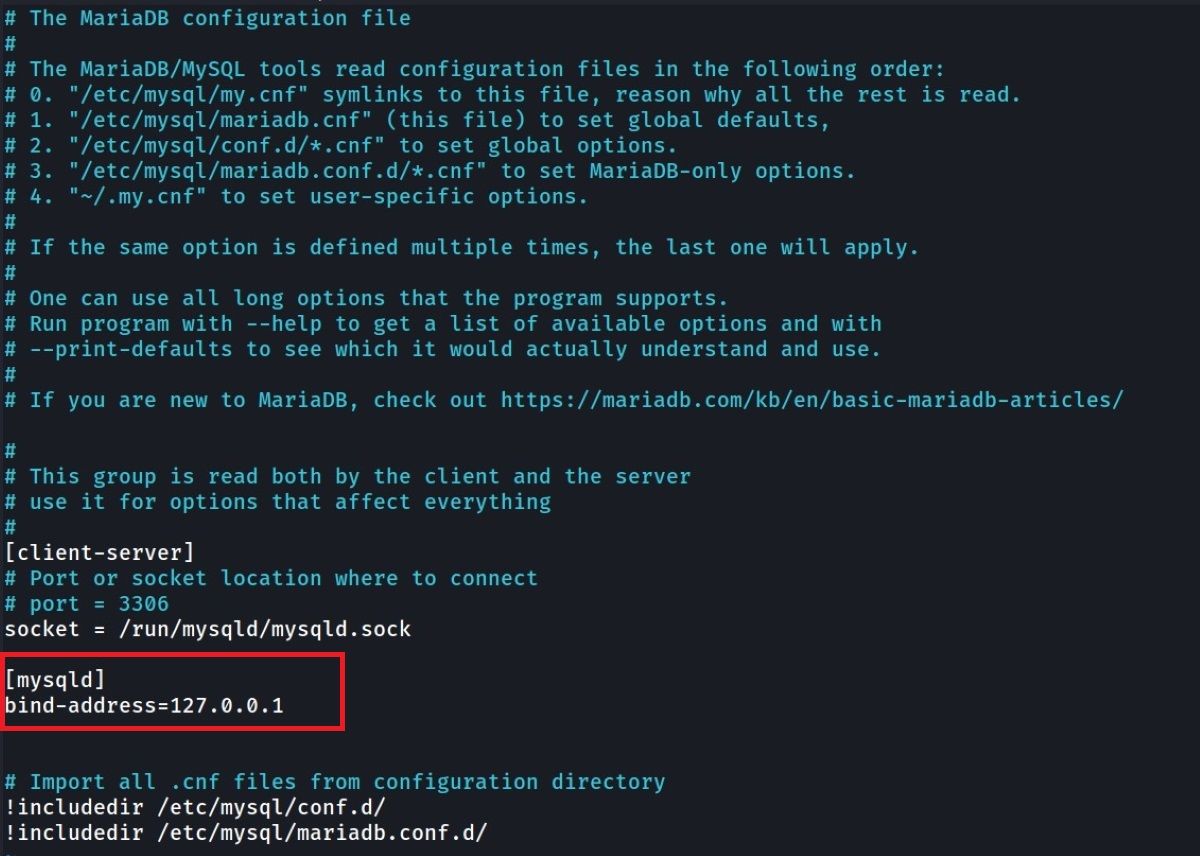
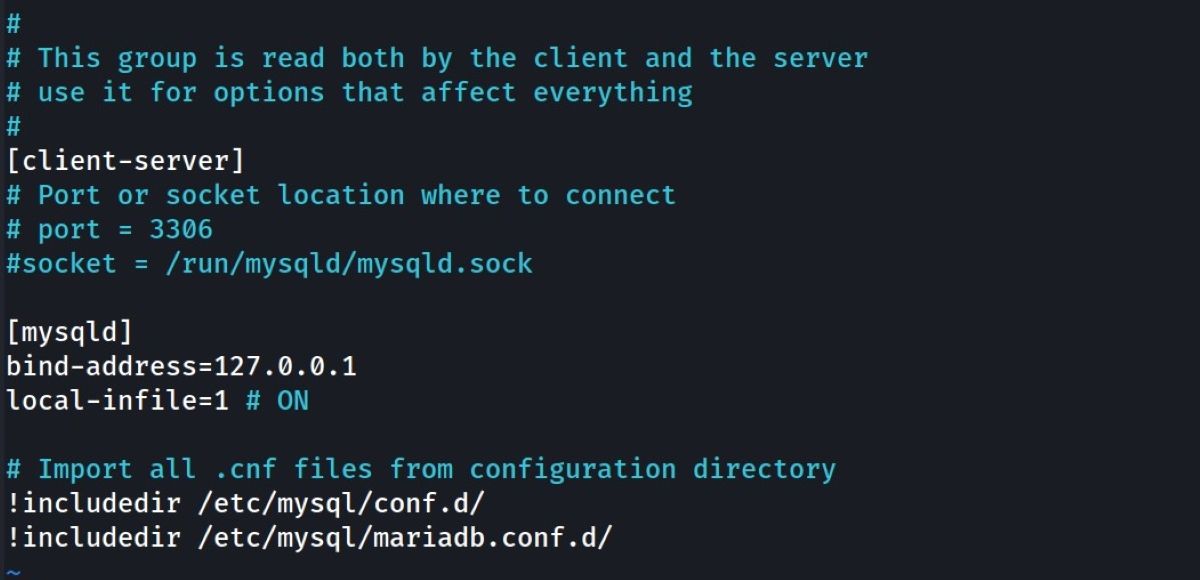
Since servers are usually run on a Linux distribution, the examples below are based on a Debian distribution. The file you need to use for SSH tunneling instead of remote connection and to close the default port to the outside world is /etc/mysql/my.cnf. In this file, you need to open a field called [mysqld] and write the following command:
        [mysqld]
bind-address=127.0.0.1
After this process, don't forget to save this file and restart the service with the following command:
        sudo systemctl restart mysqld
# or
sudo systemctl restart mariadb.service
With this, the MySQL service will only listen to the local address.
If you are using MariaDB, you can also examine /etc/mysql/mariadb.conf.d/50-server.cnf and check if there is a definition for bind-address.
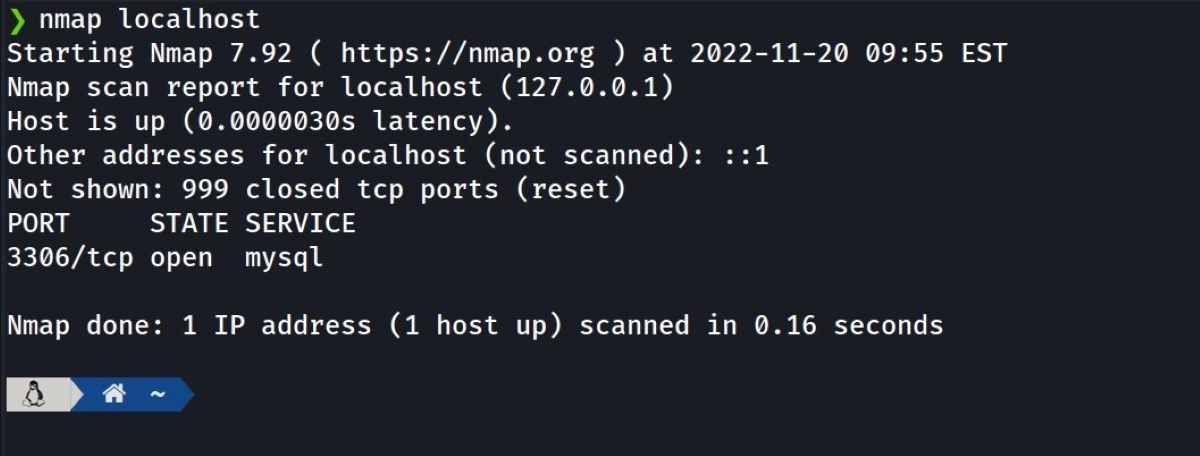
Now that you have the bind-address set to 127.0.0.1, which is localhost, you can run a Nmap scan and check the output:
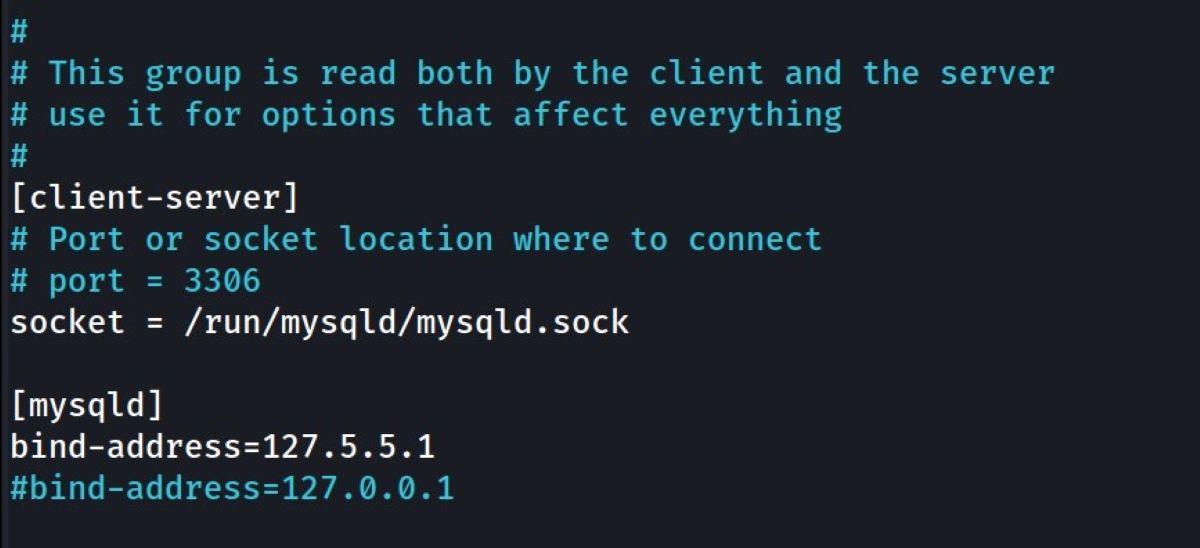
You can see the MySQL port as 127.0.0.1 represents the localhost you see. You can try and change the bind address again to make sure this works:
        [mysqld]
bind-address=127.5.5.1
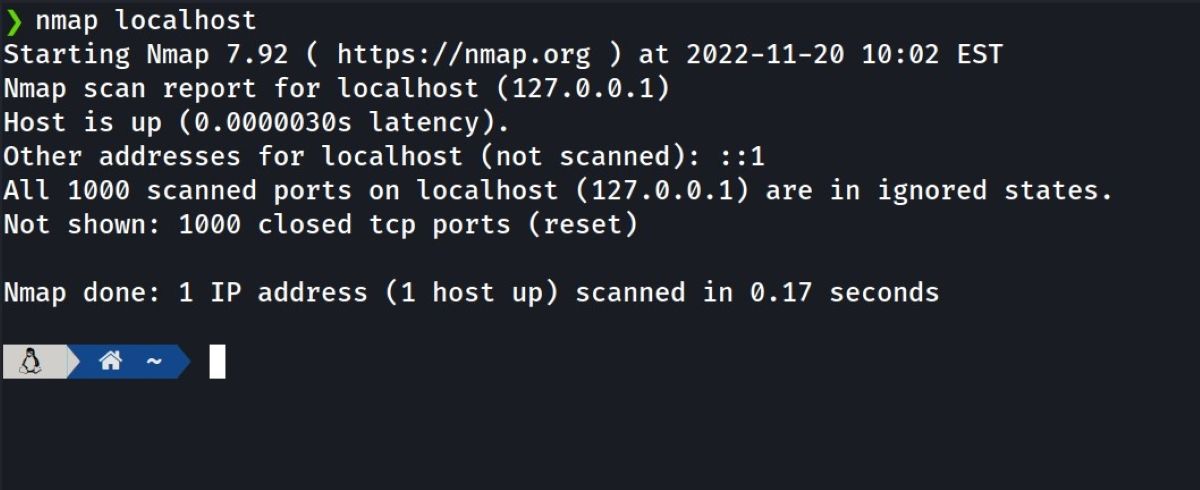
Then save the /etc/mysql/my.cnf file and restart MySQL service. If you carry out a Nmap scan again at this stage, you should not see this bind address on localhost.
Once you know this works, go back to the settings from the first step and set the bind address back to 127.0.0.1 and save again.
2. Set Up a Local File Access Barrier
MySQL can communicate with the local file system. With queries, you can see the content of a text in the local file system or burn the query result to a disk. To prevent malicious attackers using this feature, you must prevent MySQL from communicating with the local file system.
You can use a function called local-infile to take precautions. For example, imagine that you have a file named "/etc/secretfile.txt" and you have a password in this file. If the value of the local-infile function in your /etc/mysql/my.cnf file is 1, then the access is open. So you can access the secretfile.txt file.
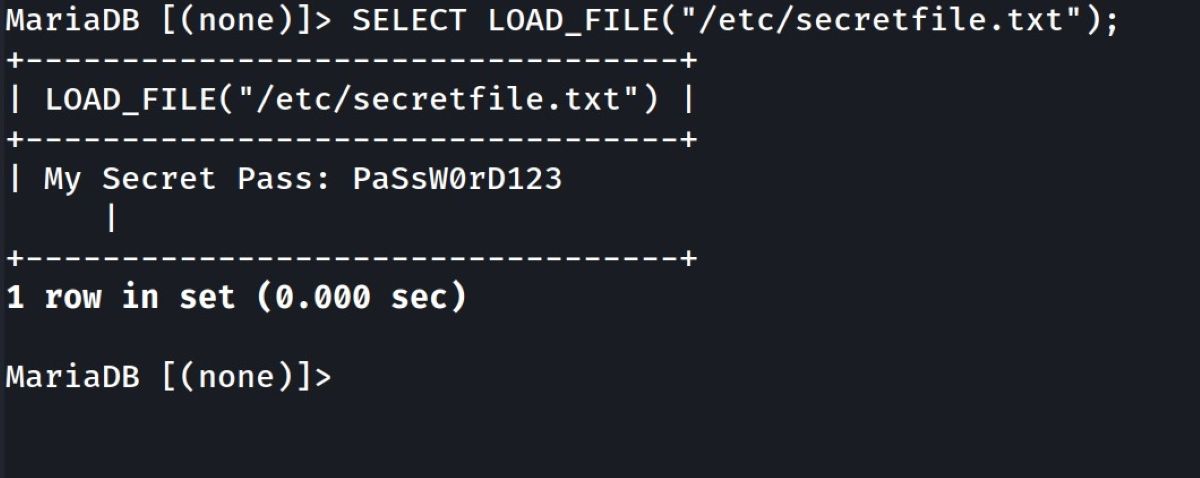
The value of the local-infile function is 1. Restart the MySQL database for the changes to take place. Now, connect to MySQL with the following command and check whether you can see the secretfile.txt file:
SELECT LOAD_FILE("/etc/secretfile.txt");
It's not difficult to capture the information in any file on your computer.
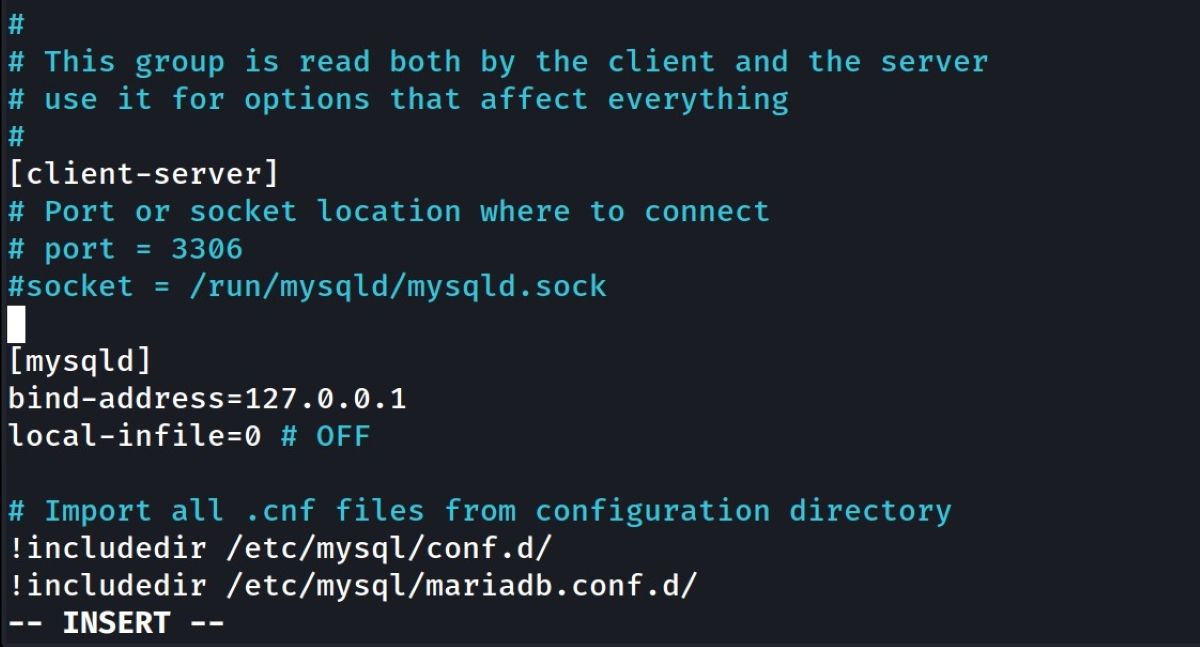
To solve this problem, change the local-infile value in your /etc/mysql/my.cnf file as follows:
        [mysqld]
local-infile=0
Restart the MySQL service. Reconnect to MySQL and repeat the previous step; you should no longer be able to see the file contents.
If users do not already have read and write permissions on local files, they will not be able to see this file. However, it is still something you should check in penetration tests and database security.
3. Set Application Users and Passwords
The database management user and the MySQL user accessing the database must be different from each other. In other words, connecting applications to MySQL with root users is extremely dangerous. If possible, define the users of applications that do not perform UPDATE or INSERT operations separately.
Another thing to consider at this point is user passwords. As in almost every field, passwords for MySQL users need to be complex and unpredictable. If you need help with this, there are great password generator systems you can use.
4. Delete Anonymous Users
When you install MySQL by default, some anonymous users occur. You need to delete these and block their access. For a secure MySQL server, you should not get any response as a result of the following query:
        SELECT * FROM mysql.user  WHERE USER="";
# Example Output
Empty set (0.001 sec)
If there are any results, you should delete these anonymous users. For example, if there were an anonymous account named "anonuser" in an environment named "localhost", you would have to use a command like the following to delete this account:
DROP USER 'anonuser'@'localhost';
5. Check MySQL Local File Permissions
Imagine you are a database administrator and you want to return to data from a week ago. In this case, you might have to connect to the database server via SSH and change the MySQL files you want. While doing this, you might have used the root user privileges of Linux; that is, the ownership and permissions of the data files can change. You don't want that.
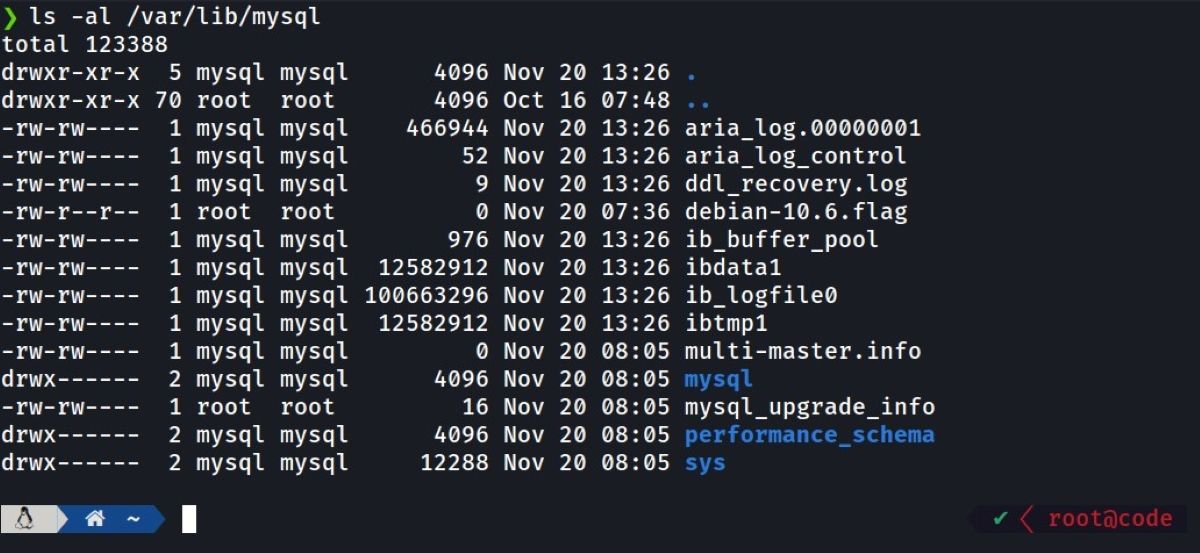
Look at the /var/lib/mysql directory to check the permissions granted. What you need to check here is whether the owner of all files is the MySQL user. The following command will do the trick:
sudo ls -al /var/lib/mysql
The read and write permissions of the files should only be for the MySQL user. No other users should have any permissions.
6. Use MySQL SSL
Thinking about a concrete example is the best way to understand MySQL and SSL usage. Imagine that one of the servers in the ABC region, where there are many different servers, is taken over by malicious hackers. Hackers will carry out an internal scan in the ABC region. In this way, they collect information about the servers.
If they detect a MySQL server during this process, they can perform a Man-in-the-Middle (MitM) attack on the target server, meaning they can steal the session information of applications and users connecting to this server. One of the best ways to avoid this is to enable SSL on the MySQL server.
7. Log and History Files
You use MySQL logs to analyze and find errors. You can edit where these logs are kept by entering my.cnf as follows:
        # /etc/mysql/my.cnf
[mysqld]
log =/var/log/mylogfiles
You can change the mylogfiles name or location as you wish. There is one more file you need to check. When you connect to the MySQL server in a Linux terminal and type various commands, these queries are saved in the mysql_history file. If you run the following command, you can see the queries you are using in the MySQL terminal:
cat ~/.mysql_history
You need to delete the contents of this file if you don't want to give information about what kind of queries you are making inside the server. Use the following command to delete the contents of the file:
sudo echo "cleaned" > ~/.mysql_history
You can then check the file contents again.
Whoever Owns the Database Owns the System
No matter what industry you work in, your database always contains important information. This can be your customers, bank accounts, and passwords. Malicious attackers know the importance and value of these. Database developers and administrators need to at least know the basics that they will encounter in penetration tests in order to beat the hackers.


