In Apple’s Macs, iPhones, and iPads, there are three types of accessibility features (vision, hearing, and motor). Generally, they’re designed to ensure that people with disabilities are able to fully control and enjoy their devices. But, their utility makes them beneficial for all users.
Since these features can be tweaked to suit the exact need of the user, it’s important to understand how they work. In this article, we’ll look at the motor accessibility features on a Mac, what they do, and how you can adjust them according to your use case. Let’s get started.
Voice Control
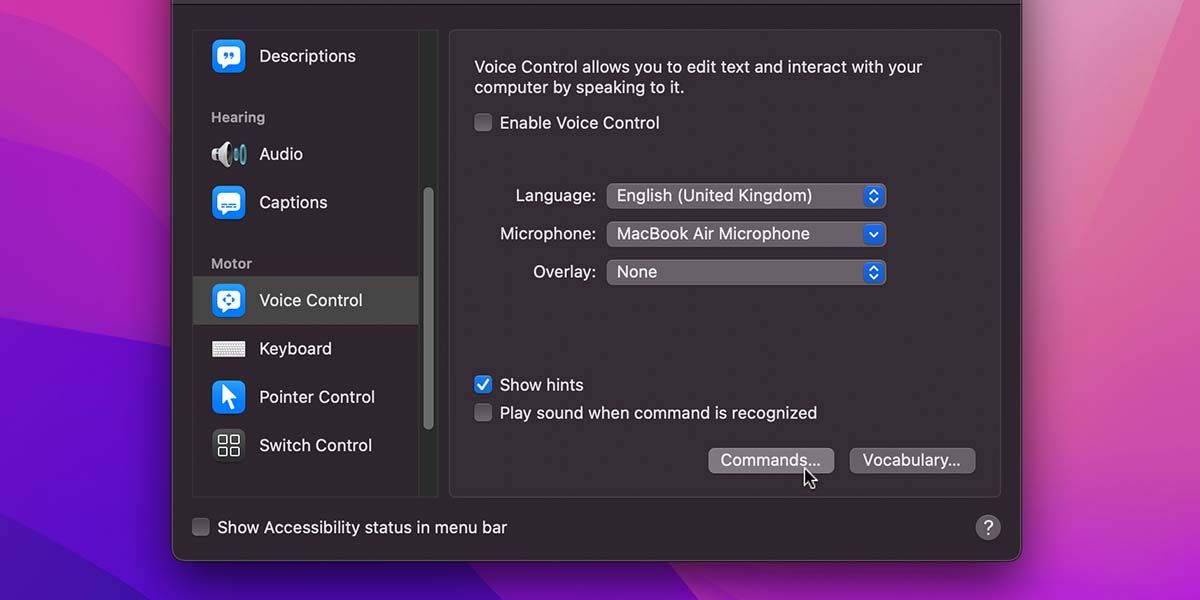
First on the list is the Voice Control feature, which is also one of the most useful macOS accessibility features, as it allows both temporarily and permanently paralyzed users to operate their Macs using their voice. You can find and enable it from System Preferences > Accessibility > Voice Control.
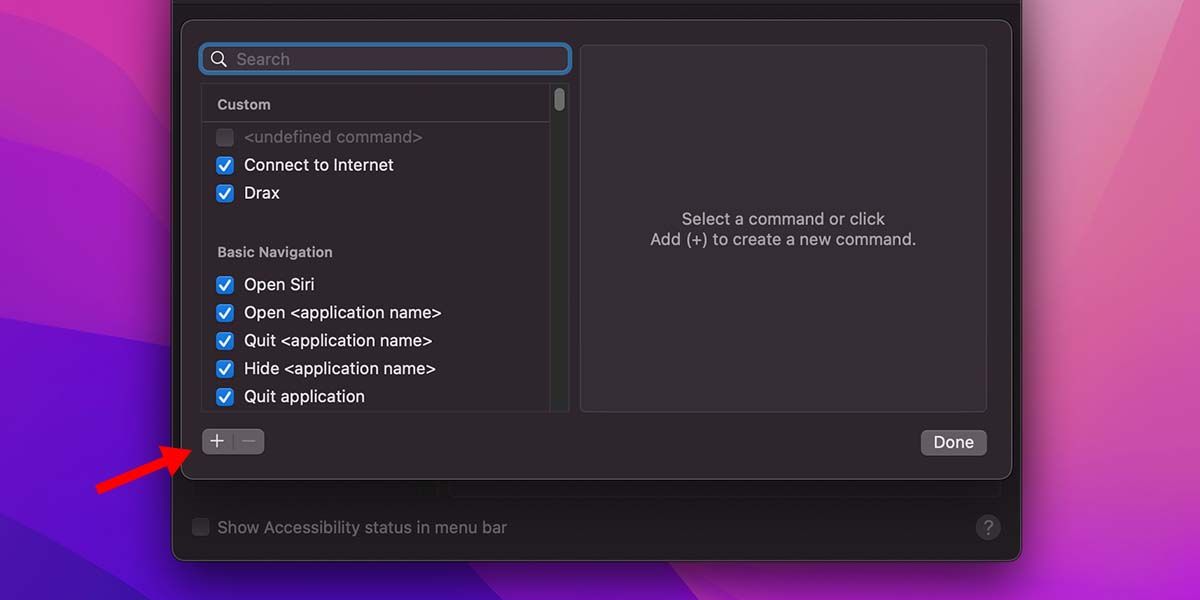
The concept is straightforward: you enable the feature and a microphone pops up on screen. You then say specific commands like “open Safari” out loud, and macOS opens the app for you. You can view all the preset commands by clicking the Commands button from the Accessibility > Voice Control panel.
In addition to these presets, you can also add custom commands. You can decide what function you want the system to perform, using a specific app, when you say something specific. To add custom commands, on the Commands panel, click the add (+) button and fill the left side panel with the specifics.
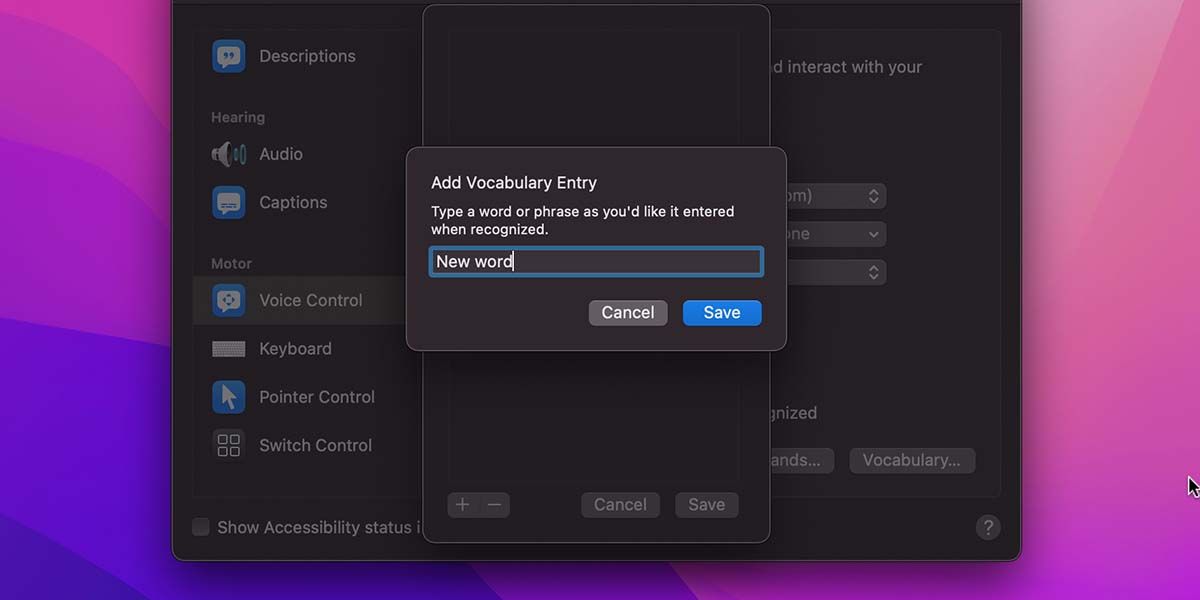
You can also add your custom vocabulary to this feature to supplement custom commands. Then, when you say those words out loud, the system will perform the specific command you designed for it. To add custom words, go to Accessibility > Voice Control > Vocabulary, click the add (+) button, insert the word, and click Save.
From multiple languages to in-depth custom commands, the Voice Control can be extensively tweaked to suit a user’s needs.
Keyboard
The second motor accessibility feature is full Keyboard access, which, when enabled, allows users to control their Macs with the following shortcuts:
- Tab + H: To show help
- Tab: To move forward
- Shift + Tab: To move backward
- Space: To activate
- Arrow keys: To move inside groups
- Control + Tab: To move to next item
- Control + Shift + Tab: To move to previous item
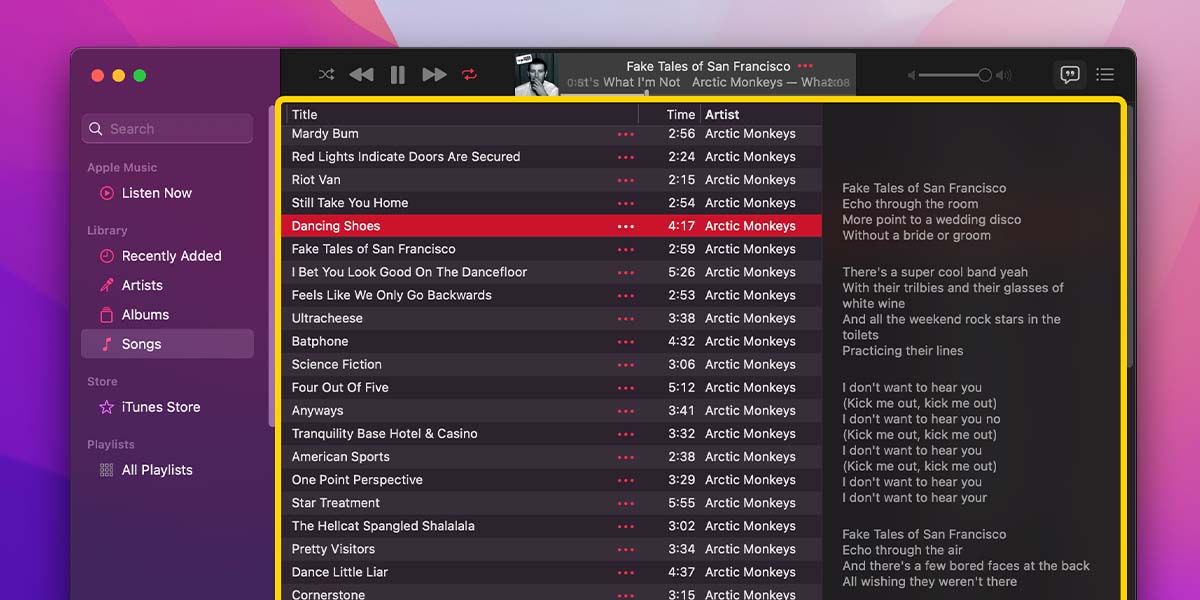
This accessibility feature divides up all the elements on your screen, letting you use these shortcuts to hop from one to another, and toggle each separately. The screenshot below shows the yellow highlight box that wraps the element that you’ve selected using the shortcuts above, when the full Keyboard access option is active.
You can tweak the appearance of this highlight (for example, to make it more or less contrasting) from the Options button beside the Enable Full Keyboard Access checkbox. Here, you can also view the full list of commands this feature adds to your keyboard.
Along with the Navigation, the Hardware and Viewer tabs in Accessibility > Keyboard allow you to customize this feature further:
- The Hardware tab allows enabling and tweaking the Sticky and Slow Keys features.
- The Viewer tab is more about the Accessibility Keyboard and how you can customize it using the Panel Editor—Apple Support has an excellent article explaining this app.
Enabling the full Keyboard access feature doesn’t mean that the existing shortcuts will be overridden. You can still use them to perform different functions as you did before, like opening different apps.
Our guide to using CheatSheet on macOS explains how you can see all the available shortcuts on your Mac, while the custom keyboard shortcuts guide explains how you can add your own shortcuts to the list.
Pointer Control
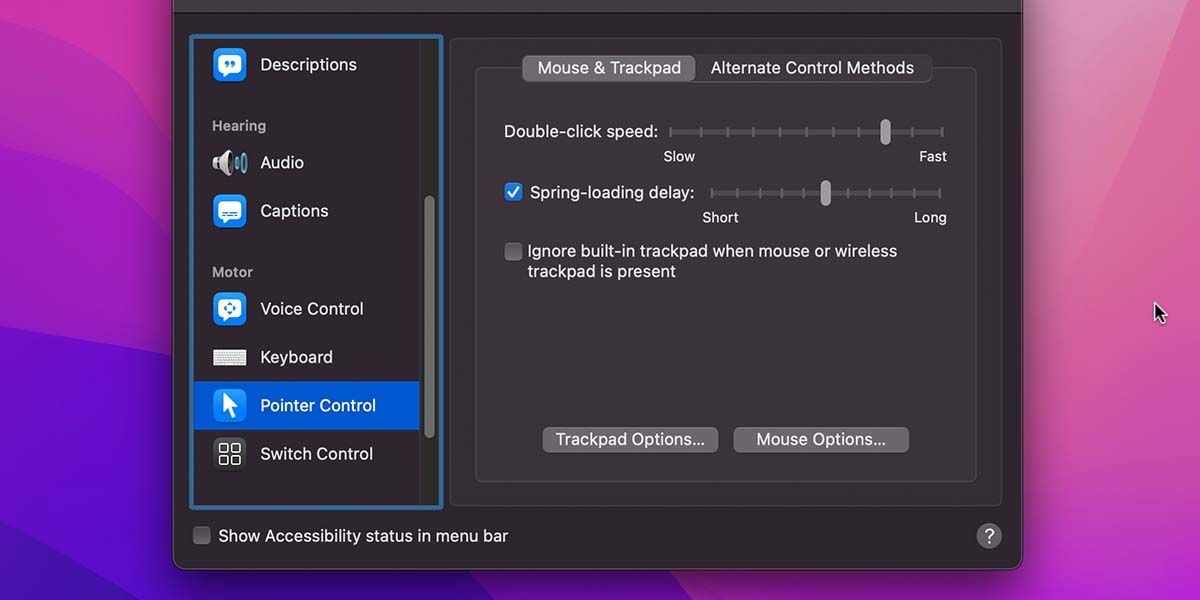
Point Control is the third motor accessibility feature on the list. It helps you tweak the performance of your mouse pointer or cursor in macOS. Under Accessibility > Pointer Control, it has two tabs: Mouse & Trackpad and Alternate Control Methods.
The Mouse & Trackpad tab lets you customize mainly your pointer’s movement on screen. Here are different settings you can find here:
- Double-click speed: Increase or decrease the speed at which you're required to double-click on files to open them.
- Spring-loading delay: Increase or decrease the time it takes for a folder to respond when you pick a file, and hover it over the folder to add it to it.
- Ignore built-in trackpad: When enabled, this feature makes the trackpad inactive when you’re using an external mouse.
- Trackpad Options: Here, you can control the scrolling speeds and types. Play around with the options to find what suits you best.
- Mouse Options: This is for when a mouse is connected, and only lets you control mouse scroll speed.
The Alternate Control Methods tab gives you the options to control macOS cursor without using the trackpad or an external device. It has three fun options:
- Enable Mouse Keys: This lets you control your cursor with keyboard keys.
- Enable alternate pointer actions: Lets you execute clicking, dragging, and dropping pointer functions via different facial expressions.
- Enable head pointer: Lets you move the pointer across the screen using your head movement.
By clicking the Options button beside each feature, you can tweak it to suit your preferences.
Switch Control
This motor accessibility feature allows users to add simple devices (like joysticks) to operate their Macs. Under System Preferences > Accessibility > Switch Control, there are four tabs that allow you to enable and customize this feature.
- General: Here, you can enable the Switch Control feature, and set its panel’s appearance and activity period.
- Typing: On this tab, you can automate the insertion or removal of spaces and capitalization of sentences. It also gives a shortcut to Keyboard Preferences, from where you enable features like autocorrect.
- Switches: This tab lets you add the switches (devices) you will use to operate your Mac.
- Navigation: Here, you can tweak Switch Control default settings like its restart position and cursor size.
Apple Support also has a detailed guide on this topic, which explains how you can set up Switch Control devices.
Apple Has Done a Lot for Accessibility
With straightforward verbal commands, facial gestures, head movements, and keyboard shortcuts, users can simplify how they operate their Mac. This ensures that users with any sorts of motor disabilities don’t feel left out, and are able to enjoy Apple’s devices.
Just as the President of the American Foundation of the Blind once said, as reported by Apple Insider, “Apple has done more for accessibility than any other company to date.” Its devices are ideal for disabled people—not only with motor disability, but also visual and hearing impairments.


