The range of tools available on Microsoft Whiteboard means there’s always a handy trick to discover and make your life easier. As far as apps go, this is a simple one, but it offers different, even fun, ways to communicate with your team.
Whether for corporate or artistic communication, you can draw, write, create tables, and adjust the program to your liking. Each of these features has its secrets, so let’s start unraveling them. Below are five expansive tricks to take your PC experience further.
1. Navigate With a Mouse and Keyboard
Using a touch pen or your fingers may be easier, but access to Microsoft’s digital whiteboard on Windows comes with its own set of useful navigation systems. When you want to draw or erase something, for example, pointing and clicking on your preferred tool is the typical way of the mouse, but you can also use the Tab key to sift through the pen icons.
Similarly, you can move the ruler around by clicking on it and using the arrow keys to navigate. Combining these same keys with the ruler selected and a held down Alt key also allows you to turn it to the angle you need.
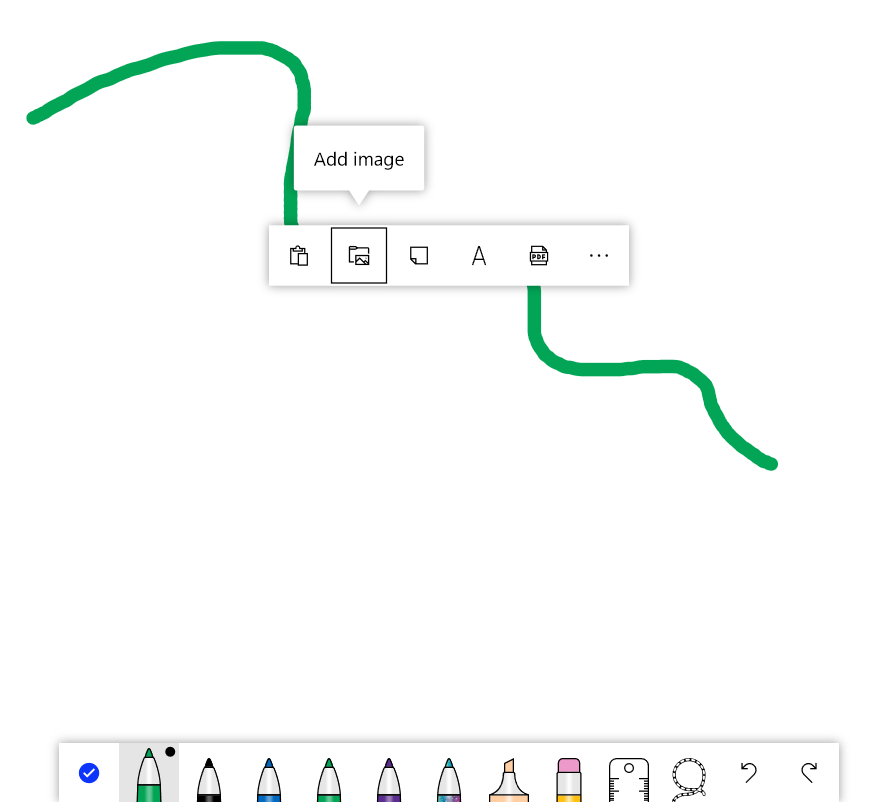
Another keyboard trick involves Whiteboard’s ability to insert objects. You can use the traditional way or through the context menu. Access this by pressing Shift+F10. Then use your trusty arrow keys to settle on an image and press Enter to add it to the canvas.
Your new feature can be manipulated too using nothing more than keyboard shortcuts. Select the object and move it around with the arrow keys. If you hold down Ctrl at the same time as pressing the keys, the object will change size, while the Alt key will rotate it.
2. Toggle Drawing and Erasing Options
A perfect tip for the more artistic users. In fact, Microsoft wanted their app to benefit people from various walks of life, not just business administrators. According to the company's blog, they even encouraged the education sector to make the most of Whiteboard’s creative and interactive capabilities.
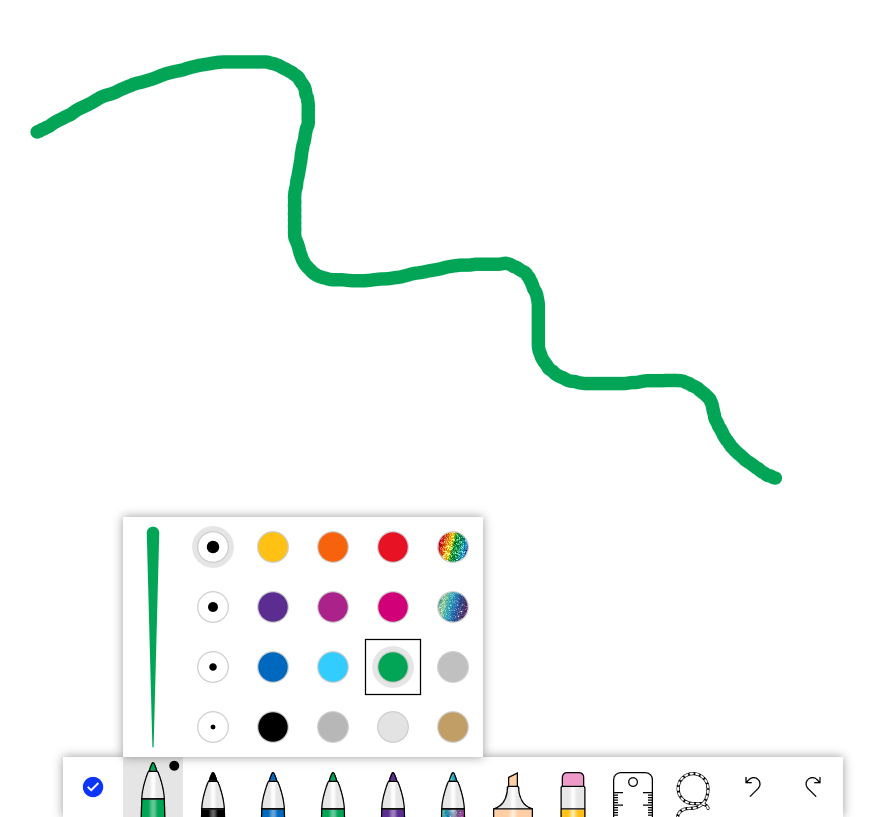
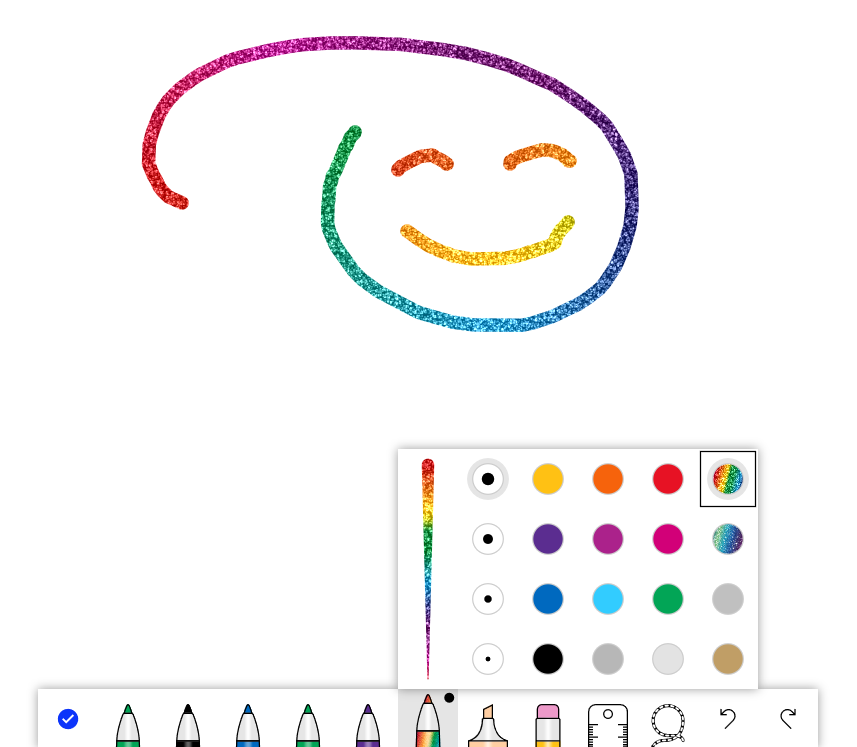
So the company brought as much fun into its software as it could without weighing it down. In terms of drawing, you can choose between pens of different types, thickness, and color, including Rainbow and Galaxy.
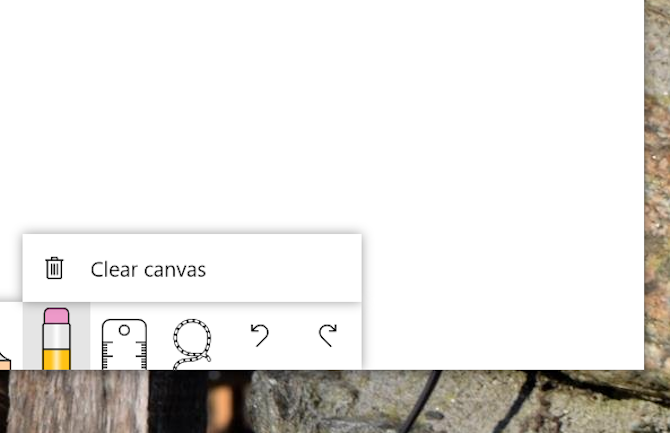
Once you’re done with the current presentation and want to erase everything on the canvas, you have two quick solutions. Click on the eraser icon and either wipe down the whiteboard with your mouse or select Clear canvas. Whiteboard will clear away everything in an instant, leaving you with a brand new board to work with.
3. Enable and Use Ink Beautification
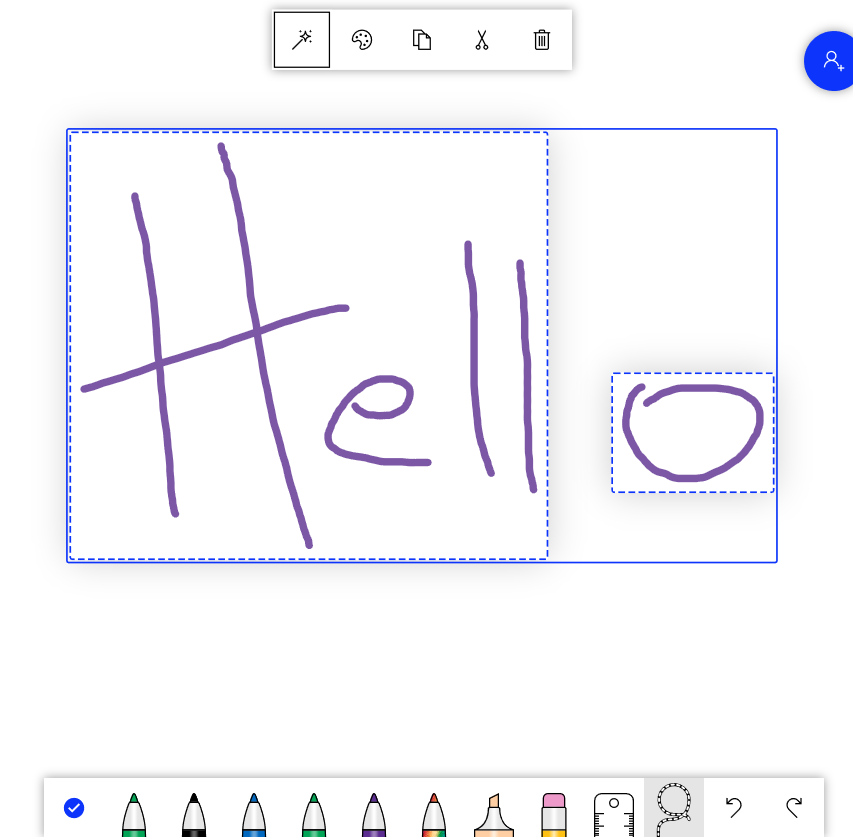
While you could just type what you want into a text box or note, there’s another interesting way to get messages across. Choose a pen and write something on the canvas, even over a note. Then use the Lasso tool to select the text, at which point a toolbar will pop up displaying the Ink beautification icon---a magic wand.
When you click it, the handwritten text will transform into something a bit more elegant. Considering how awkward it is to write on a computer, this is invaluable, especially in a group meeting. However, you can’t use the wand without making an adjustment to your system preferences first.
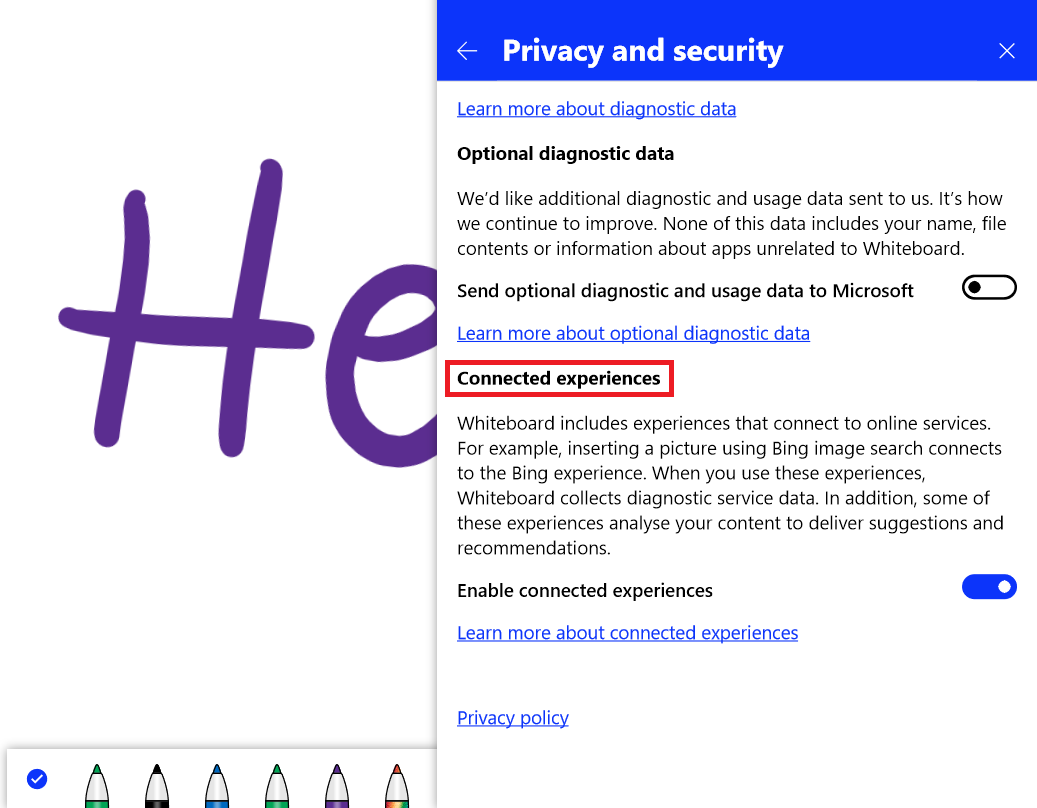
Go to the Settings menu on the top right corner of the canvas. Click on the Privacy and security tab. Among the options shown, you’ll find Connected experiences. Enabling this allows Microsoft Whiteboard to connect to online services, such as the software required for your text to be recognized and beautified.
4. Customize the Canvas
The competition in the online whiteboard market is growing with each new software. Apps like Miro and Aww offer similar tools to Microsoft and more capabilities, including cross-platform compatibility. So the tech giant is gradually boosting what Whiteboard can do.
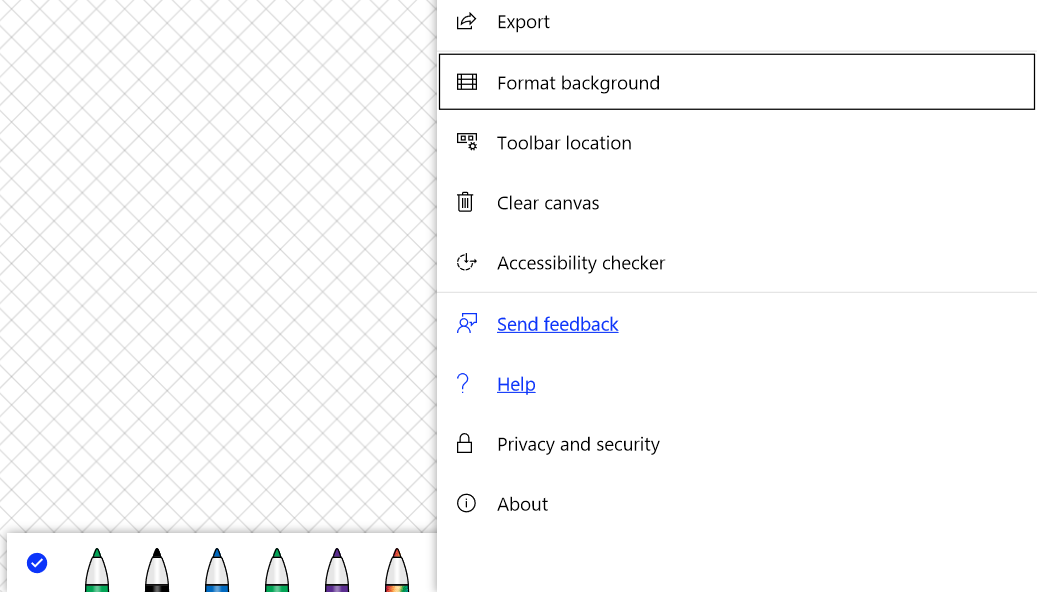
To begin with, on the same Settings menu you’ll find the Format background tab. Here you can choose a color for your canvas, as well as a pattern of eight distinct options, from dots to a diamond grid. You can turn your group’s interactive whiteboard into one big notebook.
Another adjustment you can make is to the toolbar’s location. If having it at the bottom interferes with your experience, you can move it to the left or right side of the canvas. Simply select Toolbar location from the settings and then your preferred orientation.
5. Add More Than Images
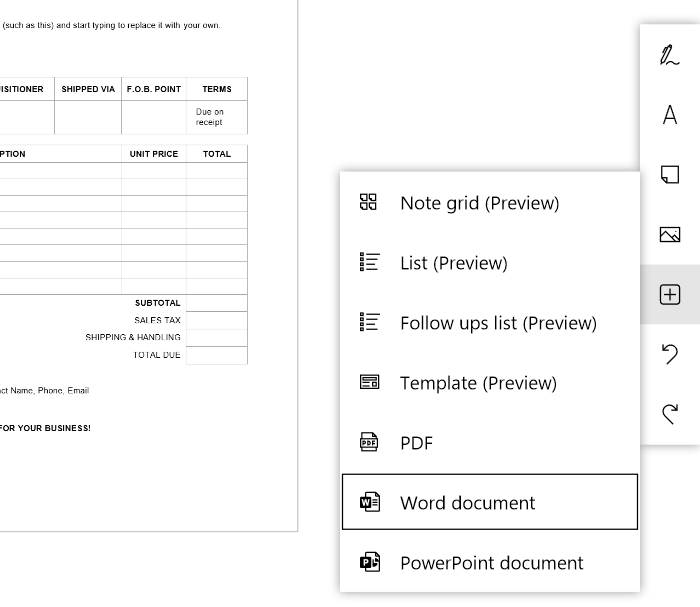
This may be the most efficient feature of Microsoft Whiteboard. Apart from pictures, Windows users can bring in Word, PowerPoint, and PDF documents. Go to the Insert menu icon on the toolbar and take your pick.
The Ink beautification tool comes in handy here too. Let’s say you want to design a new invoice and want your team’s input. You add a template from Word, but you don’t want the document’s borders to be visible and restrict creativity. Select the document and click on the magic wand to integrate its contents with a blank background.
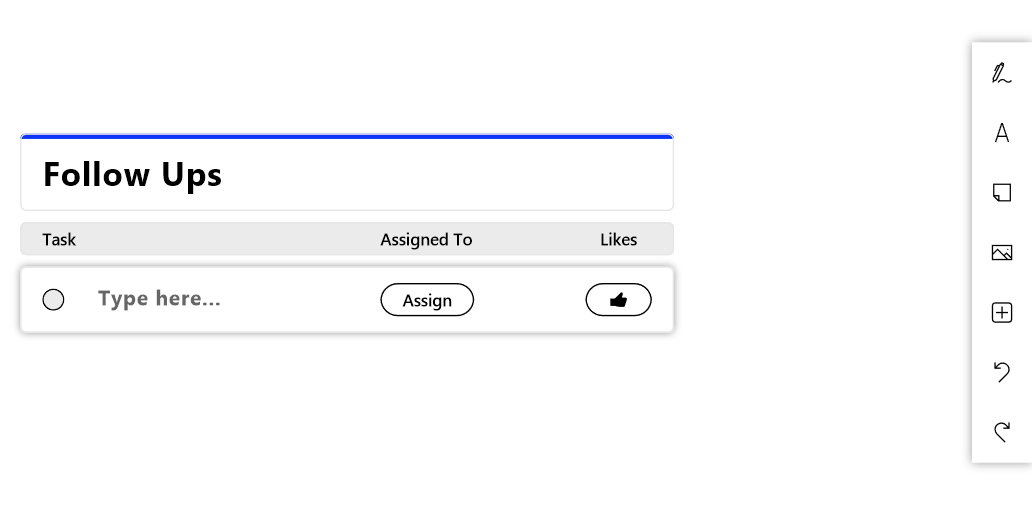
From the Insert menu icon, you can also add customizable lists, note grids, or a readymade template combining these for a particular group task. Not only that but you can invite participants to like items on a list or assign tasks to them.
Assuming you’ve included several people in your Whiteboard meeting, here’s how to do this.
Click on the Follow ups list tab and a new box will appear on your canvas. You can edit the text, change the sorting preference, and choose between a bullet and a checklist. Within the row of each item, you’ll find the Like and Assign buttons. Selecting the latter will open a full list of participants to choose from.
Collaborate Better on Microsoft Whiteboard
Think about what your meeting is supposed to achieve. Is it for brainstorming or managing a group project? Whiteboard allows you to draw, write, compile elements, and even delegate responsibilities.
Get to know these helpful tips and tricks for Windows users, but don’t stop there. In addition to other existing features, Microsoft is gradually bringing new tools to the table.

