A microphone is essential for voice calling and video conferencing within Microsoft Teams. However, some Teams users can’t make voice or video calls when their microphones stop working with that app. When that happens, your microphones might still work fine for other apps but not with Microsoft Teams.
Consequently, users can only utilize Teams for text messaging when their microphones don’t work with that app. However, video conferencing is an important feature many users need for meetings. This is how you can fix a microphone that’s not working with the Microsoft Teams software in Windows 10 and 11.
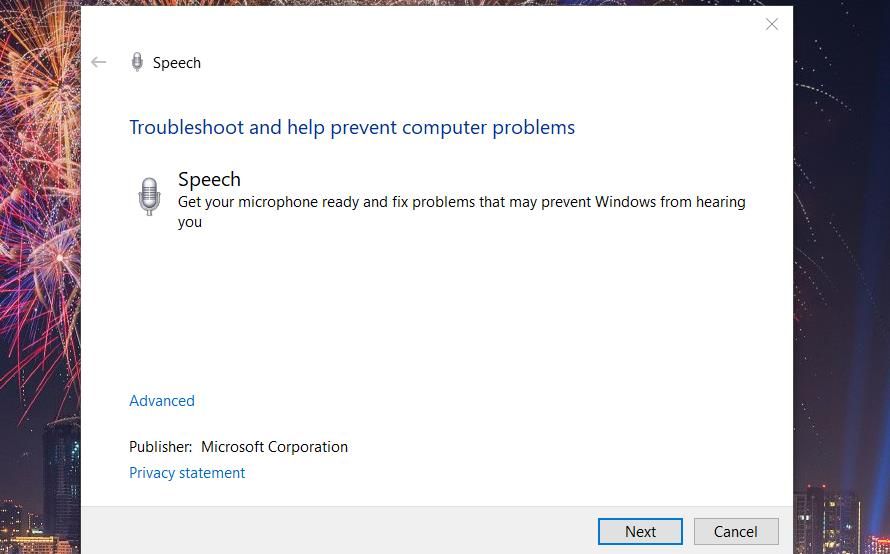
1. Run the Recording Audio and Speech Troubleshooter
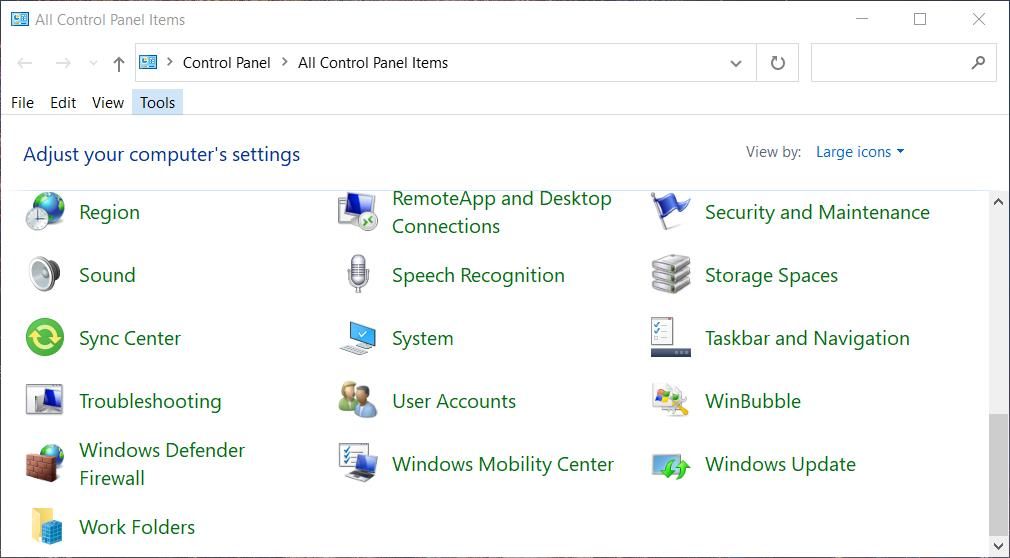
The Speech and Recording Audio troubleshooters are two tools that can be useful for fixing microphone issues in Windows 11/10. However, running the Speech troubleshooter is better since that’s more specifically for resolving audio input issues. You can select to run both troubleshooters via the Control Panel in Windows 11/10 like this:
- First, launch the Run command dialog, which you can quickly access by pressing Win + R.
- Input a Control Panel command within the Run dialog’s Open text box.
- Click Large icons from the View by menu to change the Control Panel view if necessary.
-
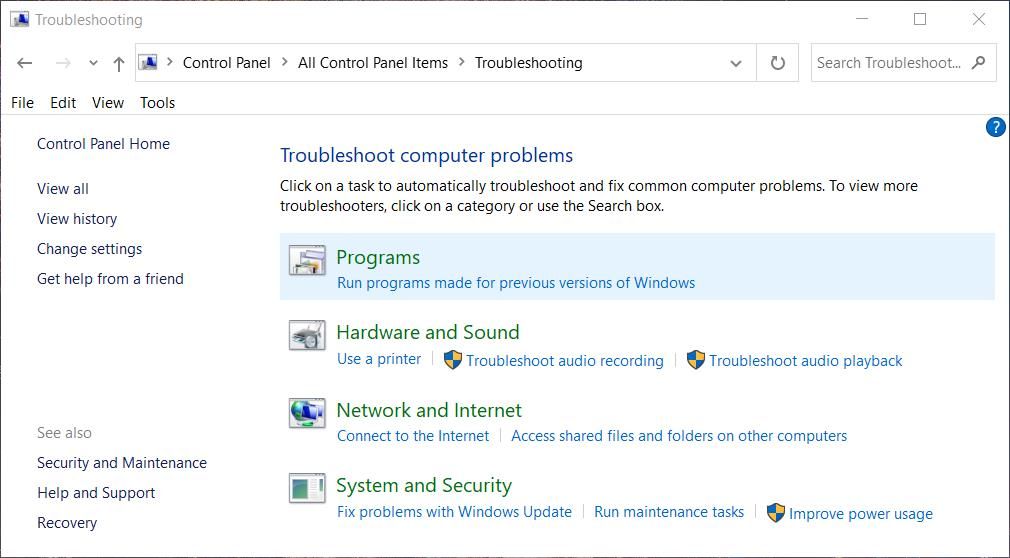
Then select Troubleshooting to view that applet.
-
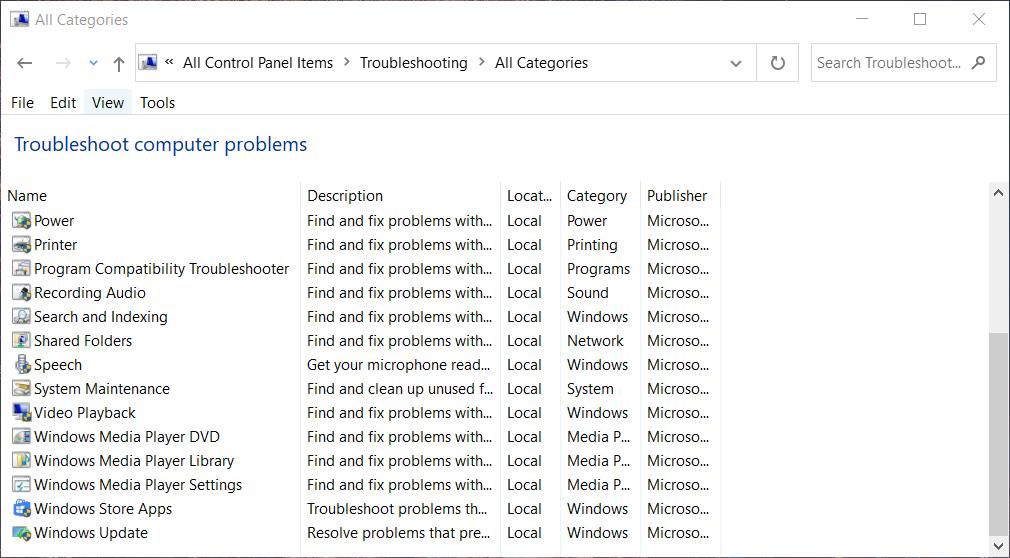
Click View all to access a list of Windows troubleshooting tools.
-
Then click Speech to start that troubleshooter.
-
Select Next to proceed with the troubleshooting.
- Apply resolutions suggested within the troubleshooter.
- If the Speech troubleshooter doesn’t resolve the issue, try running Recording Audio one. Click Recording Audio in the Control Panel’s troubleshooting list and then select options for applying the potential fixes suggested.


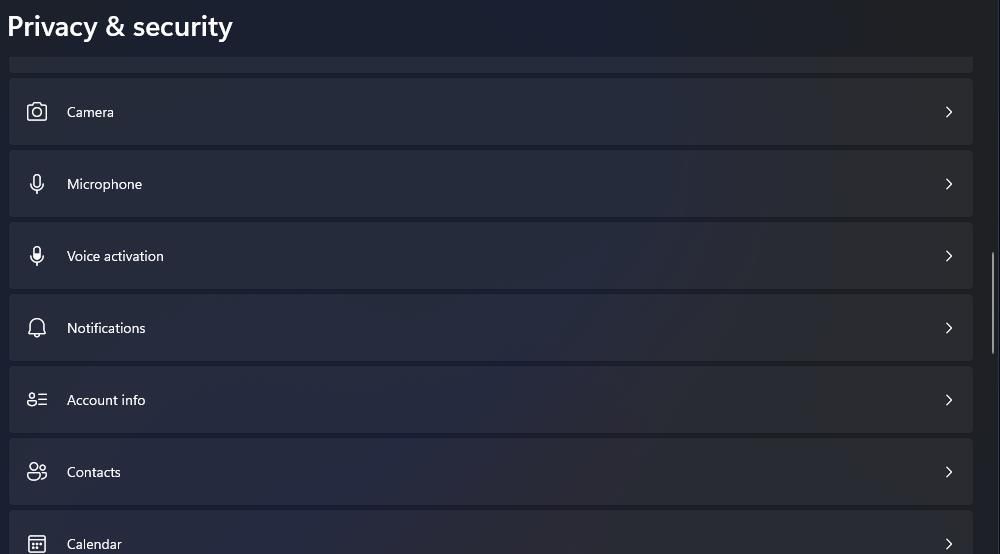
2. Enable Microphone Access for Microsoft Teams
It could be the case that your microphone isn’t enabled for Teams. You can check and configure microphone permission options for apps via Settings. This is how to enable microphone access for Microsoft Teams:
- Press the Windows keyboard button to view the Start menu and select Settings.
- Next, select Privacy to access navigation options for Windows permission settings.
-
Select the Microphone app permission navigation option.
- If the Microphone access option is disabled, turn that option on.
-
Turn on the Let apps access your Microphone toggle switch if it’s set to off.
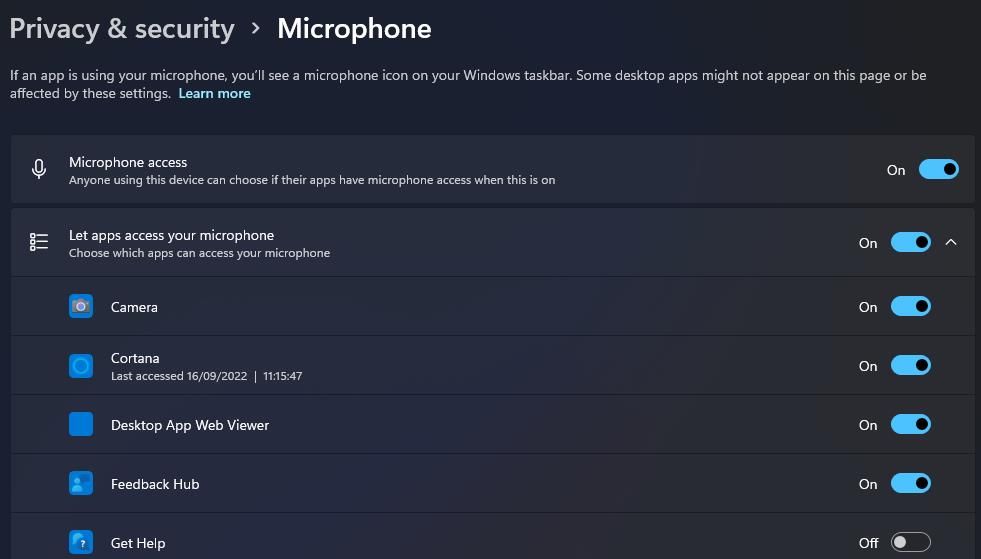
- Also, enable the Let desktop apps access your Microphone setting if you utilize the Microsoft Teams desktop software version.
- Then scroll down to Microsoft Teams in the app list to check mic access is enabled for it.


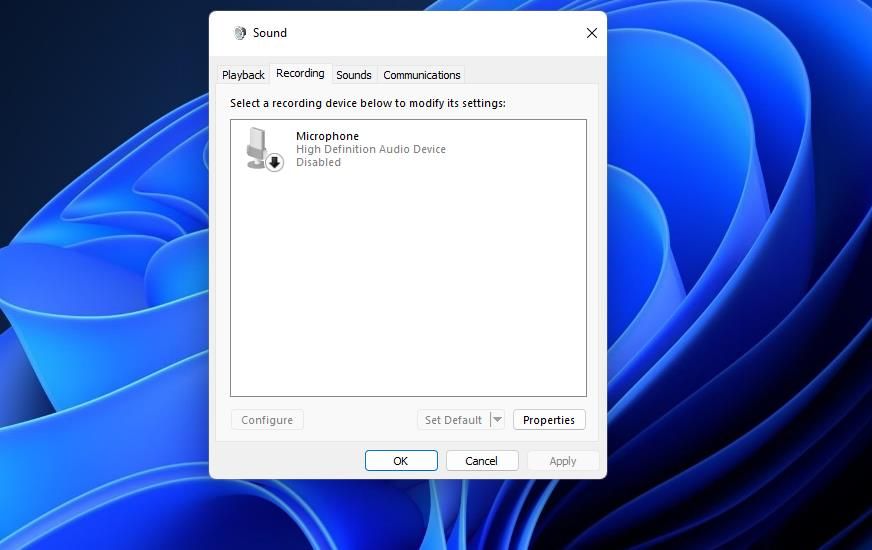
3. Check Your Microphone of Choice Is Enabled and Set to Default
Your microphone of choice for Teams must be enabled and set to default. So, check that the microphone you’re trying to utilize with Teams is enabled and set to default like this:
- Click the search tool’s taskbar button (a magnifying glass) or text box.
- Input mmsys.cpl to find a Control Panel applet for configuring sound settings.
- Select mmsys.cpl to view a Sound window.
-
Click Recording at the top of the Sound window.
-
If the microphone you’re trying to utilize is disabled, right-click it and select Enable.
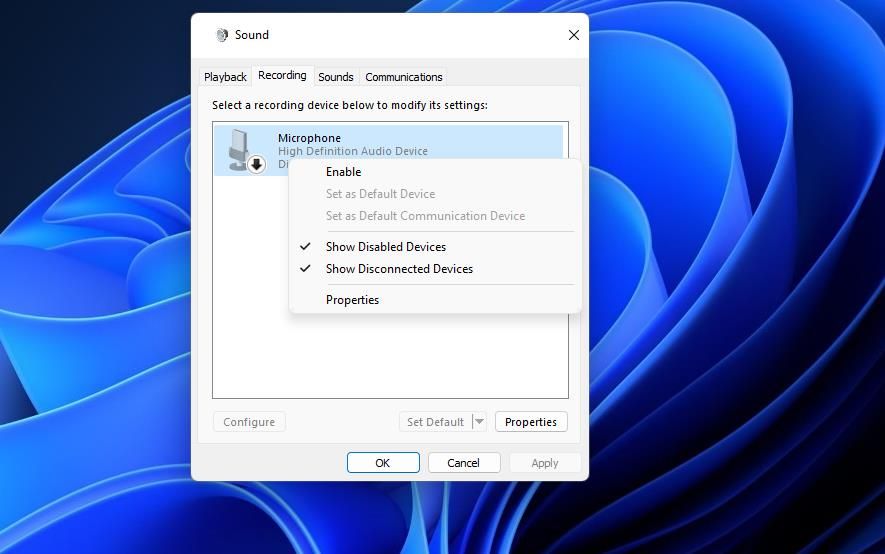
- Then select your microphone and press the Set Default button.
- Click Apply to save the adjusted options.


4. Increase Your Microphone’s Volume Level
Your microphone won’t be usable with Microsoft Teams if it’s muted or set at a very low volume. So, maybe you need to raise your mic’s volume level. This is how you can increase your mic’s volume via the Sound window.
- Open the Sound window’s Recording tab, as covered in steps one to four of the previous potential resolution.
- Select your microphone and click Properties.
- Click the Levels tab.
-
If the microphone is muted, click the speaker button to unmute it.
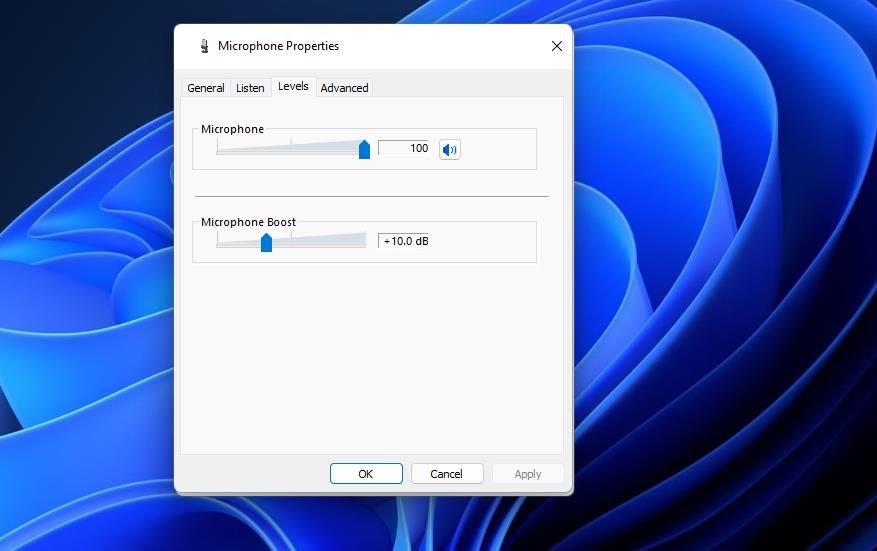
- Drag the slider on the Microphone bar further right somewhere close to at least an 80 percent volume setting.
- Press the microphone properties window’s Apply and OK buttons.

5. Check the Right Audio Input Device is Set in Teams
A common reason for a microphone not working with Microsoft Teams is that a user hasn’t selected the right audio input device within the app. Make sure you’ve got the audio input device you’re trying to utilize selected in Teams. You can select a microphone in the Microsoft Teams desktop software as follows:
- Open your Microsoft Teams software.
-
Click the ellipses (…) button beside your avatar at the top of the Teams window to select Settings.
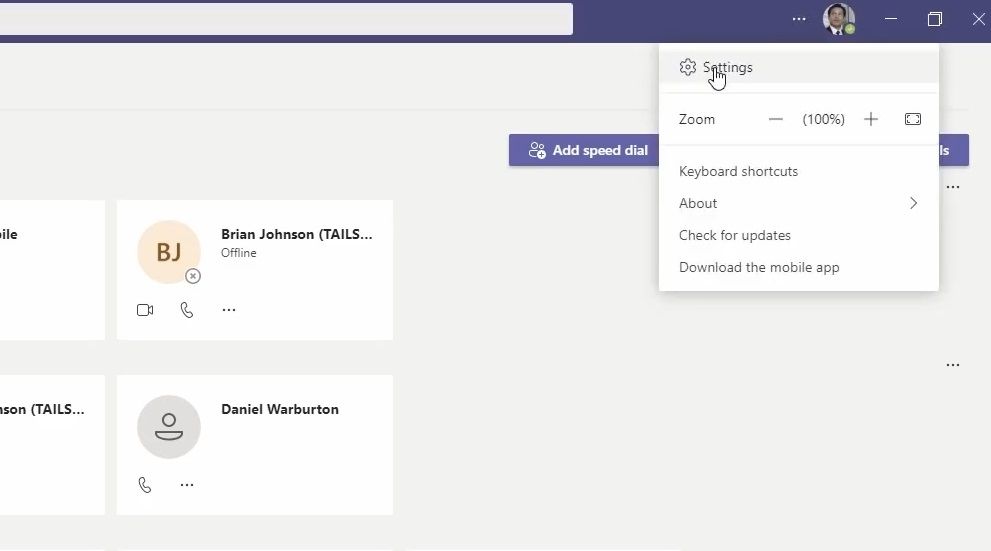
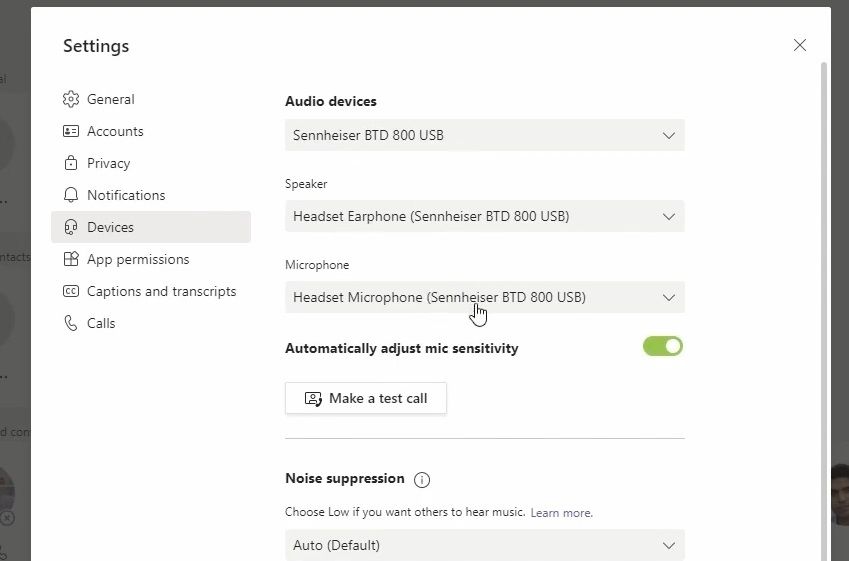
- Select the Devices tab in the Settings window.
-
Click the Microphone drop-down menu and select the right mic there.


If you’re utilizing the Teams UWP app in Windows 11, you’ll have to select the right mic within a meeting. Set up and join a meeting in the app. Click the More actions (three-dot) button within the meeting window to select Device settings. Then select the correct input audio device in the Microphone drop-down menu.
6. Perform Some Generic Windows-Based Fixes
There are some fixes you can try that work with all Windows apps that can't use your microphone. These include:
Repair/Reset the Microsoft Teams UWP App
This potential solution is only applicable to the Microsoft Teams Universal Windows Platform app. That app’s Repair and Reset options in Settings could come in handy for fixing this microphone issue. Try selecting the Reset option for Microsoft Teams, as instructed in our article about resetting Microsoft Store apps. You can also select a Repair option just above the Reset button.

Reinstall the Microphone’s Driver
Your audio input might not be working with Teams because of a microphone driver issue. Reinstalling that driver could resolve the issue. These are the steps for reinstalling a microphone’s driver in Windows 11/10:
- Press the Windows key + X to access a menu of shortcuts for numerous system tools.
- Select Device Manager to access that hardware tool.
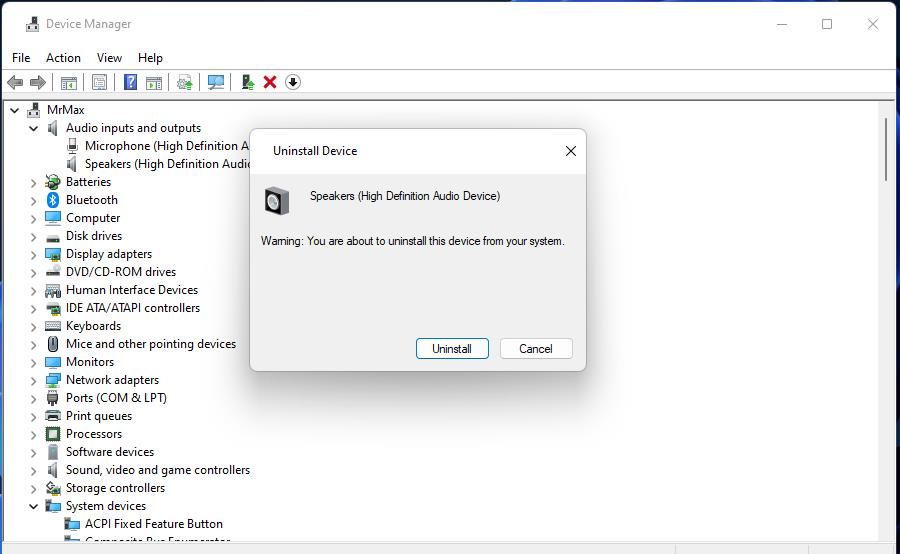
- Double-click Audio inputs and outputs to view that category’s devices.
-
Right-click the microphone audio input device and select its Uninstall context menu option.

-
Press the Uninstall button on the confirmation box that appears.
- Restart the PC for Windows to automatically reinstall a generic microphone driver.


Reinstall Microsoft Teams
Reinstalling Microsoft Teams might be necessary to fix this microphone issue if all other potential fixes fail. Some of that app’s files could be corrupted on your PC, which this resolution will likely remedy. You should be able to remove both the Microsoft Teams UWP and desktop apps via Apps & features, as covered within this article about uninstalling Windows software.

Then you’ll have two options for reinstalling Microsoft Teams. You can download and install the UWP app by clicking Get in Store on this Microsoft Store page. Or you can install the desktop software by clicking Download for desktop on the Microsoft Teams page. If you go for the latter option, you’ll need to double-click the downloaded MSTeamsSetup_c_l.exe file to install the desktop software with its setup wizard.
Utilize Your Microphone in Microsoft Teams Again
So, don’t be in too much of a hurry to ditch Microsoft Teams for Skype or other alternatives when your microphone stops working with that app. At least try applying some of the potential fixes above for getting a microphone to work with Teams first. One will probably work, but you can also contact a support agent about this issue from this Microsoft help page.