Large projects are easier to handle if you break them down into smaller sections. So, whether you're writing a 25-chapter novel or a 1,294-page technical report written by different team members, you can accomplish things faster if you work in bite-sized chunks.
And if you were to combine parts of a document into one, wouldn't it be better if you no longer had to copy and paste each file from all over your computer, then format them manually all? Here's how you can do that with LibreOffice's Master Document.
Creating a New Master Document
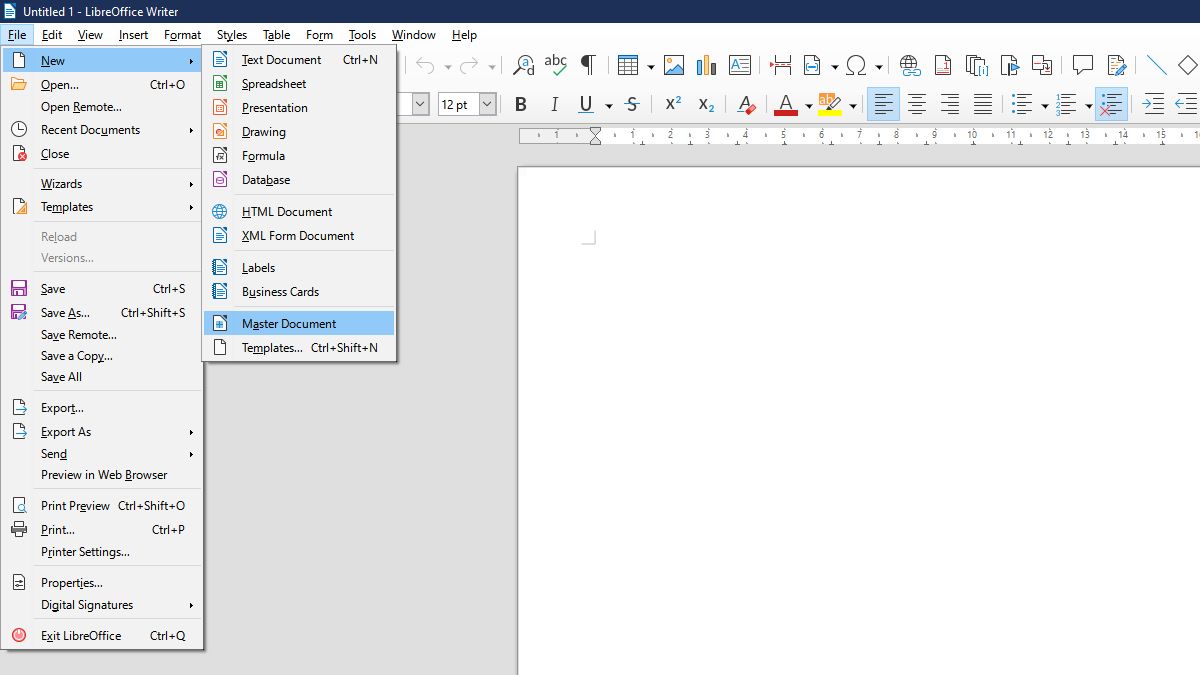
When starting a new project from scratch, create a new blank Master Document. To do so, go to File > New > Master Document. When you click on it, a new window should open, along with a Navigator window. Also, for a clearer view, drag the Navigator window and snap it to the side of the main window.
You should see a Text entry in the Navigator window. Draft and format your title and introduction under this entry immediately; that way, you can set the style which the rest of the documents you'll add will follow.
Once done, you can now add sections from various files to your Master Document. However, remember that you can only add word processor documents like ODT, DOCX, and WPS file types.
Adding Subdocuments to Your Master Document
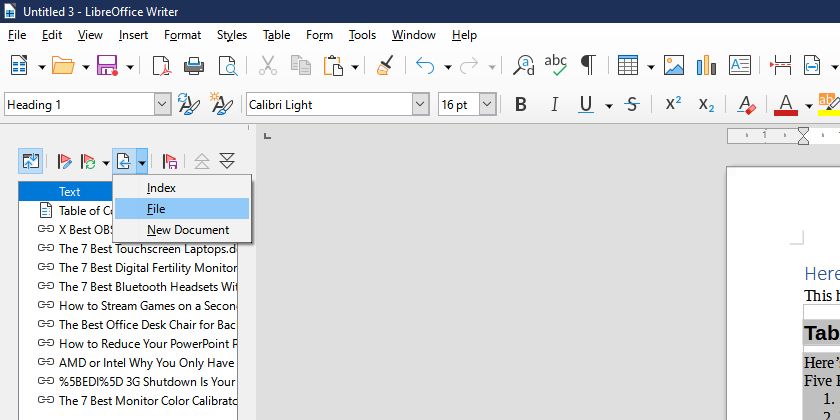
Now that you have your Master Document's formatting ready, you can now go ahead and insert your existing subdocuments. To do so, go to the Navigator window and click on the Insert icon. From the dropdown menu that will appear, click on File.
Head to the directory location where you saved the files you added, click on it, then select Open. You should see the file you added in your master document. You will also see the file name of the added document appear in the Navigator window.
To arrange the subdocuments and other parts of your Master Document, drag the section you need to move to your desired location in the Navigator window. Alternatively, you can click the file name or section title in the Navigator window and click on Move Up or Move Down to place your section.
Formatting Your Chapters
Ensure all documents start with the same heading level if you want your subdocuments to begin on their own page. For example, if you're combining a report with ten different sections, ensure that each part starts with the same Heading Level (like Heading 1). Otherwise, you might end up with a confusing document.
You then need to click on Styles > Manage Styles. A Styles window will appear on the right side with a list of different paragraph styles. Right-click the Heading Level you're using for each section—in our example, it's Heading 1—then choose Modify.
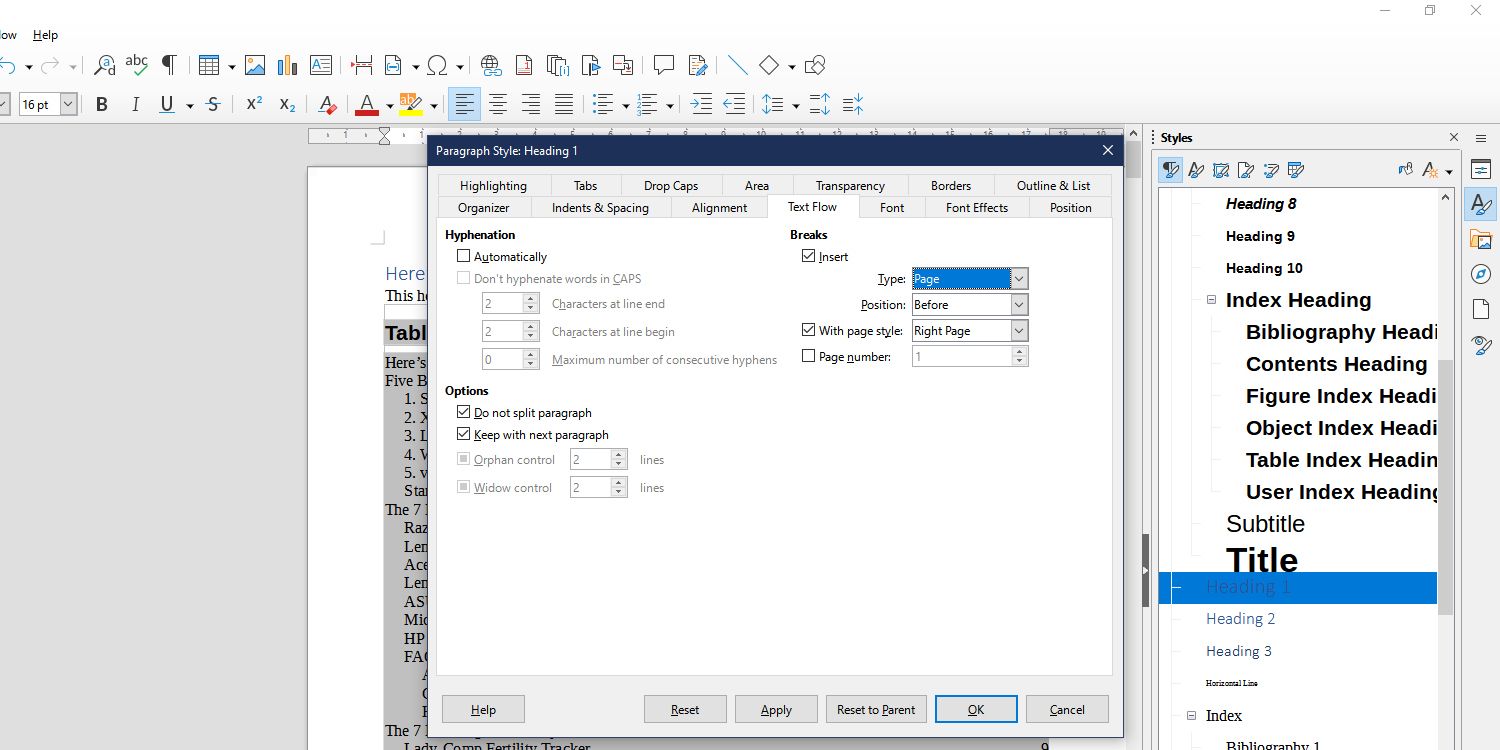
In the new window entitled Paragraph Style: Heading 1, go to the Text Flow tab. Under Breaks, add a tick mark to the Insert checkbox, then under the Type: dropdown menu, select Page.
If you want each section to start on the right side of a spread, like in some books, put a tick mark on the With page style: checkbox, and then choose Right Page from the menu.
After you press OK, you should see each section of your Master Document start on its own page. If you want to check if your Right Page spacing was set correctly, go to the lower right-hand corner of LibreOffice, right beside the zoom control, then click on the Book view icon.
Adding an Index
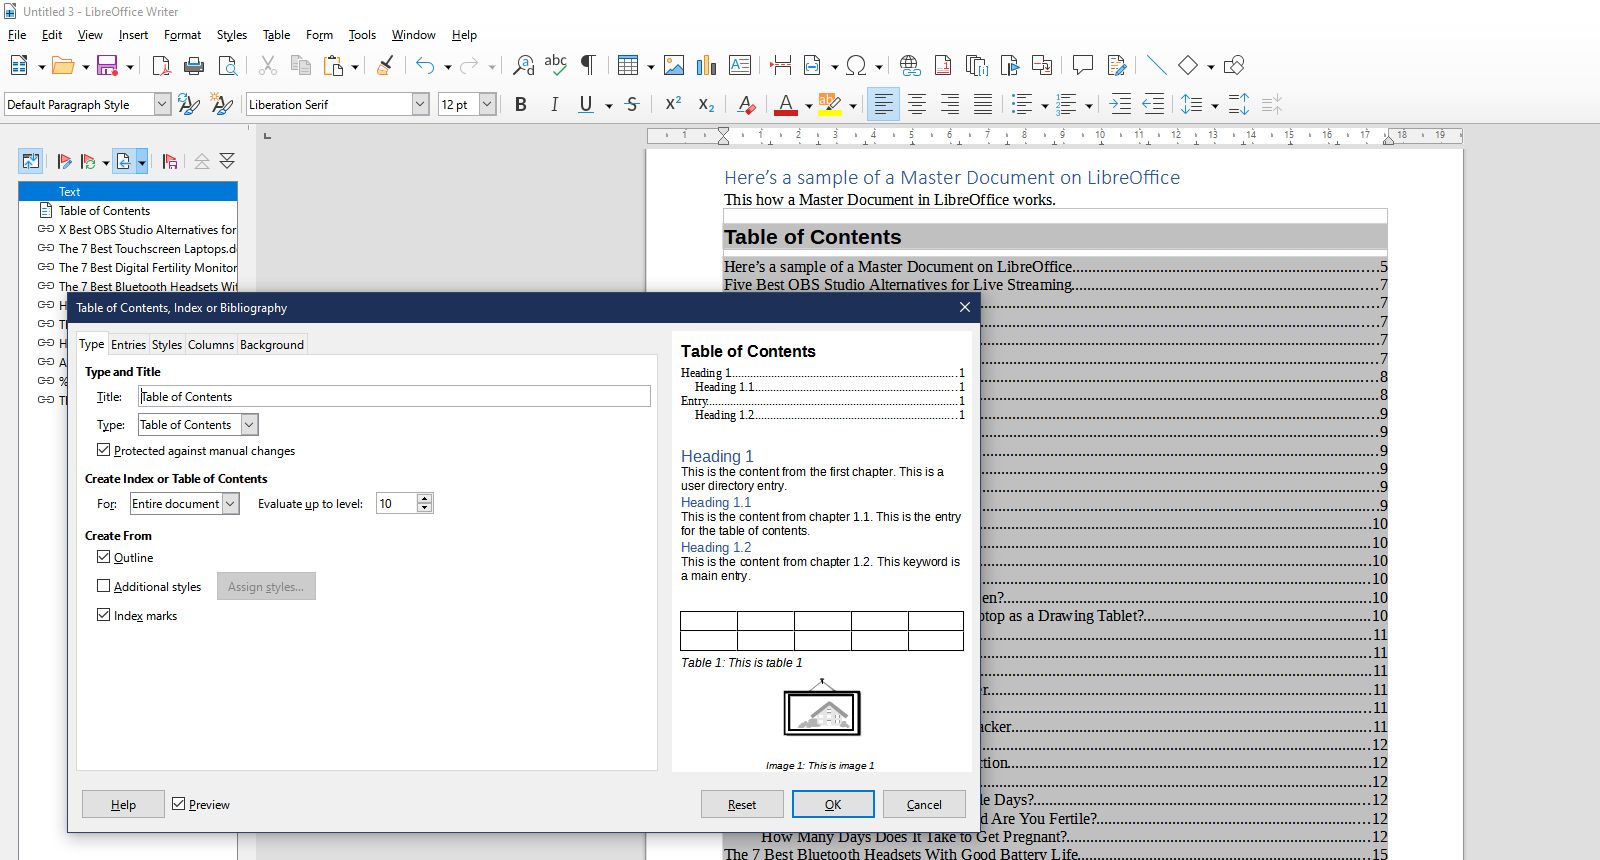
Of course, when you're creating such a large document, it would be wise to add a Table of Contents and other indices. In the Navigator window, click on the Insert icon. A Table of Contents, Index or Bibliography window will then appear.
Under the Type tab, in the Type and Title section, change the Title as you see fit. You can then click the Type dropdown menu and select the type of index you want to add. You can also go to the Columns tab if you wish your index to have columns, thus saving space.
Once you're satisfied with your setup, press OK. You should then see your chosen index appear in your document.
Editing Your Sections
If you need to make changes to your content, you cannot do it directly inside your Master Document. When you try to insert text or make any changes to a subdocument from your master file, you will get a “Write-protected content cannot be changed” error.
You should instead double-click on the linked file in the Navigator window. LibreOffice will then open the file in a new window, where you can make your changes. Once you've made and saved the changes you need, you need to update your Master Document to see it.
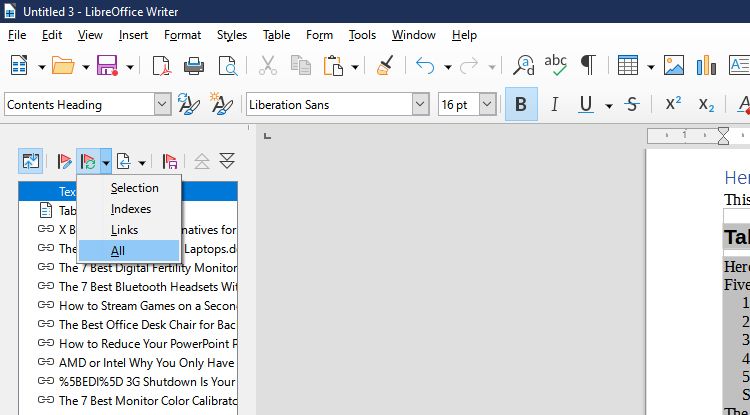
To do so, go to the Navigator window in your Master Document. You should then click on the Update icon and then pick All in the dropdown menu. The app will then confirm if you want to do so—just click on Yes, and all the changes made to your subdocuments will reflect in your main document.
Exporting Your Final Output
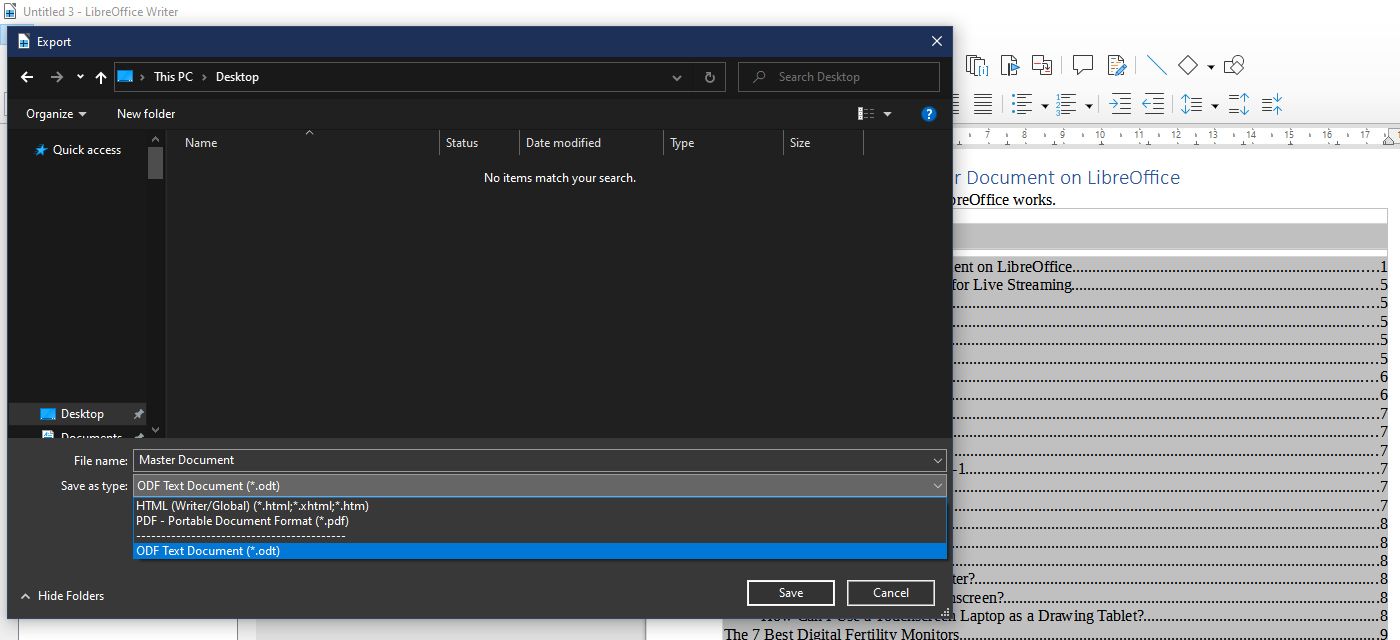
Once you've finalized your main document, you can export it as an ordinary ODF, an HTML file, or a PDF. This ensures any unauthorized changes in your subdocuments won't affect your final output.
You can do that by clicking on File > Export… A new Export window will appear, showing your file system. To choose your output, click on the Save as type: dropdown menu. And when you're ready, click Save.
Note that once you save your final output, any changes in the subdocuments will no longer affect that file. If any of your subdocuments were updated after you exported your final file, you have to repeat the export process from the Master Document again.
Compiling Your Work Has Never Been Easier
Whether you're working with multiple documents you wish to update independently or have a team creating different sections of a comprehensive report, LibreOffice's Master Document feature will help you compile all of it quickly.
You no longer have to track changes across multiple files and then update it manually to your output. You also don't have to format each subdocument individually. The Master Document will automatically update your final file in just a single click and apply your style to all linked subdocuments.
The Master Document feature makes working with massive documents a breeze, whether you're doing it alone or with a team.


