What if you find your current monitor small and stifling, but you're not a fan of ultrawide displays? Well, sounds like you need to get four monitors and arrange them in a 2x2 grid! So, you go out, get the monitors and bracket you need, and set it up on your workstation.
Your computer tells you you have four separate and unique displays... but you want to combine them into one giant screen instead. Here are some ways to combine your different screens into one giant display.
1. Combining Displays With the Intel HD Graphics Control Panel
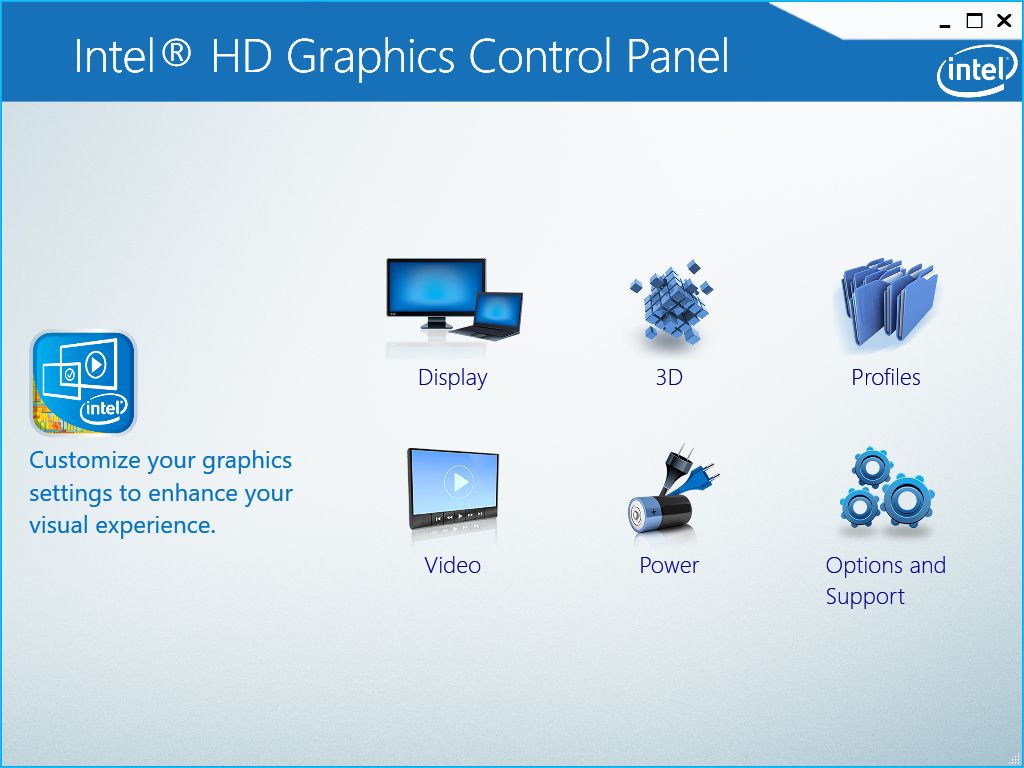
This option is for computers powered by an Intel processor with integrated graphics. If you have one, you can use the Intel HD Graphics Control Panel to combine your monitors.
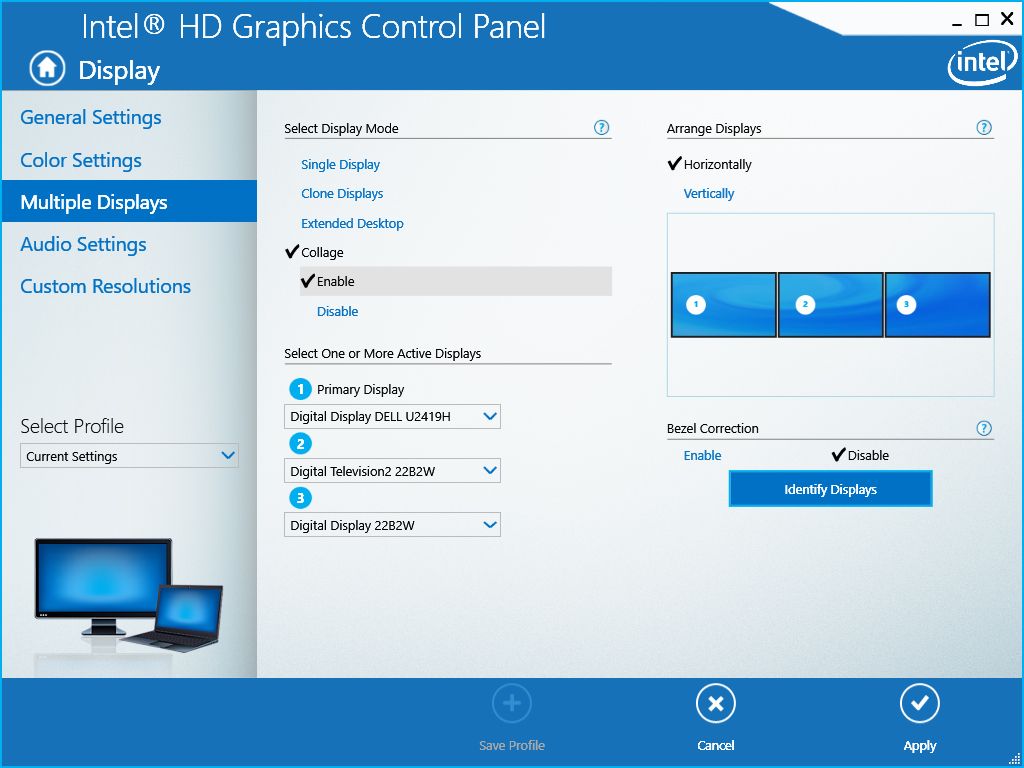
Access the control panel by right-clicking on your desktop and then choosing Graphics properties. When the control panel opens up, select Display, then Multiple Displays.
Under Select Display Mode, click on Collage. Under the submenu that will appear, choose Enable. Once done, numbers should appear on your screen. They are there to help you arrange your displays on the app.
To arrange your monitors properly, you need to choose the correct setup. Under the Arrange Displays section, you can select between Horizontally or Vertically. Ensure that you select the right configuration to avoid confusion.
Once you have chosen the right monitor arrangement, go to Select One or More Active Displays. Under each number, in the dropdown menu, choose the correct monitor located at the number. So, if 1 Primary Display is at the left-most position, ensure that the left-most monitor is assigned there.
Don't worry if your monitors have the same brands or names. Whenever you make a selection, a number would appear on your screen to ensure that you make the right choice.
Once you're happy with your settings, click Apply. Your screen may blackout for a moment, but don't panic; wait until the settings are applied.
When your screen returns, the control panel will ask you to keep the settings. Choose Yes if you're happy with it. But if you want to revert to the original view, select No.
Also, if your monitor bezels make for less immersive views, go to Bezel Correction. Select Enable, and you should see patterns appear across your screen. You can then adjust the Bezel Values to hide a portion of your desktop area. This ensures a seamless and more immersive viewing experience.
2. Combining Displays With AMD Radeon Settings
If your computer has an AMD chip or uses a discrete AMD graphics card, you can use Eyefinity to span the desktop.
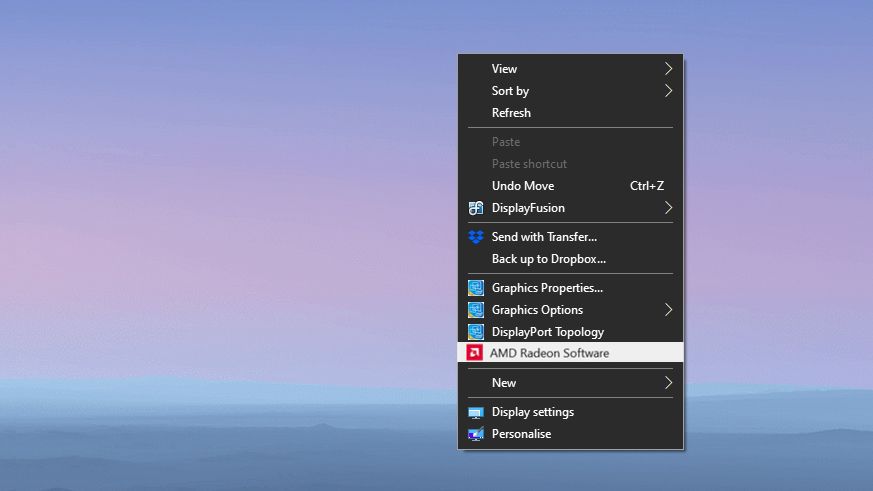
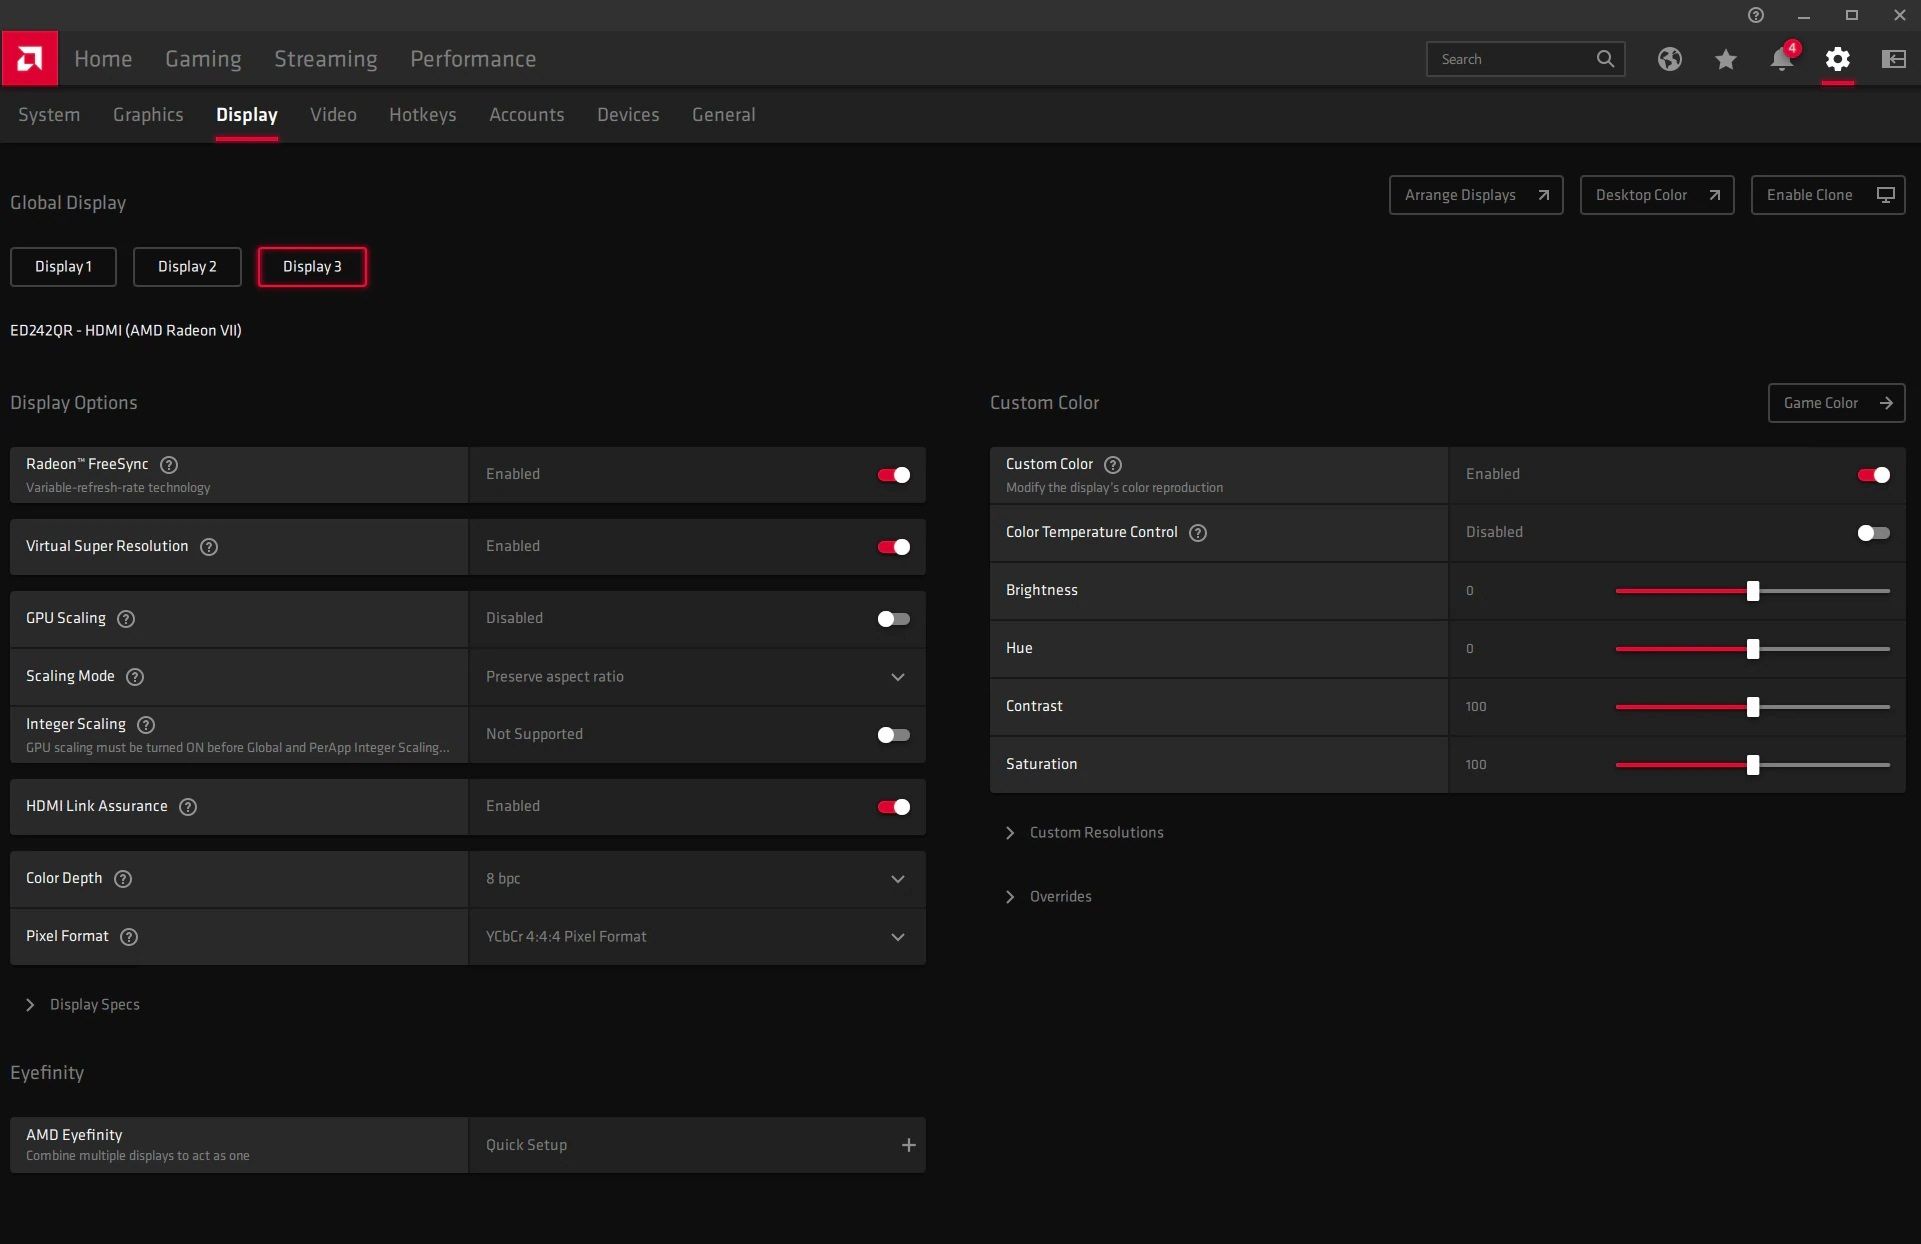
Right-click on your desktop, then choose AMD Radeon Software. Once the settings windows pop up, choose settings (gear icon) on the upper right section. From the submenu, select Display.
In the Display submenu, look for the Eyefinity section. You should see an AMD Eyefinity item. Next to that, click on the Quick Setup button. AMD will then create a new arrangement based on your display arrangement in Windows.
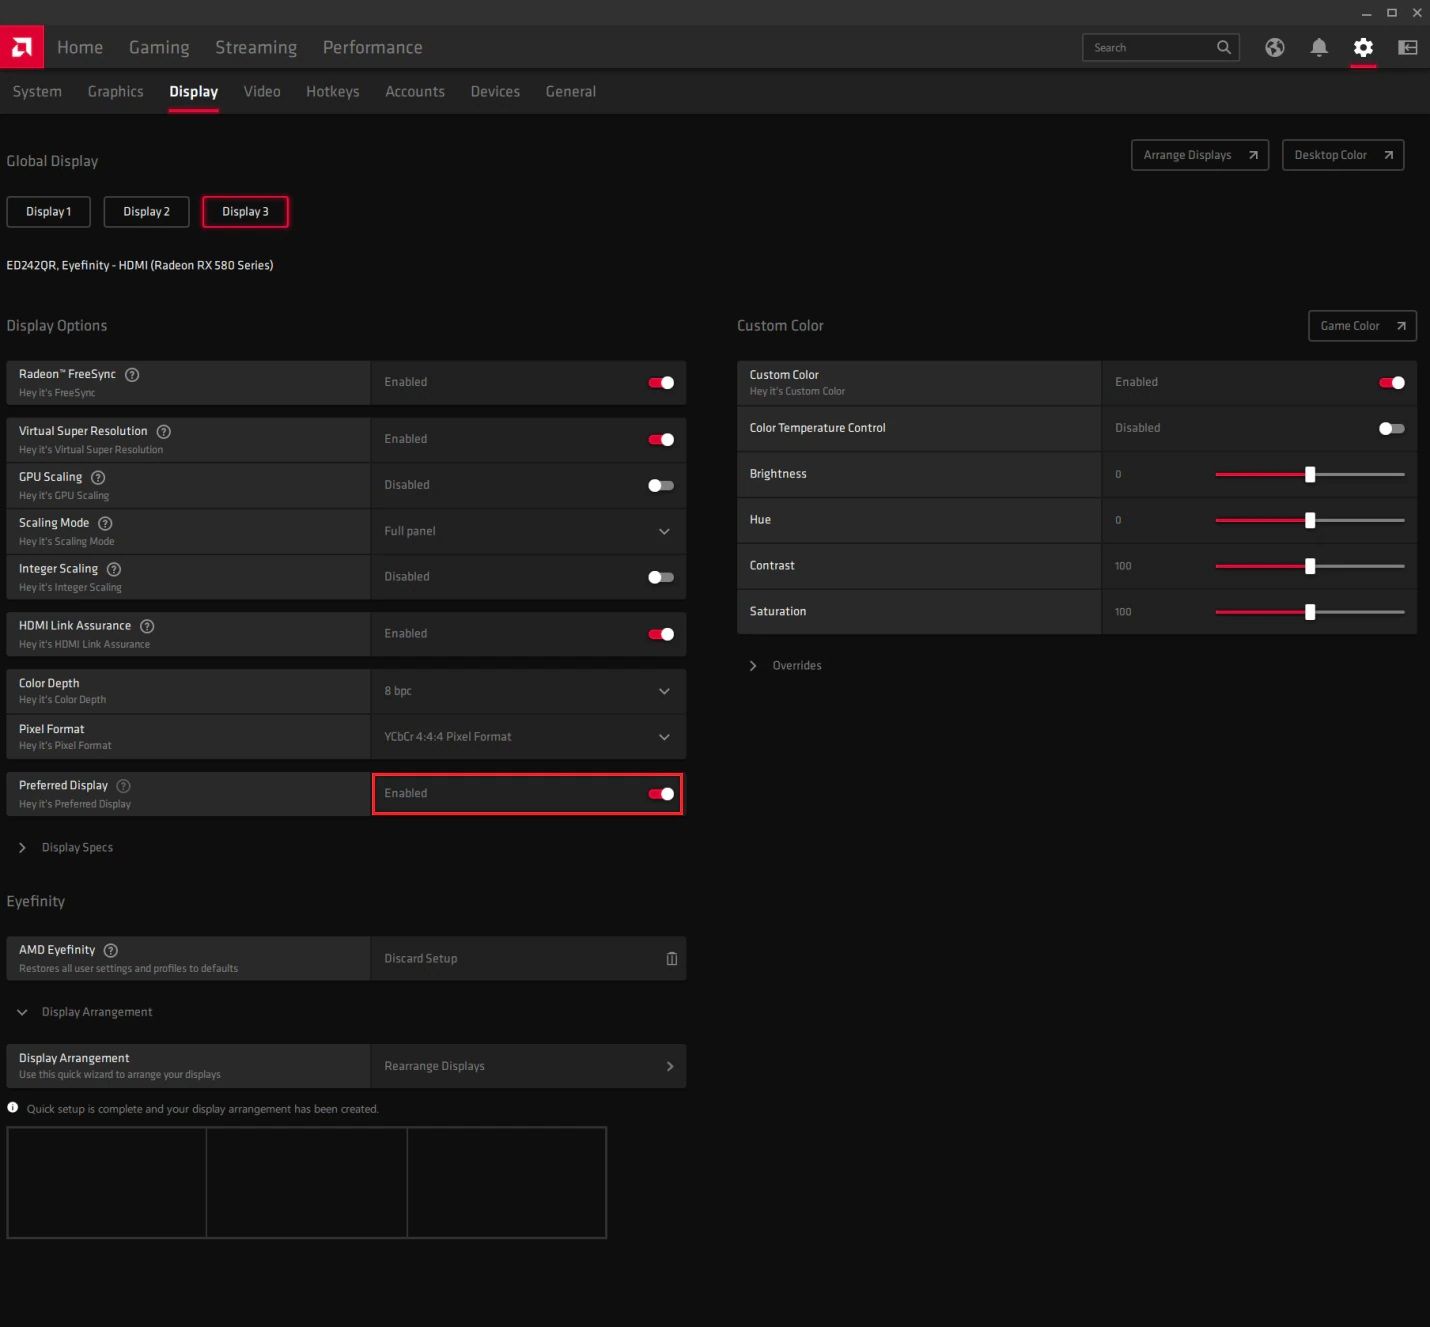
If the display arrangement is incorrect, you can change it by going to Display Arrangement and choosing Rearrange Displays. One of your displays will turn blue when you do this.
Click on the corresponding box to confirm the location of the blue screen in relation to your other monitors. Continue doing this until you've confirmed the placement of all your displays.
To set your preferred primary display, return to the Display submenu. Under that, go to Global Display, then select the monitor that you want to set as primary.
With your preferred screen selected, scroll down the screen until you find Preferred Display. Click on it and ensure it's Enabled.
Once done, your multi-monitor setup will act as a single display.
3. Combining Displays With the NVIDIA Control Panel
NVIDIA graphics cards have a "Surround" feature for converting your multi-monitor setup. This lets you stretch a single desktop across multiple displays.
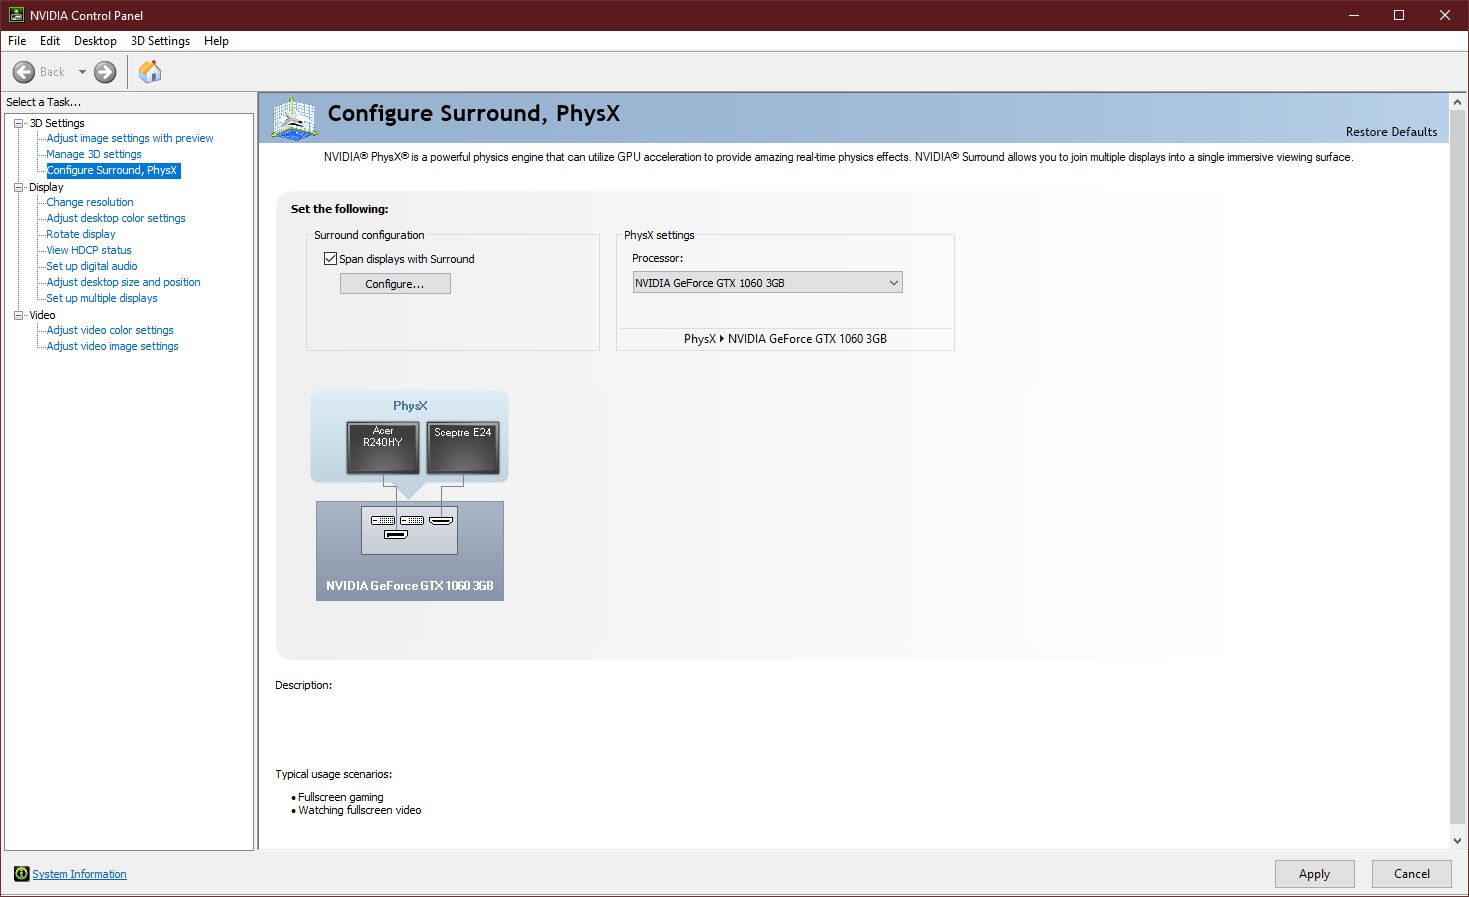
You can access NVIDIA's settings by right-clicking on your desktop and choosing NVIDIA Control Panel. On the left navigation pane, under the 3D Settings parent, click on Configure Surround.
On the main screen, then you should see options for Surround. Put a tick on the Span displays with the Surround check box, then choose Configure. An NVIDIA Set Up Surround window should pop up.
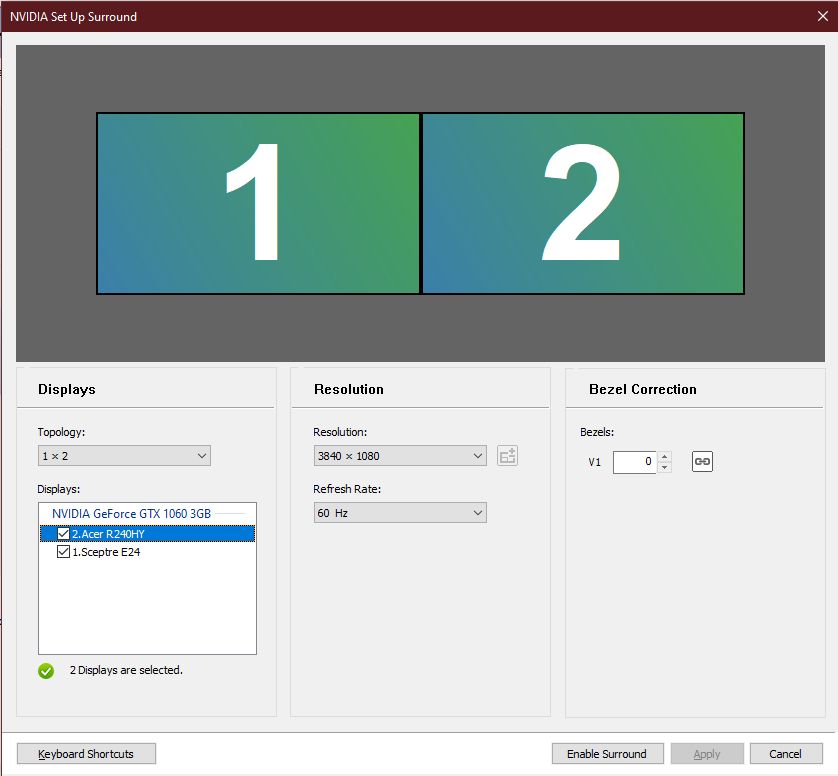
In the new window, configure your displays as needed. The Topology dropdown menu shows you your possible monitor layouts. Under Displays, choose the screens that you want to use as part of your desktop.
In the Display Grid Area, arrange the monitors to match their physical arrangement. You can also specify the orientation of each monitor here.
Set the resolution and refresh rate of your entire screen under the Resolution Section. Under the Bezel Correction Section, adjust the monitor gaps for a seamless view.
If you want to activate the Surround feature for specific uses only, like playing a game, choose Keyboard Shortcuts. This allows you to activate and deactivate Surround quickly. You could also set hotkeys for other features like bezel peeking.
4. Combining Displays With Dual Monitor Tools
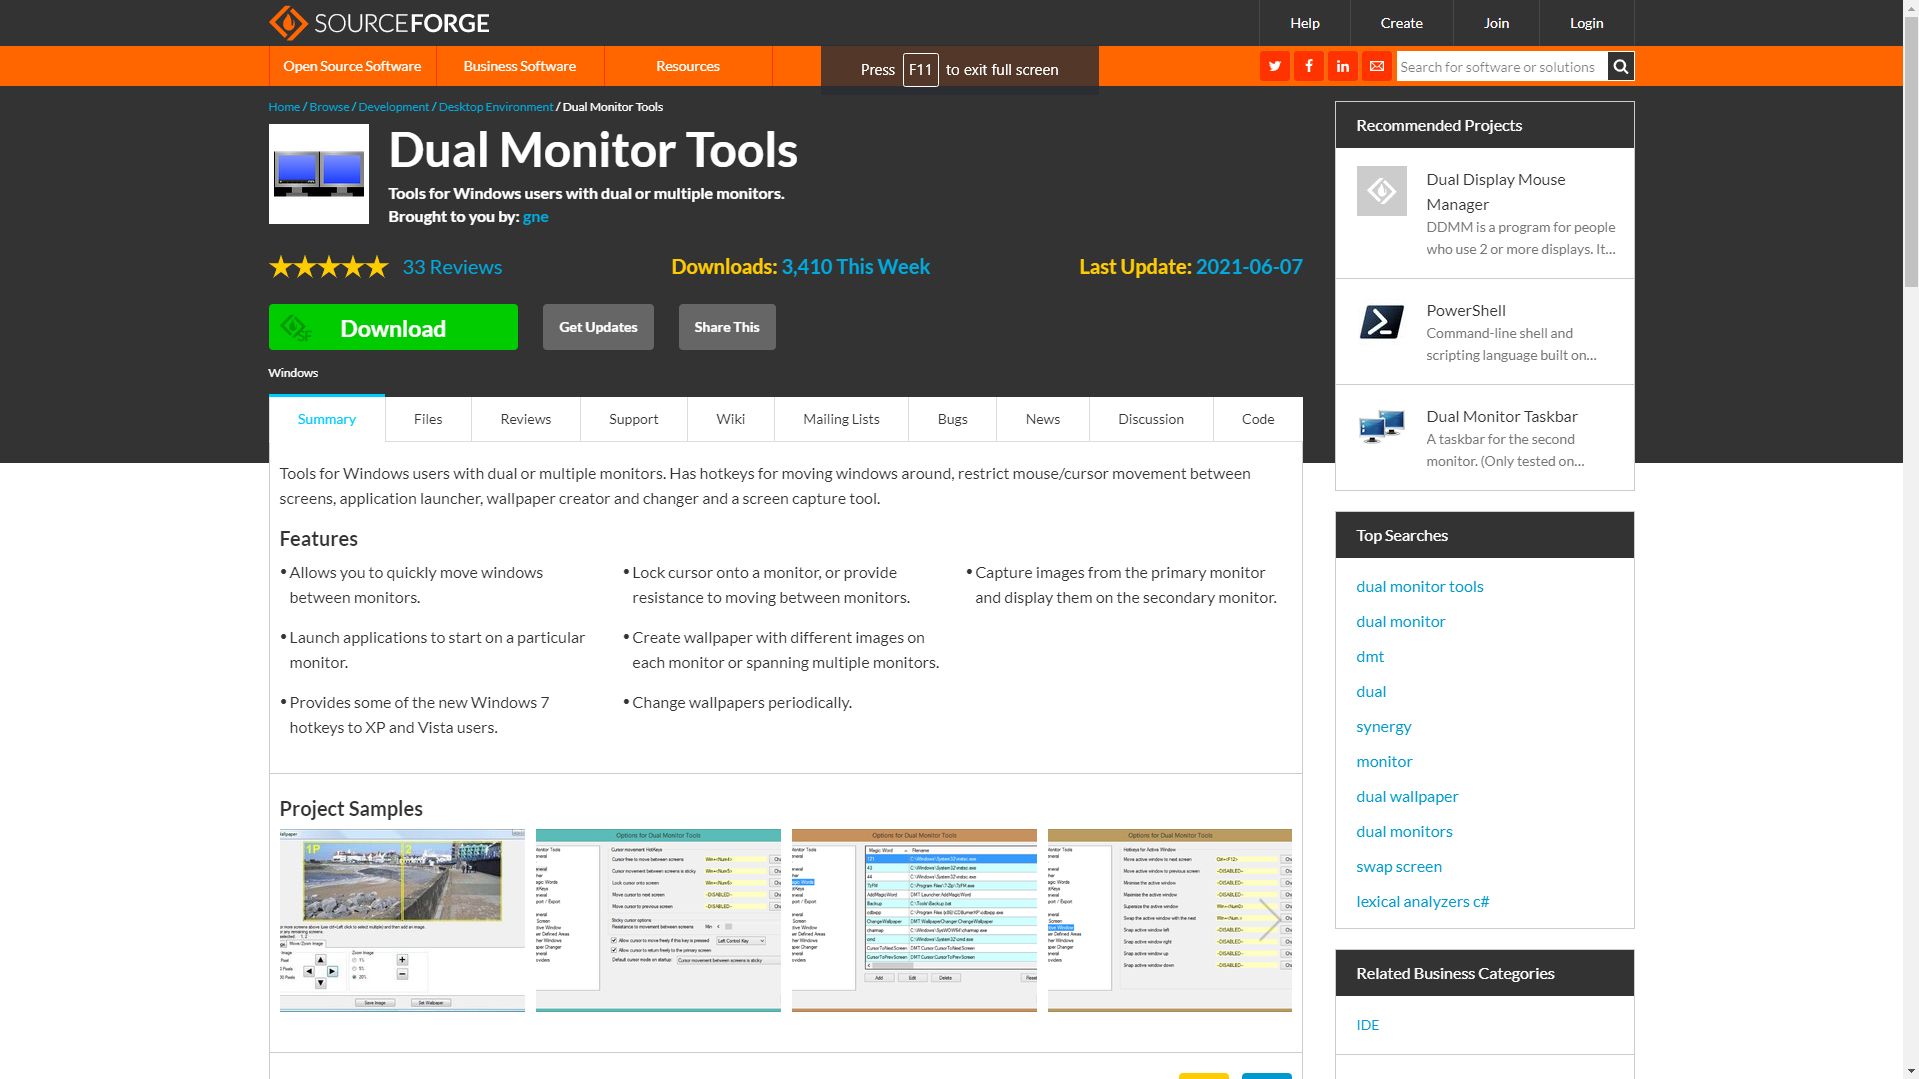
If you don't have the above drivers on your computer or don't want to have a single wide display all the time, you can use Dual Monitor Tools instead.
It's a light, open-source software that allows you to maximize an app across every screen. It's also packed with additional features like Wallpaper Changer, Snap, and Launcher.
Download and install Dual Monitor Tools, then access the app via your Notification Area at the Windows Task Bar. Right-click on Dual Monitor Tools Logo and choose Options.
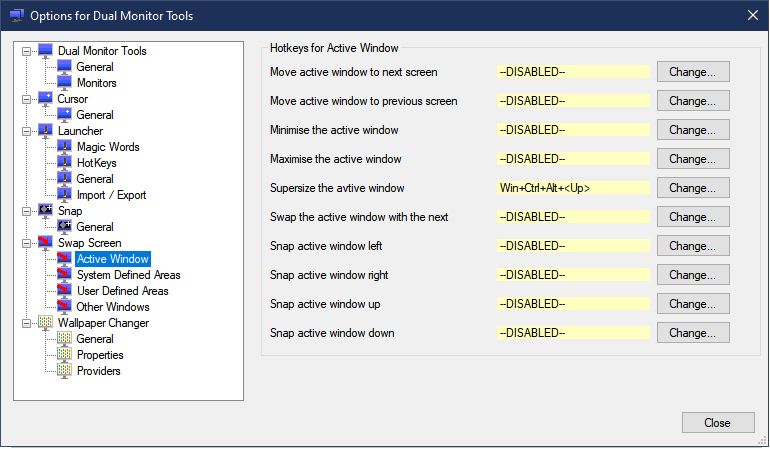
The Options for Dual Monitor Tools window will appear. On the navigation pane, choose Active Window under the Swap Screen parent.
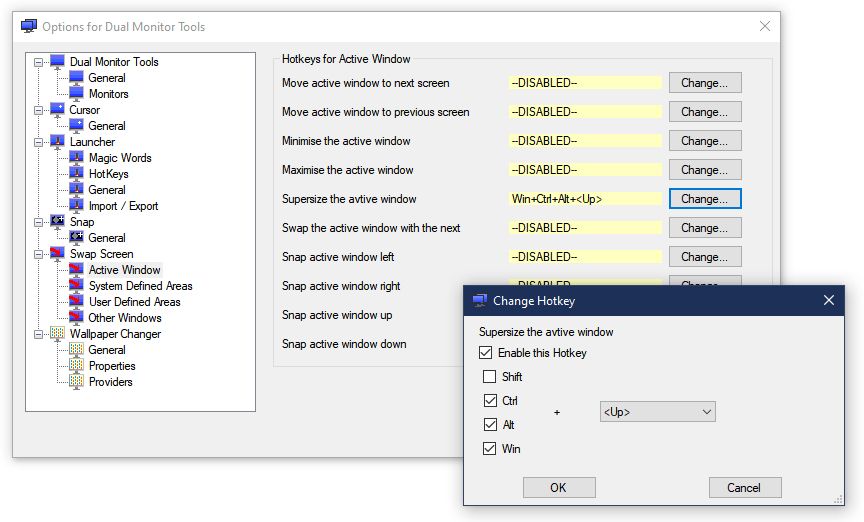
On the main panel, you should see Hotkeys for Active Window. Look for Supersize the avtive (sic) window, then choose Change.
A Change Hotkey window will appear. Put a tick mark on the Enable this Hotkey. You then need to put tick marks on the hotkeys and choose the key from the dropdown menu to Supersize your app. Once done, press OK.
You can then select Close to exit the options screen. Now, to maximize your current app across all your screens, all you need is to press your preset shortcut. Your current program will then span across your screens.
Download: Dual Monitor Tools (Free)
Maximize Your Screen
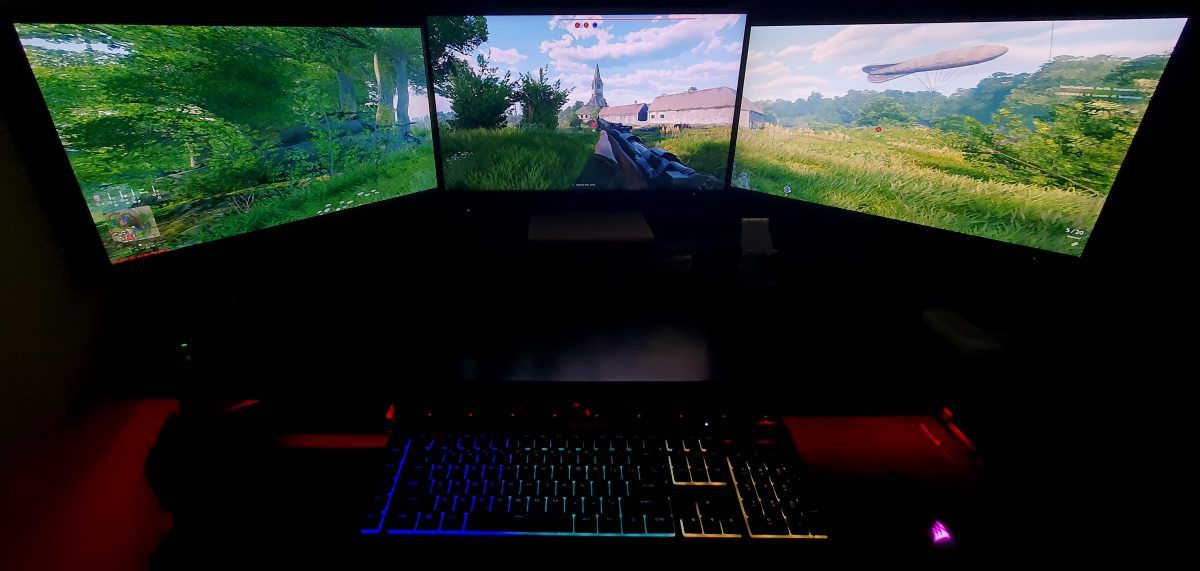
Most multi-monitor setups are built for productivity. But if you can also enjoy it for gaming, why not? Now, you can make use of all your screens when playing. After all, if you work hard, you should also play hard.
Now that your PC is sorted, how about your laptop? It may not have the same capacity for multiple monitors that a computer has, but you can still add more screens to improve your gaming or productivity experience.

