Google Sheets is one of the most powerful spreadsheet programs that allows you to store massive data sets and perform complex calculations on them. It uses functions and formulas to do these computations on the data stored in the cells.
This makes many jobs easier as you don't have to do any calculations manually. In short, it can save you a lot of time and effort if done correctly. But, it is a complicated program to get started with. Read on to master the basics of this sometimes intimidating program.
Why Use This Guide
Most beginners aren't fully aware of Google Sheets' functionality or where to start. This guide will discuss how you can set up a perfect work environment, use functions and formulas, and create charts in Google Sheets.
If you're a newbie, this guide will act as an ideal starting point. But, if you’re a little more experienced, you could start looking into other more complex, useful Google Sheets formulas.
Setting Up the Perfect Work Environment in Google Sheets
For many users, the default size of the cells in a spreadsheet may be too small or too large to fit the data correctly. It's best to change the appearance beforehand so that your data can look visually appealing and easy to read. Here are a few things you can do to change the appearance of your spreadsheet.
Changing the Size of a Row or a Column in Google Sheets
There are two ways to adjust the size of a column or a row in Google Sheets.
Method 1: To adjust the row or column size on the go, all you have to do is:
- Hover your cursor on the edge of the column or row header, denoted by a gray divider line. Hovering over a divider line will change the cursor shape to a line with arrows on both sides.
- Click and drag your cursor to either left or right or up or down, depending on whether you're resizing a column or a row.
Method 2: This allows you to resize single and multiple rows or columns. Follow these steps to do so:

- Click on the row or column header to select it. Use Shift + Left Click to select multiple columns or rows.
- Right-click to open a drop-down menu.
-
Click on the Resize option. The option may look different depending on resizing rows or columns. Clicking this will open a small window allowing you to adjust your settings.
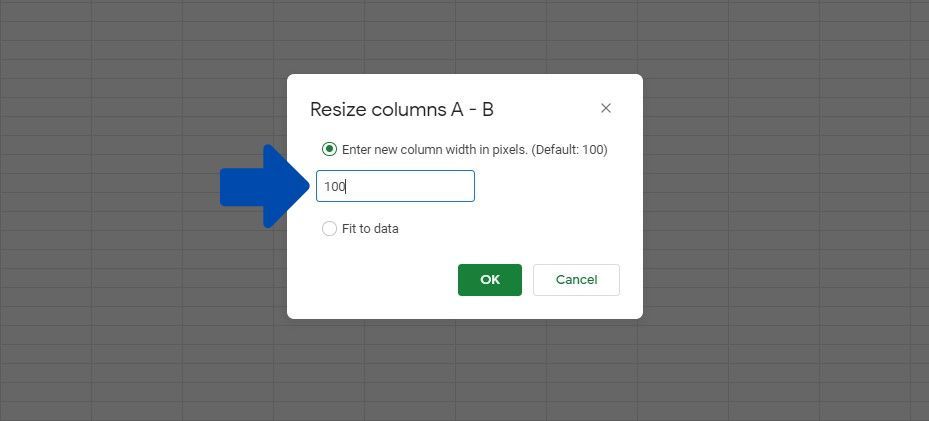
- Type in your desired size in the text box.
- Click OK to save your changes.

Managing Spreadsheets
Having multiple tabs within a spreadsheet is an easy way to divide them depending on your data. It helps keep your sheet organized and prevents slowing down when you open a sheet with many formulas running at once.

To add a spreadsheet, simply click on the Plus icon (+) in the bottom-left part of the screen. This will create another tab in the same spreadsheet. Think of this as pages in a book.
Working with two or more tabs in a spreadsheet can get confusing when you don't know which spreadsheet tab contains what data. One solution to this problem is to rename the tabs.

To do this:
- Right-click on the tab you wish to change the name of. A drop-down menu will show up.
- Click on Rename and type in the name for the tab.
- Press Enter to save the changes.
To delete a spreadsheet tab, right-click on the desired tab and choose Delete from the drop-down menu. Google Sheets will ask you for confirmation. Click on OK, and it will delete the tab.
Using Functions in Your Spreadsheet
If you're new to Google Sheets, functions are some of the essential things you should aim to learn as they are powerful, predefined formulas that allow you to perform calculations in your spreadsheet. There are three ways to enter a function into your spreadsheet.

Method 1: Select the cell where you wish to input the function in the first method. Then click on the fx text bar and enter the function there.
Method 2: Enter the function directly into the cell.
Method 3: Follow the below steps to use a function through the Insert menu:

- Click on Insert in the top bar.
- Select Function in the drop-down menu.
- Click on All and then look for your desired function in the list.
- Click on your desired function to add it to the cell.
Understanding Syntax
Every formula follows a specific syntax, and deviating from that can cause the formula not to work at all. While many functions operate with different syntax, many use a similar line of calculation. Here is the syntax for most of the formulas in Google Sheets:
=FUNCTION(argument_1, argument_2,...)
- Function is the function name and indicates to Google Sheets the calculation you wish to perform.
- Arguments are the parameters the function uses to return a result.
Operators in Google Sheets
Formulas can use several different operators within the arguments. These include:
- Arithmetic operators: These are used to perform mathematical calculations such as addition, subtraction, multiplication, and division.
- Comparison operators: These operators are used to compare values and return logical expressions like TRUE or FALSE.
- Concatenation operators: These operators are used to connect multiple strings into one. Google Sheets also has a CONCATENATE function.
- Reference operators: These operators are used to create Google Sheets formulas. These can also be used to show and connect data ranges.
Insert Charts in Your Spreadsheet
Simply entering your data isn't enough when working with people who may want a quick overview of results. Huge spreadsheets can be tedious to analyze, so you can use Google Sheet's handy Charts feature to make data more readable.
Here are the steps you need to follow to create a chart in Sheets:

- Select the cells containing the data you wish to add to the chart. This will be indicated using a blue outline around the cells.
- Click on Insert in the top bar.
- In the drop-down menu, select Chart.
- A sidebar will show on the right side of the screen.
- Select the box under Chart Type and select the chart you wish to build.
- Once done, feel free to close the sidebar using the cross symbol (X).
You can customize the color, font, style, background, and other features by going to the Customize tab in the Chart Editor.
Keep Learning Google Sheets
Now that you have a handle on the basics, you can start building spreadsheets. But, it takes years to become a true pro at Google Sheets. Keep on practicing, and that time will fly by as you master this powerful program.