
Mapping a network drive helps you access shared folders and files on a network. It allows you to access such resources as if they were on your local computer, making it easy to work with files stored on a network.
This can be particularly useful for businesses or organizations with multiple computers or servers that want to share files and resources between them easily.
But is it really that simple to set up mapping? Keep reading to learn how to map a network drive in Windows 11 using different methods.
Configure Network Discovery in Windows
Windows has a feature called network discovery that allows your computer to discover and access other devices on the same network, such as computers, servers, and printers.
This allows you to share any file or folder with other devices on the same network. Before mapping a network drive, make sure that network discovery is enabled on your computer.
Follow the sets below to enable network discovery on Windows:
- Press Win + I to open the Settings app.
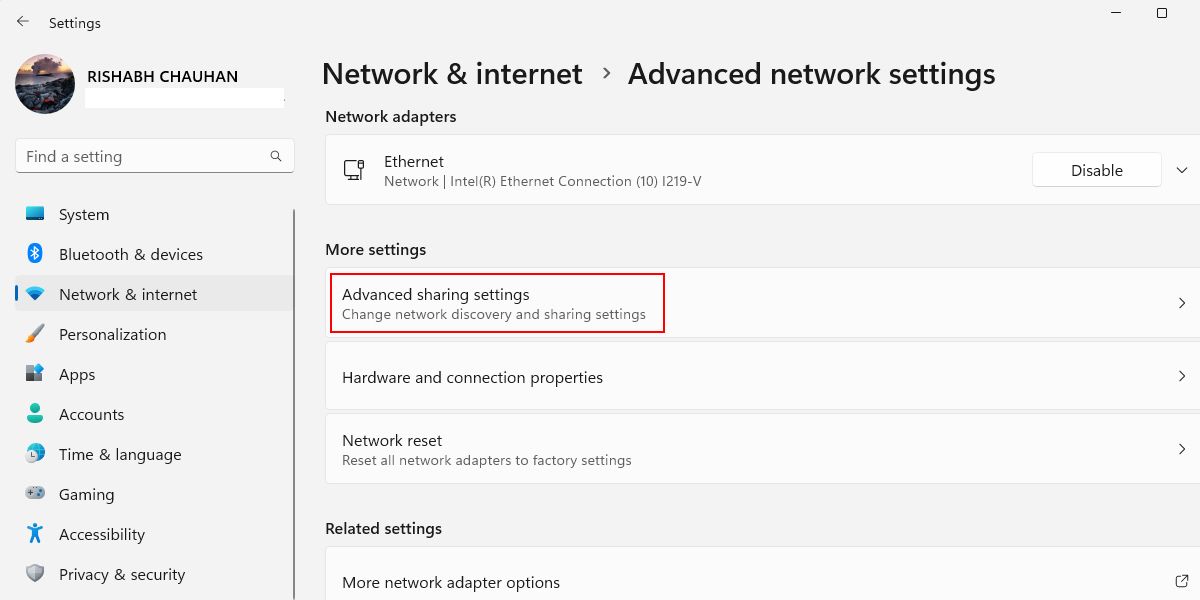
- Head over to Network & internet from the left pane and click on Advanced network settings on the right.
-
Next, click on the Advanced sharing settings option under More Settings.
-
Open the Private networks settings and set the toggle next to Network discovery to On.
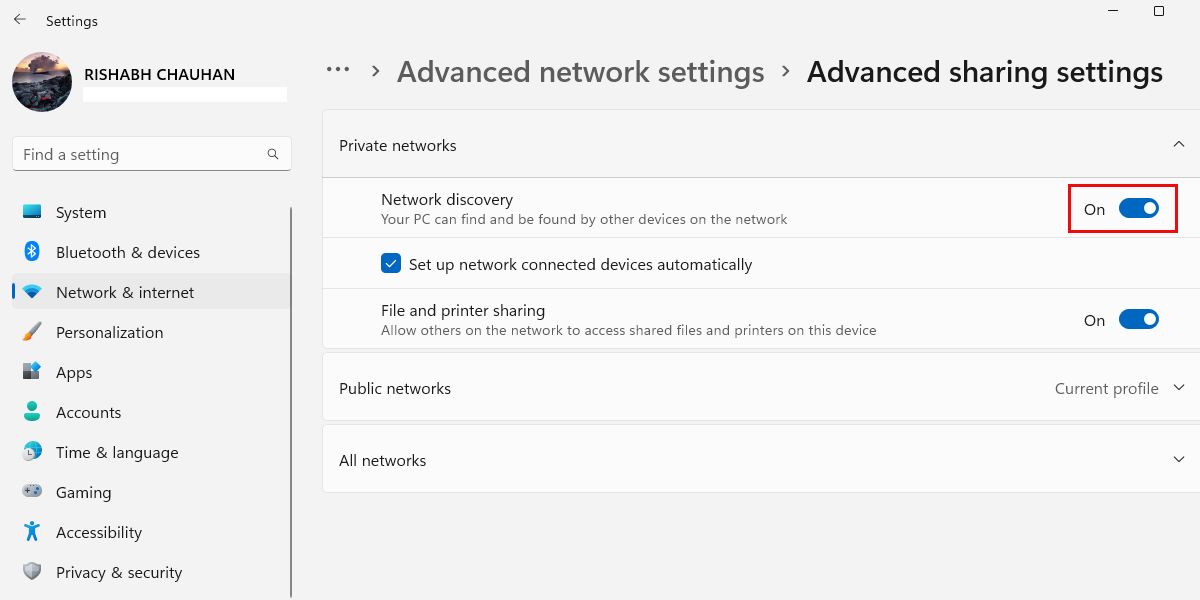
- If you're looking to access a printer on the network, make sure to enable File and printer sharing.


Once you turn on network discovery, other devices on the same network can see your computer and access it.
Select Private networks if you are connected to a trusted network, such as your home network. But if you're connected to an unfamiliar network, you should select the Public networks option.
Remember that enabling network discovery may make your computer more vulnerable to security risks as it allows other devices on the network to access your computer.
Therefore, it's crucial to ensure that you have a strong password and customize your default Windows Firewall to protect your device in case something goes wrong.
1. Map a Network Drive Using File Explorer
Once you have turned on network discovery, you can map a network drive in Windows 11 using File Explorer.
Here's what you need to do to use File Explorer for mapping:
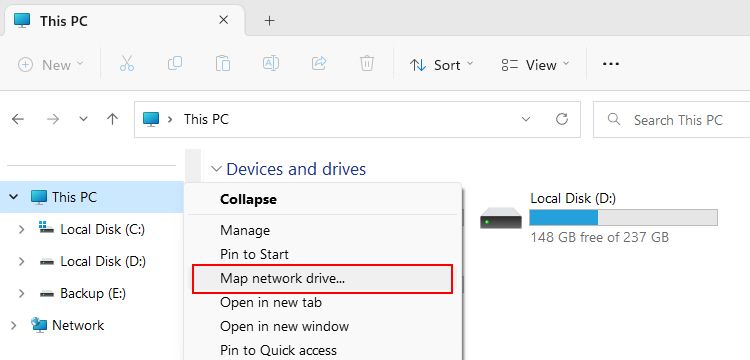
- Press Win + E to open File Explorer directly, and click on This PC in the left pane.
-
Right-click on This PC and select the Map network drive... button in the context menu that appears.
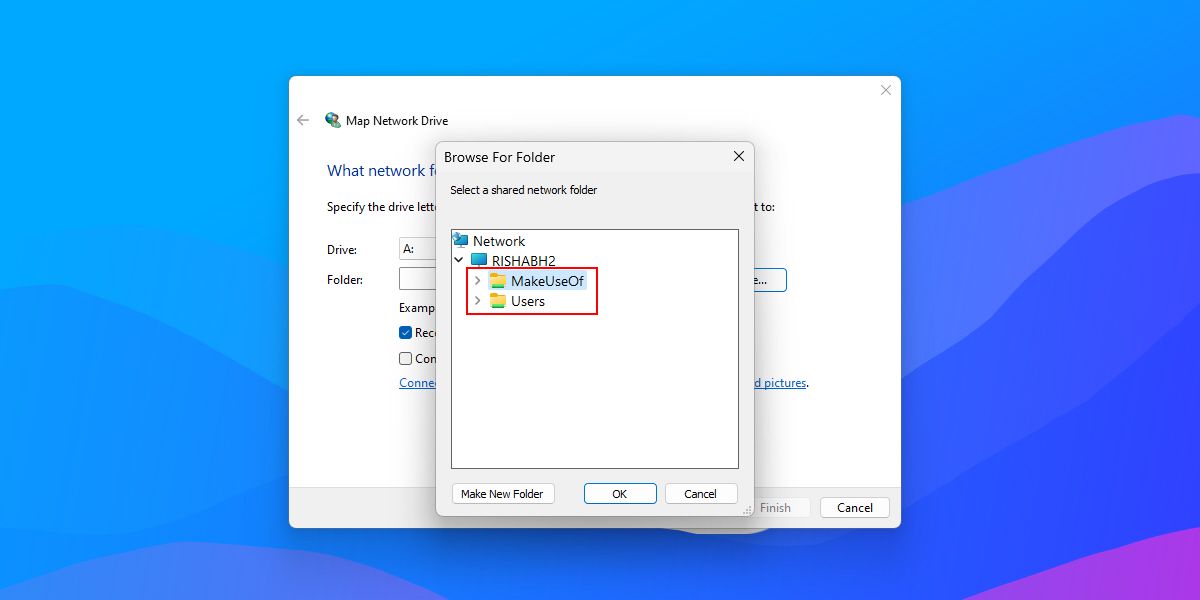
- Choose a unique drive letter in the Map Network Drive window. This is the drive you'll use to access the shared folder from your computer. As an example, we've selected A: as the drive letter.
-
Enter the path to the shared folder you want to map in the Folder: field. This can be a local path on the computer, such as \\YourComputer\SharedFolder, or a network path, such as \\ServerName\SharedFolder.
- If you need a username and password to access the shared folder, check the Connect using different credentials box and enter the required information.
-
Click Finish to complete the mapping process.


Once you have completed these steps, it'll map the folder to the specified drive letter in File Explorer. You can access the shared folder at any time by double-clicking on the drive.
Want to access the shared folder in milliseconds? You can create a shortcut to the mapped network drive on your desktop for quick access.
2. Use Windows PowerShell for Mapping
Windows PowerShell is a Windows command-line utility that provides a powerful set of tools and commands. One of the tasks you can perform using PowerShell is to map a network drive.
Follow these instructions to map a drive using Windows PowerShell:
- Open the Start menu and type PowerShell into the search bar.
- Select the best match and choose Run as administrator.
-
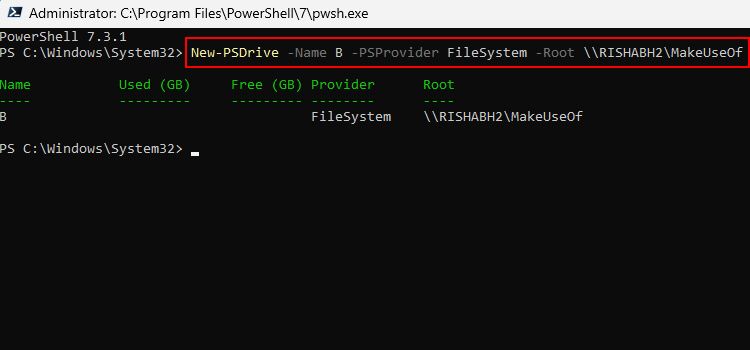
In the PowerShell window, type the following command, replacing DRIVE with the drive letter you want to use and \\ServerName\SharedFolder with the path to the shared folder:
New-PSDrive -Name DRIVE -PSProvider FileSystem -Root \\ServerName\SharedFolder
-
If the shared folder requires a username and password to access, you can add the -Credential parameter to the command, followed by a username and password in the format username and password. For example:
New-PSDrive -Name X -PSProvider FileSystem -Root \\ServerName\SharedFolder -Credential username password
- Hit Enter to allow PowerShell to map the network drive. You can access the mapped drive from File Explorer now.

Besides mapping, you can do a wide range of things, like managing and automating tasks on Windows. For that, you must know some useful PowerShell commands.
3. Use Command Prompt for Mapping
Just like you used PowerShell earlier, you can use the Windows Command Prompt tool to map a network drive.
So, follow these simple instructions:
- Open Command Prompt as an administrator.
-
Type the command line given below, but replace DRIVE with any drive letter and \\ServerName\SharedFolder with the shared folder's path:
net use DRIVE \\ServerName\SharedFolder
-
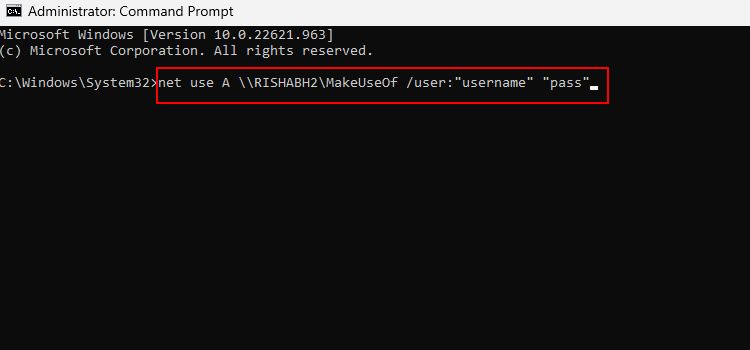
If the shared folder requires a username and password to access, you can add the /user parameter to the command, followed by a username and password in the format username and pass. For example:
net use DRIVE \\ServerName\SharedFolder /user:username pass
- Once you've made the required changes, hit Enter to execute the command.

That's it. It'll take a few seconds, and then you can access the mapped drive from File Explorer with one click.
How to Disconnect a Mapped Network Drive
Disconnecting the network drive is a no-brainer if you no longer need access to the files on it.
Here's how you can disconnect a mapped network drive in a few steps:
- Press Win + E to open File Explorer.
-
Right-click on Network in the left pane and choose Disconnect network drive from the context menu.
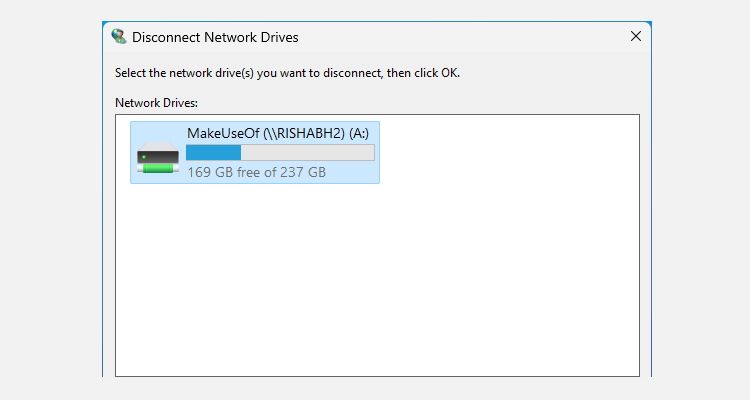
- In the next window, choose the drive letter or name of the network drive you want to disconnect. Click OK to disconnect it from your system.

The mapped network drive will now disappear from File Explorer, and you can no longer access it from the drive letter you created earlier.
Map Network Drives Easily in Windows 11
Mapping a network drive in Windows 11 is a great way to access shared folders on other computers or servers. This can save you time and make managing and organizing your files easier.
While mapping is only useful in the case of network drives, there are many other methods to share files without a network setup. For example, you can use external storage, cloud storage services, a data transfer cable, etc.