Giving an option to return products and offering a warranty to your customers will help you stand out from the crowd. In addition, it provides customers a sense of assurance that increases the conversion rate.
Most online buyers, be it consumers or businesses, prefer to have some guarantee or option of getting their money back if the product or service purchased does not deliver as promised.
However, if you're getting hundreds of orders each day, tracking the return and warranty process can be hectic. This article explains how to do return and warranty management directly from your store.
Return and Warranty Management Plugin
Return and Warranty Management is a plugin for your WordPress website which will help you add refund options and set rules to process these options. It works with both members and non-members and is fully compatible with PayPal's official standard.
You can connect the plugin directly to the PayPal API. When the customer checks out from your website and chooses Refund in the payment options, the money will be immediately sent back from your PayPal account.
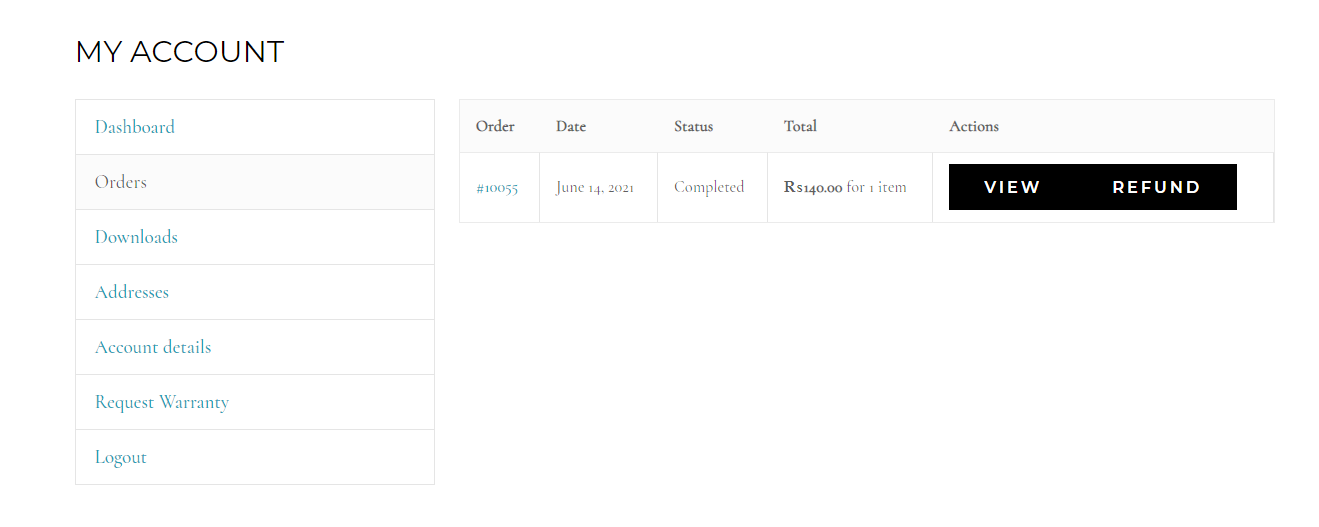
This plugin starts showing the refund option in the order review section after being placed through your website. Thus, through this plugin, your customers can instantly get refunds on their orders if they're unsatisfied for any reason.
You can also easily handle WooCommerce warranties with this plugin while maintaining your company's return policy and standards. However, we'll only explain how you can handle refunds with this plugin for the scope of this article.
Download: Return and Warranty Management System For WooCommerce
Let's get started by setting up the plugin without further delay.
Installing the Return and Warranty Plugin
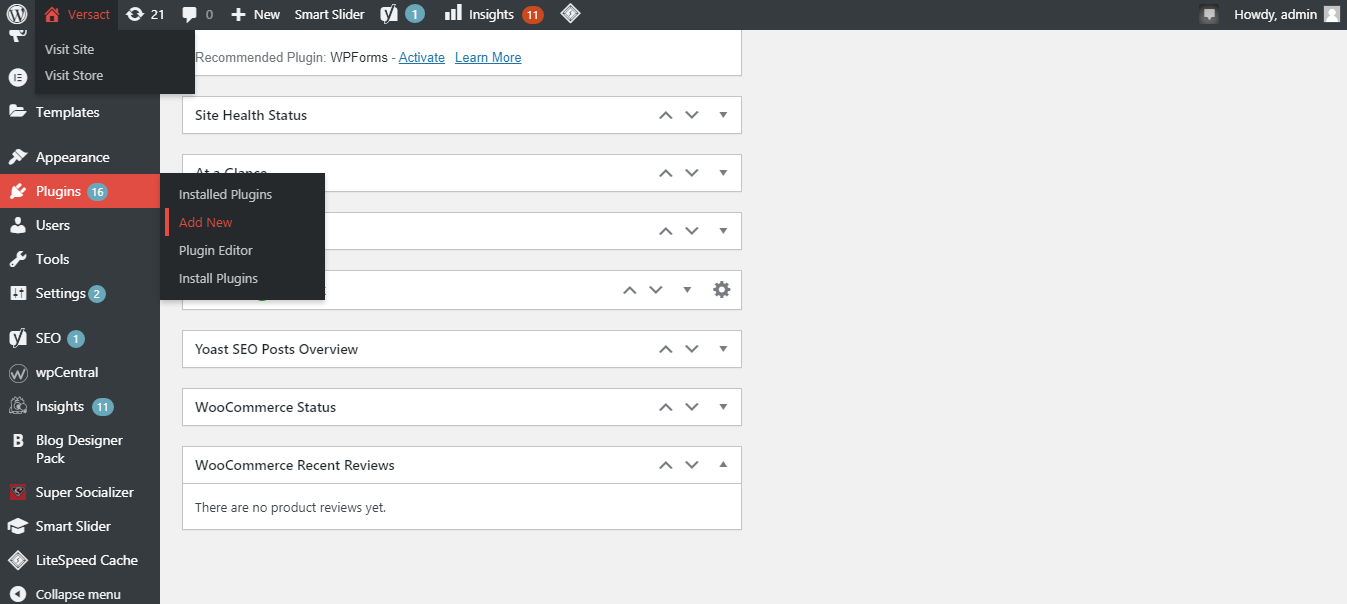
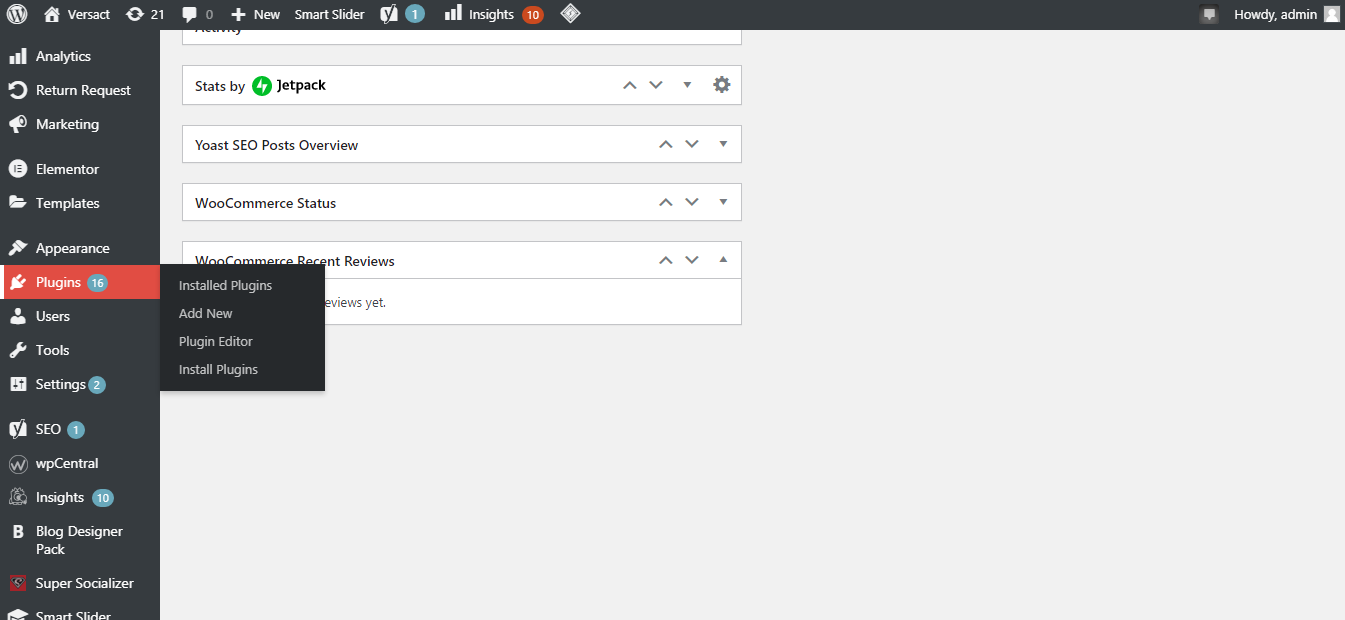
1. Go to the Plugins section of the WordPress dashboard, and then click Add New.
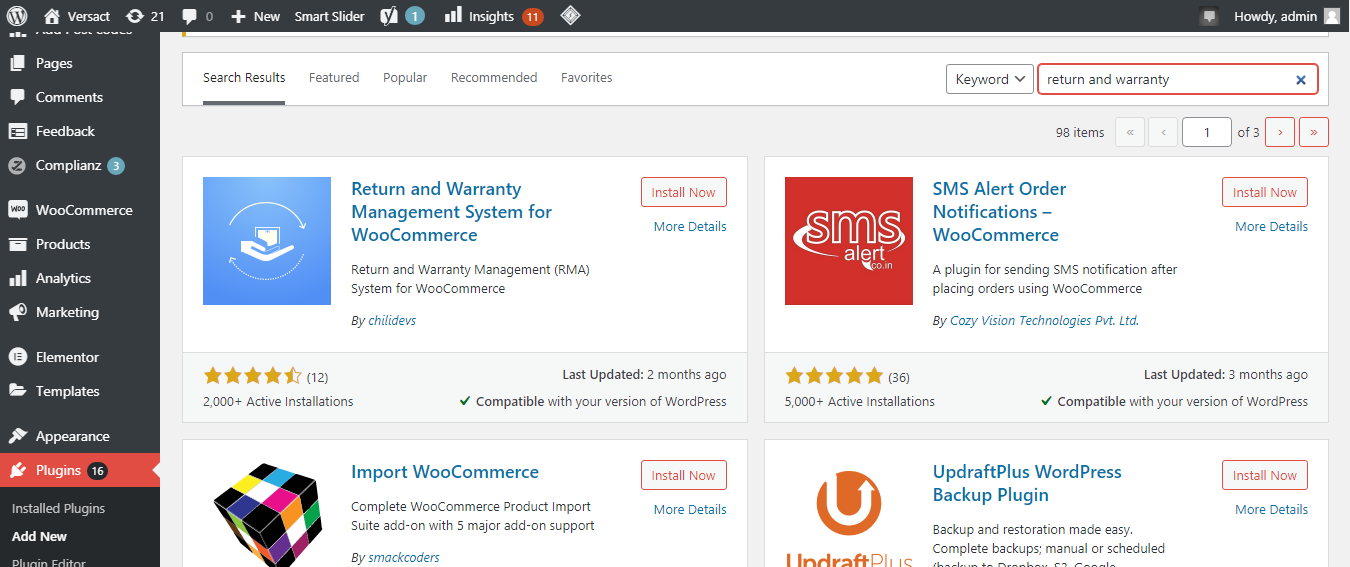
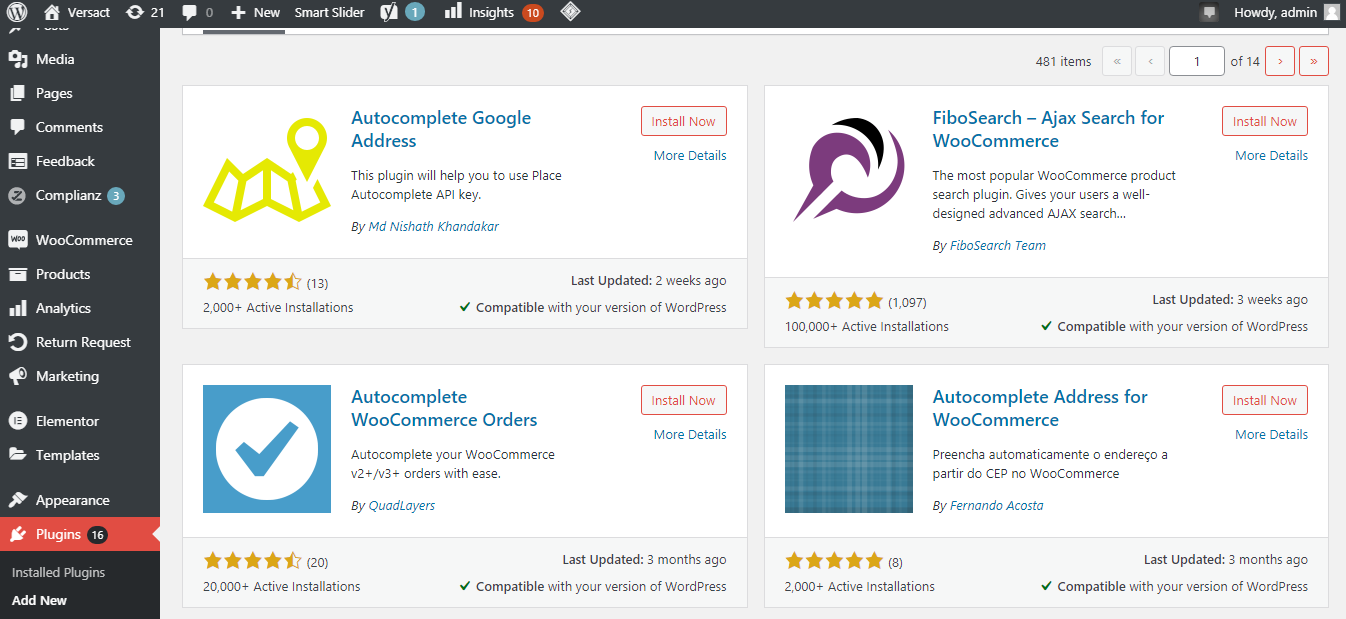
2. Search for return and warranty in the search field. Then, install and activate the plugin.
Enable Refund Option
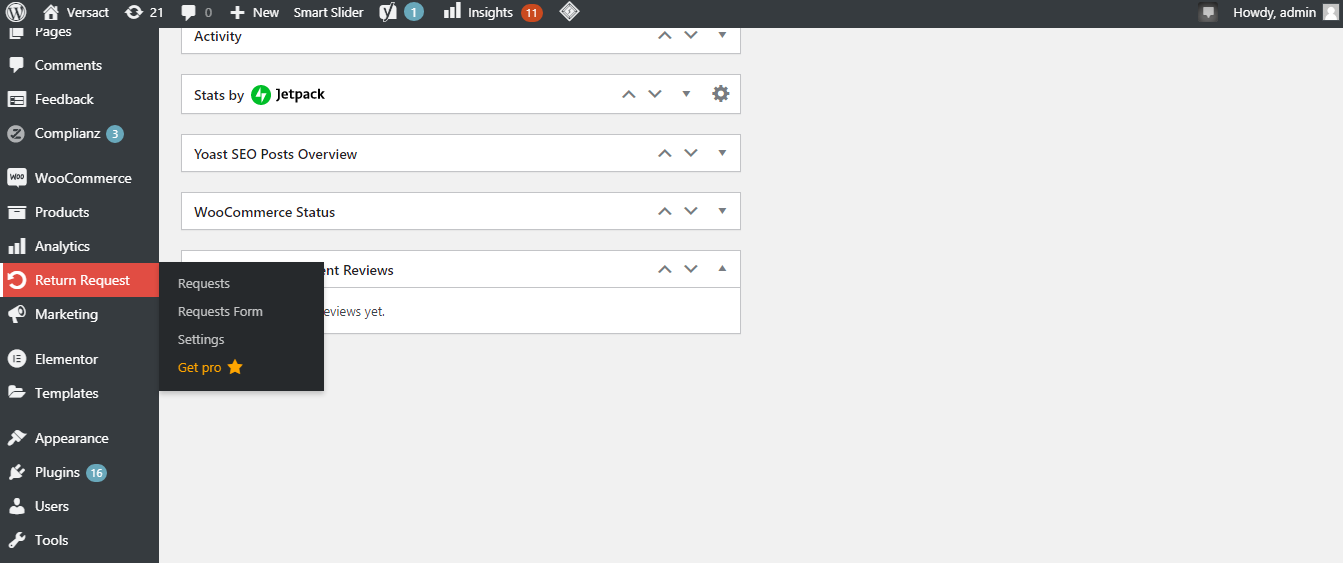
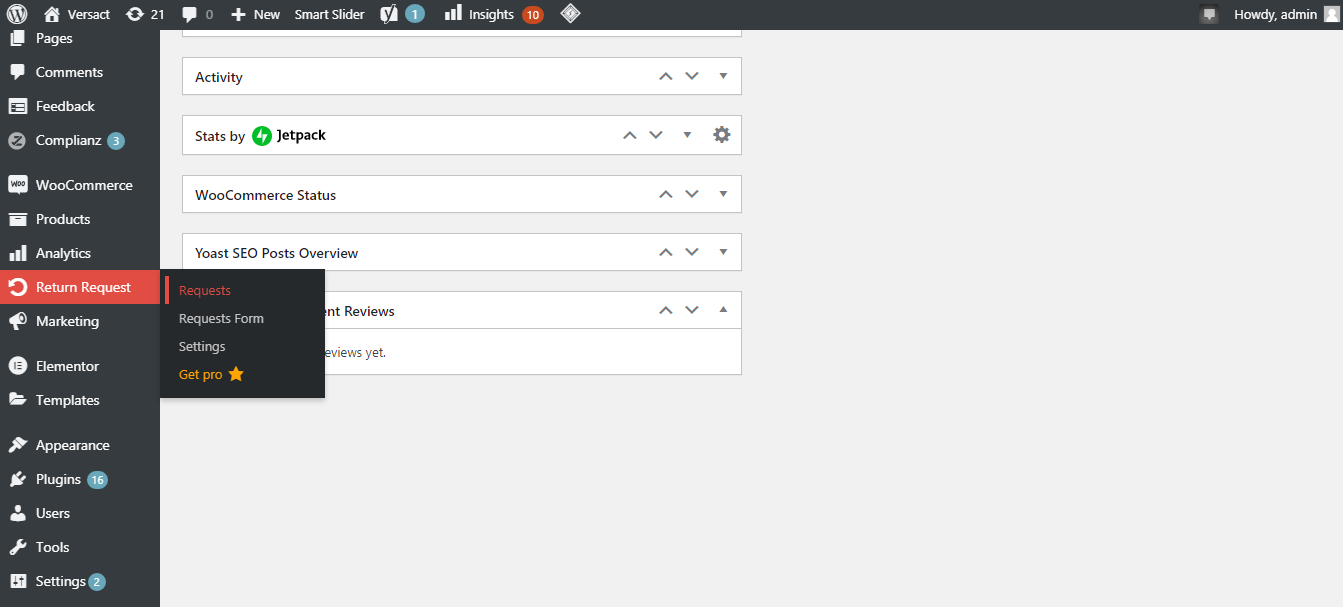
1. Navigate to Return Request in the WordPress dashboard menu and click settings.
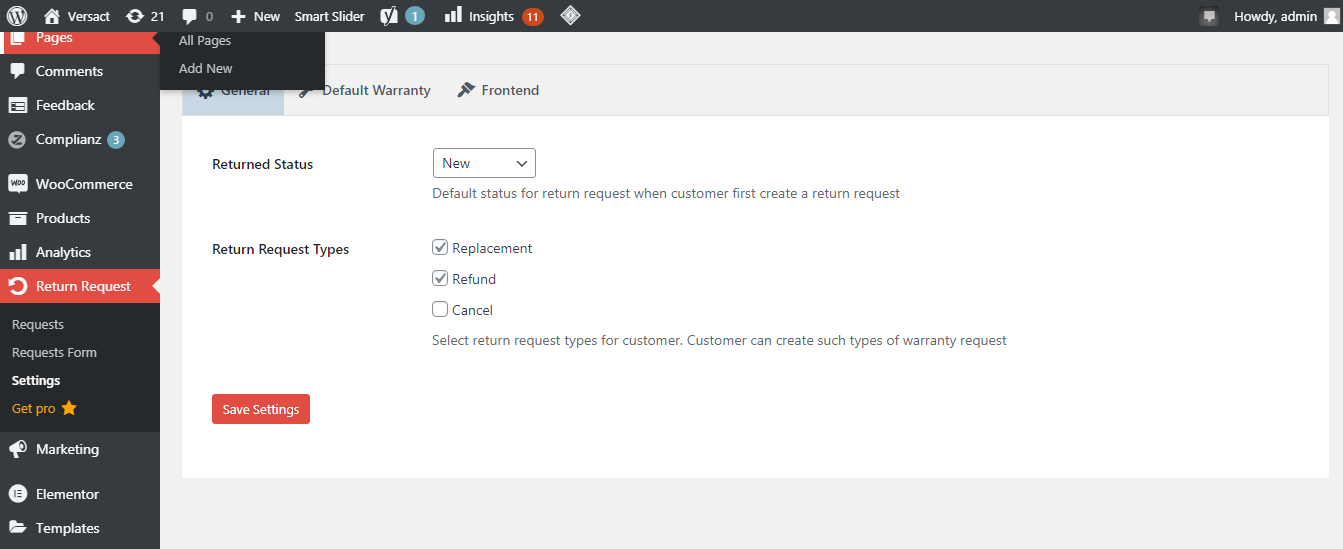
2. Select the return request type you wish to make.
3. Click on save settings, and the refund feature will be enabled on your website.
Set the Number of Days
This plugin allows you to set a period within which the customer can return an item from the day of purchase. Here's how you can set it up.
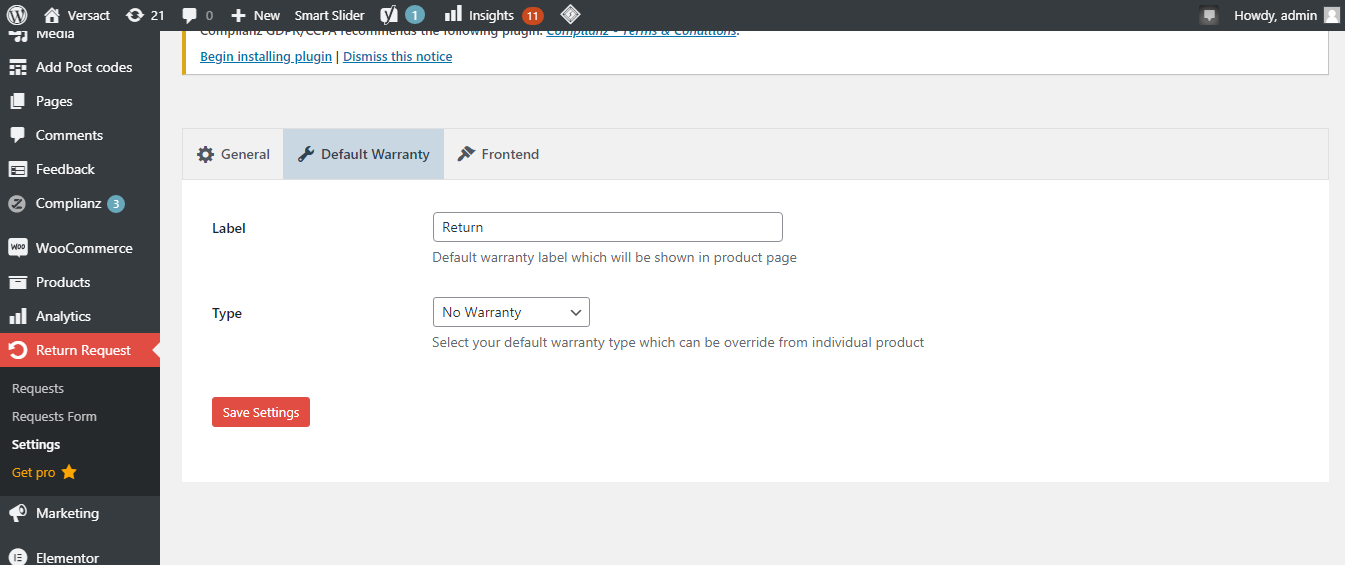
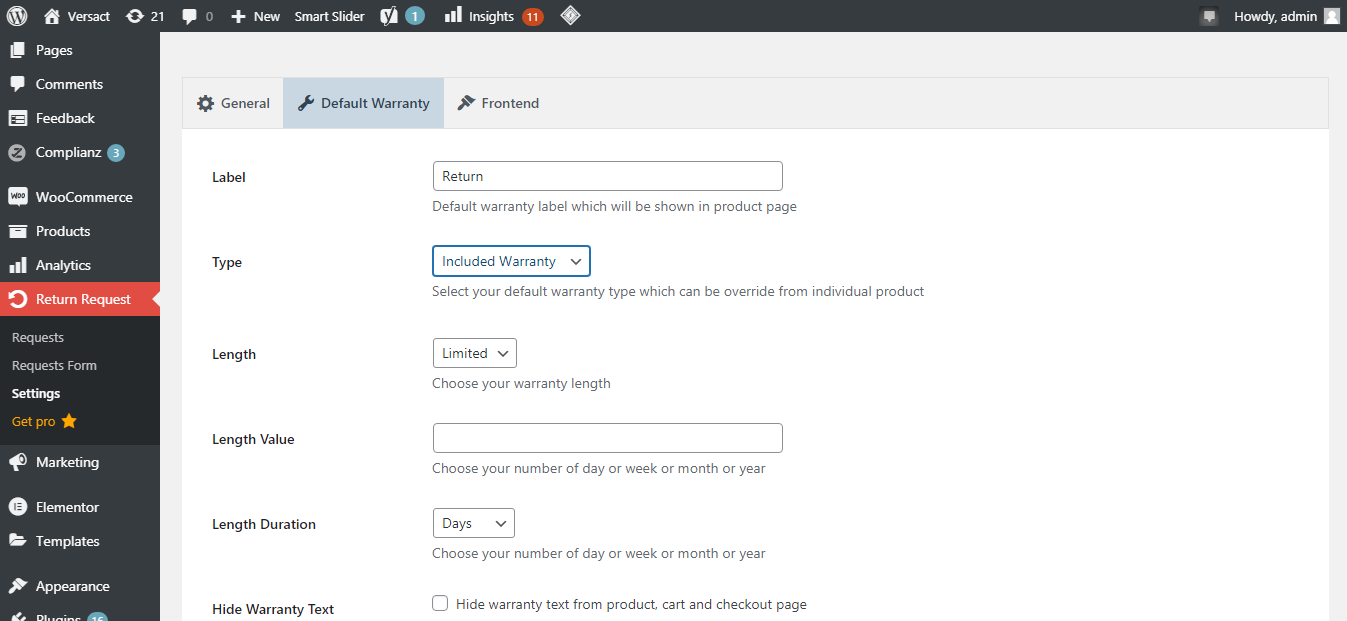
1. Go to the Default Warranty within the settings and rename the Label section to "Return".
2. Select Included Warranty next to the type.
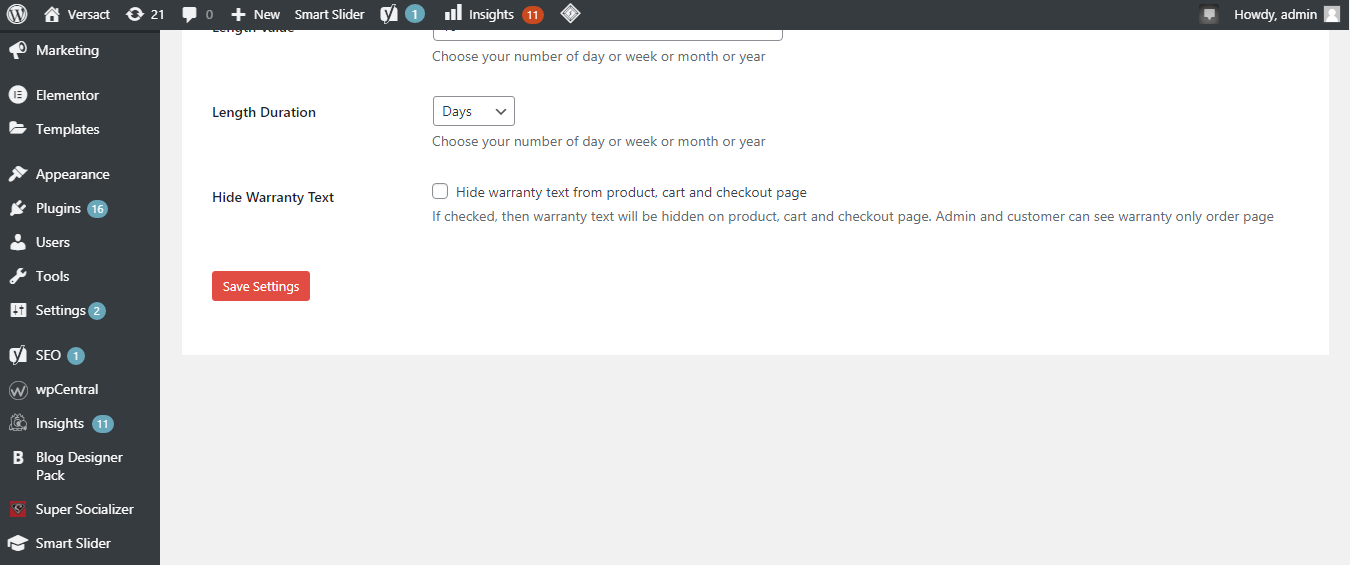
3. In the field next to the length, enter the number of days during which customers can return the product. If you want to give an unlimited warranty, you can also select it here.
4. Once you've made the changes, click save.
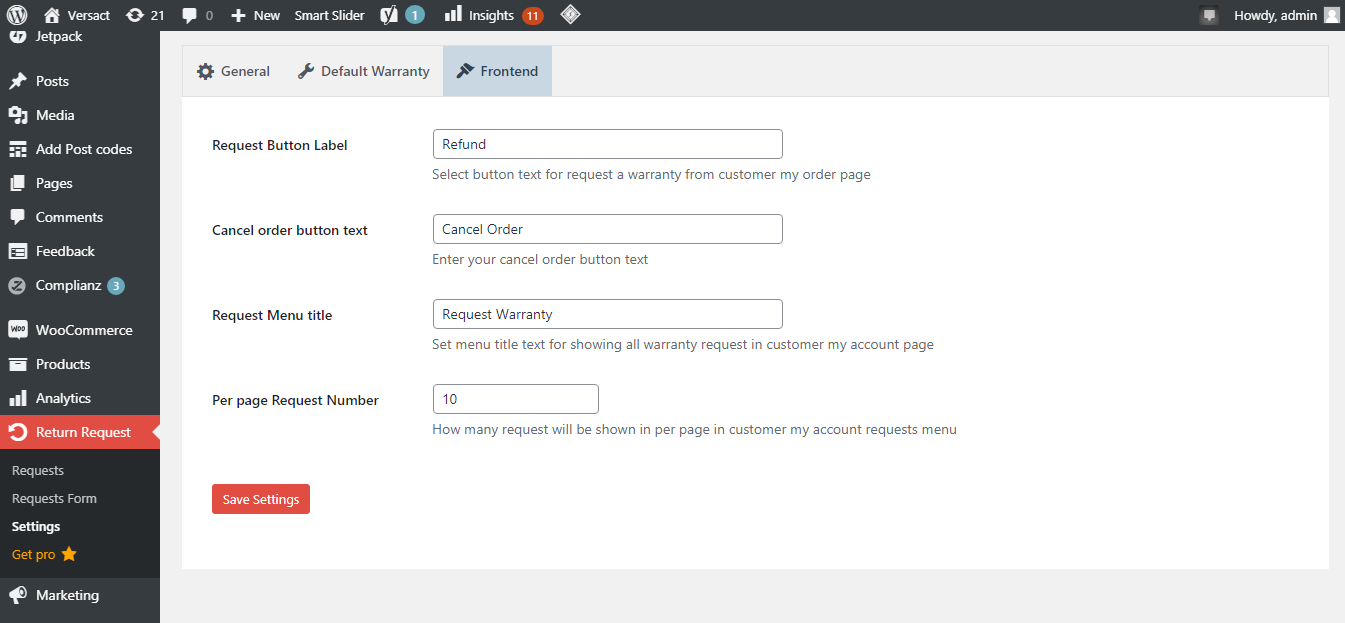
5. In the Frontend section, you can also change the text displayed on the button.
This is how you can set a limited time during which the customer can return the item after purchase. So, every visitor can see the return details without going into the policy pages. You can also set a different number of days to return different products.
How to Change the Order Status
Following the instructions below will make the order status automatically completed for prepaid orders so that once the order has been paid for, the customer will see the refund option.
To do this, you'll need to install the Autocomplete plugin on your website.
What Is Autocomplete Plugin?
The autocomplete plugin makes it easy for customers to get a refund if they've paid for an order with a credit card or PayPal. It'll set the order status to completion once it's placed on your website and the customer instantly sees the refund option.
The plugin allows customers to automatically see the refund option when they activate the order, making it less tedious. So, even if you haven't shipped the item, they can quickly inform you about the refund. It saves shipping costs on both ends.
Download: Autocomplete WooCommerce Orders
Installing the Plugin
1. Go to WordPress Dashboard > Plugins > Add New.
2. Search for Autocomplete Woocommerce Orders. Click install > activate.
After you've installed the plugin, you'll need to enable the auto-completion feature for paid orders.
Enable the Auto-Completion Feature
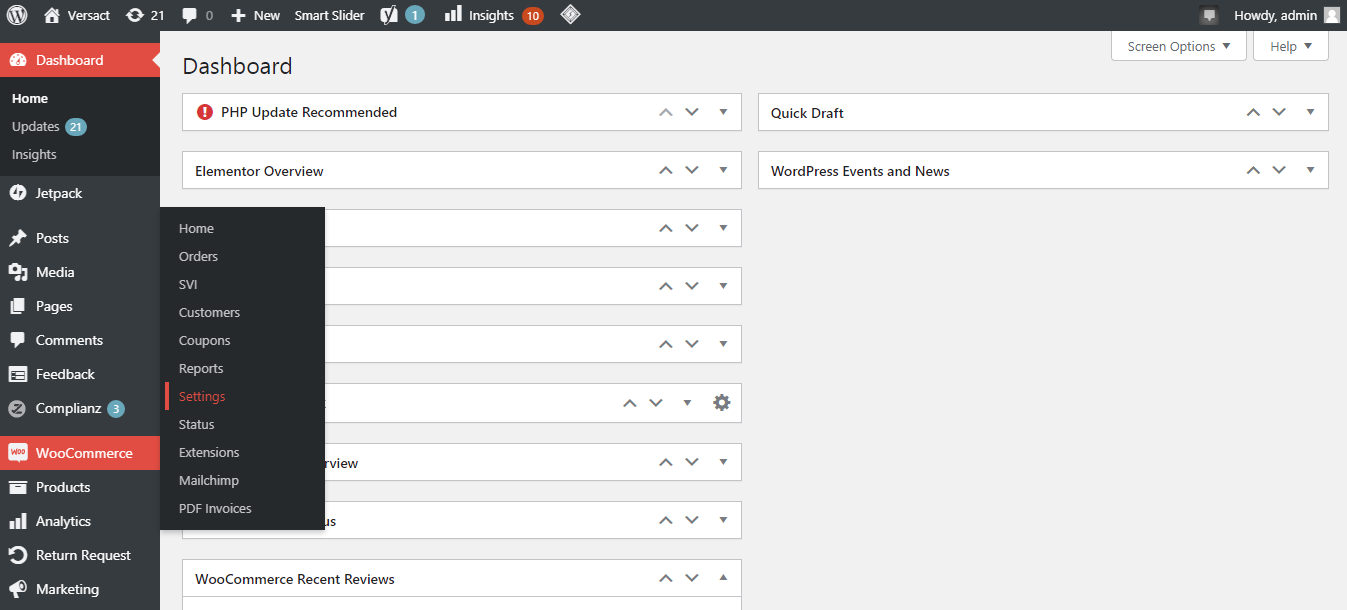
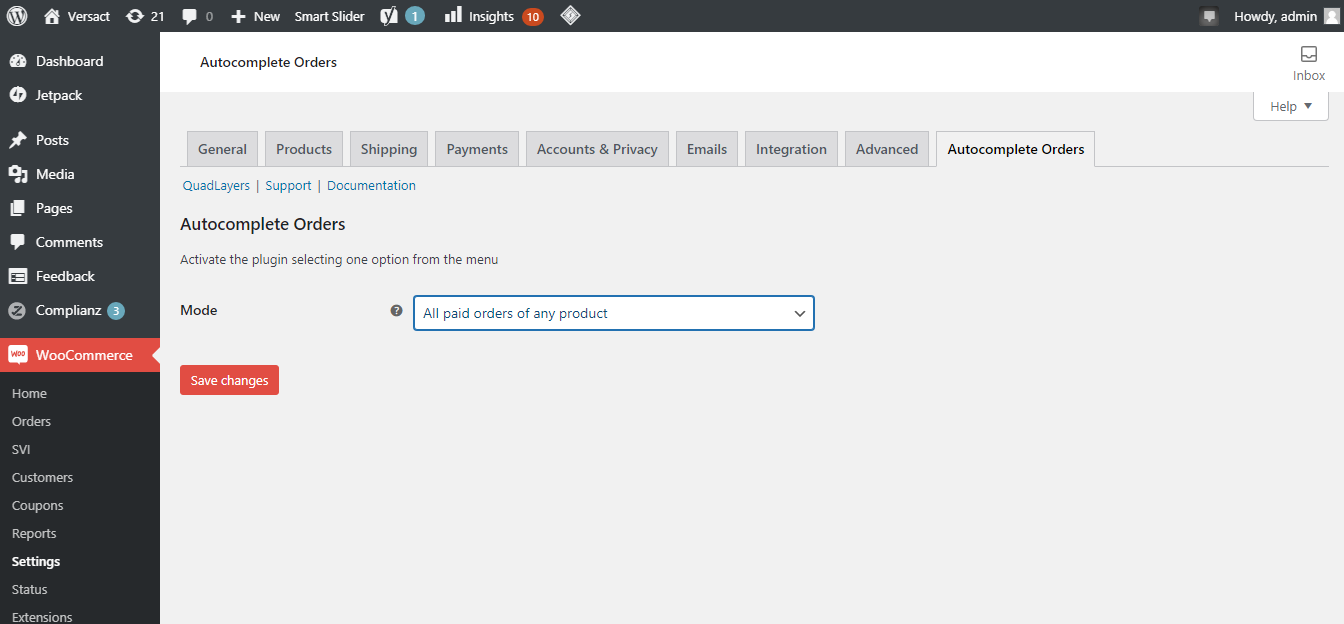
1. Go to Woocommerce > Settings > Autocomplete Orders to enable it.
2. Select All paid orders from the mode drop-down menu and click save changes.
Your auto-complete option has been enabled successfully. The status of all paid orders you receive on your website will automatically change to complete.
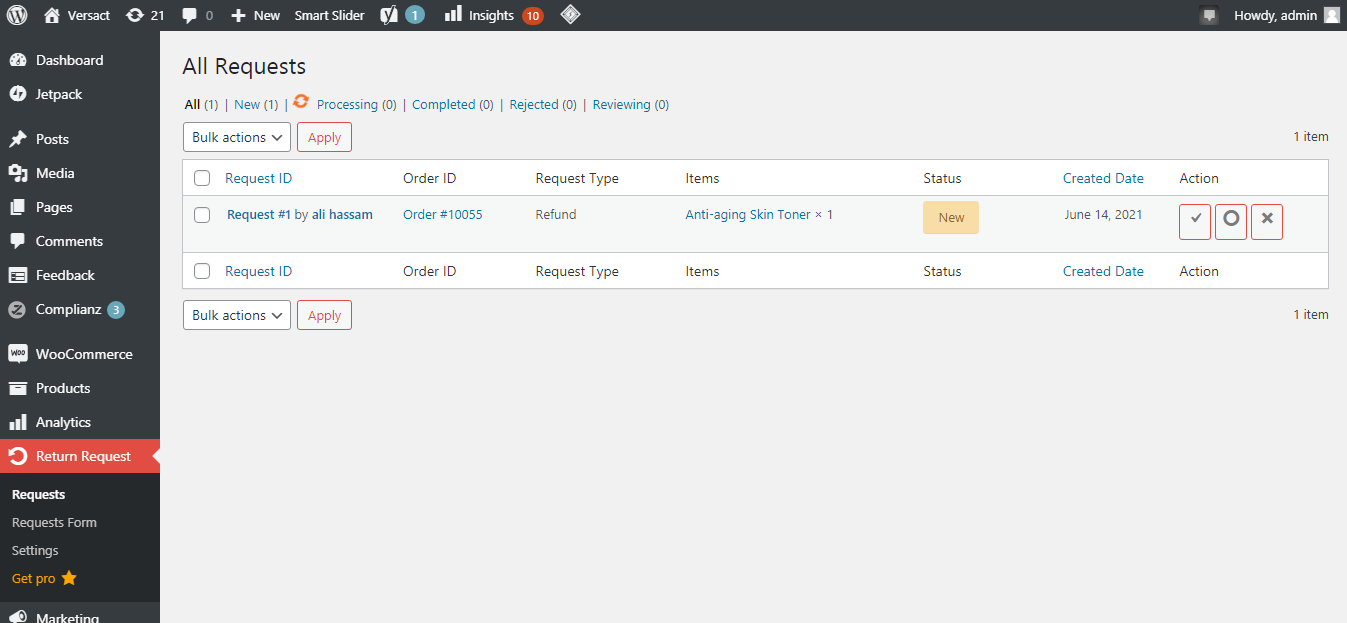
In addition, you will receive an email notification once your customer makes a refund request, and you can also view the request through your website.
1. To see the request, go to dashboard > Return Requests.
2. Here, you can see the refund request set by the customer
How to Refund Money to Your Customer
You can process refunds in WooCommerce in two ways:
1. Automatic: A refund automatically changes the WooCommerce order status and also reverses the payment for your customers.
2. Manual: The WooCommerce order status is changed to the manual refund method, but the money must be returned to the customer manually.
Checking Requested Refunds
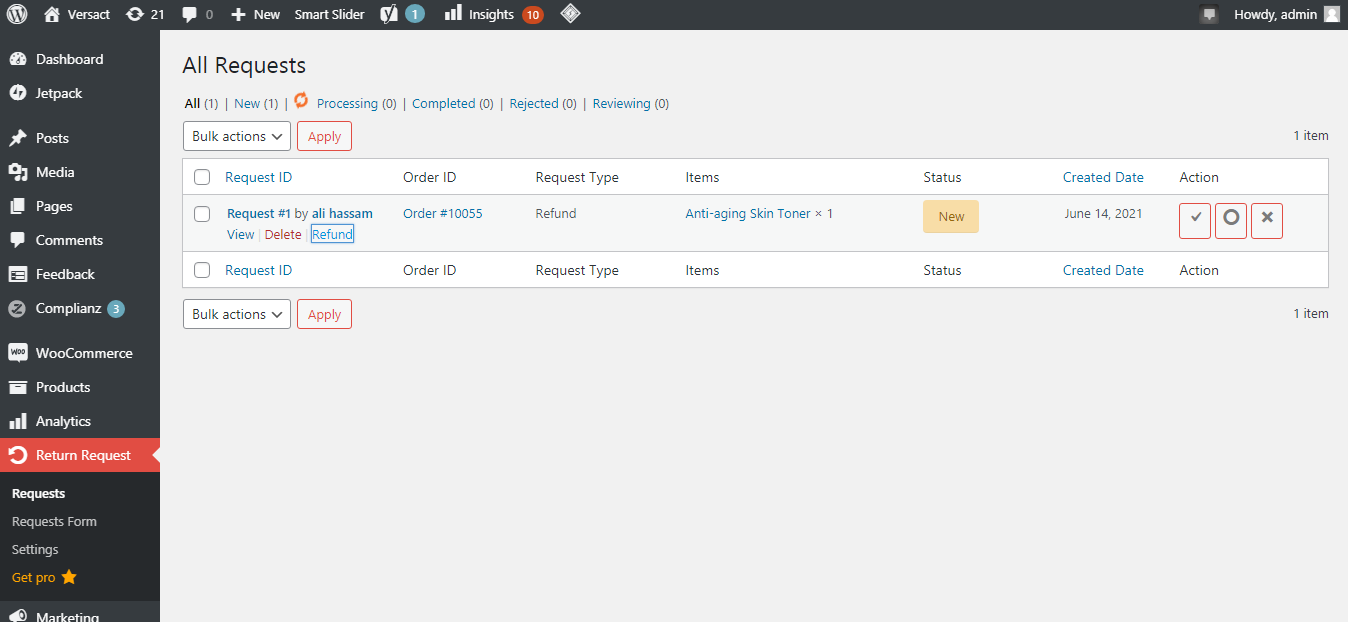
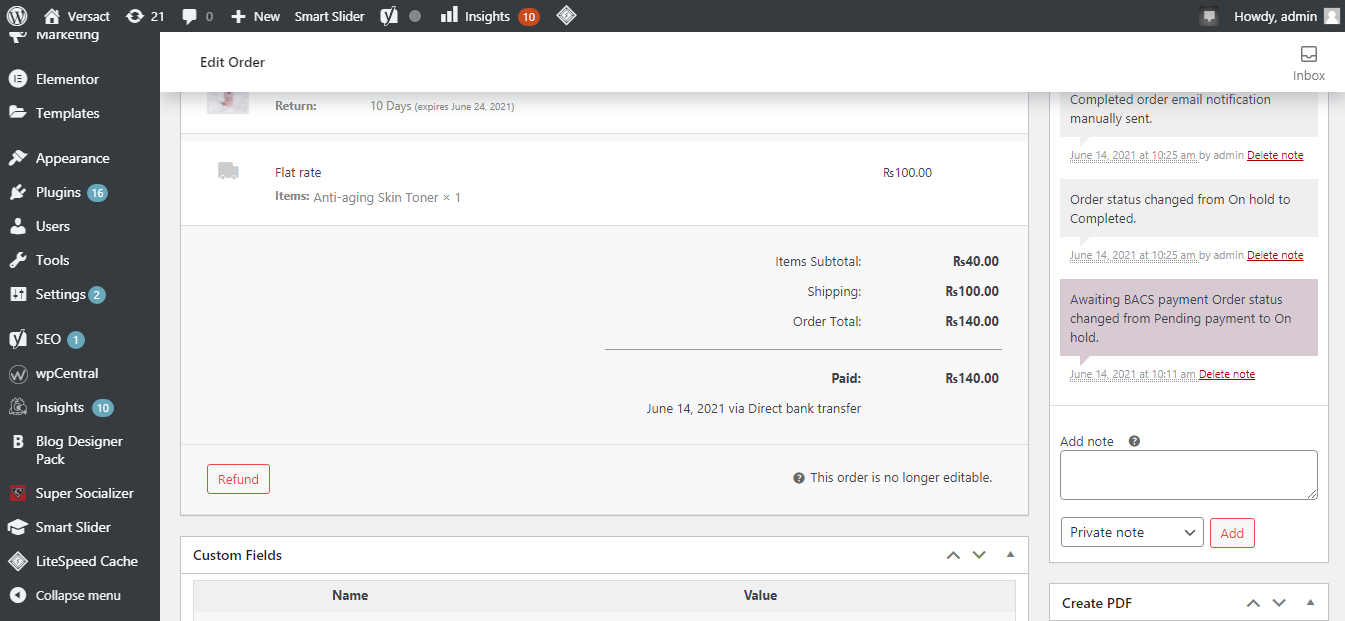
1. On the return request page, click on the refund.
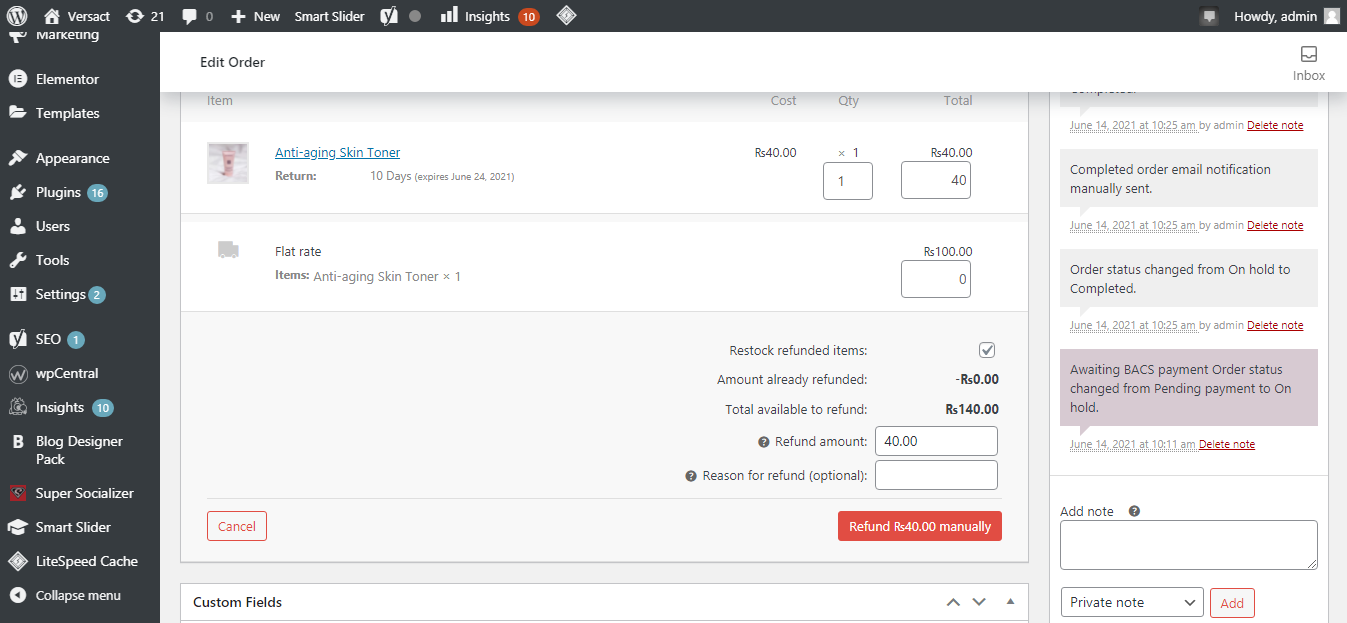
2. You can see the order details of the customer and the amount of money you have to refund.
3. Clicking Refund will prompt you to choose whether to refund manually or via credit card payment.
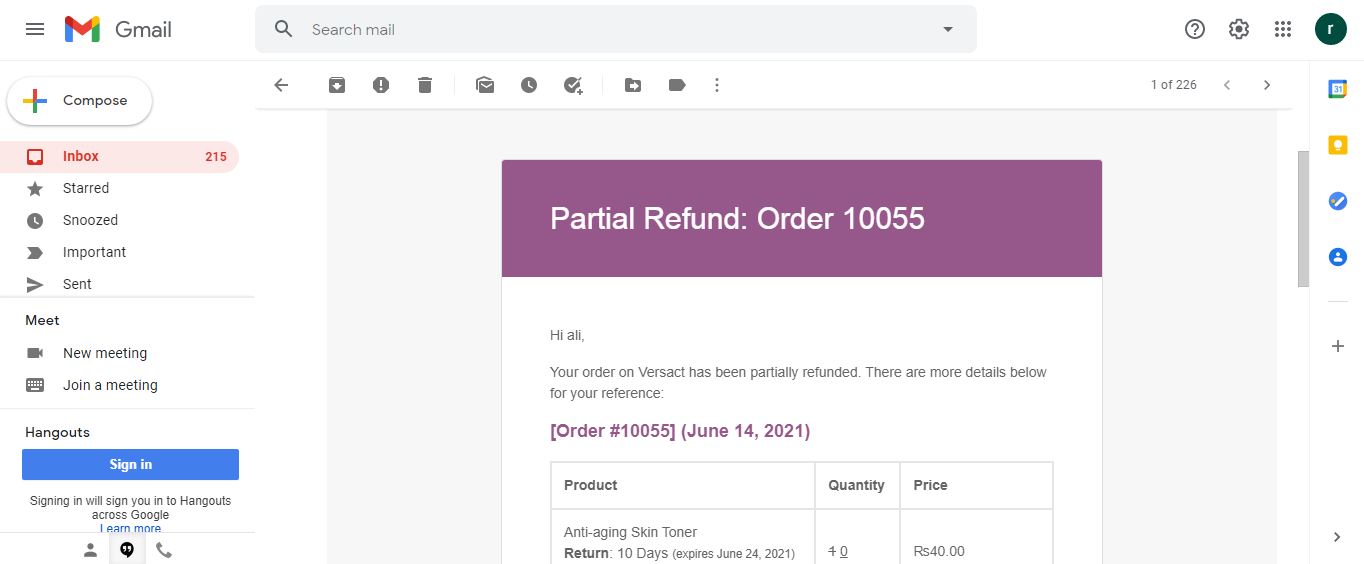
Make sure the quantity of the product is correctly set. The order won't be marked as refunded if the quantities of items aren't specified when a refund is issued, and an email will be sent with the phrase partial refund.
As soon as you update the refund request, your customer will receive an email notification.
This is how you can manually refund money to the same bank account that the customer used to purchase the product.
Manage Refund Requests More Effectively
Refunds are an integral part of handling and managing negative or unhappy customers. Having a well-defined refund policy is critical because it tells your customers what to expect if they buy from you.
With this plugin, you can manage the requested refunds within your dashboard to not rely on third-party services. In addition, the quick processing of refunds increases the customers' satisfaction and trust that helps your website attract more visitors.
If you don't have expertise over WooCommerce, you can try any of its alternatives like Shopify and Magento which are comparatively easy to use.


