Get into the Christmas spirit with our guide to making your own personalized Christmas cards (or cards for any occassion, for that matter).
In this tutorial, we’re going to use Photoshop, but there are lots of other free image-editing tools you can use to achieve the same effects.
Set the Canvas for Your Card
Before you start, you need to figure out what sort of card you intend to make and print. Assuming you’re printing at home (or work—we won’t tell anyone, promise), you’re going to want an A4 canvas.
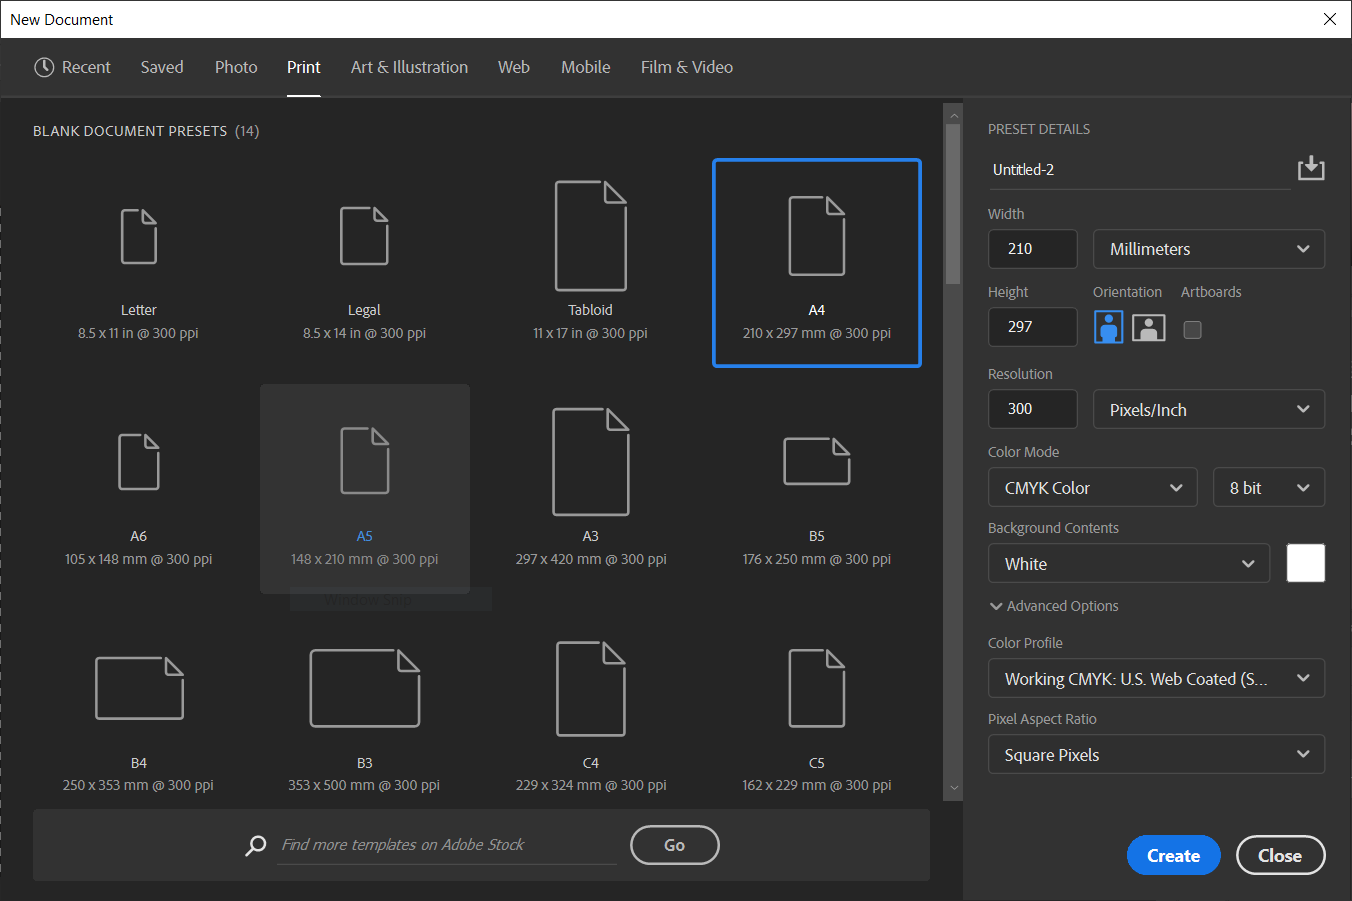
Open Photoshop and click on Create New. From there, select Print, then pick A4 from the list.
Set the paper orientation—for this how-to, we’re choosing Portrait (which will create a card that stands in landscape when folded in two).
By default, the resolution is 300dpi, which prevents pixelation that comes from printing. You can boost this, but don’t go higher than 1800dpi.
Finally, change the Color Mode to CMYK Color, and press Create.
Grab a Holiday-Themed Photo
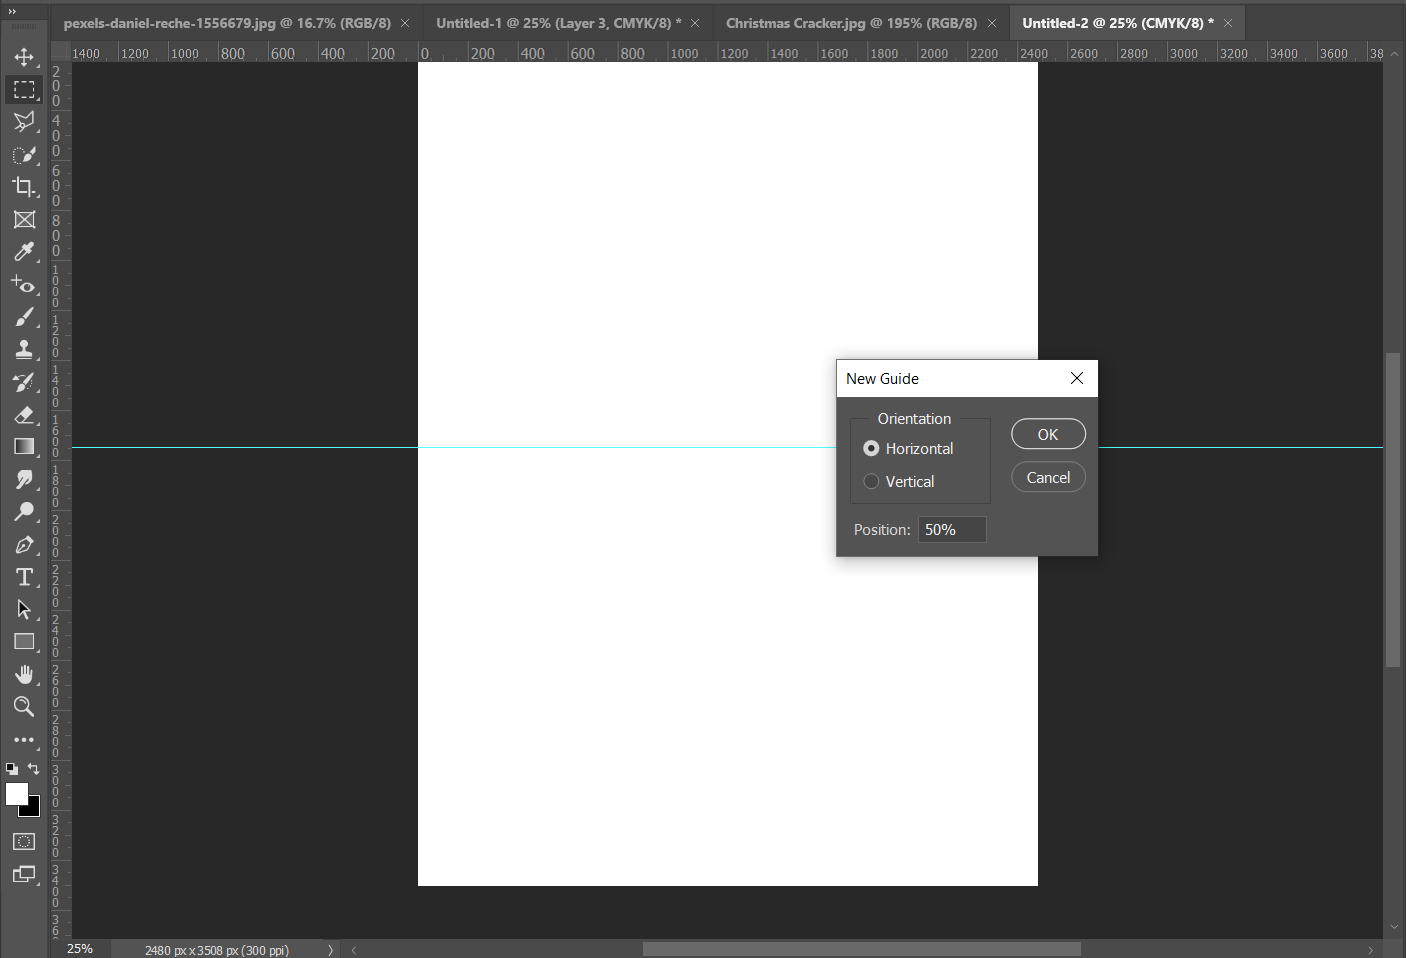
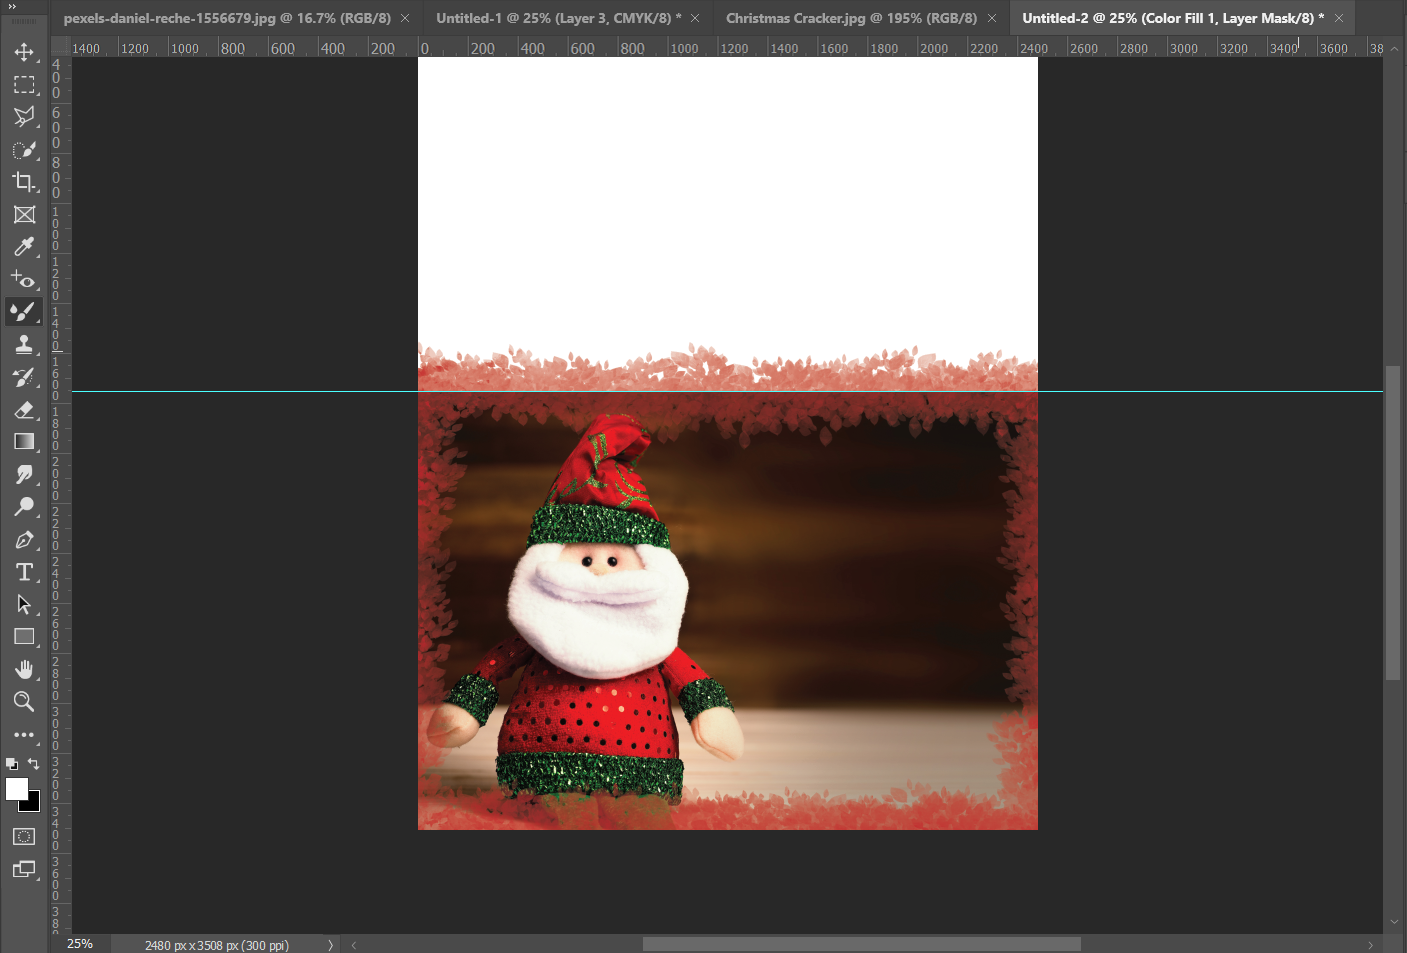
With your blank canvas on screen, it’s a good idea to make a center line—you don’t want your image to spill onto what will become the back of the card.
Press Ctrl (Windows) or Cmd + R (Mac) to open the ruler. This measures the page in pixels, so with our setup, it’s 2480x3508px.
Click View > New Guide and choose your axis. As it’s a landscape card, we’re using Horizontal.
Set the Position to 50 percent (type 50% or 1754px) to add an invisible guide line through the center of your card.
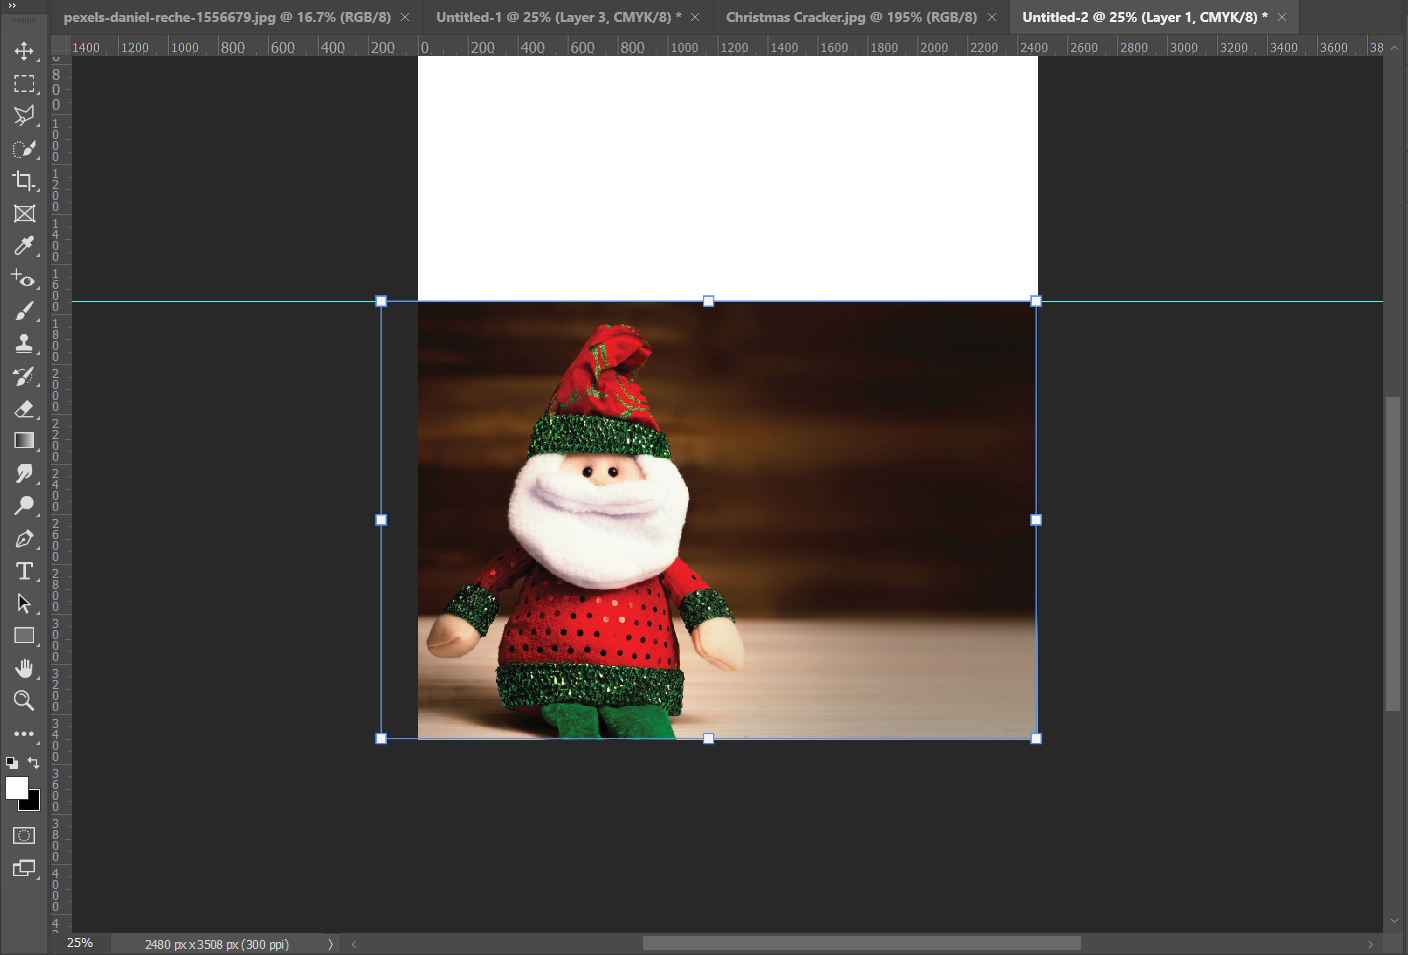
Open your festive photo, and press Ctrl/Cmd + A then Ctrl/Cmd + C to copy it. Move back to your blank canvas tab. Press Ctrl/Cmd + V to paste the image onto the page.
Unless you’re extremely lucky, this image won’t fit inside. We’ll need to resize it by pressing Ctrl/Cmd + T. Move the image into position at the bottom of the page—it doesn’t matter if your image spills over the guide line as we can mask it later.
Your Christmas card is now beginning to take shape.
Add a Vibrant Border
So you don’t lose any image when printing, add a border around your image. First, highlight all layers in the Layers panel.
Right-click, and then select Flatten Image. With all your layers brought together as one, click on the padlock icon to unlock the image.
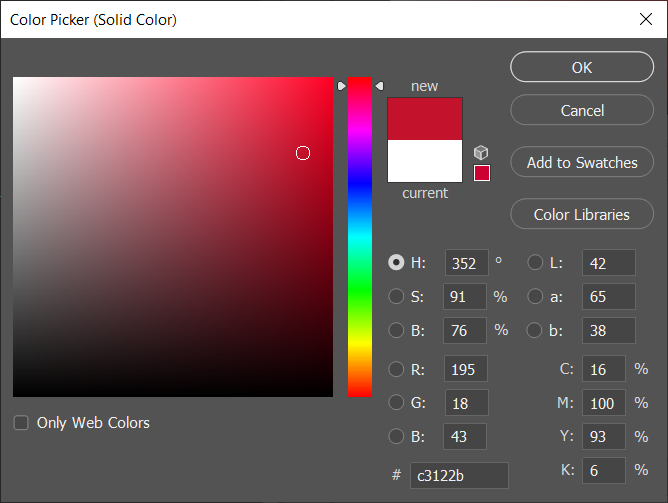
Press the Adjustment Layer button in the Layers panel, and choose Solid Color. In the color swatch, pick your color—we’re going with a Christmassy red here.
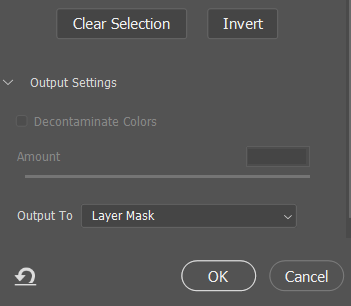
Double-click the Layer Mask to open Properties. Click the Invert option, set the Output to Layer Mask, and click OK.
Pick the Brush Tool from the toolbar, and check that the Foreground Color is set to White. Open the Brush Tool options to select any Brush type that strikes your fancy.
Once selected, draw around the edge of your image. As you do, the background color appears as a border. For now, don’t fret if your border spills onto the back of the card.
Create Festive Effects
Let’s make the card even more festive by adding a few extra effects. Below, are some Photoshop tricks that you might want to try.
Adding objects to your card
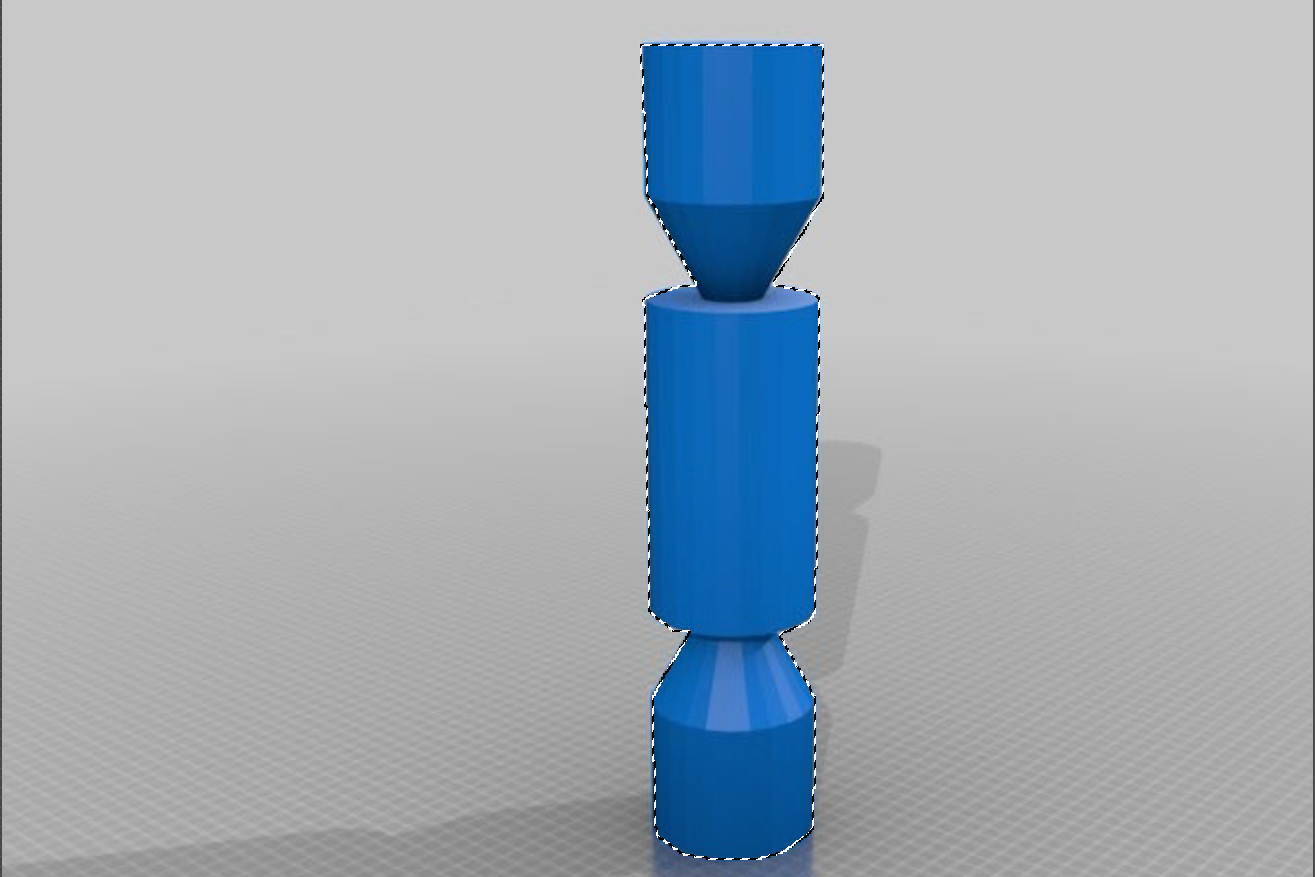
First, let’s add a Christmas cracker to the corner. In your photo, you might want to add a Santa hat to one of your subjects, or pop a Christmas tree on display; the method for achieving this is the same. Read our guide to find out more about how to add someone (or, in this case, something) to your images.
Open your new image, and select the area you want using the Lasso Tool, Pen Tool, or pressing Select > [Subject].
Hit Ctrl/Cmd + C to copy the selected area, then tab over to your Christmas card and press Ctrl/Cmd + V to paste it in.
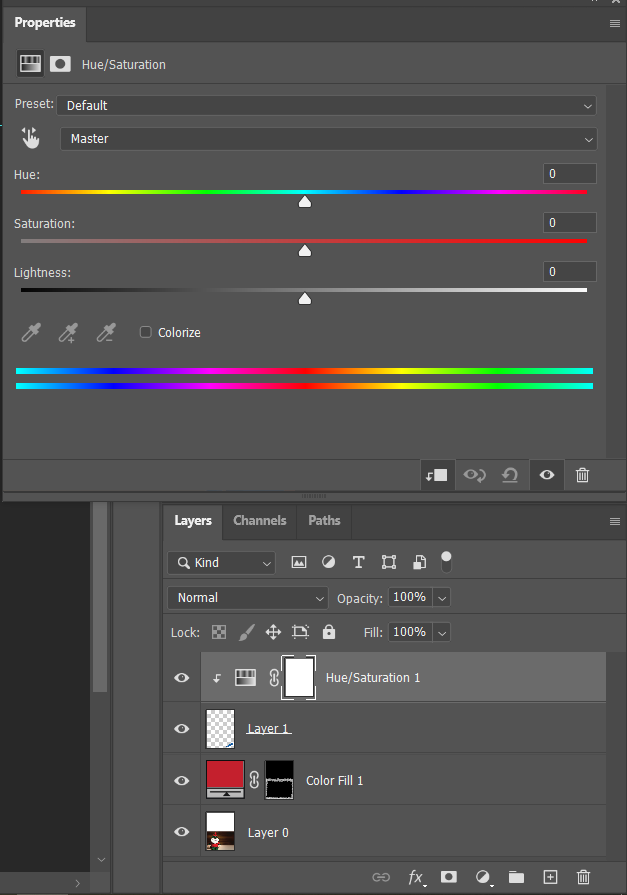
Use Free Transform (Ctrl/Cmd + T) to reposition and resize the object. If the colors aren’t quite right, click the Adjustment Layer and choose Hue/Saturation.
Right-click on this layer. Select Create Clipping Mask, and make sure the layer with your object is directly beneath this. This ensures any alterations only affect the object, not the rest of your card.
Adjust the Hue, Saturation, and Lightness sliders.
Next, do the same again—open the Adjustment Layer, and create a clipping mask. But this time, choose Color Balance instead of Hue/Saturation. Once again, play with the sliders to hit your desired color.
Adding falling snow
Now, let’s make your card super-Christmassy by adding falling snow. You can see this in more depth in our guide on how to add festive effects to your photos.
To do this, go to Layer > New > Layer, and then navigate to Edit > Fill. In the Fill Options, select Black from the Contents dropdown.
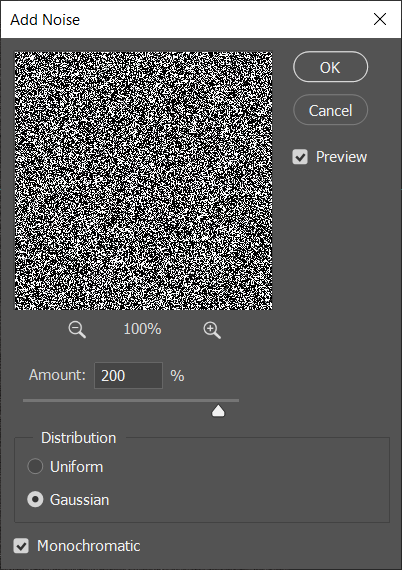
Click Filter > Noise > Add Noise. The Amount can be anything you like, but we’re using 200 percent. Distribution should be set to Gaussian, then check the box Monochromatic.
Next, choose Filter > Blur > Gaussian Blur. Set the Radius to five (the radius dictates how large your snowflakes will be, so play around to find the settings you like).
Up to Image > Adjustments > Threshold. As you drag the Threshold slider along, you’ll begin to make “snowflakes”. Find the flurry (or blizzard) that works for you. We’re choosing 60.
Highlight your new layer, and change the Blending Mode to Screen or Lighter Color.
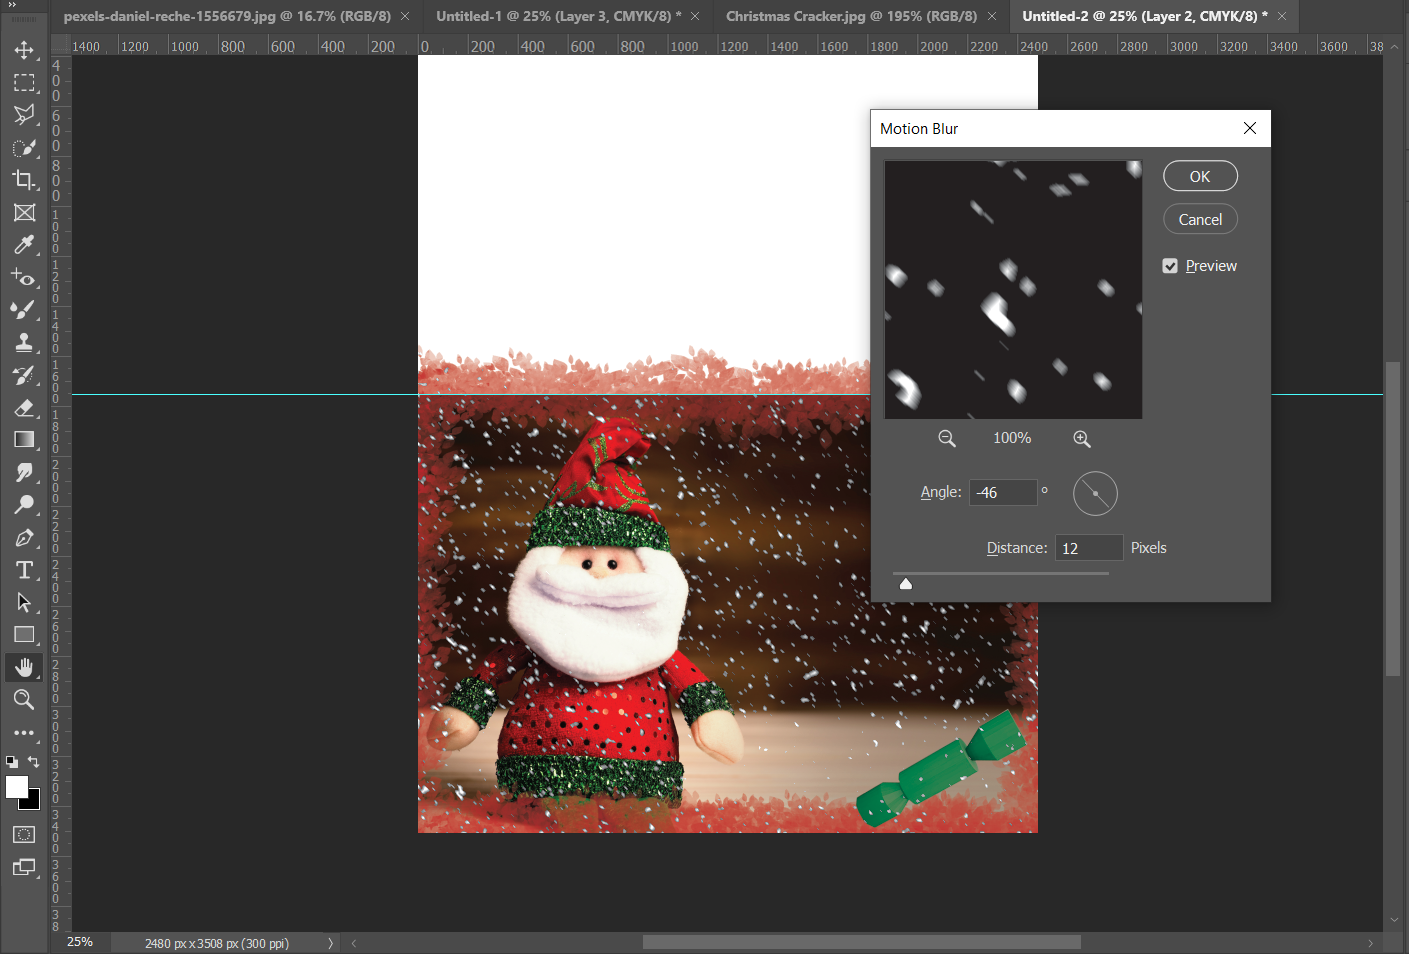
Click Filter > Blur > Motion Blur, where you need to adjust the Angle and Distance until it looks like it’s snowing.
You can then repeat these steps to add further layers of snow for a more realistic look.
Add Your Holiday Greeting
Time to pop some text on the front of the card—happy holidays, season's greetings, or merry Christmas are some cheerful tidings you might want to consider adding.
Pick the Type Tool from the toolbar, then create a rectangle where you want the words to appear. Write out your message. If you need to, you can select the Move Tool to tweak the text’s position.
Above the image are a handful of Type options, which offer ways to change your font style, color, and size. Double-click on your text, then select your preferred settings from the dropdown menus.
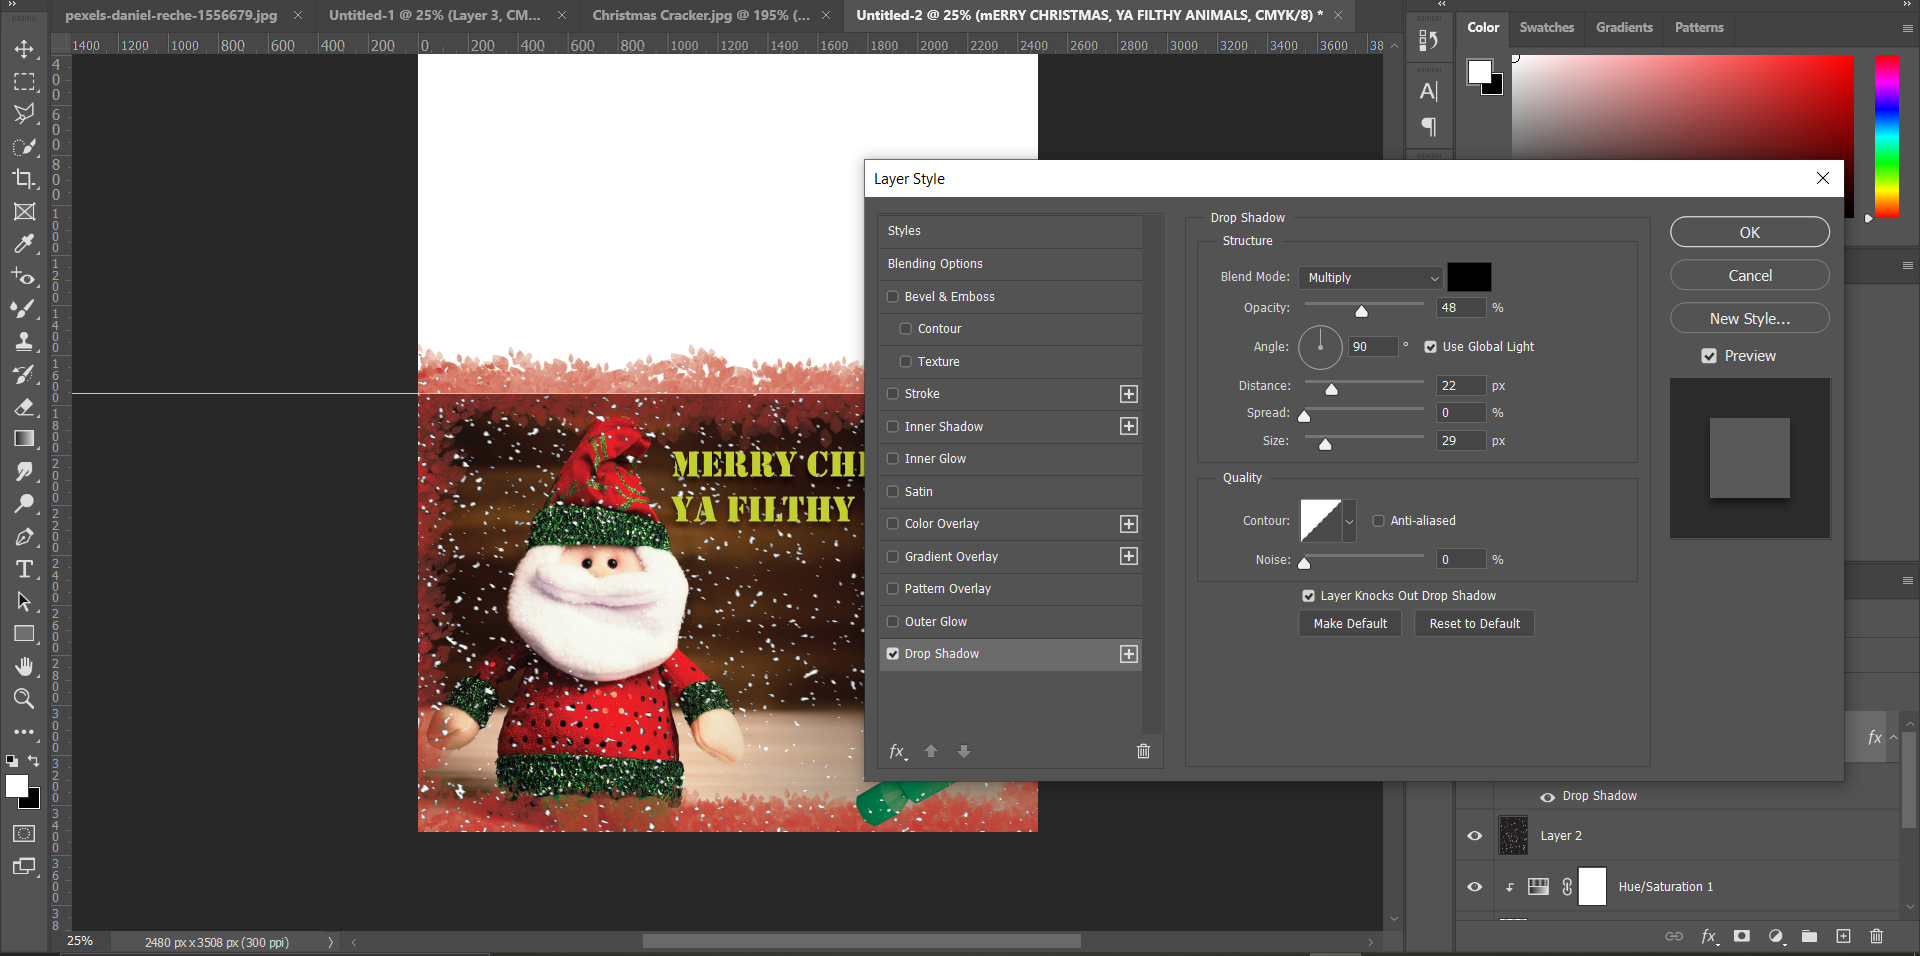
You can also add a drop shadow around the text to make it look like it's floating above the page. To do this, head to Layer > Layer Style > Drop Shadow. Toy with the sliders under Structure to find the best look for your card.
Clean up the Back of the Card
If your border, or any other part of the image spilled over onto the rear of the card, it’s time to clean that up.
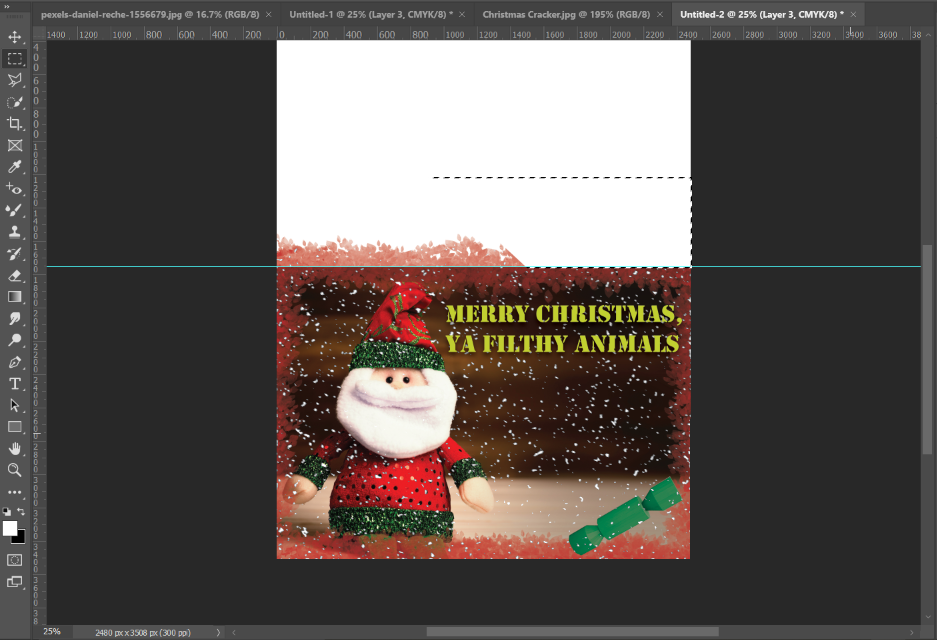
Click on the New Layer button in the Layers panel (or go to Layer > New > Layer). From the toolbar, pick the Rectangular Marquee Tool.
Place your rectangle over the area, mindful not to go past the central guide line. Click Edit > Fill, and in the Color dropdown, select White. The area you’ve just selected is immediately filled in.
Print Your Card and Send Some Holiday Joy
Finally, print out your design, and carefully back it onto a lightweight, plain card.
Write your message inside, and have yourself a crafty little Christmas!

