Have you ever wanted to manipulate an entire subject’s movements in a natural, puppet-like way in Photoshop? Here, we will show you not only how you can achieve that, but also how you can turn it into a fun animation.
One of the newest warp tools in Photoshop is the Puppet Warp Tool. Although most warp tools work very similarly, the Puppet Warp Tool has a fun aspect that really helps create natural bodily movement.
What Is Photoshop’s Puppet Warp?

The name gives us a clue as to what the Puppet Warp Tool can do, but for a little more detail, let’s discuss what the Puppet Warp is.
Imagine a puppet on a string, where the strings connect to the puppet’s limbs. Those connections allow the puppet’s body to move somewhat naturally like a human’s; the Puppet Warp Tool works to manipulate an image in a similar fashion.
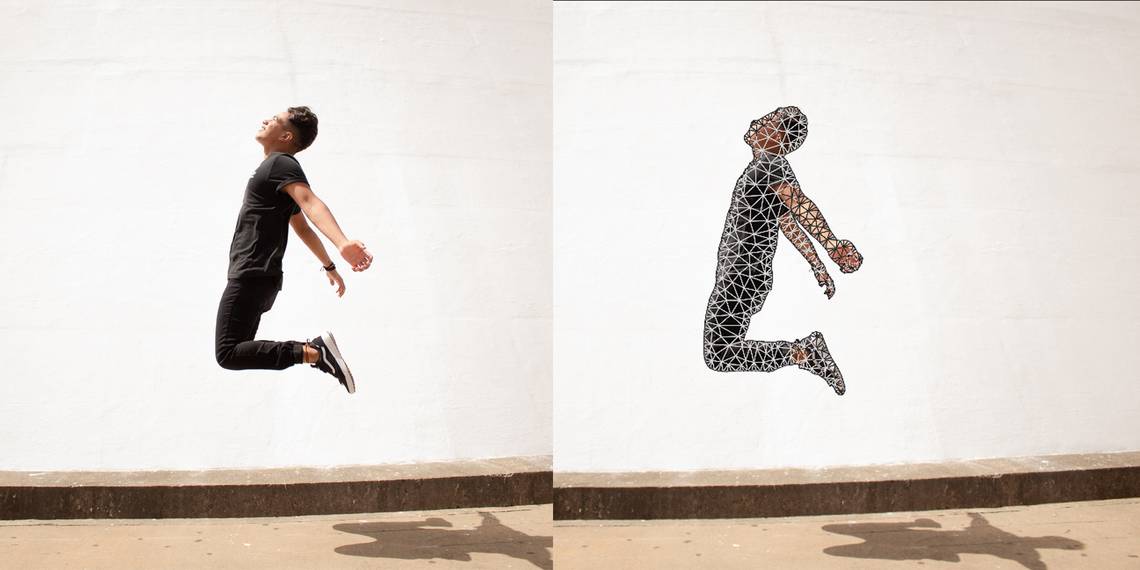
Like many warp tools, the Puppet Warp Tool in Photoshop applies a mesh to the subject that allows you to push and pull the subject to your desired movements. Along with the triangular mesh, Puppet Warp allows you to place pins to any part of the mesh to create joints. These joints help Photoshop create natural warping similar to a body’s real-life movements.
How to Use the Puppet Warp Tool in Photoshop
To begin, find a suitable image to use. The effect works best on a human or animal body which is clearly isolated from the background. Once you’ve chosen your image, open it in Photoshop. Duplicate the layer in the Layers Panel by right-clicking the image and clicking Duplicate Layer.
First, you need to select the subject. While you could manually select it using a variety of methods, if your chosen image has an obvious subject contrasted against a neutral background then you can use the Content-Aware Fill to auto-select the subject.
With your duplicated layer selected, ensure the Rectangular Marquee Tool, or another selection tool, is selected. In the menu, click Select > Subject. Your subject will now have running ants around its edge, separating it from the background.
With your subject selected, right-click the image and click Content-Aware Fill. This will bring up a new window showing two comparison windows.
In the pop-up, you’ll notice your original image on the left will now have a green screen sampling around the neutral background of your subject. The Preview window on the right will show you the results of the Content-Aware Fill.
If your Preview screen still shows a faint outline of where your subject previously sat, you can add 10 px in the Feather box at the top, by 7 - 10 px, and click Expand. This will remove the outline and make the image look more natural where the subject has been removed. Click Apply or OK once you’re happy with the result.

The running ants from your selection will still be seen, although your subject has now disappeared. Do not deselect as you will continue using the selection shape for the next stage.
On the Layers Panel, drag the duplicated layer above your recent isolated subject layer. Then with the duplicated layer selected, click the Add Layer Mask button on the bottom of the layers panel.
This produces the opposite of Content-Aware Fill and creates a mask to remove the background from your subject. This will now give you one layer with an isolated subject and one layer with only a visible background, plus your original image as its own layer which will come in handy later.
On the masked layer, right-click the layer and click Convert to Smart Object. Then go to the main menu and click Edit > Puppet Warp. You’ll notice this applies a triangular mesh over your isolated subject, allowing you to warp it.
You may choose to keep the mesh visible, but it’s easier to add the pins and see how the image manipulates if you switch the mesh visibility off. In the mesh toolbar at the top, there’s a toggle button for Show Mesh. It makes no difference for how the image warps if the mesh is visible or not, but it may help you see the details of your subject if you switch it off.
Now, with the Puppet Warp Tool on, you’ll notice the cursor shows as a pin. Using the pin, click on each limb joint on your subject, keeping the natural movements of the body in mind–each limb only needs one pin.

Once you’ve placed the pins, you can then drag the body parts like a puppet. Be aware of further warping; this is one reason it’s better to switch the mesh off, so you can see any unwanted warping before it’s too late.
We suggest moving every single limb, so nothing is in the same place or position as the original image. Be aware of natural body movements–although Puppet Warp is very intuitive, sometimes it can warp unnaturally.

If you drag a limb through an existing part of the selection, it may bring it forward even though it would be physically impossible for the body to move in that way. If this happens, simply right-click on the affected area and click Bring Forward or Send Backward to fix it.

Once you’ve warped your subject into your desired position, you can simply click any other button on the tool panel and a popup will ask if you want to apply the warp. Click Apply. You can now see your final warped puppet.
How to Animate Your Puppet in Photoshop
Once you’ve created your puppet warp, you could use it to make an animation that you can turn into a GIF. This can simply be for fun rather than a serious animation, but your warping skills may allow you to create a fluid movement for a longer animation.
On your Layers Panel, highlight the masked background layer and the layer with your isolated subject, and merge these layers together by right-clicking one of the two highlighted layers and clicking Merge Layers. You should be left with your original image on the bottom layer and your new warped image on the top layer.
Click Window > Timeline to bring up Photoshop’s animation timeline. This will bring one of your layers into the timeline as a frame. Click the Convert to Frame Animation button in the bottom left corner of the timeline panel, then click the timeline menu button on the right-hand side and click Make Frames From Layers. This will bring your other layer/s into the timeline panel.

With all your layers in the animation timeline, click the arrow under each frame to set the timing. For a quick animation, we suggest 0.2 for each frame. Click Play in the timeline to see how your animations look.
Once you’re happy with the results, you can save it. Go to File > Export > Save For Web (Legacy). Most of the settings should be as you need them. Ensure that you save your file as a GIF, as the other formats don’t allow for moving imagery.
Make Fun Animations in Photoshop
Now you’ve learned how to use the Photoshop Puppet Warp, you can manipulate a lot of images for funny or realistic uses. Turning your puppets into an animation can be fun, or simply an extra editing skill in your back pocket.
Go ahead and test them on other poses, animals, or non-living subjects to see how far you can push the Puppet Warp Tool.