Apple’s trackpad is unlike typical laptop trackpads, which only come with a couple of standard features like scrolling and clicking. In contrast, the Apple trackpad has almost a dozen tricks and gestures that you can use for shortcuts and activating different features.
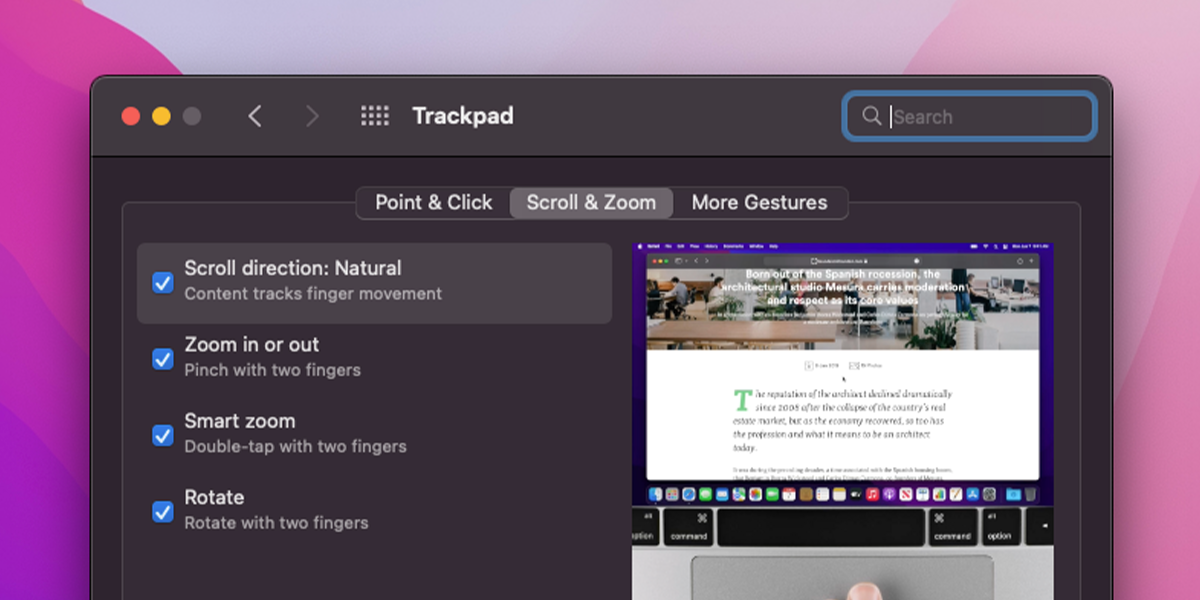
In this guide, we’ll explore what these gestures are, how you can use them, and how you can tweak them to suit your preferences. All of these are either from the Scroll & Zoom or the More Gestures tabs you can find by going to System Preferences > Trackpad. Let’s get going.
1. Scroll Direction
The Scroll Direction: Natural gesture is at the top of the Scroll & Zoom tab. When enabled, it makes pages or apps scroll in “natural” directions when you scroll using trackpad. This means that the page goes up when you slide two fingers up and goes down when you slide them down. If disabled, the scroll works in the opposite way—which is the unnatural direction.
This feature is enabled for users who (often or occasionally) switch between mouse and trackpad. With the mouse, the unnatural scroll direction is mostly used. Whereas, with the trackpad, natural makes more sense. To switch the scroll directions automatically when you change devices, read our scroll direction guide.
2. Zoom Features
Up next, we have the zooming features from the Scroll & Zoom tab: Zoom in or out and Smart Zoom. The first feature is quite simple: spread two fingers to zoom in and pinch two fingers to zoom out.
The second feature, Smart Zoom, also allows you to zoom in or out using the trackpad, but you use this by double-tapping with two fingers on browser pages or word processors. Smart Zoom simplifies and smoothens the zooming experience.
Though it’s possible to turn both these features off, they are not customizable.
3. Rotate Images
Below the zooming features, you have the option to rotate images using the trackpad. This feature is useful when using image manipulation software, either built-in (like Preview) or third-party (like Photoshop).
To do this, simply place your thumb and index finger with about an inch between them on the trackpad. Then, turn both clockwise or anticlockwise to rotate the image however you want. This gesture can’t be customized.
4. Swipe Pages and Apps
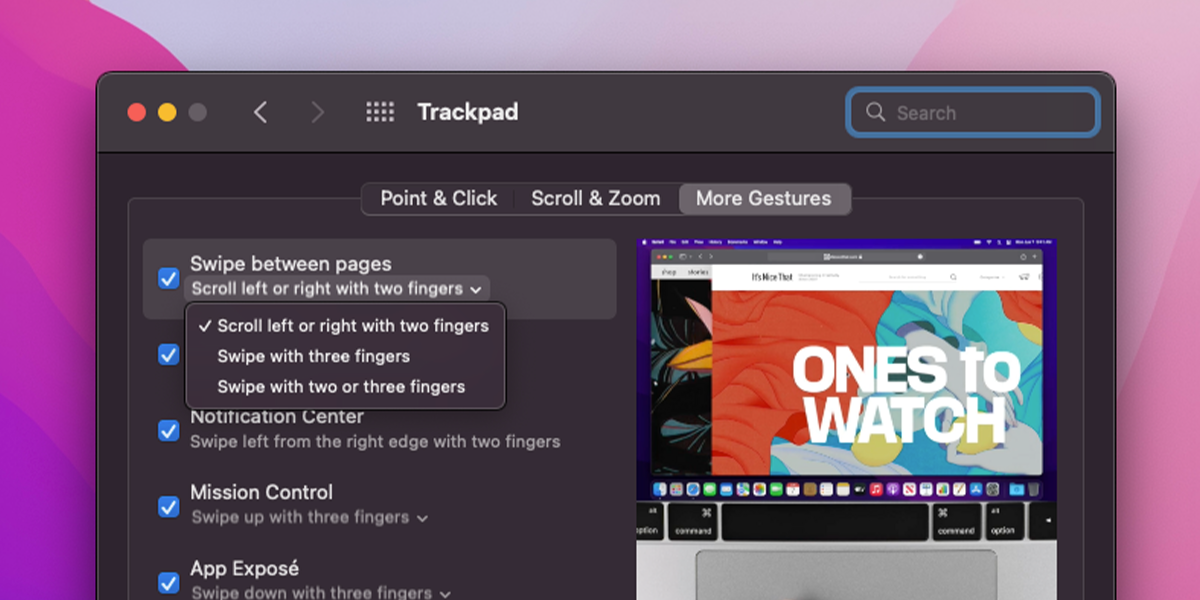
The Swipe between pages and Swipe between full-screen apps are the first two features on the More Gestures tab from System Preferences > Trackpad.
Swipe Between Pages
This gesture lets you swipe pages (go back or move to the next page) when you’re using apps like Apple Books or are browsing the web. To do this, swipe two fingers left or right on your trackpad.
You can change the gesture to Swipe with three fingers or Swipe with two or three fingers, by clicking the dropdown under the feature’s name.
Swipe Between Apps
This gesture lets you switch apps quickly when you’re using the full-screen mode on your Mac. You can do this by swiping three fingers horizontally on your trackpad, by default.
Though you can change it to swiping with four fingers, keeping it to three would allow you to swipe with either three or four fingers. This is because, with the three-fingers setting, the trackpad registers three fingers only, even if you swipe with four or five fingers!
5. Check Notifications
If you swipe left on your trackpad’s far-right edge with two fingers, you can access the Notification Center. This is the third option on the More Gestures tab.
You can look at all your alerts and notifications quickly this way, and hide the menu again by swiping right with two fingers. This feature can be turned off, but not customized.
6. Reveal Apps
Mission Control and App Exposé are perhaps the most useful trackpad gestures. Both let you view the active apps, but with a slight difference.
Mission Control
Apple’s Mission Control feature shows you all your opened apps and desktops. You can then choose to add more desktops, combine different apps in full-screen mode, and see which apps you’d like to close. This is a useful feature when you want to either organize your apps or declutter your Mac.
To access Mission Control using the trackpad, simply swipe up with three fingers. You can choose to disable this feature and also customize to make it four fingers instead of three.
App Exposé
This feature shows you all the opened windows of the active app (the app that you’re using). So, if you have two Google Chrome windows opened, and you want to switch between them, swipe down with three fingers on the trackpad. You’ll then see all the active windows. Simply click the one you want to work on, and it will become active.
You can choose to disable this feature or customize it to swipe with four fingers.
7. Open Launchpad
Launchpad helps you access your apps with a single-click. While you can access it from the Dock, your Mac’s trackpad has an easier gesture for it: pinch with thumb and three fingers.
You can disable this feature, but cannot customize it.
8. Show Desktop
The final gesture Apple’s trackpad has to offer is Show Desktop. It allows you to instantly access your desktop by hiding all the active apps. To do this, simply spread with thumb and three fingers. Reverse this gesture (or pinch) to bring back all the apps. Unfortunately, this gesture doesn’t work if you’re using an app in full-screen mode.
The Trackpad Is Magical
With this variety of gestures, Apple’s trackpad qualifies as one of the best peripherals on the market. Remember, to get the best use out of it, it’s important you tweak the settings of each feature to suit your usage and comfort.
By the way, have you used the Magic Mouse? It also offers a variety of gestures, making it another unique pointing device. But, we still think that the Magic Trackpad is better, primarily because it’s more comfortable and that you can use it while it’s charging.

