When working with a lot of tracks in Logic Pro X, it can get difficult to keep everything organized. That's where Track Stacks comes in. This fantastic feature can organize tracks into groups to save you time and energy, and more importantly, reduce strain on your CPU.
Track Stacks makes it incredibly easy to create a submix, apply group effects, and play multiple instruments at once. So if you want to get the most out of this feature, and boost your workflow, here are five different ways you can use Track Stacks in Logic Pro X.
1. Group Tracks
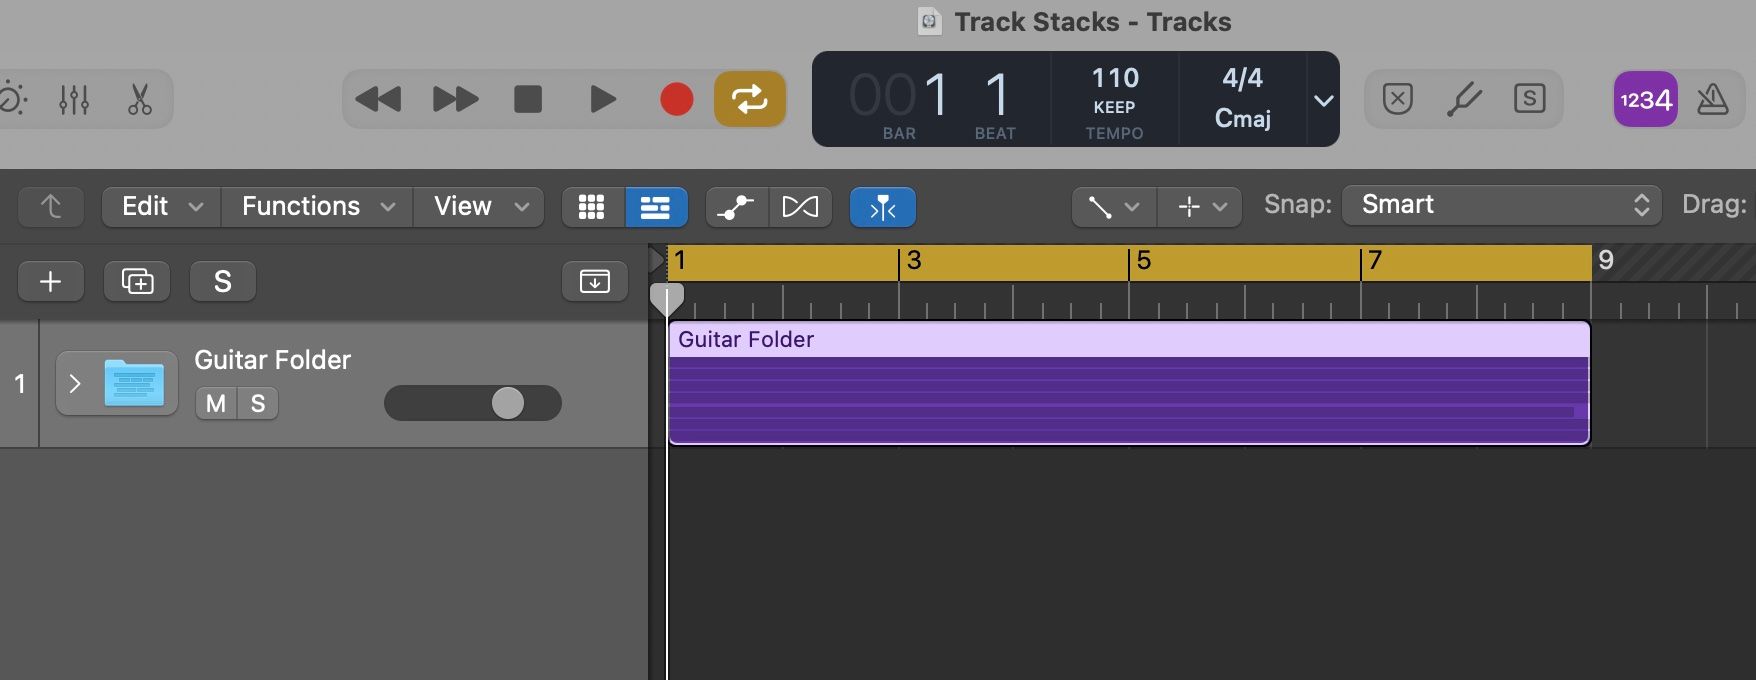
The most simple use of Track Stacks is to get your workspace organized by putting a group of tracks into a single folder. The benefits include taking up less space on the screen, and being able to mute, solo, and change the volume using just one fader in the mixer.
Hold the Shift key on your keyboard and select the tracks that you want to group together, then right-click on the track header and select Create Track Stack. When the dialogue window appears, select Folder Stack and press Create. After that, the group of tracks you selected will be put inside one single track named Sub 1.
You can go ahead and change the name of this track to whatever you like. By clicking on the track icon you can also replace the picture used to label the track. Now that you've grouped several tracks together, and labeled them how you want, it should make it easier to visually organize your work in Logic.
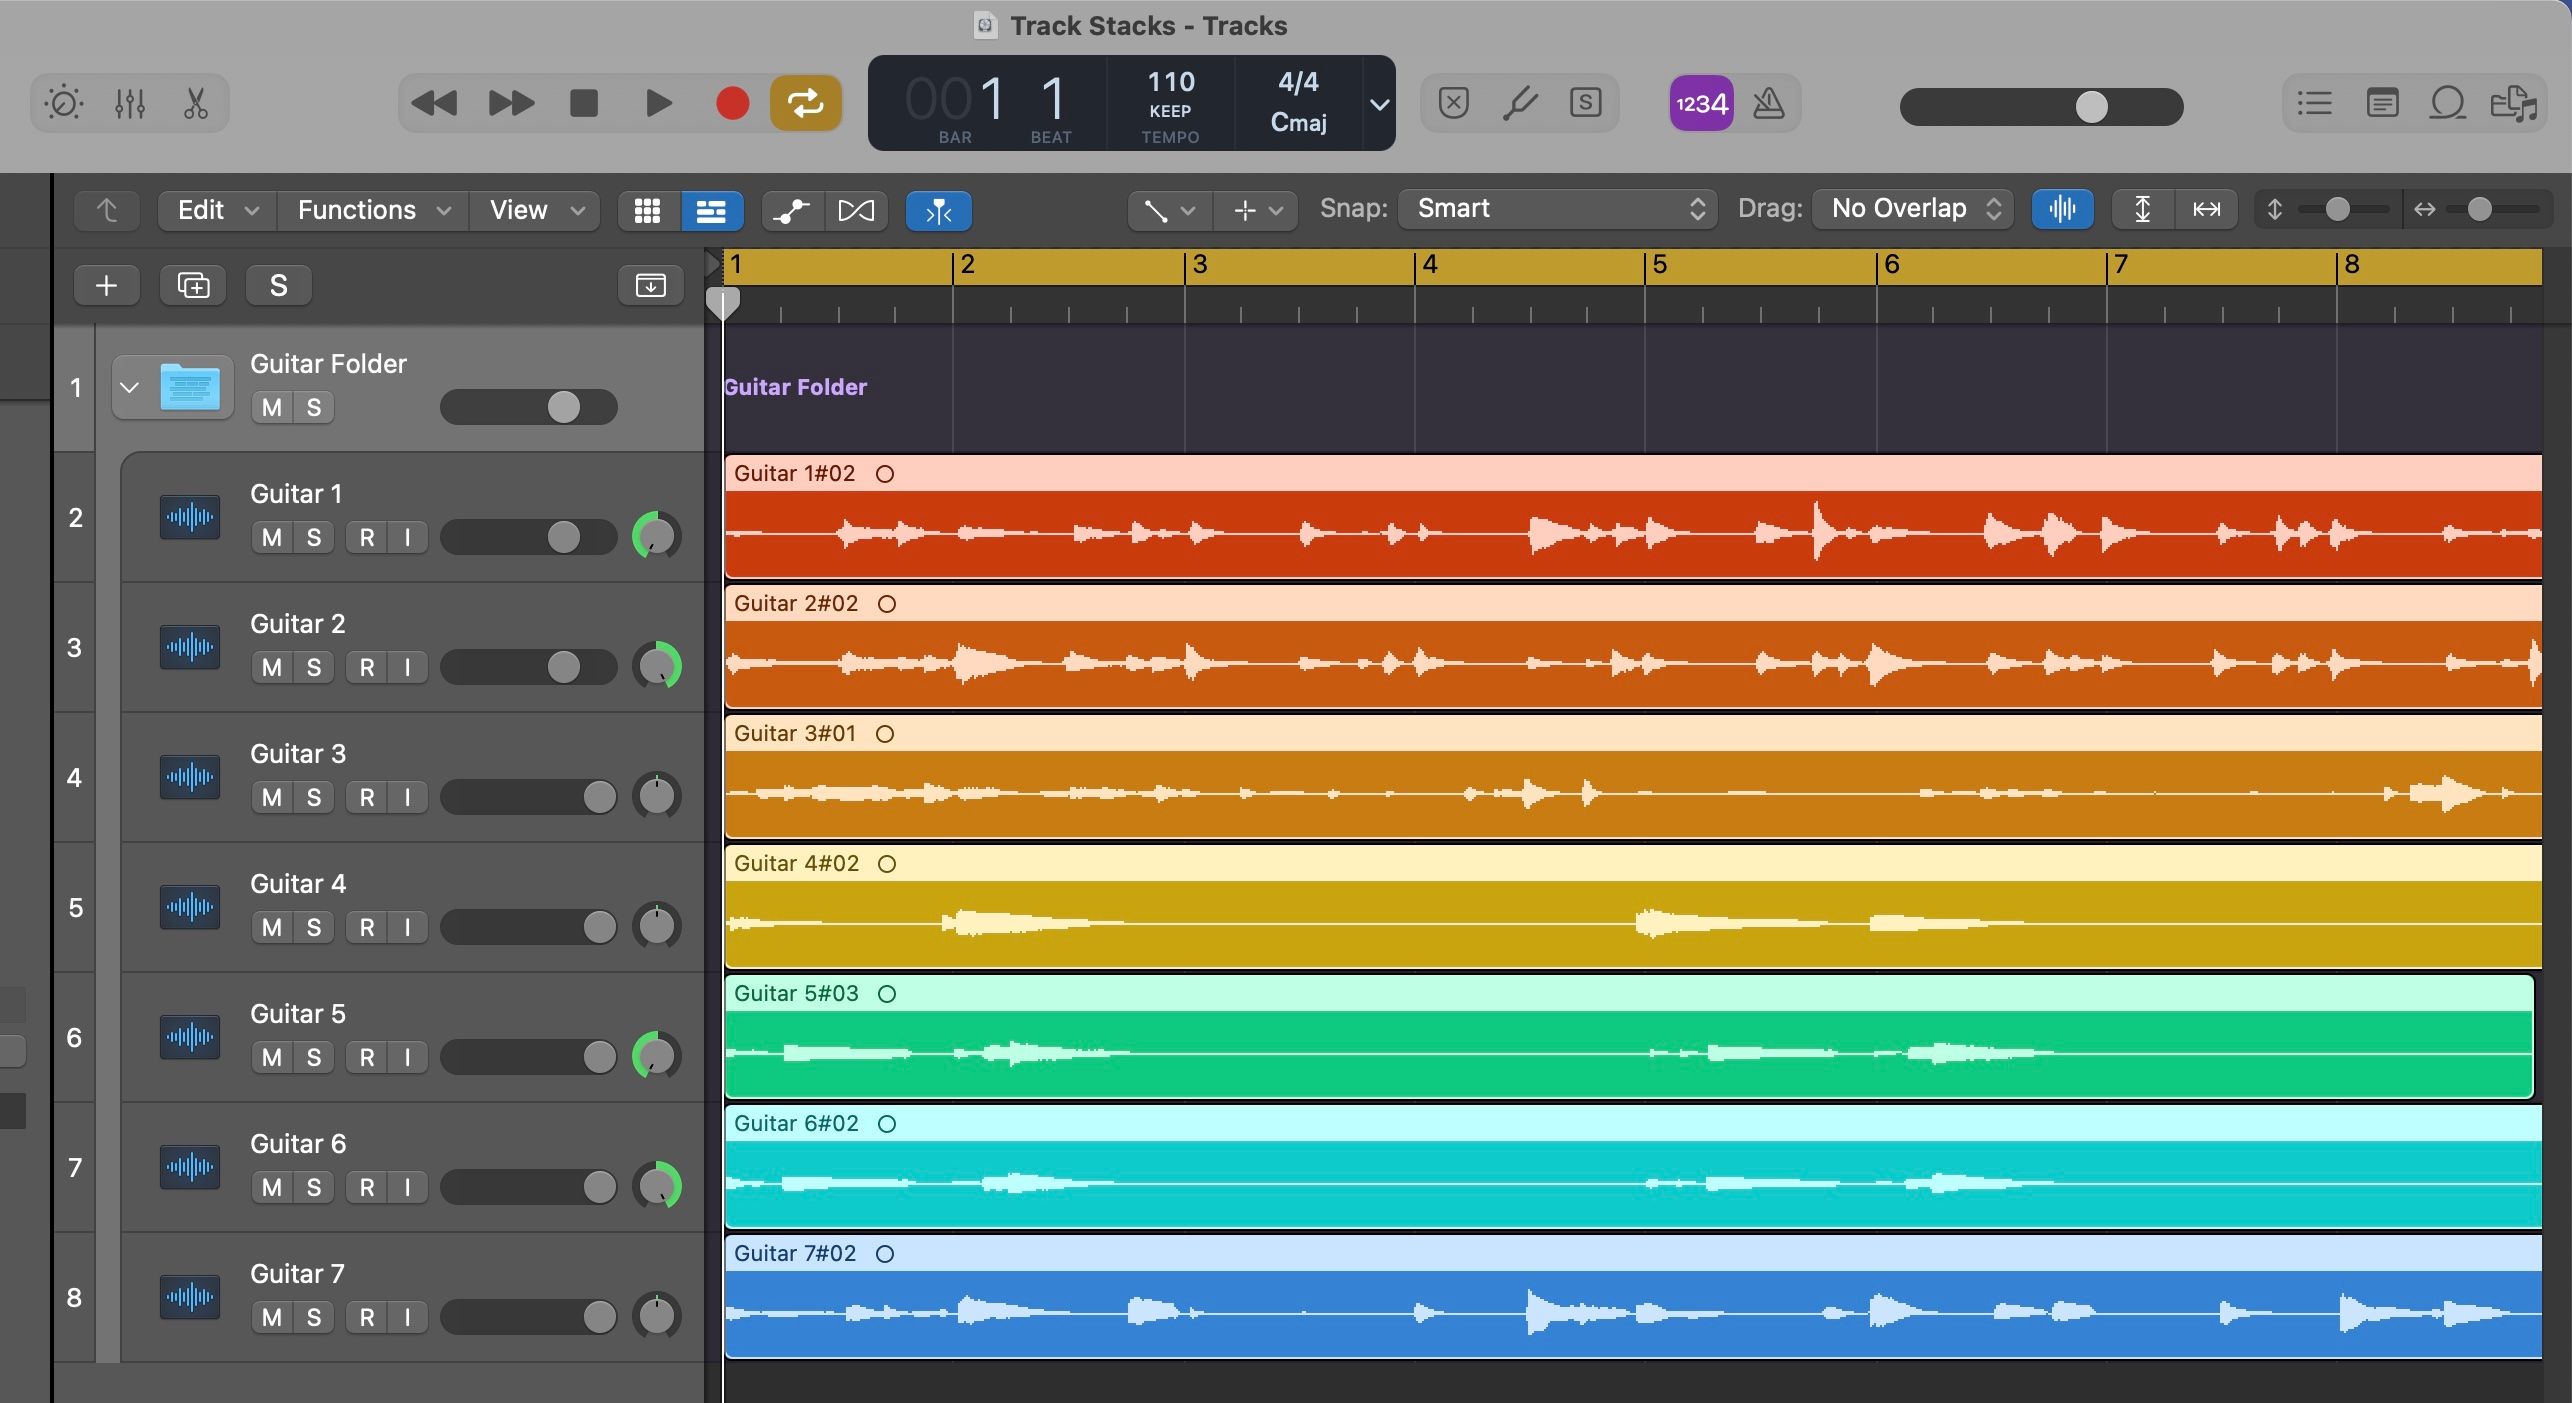
To view what's inside the folder at any point, simply click on the arrow directly next to the track icon. This will expand the folder to show every track that's grouped inside, and from there you can make individual changes to tracks as needed.
2. Create a Submix
Creating a submix is a lot easier in Logic when you create a Summing Stack with the Track Stack feature.
Hold the Shift key on your keyboard and select the tracks that you want to group together, then right-click on the track header and select Create Track Stack. When the dialogue window appears, select Summing Stack and press Create. After that, the group of tracks you selected will be put inside one single track named Sum 1.
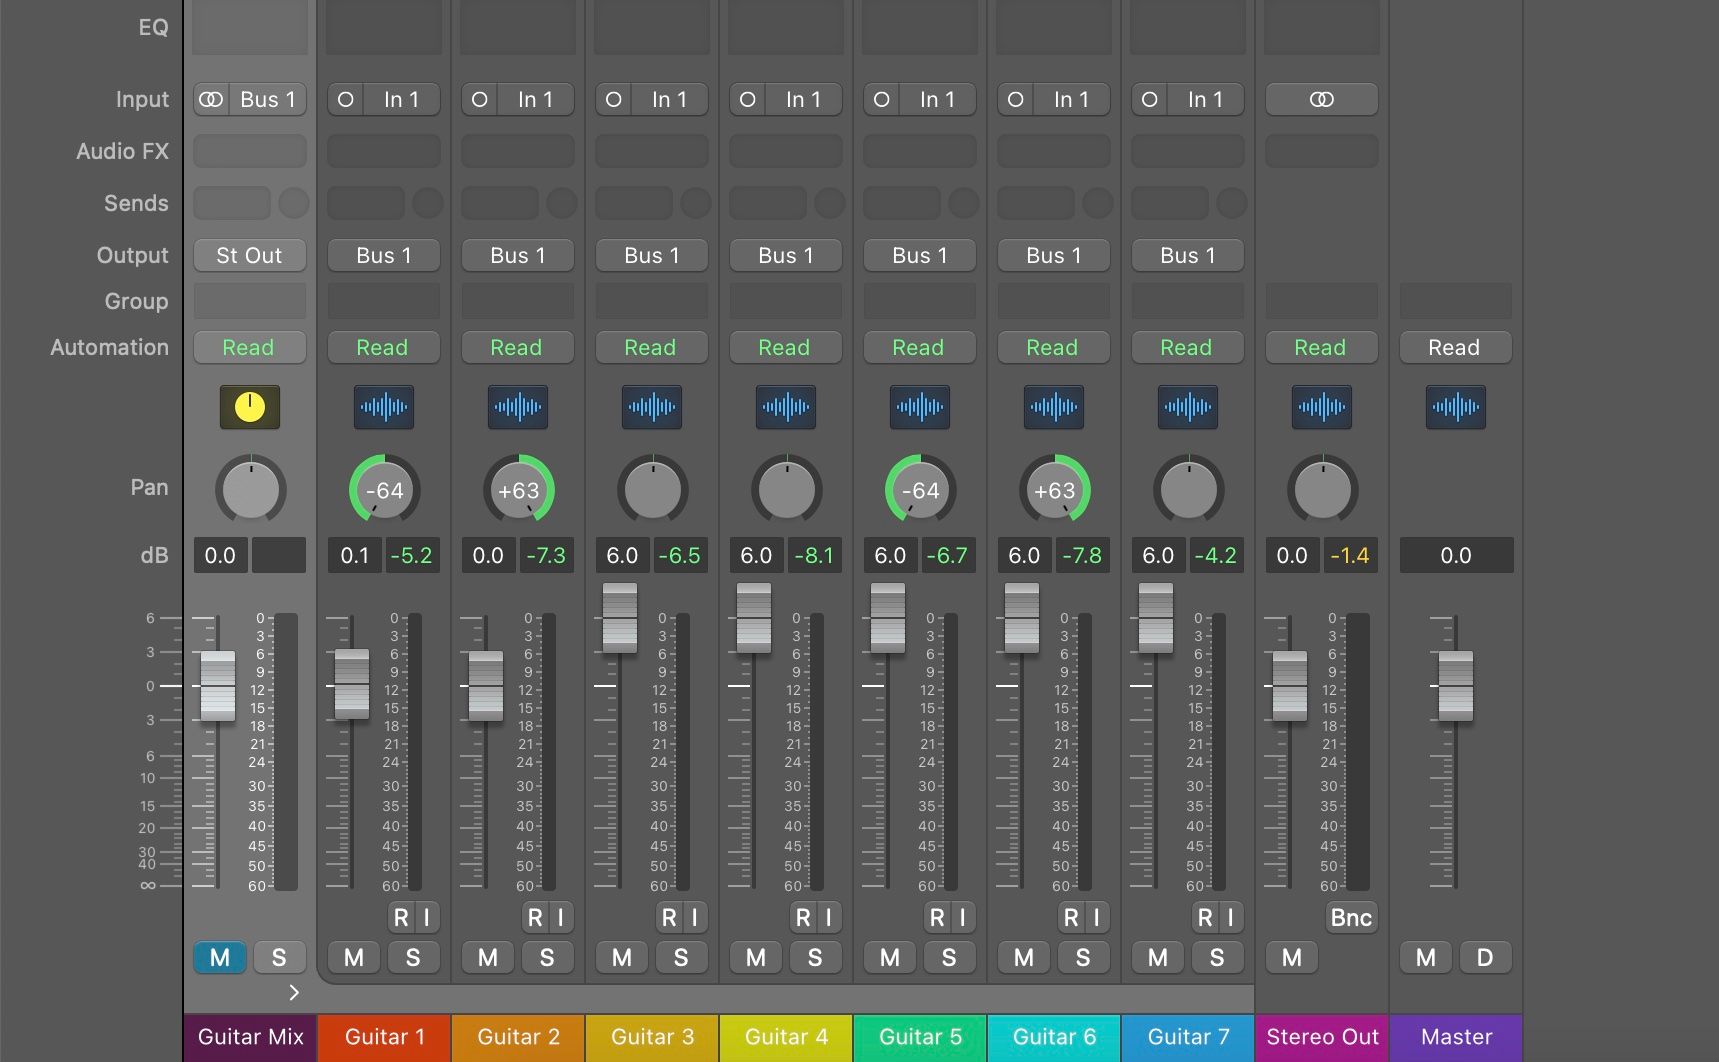
The key difference about a Summing Stack is that the tracks inside this group are now being routed to a Bus channel. Logic conveniently handles this for you now, whereas, in the past, routing tracks to a Bus would involve manually changing the input and output of all the tracks you want to group.
If you don't know much about how Bus groups work, don't worry, all you need to know is that a Summing Stack is a far easier and more efficient way to create a submix in Logic. In the next point, we will explain more about what you can do within a submix.
3. Apply Group Effects and Automation
Once you have created a Summing Stack, it's easy to apply effects and automation to the entire group by making changes to the group channel strip.
Press X on your keyboard to open the mixer window, then press the arrow above the Summing Stack name, e.g. Sum 1 or Guitar Mix in this case. This will expand the view, so you can see all the tracks inside this group. On the channel strip for the Summing Stack, click on an empty space next to the Audio FX label to add an effect plugin.
Any effects that you place on this channel strip will apply to every track within the Summing Stack, which is particularly useful for applying effects like EQ and Reverb to multiple takes of the same instrument. Applying one effect to a group, rather than the same effect to each individual track, also reduces the strain on your computer's audio processing significantly.
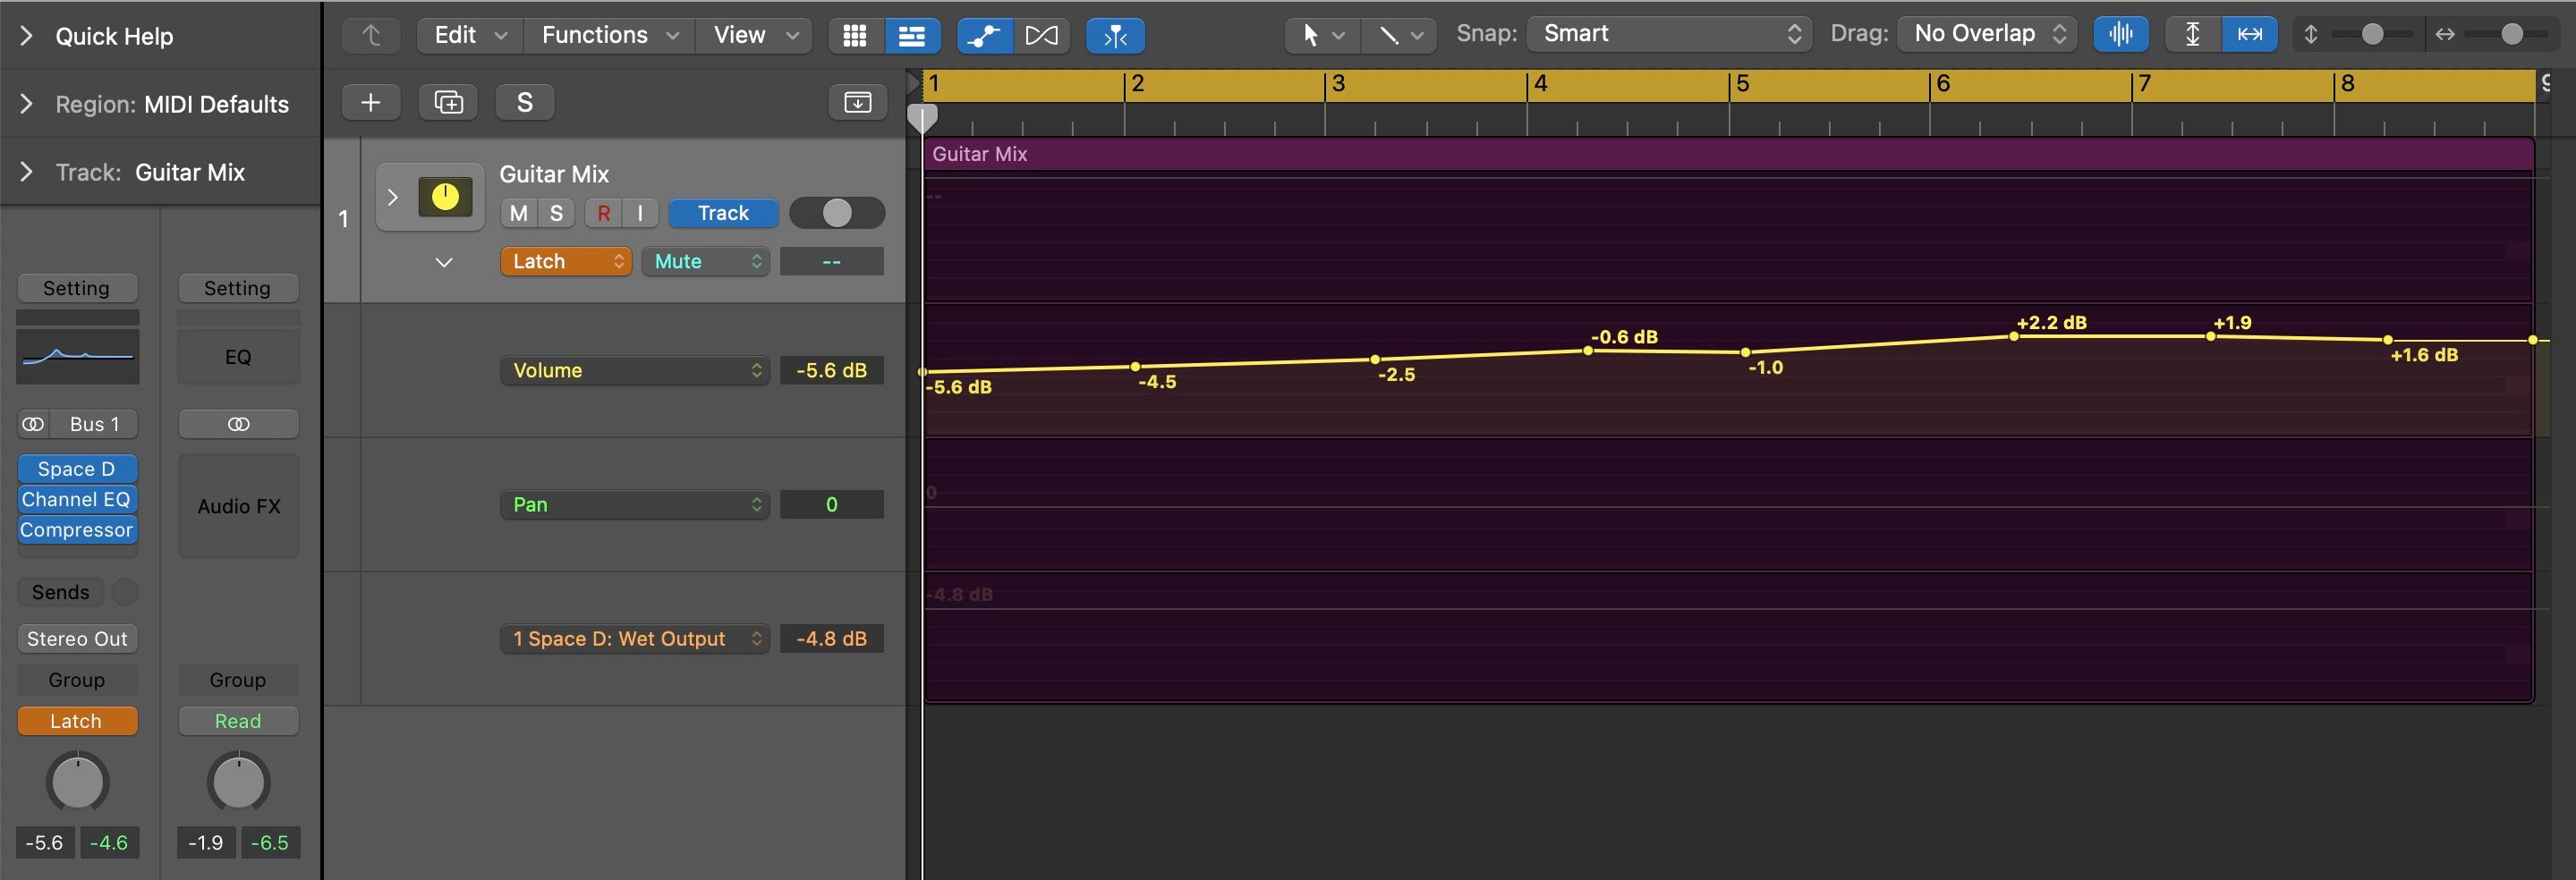
You can also do the same thing with effects automation, which is great for applying volume changes to the whole group while also preserving individual fader levels, for example. In the editing timeline, simply click the arrow beside Read to expand the automation view and make changes as needed.
4. Play Multiple MIDI Instruments Simultaneously
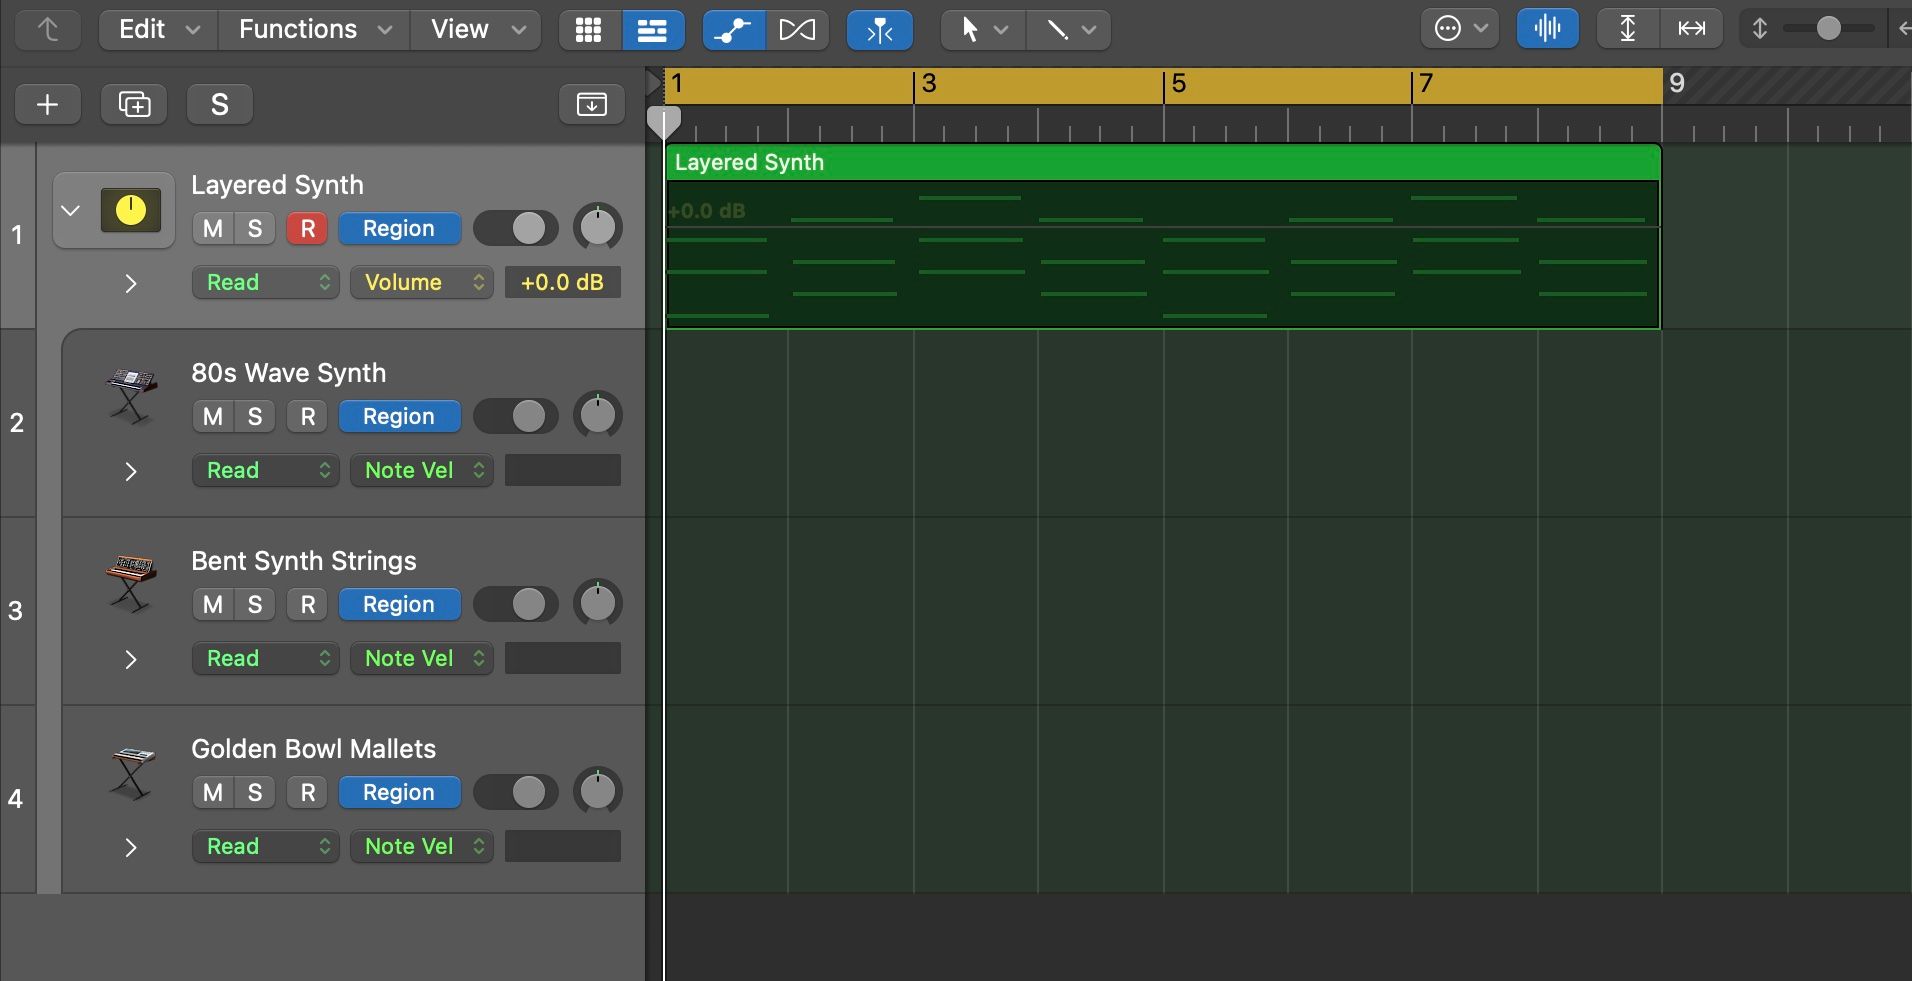
One lesser-known use of Track Stacks is playing more than one software instrument at the same time. This can be a huge time saver if you want to record different instruments playing the same melody or harmony. You can also use it to build unique textures by playing several synthesizers together.
Hold the Shift key on your keyboard and select the software instrument tracks that you want to play together, then right-click on the track header and select Create Track Stack. When the dialogue window appears, select Summing Stack and press Create. After that, the group of tracks you selected will be put inside one single track named Sum 1.
Make sure the Summing Track is selected by clicking on the track header region, then press the R button to arm the track for recording. Once you're ready, press the record button at the top of the screen to start recording your software instruments.
You will notice that a MIDI region is only created on the Summing Track, and not on each individual track. However, you can still record individual software instruments within a stack if you like. If you want to take it one step further, try setting up a spatial audio session in Logic and mixing your sounds in surround format.
5. Control Features Inside Producer Drum Kits
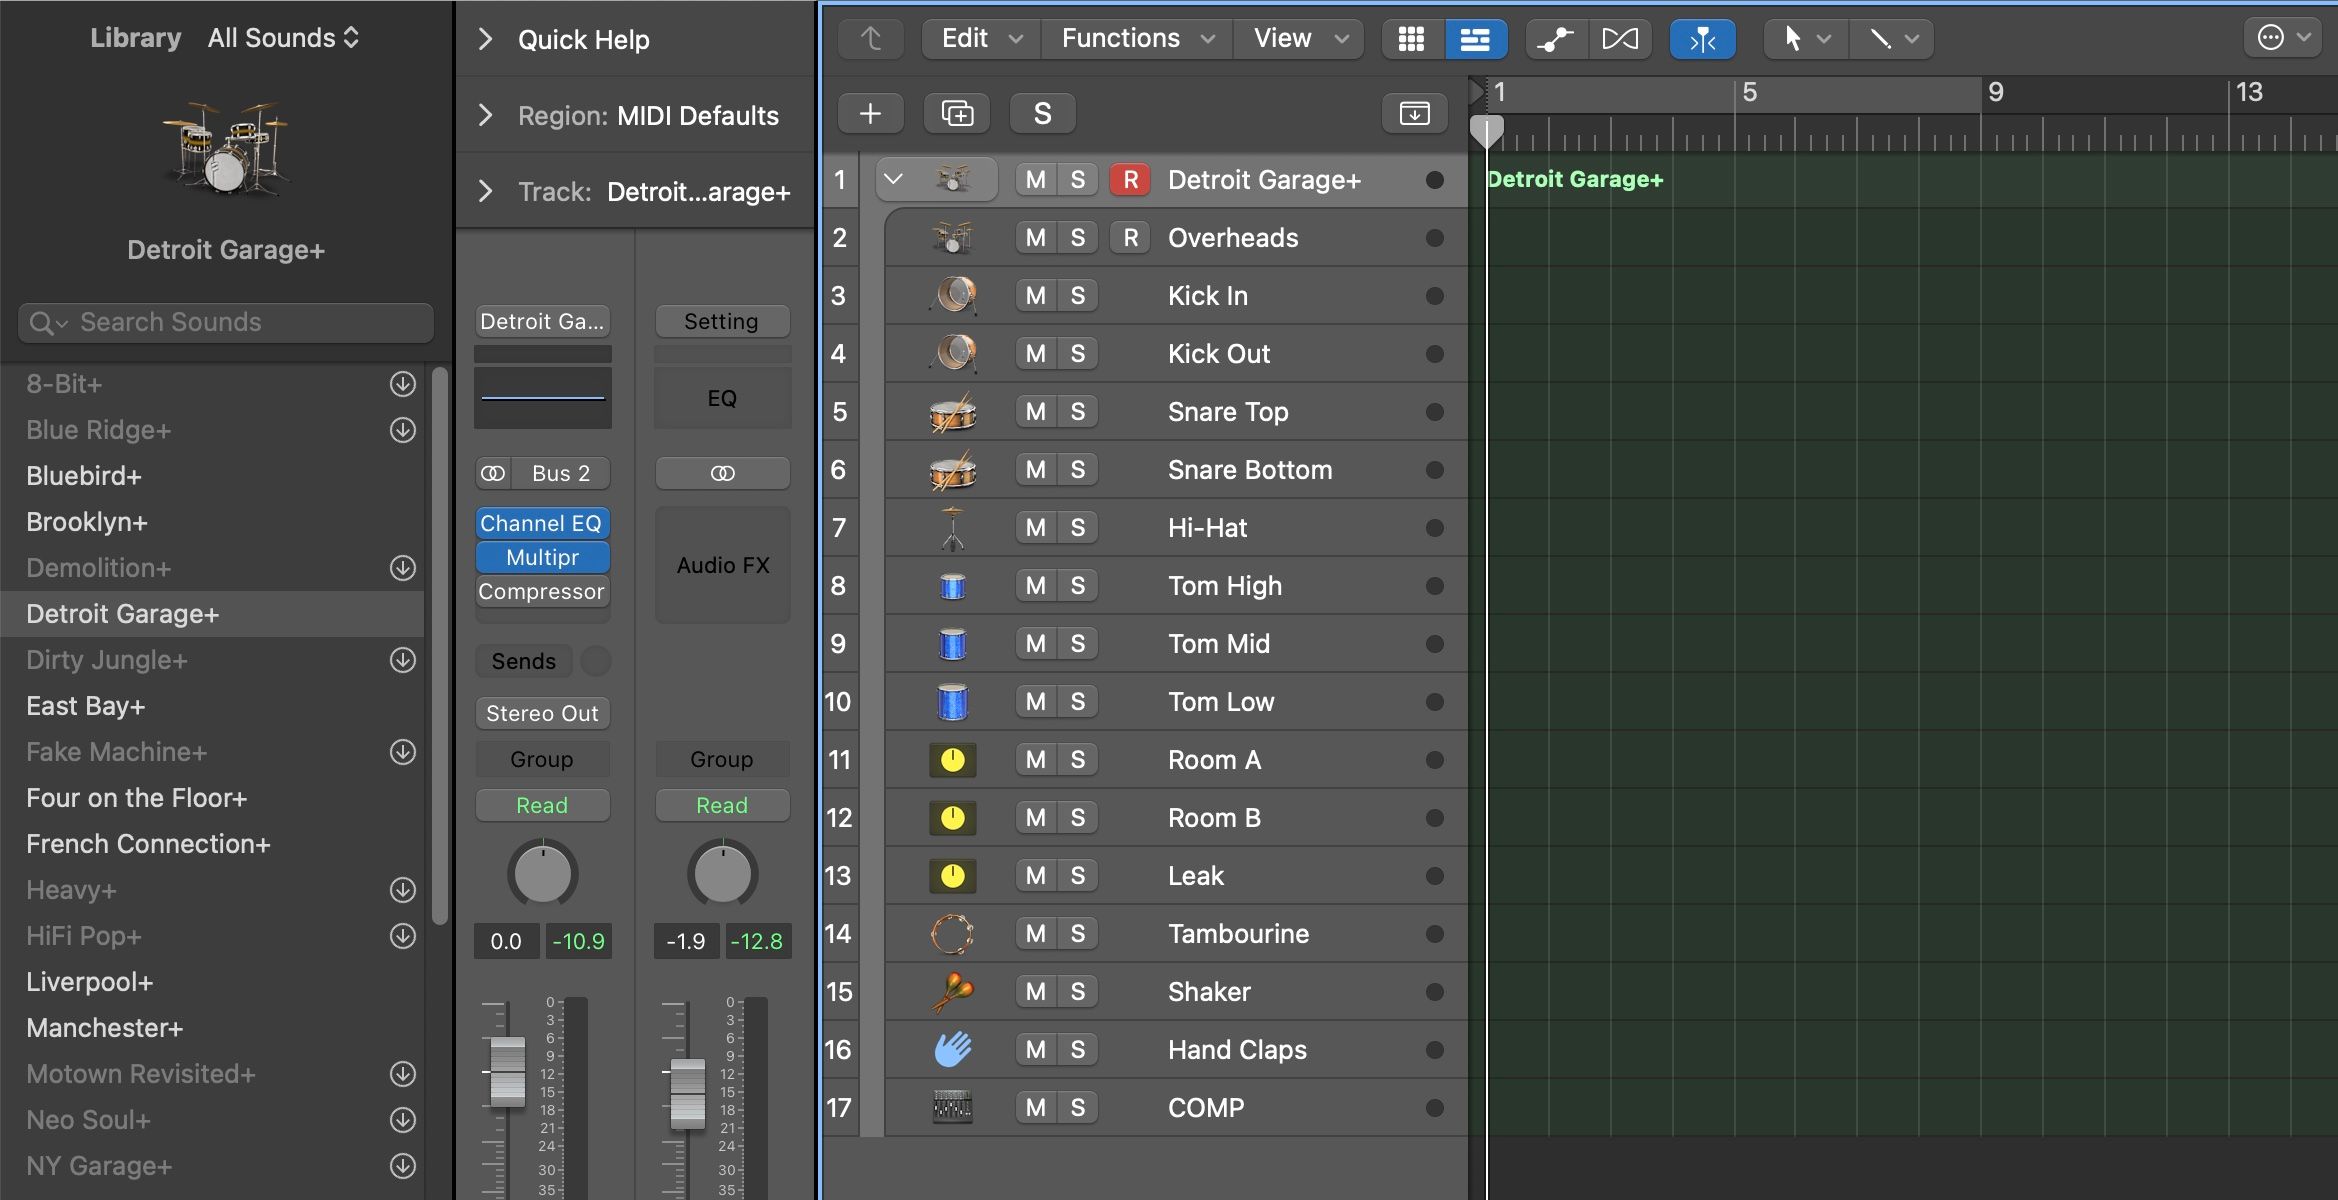
One place you will encounter Track Stacks already in use is with Producer Drum Kits. These are pre-designed MIDI drum kits that you can use in Logic, and it turns out you can tweak them by opening the Summed Stack and making changes.
Create a new software instrument track by using the keyboard shortcut Option + Command + N, then select Software Instrument and press Create. In the library panel on the far left-hand side, scroll to the left and navigate to Drum Kit > Producer Kits, then select a drum kit.
Now, you might recognize a familiar arrow next to the icon of the drum kit, indicating that you can expand the stack. Clicking the arrow will show you all the individual software instruments that make up the drum kit, such as a kick, snare, toms, and so on. This allows you to alter any of the single parts that make up the producer kit, including adding EQ, effects, and panning.
Simply looking in the mixer view will give you an idea of how the drum kit has been routed and mixed, so you can even use it to learn a few mixing tricks.
For anyone looking to upgrade their podcasting setup, make sure to check out the best mixing desks for podcasters.
Discover New Tricks With Track Stacks
The Track Stacks feature in Logic is an essential tool for organizing your Logic project and keeping your workflow running smoothly. A Folder Stack is a great tool for anyone starting out, while for seasoned producers, a Summing Track makes creating a submix effortless.
Once you've got those under your belt, try out a hidden feature like layering MIDI instruments, or digging into Producer Drum kits to craft the ultimate sound.

