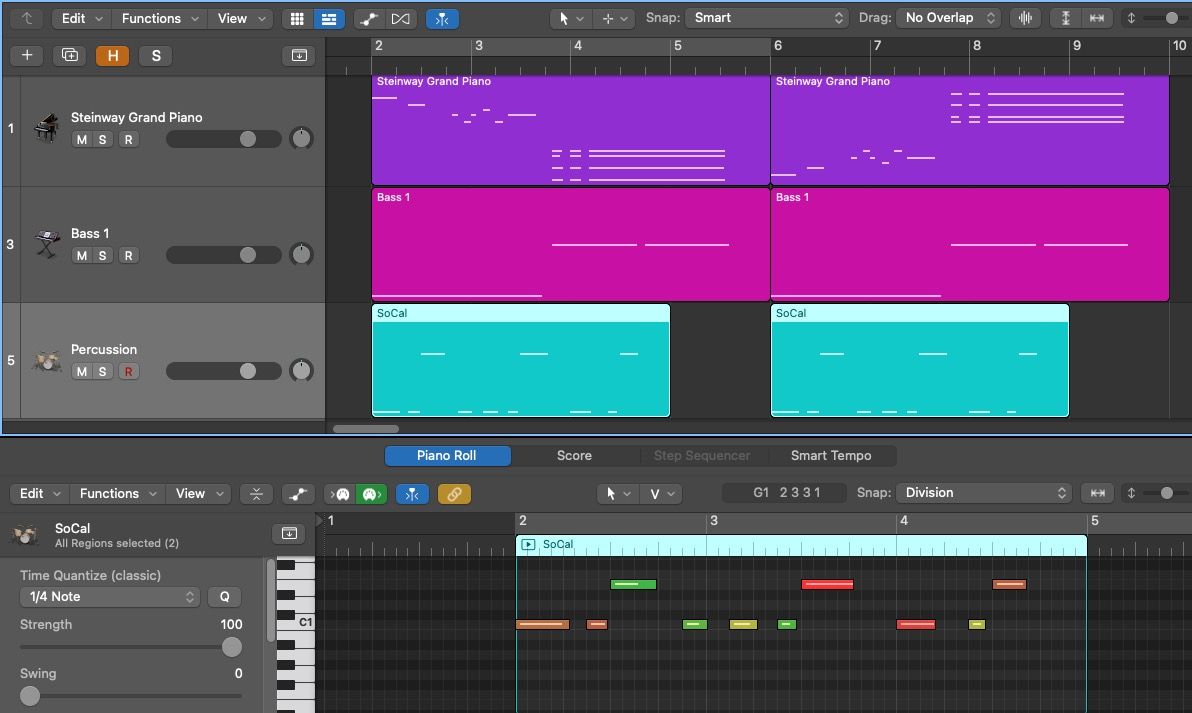
Like most digital audio workstations, Logic Pro lets you choose from a library of software instruments. When you record a software instrument, instead of generating audio regions, you create MIDI regions.
Any errors you make while recording a software instrument on a MIDI or computer keyboard can be easily corrected in the MIDI editor in Logic Pro. Learn how to use the editing tools well, and you can vastly improve the sound and feel of your digital recordings.
How to Edit MIDI in the Piano Roll Editor
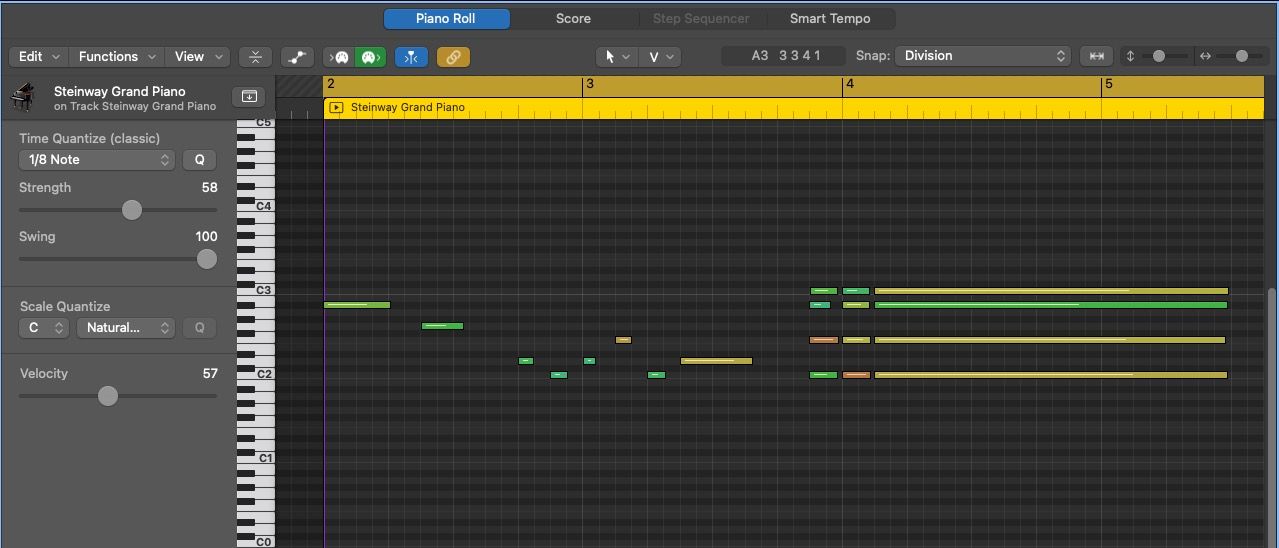
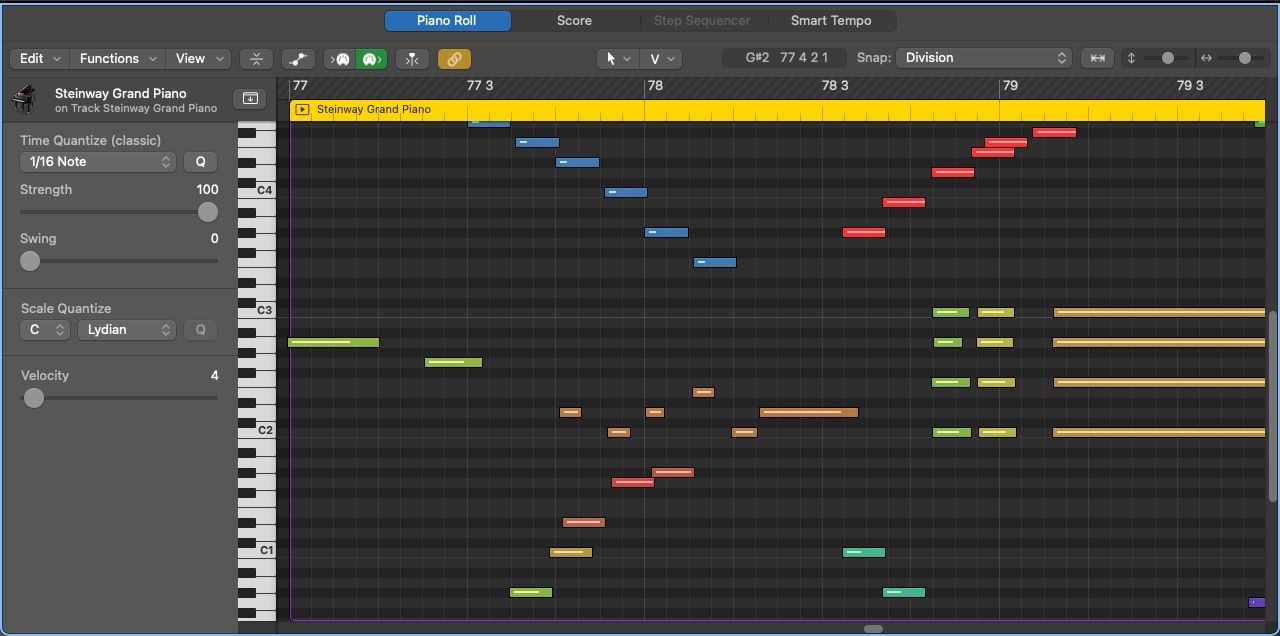
To edit your MIDI regions, open the Piano Roll Editor by double-clicking on a MIDI region. The central area lets you change the pitch, length, and timing of any note.
In the side window to the left, choose the quantization note length by clicking below Time Quantize (classic). Press the Q button on its right to activate quantization. You can use this to quickly make your MIDI regions match the tempo perfectly.
The Strength slider, below the quantize button, lets you choose the degree to which quantize changes are implemented. The Swing slider determines how much swing or marginal off-beat emphasis is placed on selected notes.
You can quantize to a set key or modality (scale type) in the Scale Quantize section. This means if you have a wrong note, you can quickly correct it by quantizing to your intended key and desired scale mode.
Use the Velocity slider to change the dynamic of each note. This differs from volume as it affects the intensity of a note, not just the volume.
You will need to carefully choose the note length you quantize at, or you may change the rhythm away from your intended outcome. Also, you can use this tool to experiment, and find out what different rhythms sound like.
Bear in mind that you can suck the life out of a recording or mix by applying perfect quantization. In this case, you can either manually move notes slightly off-center, lower the quantization Strength slider, or increase the Swing.
You can also select Functions > MIDI Transform to add life to your MIDI tracks, which we'll look into further below.
Useful MIDI Editing Tools
In case you're just getting started with Logic Pro, we'll go over the basics for efficient editing.
In the Piano Roll Editor window, use Cmd + side-arrows/up-arrows to zoom in or out horizontally/vertically. Click and drag over many notes to select many at once. You can then press Shift on individual notes to select or deselect them.
Click and drag on the left or right border of the rectangular notes to shorten or lengthen them.
You can click on notes to hear them, and drag them up or down to change their pitch. Alternatively, select a note(s) and use Alt + up/down-arrow keys to change their pitch up or down a semitone.
Use the keyboard shortcut Shift + Alt + up/down arrow keys to raise or lower selected notes by an octave. Similarly, hold Shift + Alt while applying velocity or note length edits to make all selected notes have that velocity or note length.
If you're interested in editing the timing and pitch of audio regions, consider looking into our guides on how to use Flex Pitch and Flex Time in Logic Pro.
The Piano Roll Editor Tool Menu
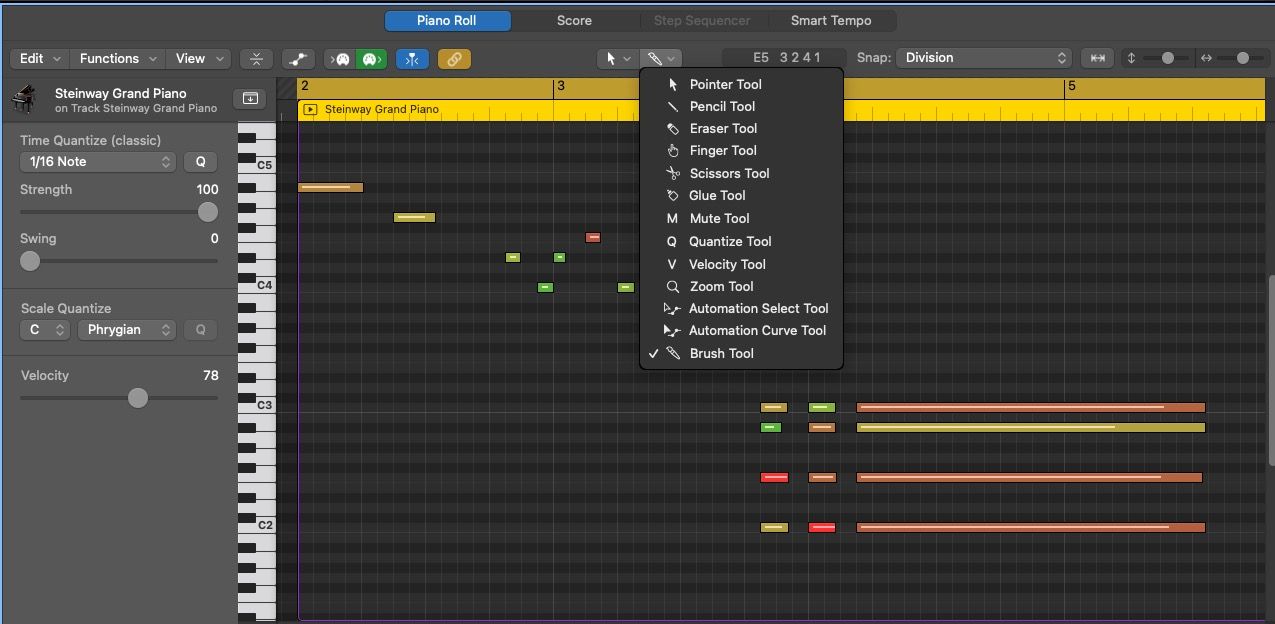
Similar to your Workspace area, various tools are available to choose from in your left-click tool menu and Cmd-click tool menu. These can be found in the top-center of your Editor window.
By default, the Pointer Tool is selected as your left-click tool, and the Pencil Tool as your Cmd-click. Hold Cmd and click to use this second option.
Pencil Tool
The Pencil Tool lets you create notes wherever you click. Drag to the left or right after clicking to alter the note length. The note length is determined by the length of the last note created.
Brush Tool
The Brush Tool lets you create multiple notes wherever you click and drag. The pitch of the note depends on where your cursor is on the vertical scale, and the note length depends on the quantization note length selected in the side-window.
Other Tools in the Tool Menu
There are a few other tools in the Tool Menu that you may or may not want to integrate into your workflow:
- Velocity Tool: Drag up or down over notes to increase or decrease velocity.
- Scissors Tool: Split notes at the cursor.
- Glue Tool: Merge multiple selected notes into one.
- Finger Tool: Drag sideways to shorten or lengthens notes.
- Mute Tool: Mute selected notes.
- Quantize Tool: Apply quantization to selected notes.
- Zoom Tool: Click and drag over notes to zoom in on them. Click again to zoom out.
- Automation Select Tool: Select multiple automation points in the automation track (keyboard shortcut A).
- Automation Curve tool: Apply different curves between two automation points.
- Eraser Tool: Delete selected notes.
MIDI Transform in Logic Pro
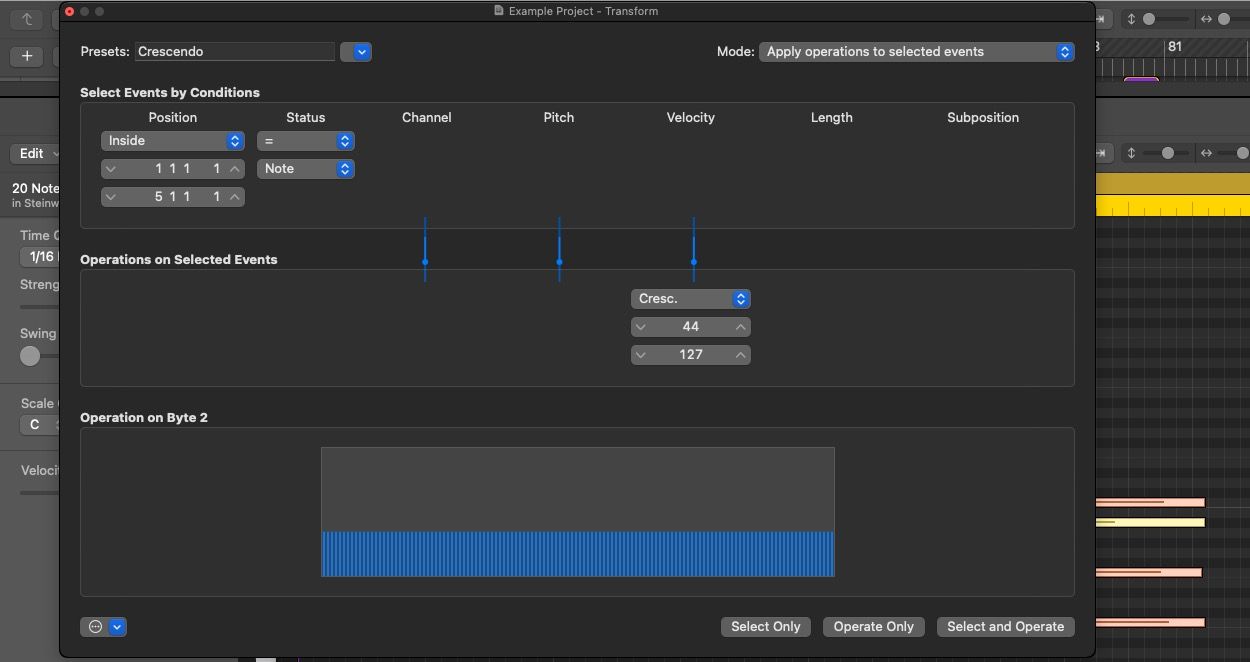
One of the best tools you can use to enliven your robotic sounding MIDI files is the MIDI Transform function. To view the MIDI Transform options, navigate to the top-left of your Editor window, and press Functions > MIDI Transform after you have selected a group of notes.
Select the Crescendo option to create a gradual increase in velocity after you input the original and final velocity value. You can also use the Humanize option to make small random shifts in velocity, or the Randomize Velocity function to apply this effect to a greater degree. Click Operate Only in the MIDI Transform window to apply these functions.
This can dramatically alter a monotonic sound into something that feels alive. Experiment with these functions, and you can stumble upon new ideas while generally improving your MIDI regions. You can also reverse your audio in Logic Pro to generate even more interesting sounds and creative options.
What Are the Best MIDI Editing Tools for You?
As you may have noticed, there are multiple ways to apply the same changes to your MIDI regions. For example, you can use the Velocity slider or backspace instead of the Velocity Tool or the Eraser Tool. While certain editing tools could be called the best for editing MIDI regions, everyone's workflow is different. What works well for you may not work well for someone else.
Find out what tools suit and improve your workflow by trying them all. Your creative process will determine what best fits your creative and editing style. While you may get comfortable using one set of tools, don't forget to experiment with new tool combinations to see if you can gain an inch in your editing time or overall creative output.
You can also try to organize your Logic Pro sessions to a professional standard to save you even more time when editing and creating.
Bring Software Instruments to Life
The MIDI editing tools available on Logic Pro not only let you guarantee rhythmic perfection but also let you add dynamics and randomness to bring the digital sound to life.
Select the right note length division and quantize sections of your MIDI regions to make sure nothing is out of time. Use the Strength and Swing sliders to lessen or increase the impact of quantization and the Velocity slider to alter the dynamics of each note. Set your MIDI regions to a specific scale, and improve your workflow by using the best MIDI editing tools for you. Then, make the most of the MIDI Transform function to add a spark and flow to your MIDI regions.

