When editing your photos, you’ll likely choose either Adobe Lightroom or Photoshop. And considering that both tools are relatively complex, you might find it beneficial to focus on learning one for a few months—before doing likewise with the other.
But as you become more proficient with both platforms, consider using them together. In fact, many of your favorite creators do precisely that.
Using Lightroom and Photoshop together has several advantages. You can make deeper edits to your images, remove unwanted sections of your pictures, and much more. Here are the ways you can use Lightroom and Photoshop together.
How to Get Adobe Lightroom and Photoshop Together
Before we look at how you can use Adobe Lightroom and Photoshop together, let’s discuss how you can get both programs. To use the full versions of Lightroom and Photoshop, you’ll need to get an Adobe Creative Cloud subscription.
The best way to use Lightroom and Photoshop together is by purchasing the Photography Plan. You can choose whether you want 20GB of cloud storage or 1TB; the former is the most affordable option.
Adobe’s 20GB Photography Plan costs $9.99 per month. Meanwhile, the 1TB subscription will cost you $19.99 monthly. With both, you’ll get both Lightroom Classic and Creative Cloud—in addition to Photoshop.
If you’re a student or teacher, you can get the Creative Cloud All Apps subscription for $19.99 per month. You’ll get access to useful video editing tools in Adobe Premiere Pro, plus plenty of other apps—so you might want to consider that if you’re more multifaceted.
At the time of writing, Adobe doesn’t have a one-time purchase for Photoshop or Lightroom.
How to Use Photoshop and Lightroom Together
Let’s look at how you can use the two platforms to edit your photos better.
1. Image Previewing
Before you edit your images, you’ll want to look at which ones you’d like to alter—and those you’d rather leave. Of the Adobe editing tools, Lightroom Classic is the best option for this.
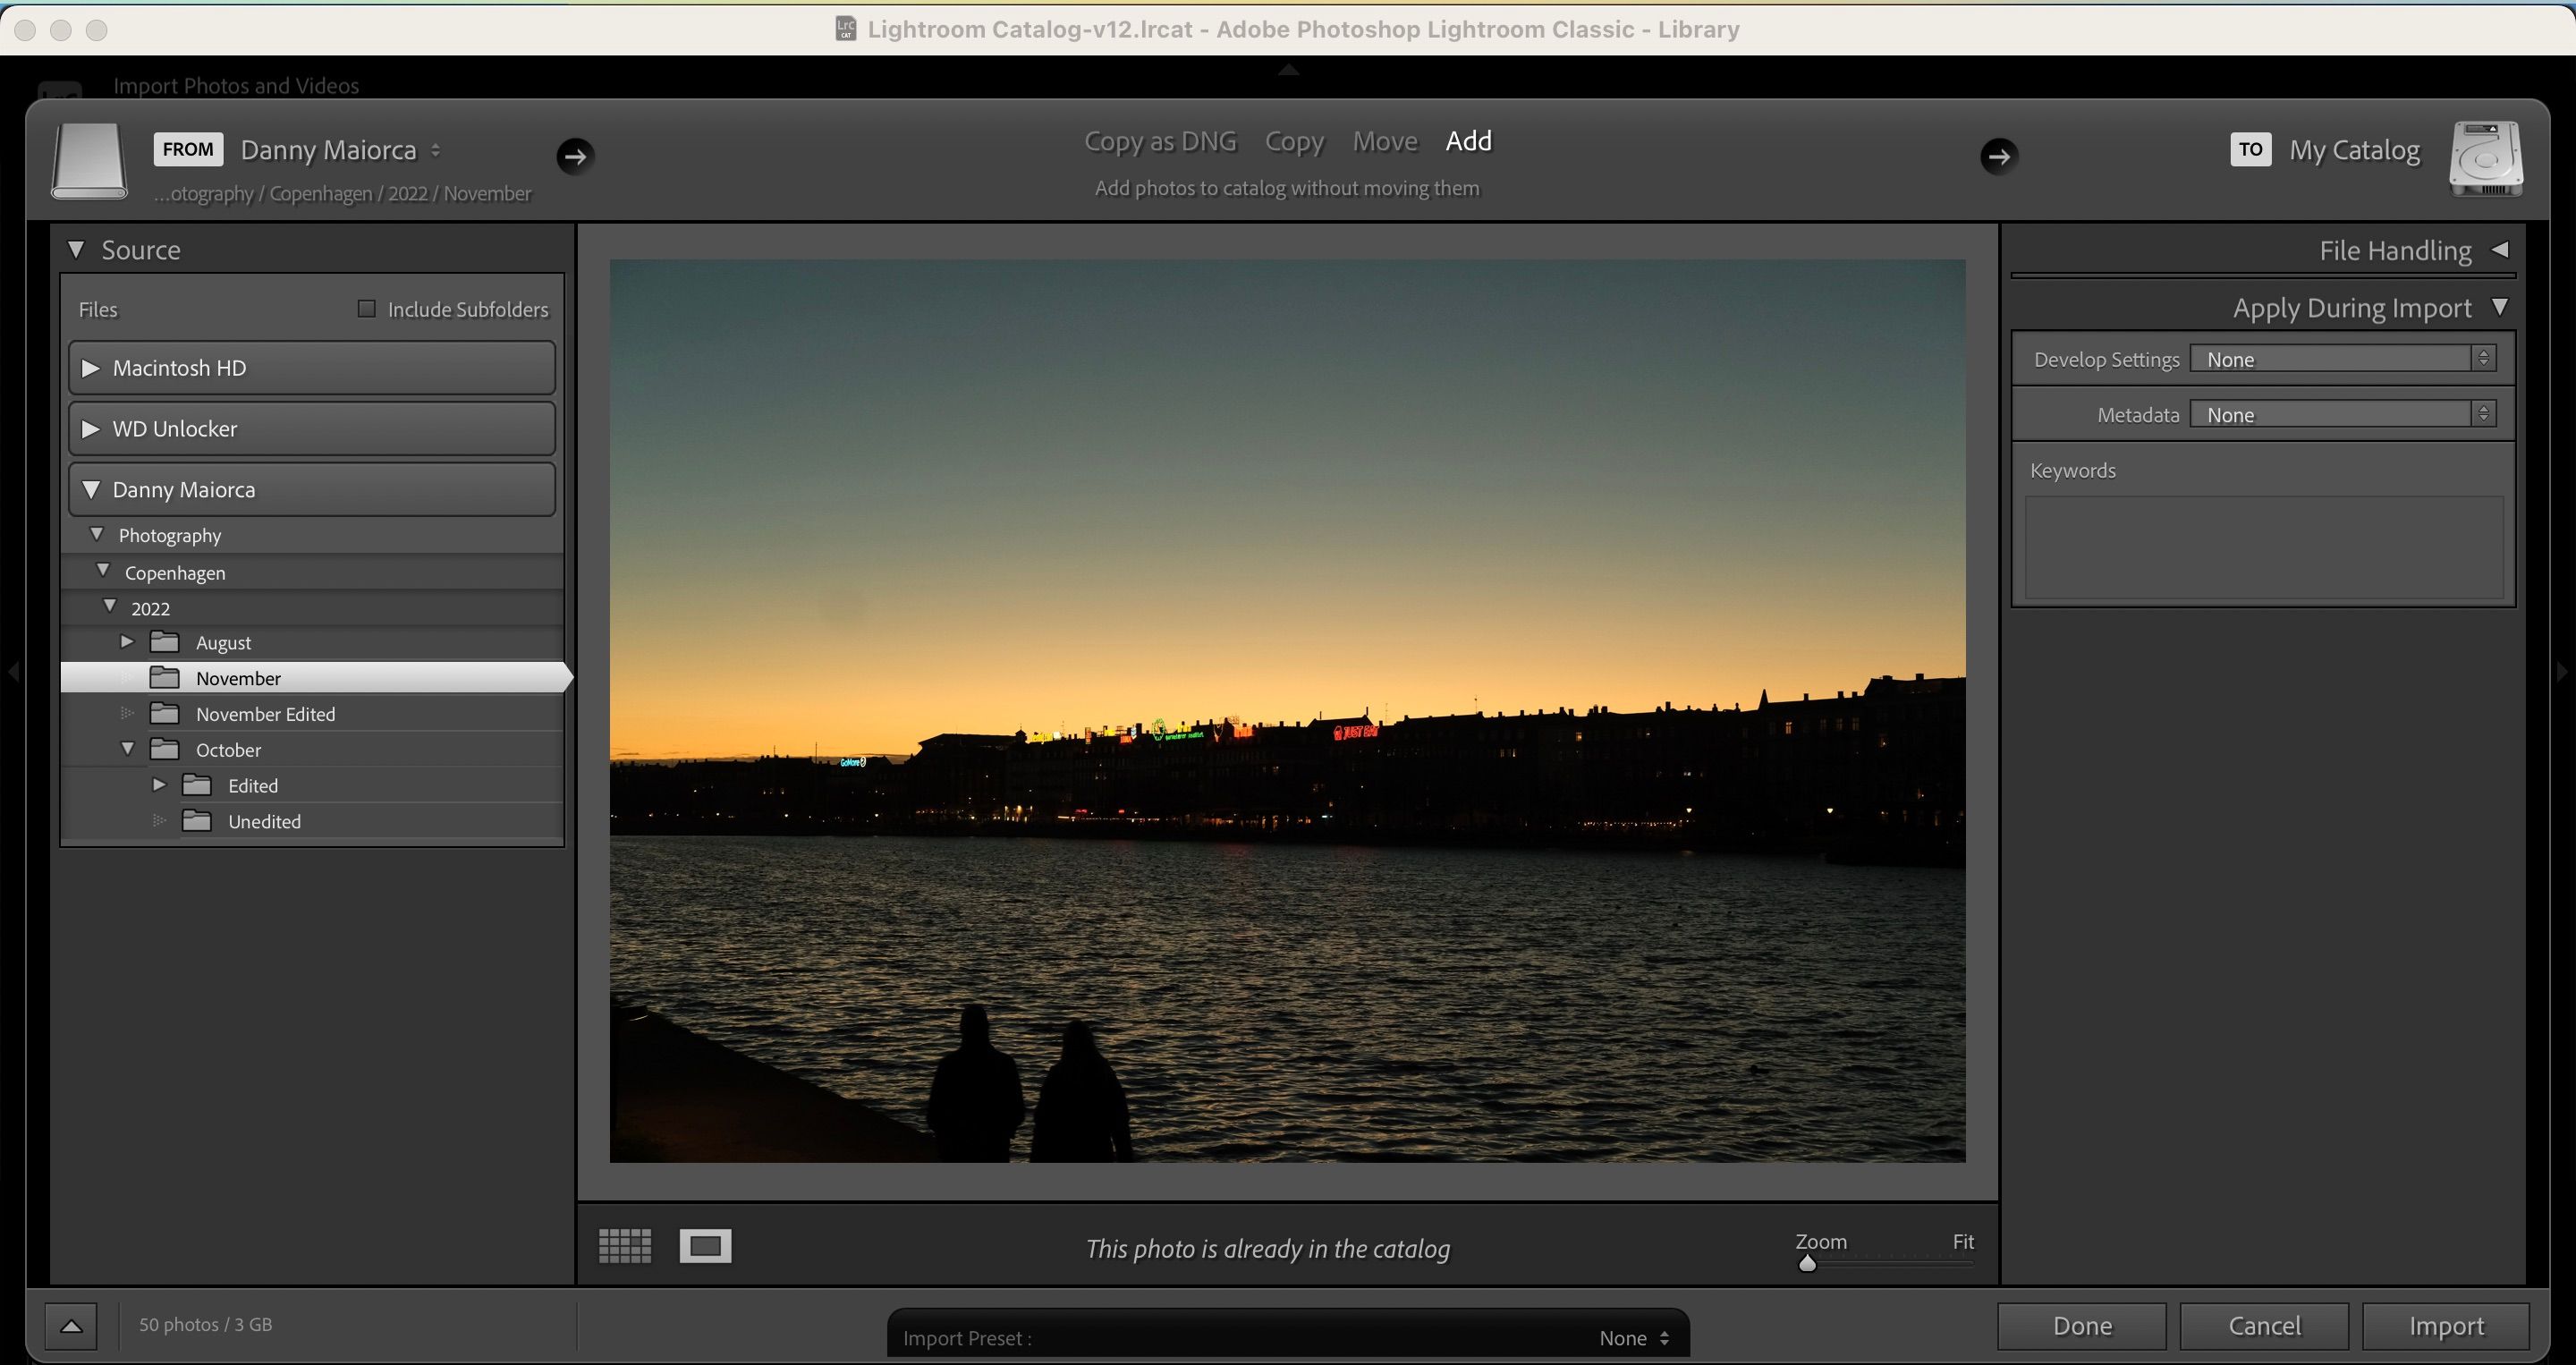
When you select the drive to import your images into Lightroom, you can double-click on an image to see a full-size preview. Once you’ve ticked the pictures you’d like to add into the app, you can click on the Import button and begin editing.
Before importing your photos to Lightroom, you can also use the Zoom/Fill slider in the bottom right to zoom in and out. Doing so will help you determine whether your picture is too blurry, and it’ll also help you catch other unwanted things before continuing editing in Lightroom and Photoshop.
2. Retouching Images
Once you’ve made the initial edits in Lightroom, there might be additional issues you can’t remove using the app. In these instances, you can always use Photoshop to get rid of these distractions instead.
In Photoshop, you will find a considerable suite of retouching tools available. For example, the Patching tool can replace specific areas in your photo. You will also find a Spot Healing option that works similarly to the one in Lightroom.
Photoshop also has Eraser and History Brush tools, both of which are useful for helping you achieve your desired results. You can also use different features to brighten and darken specific areas of your photo.
3. Initial Color Grading
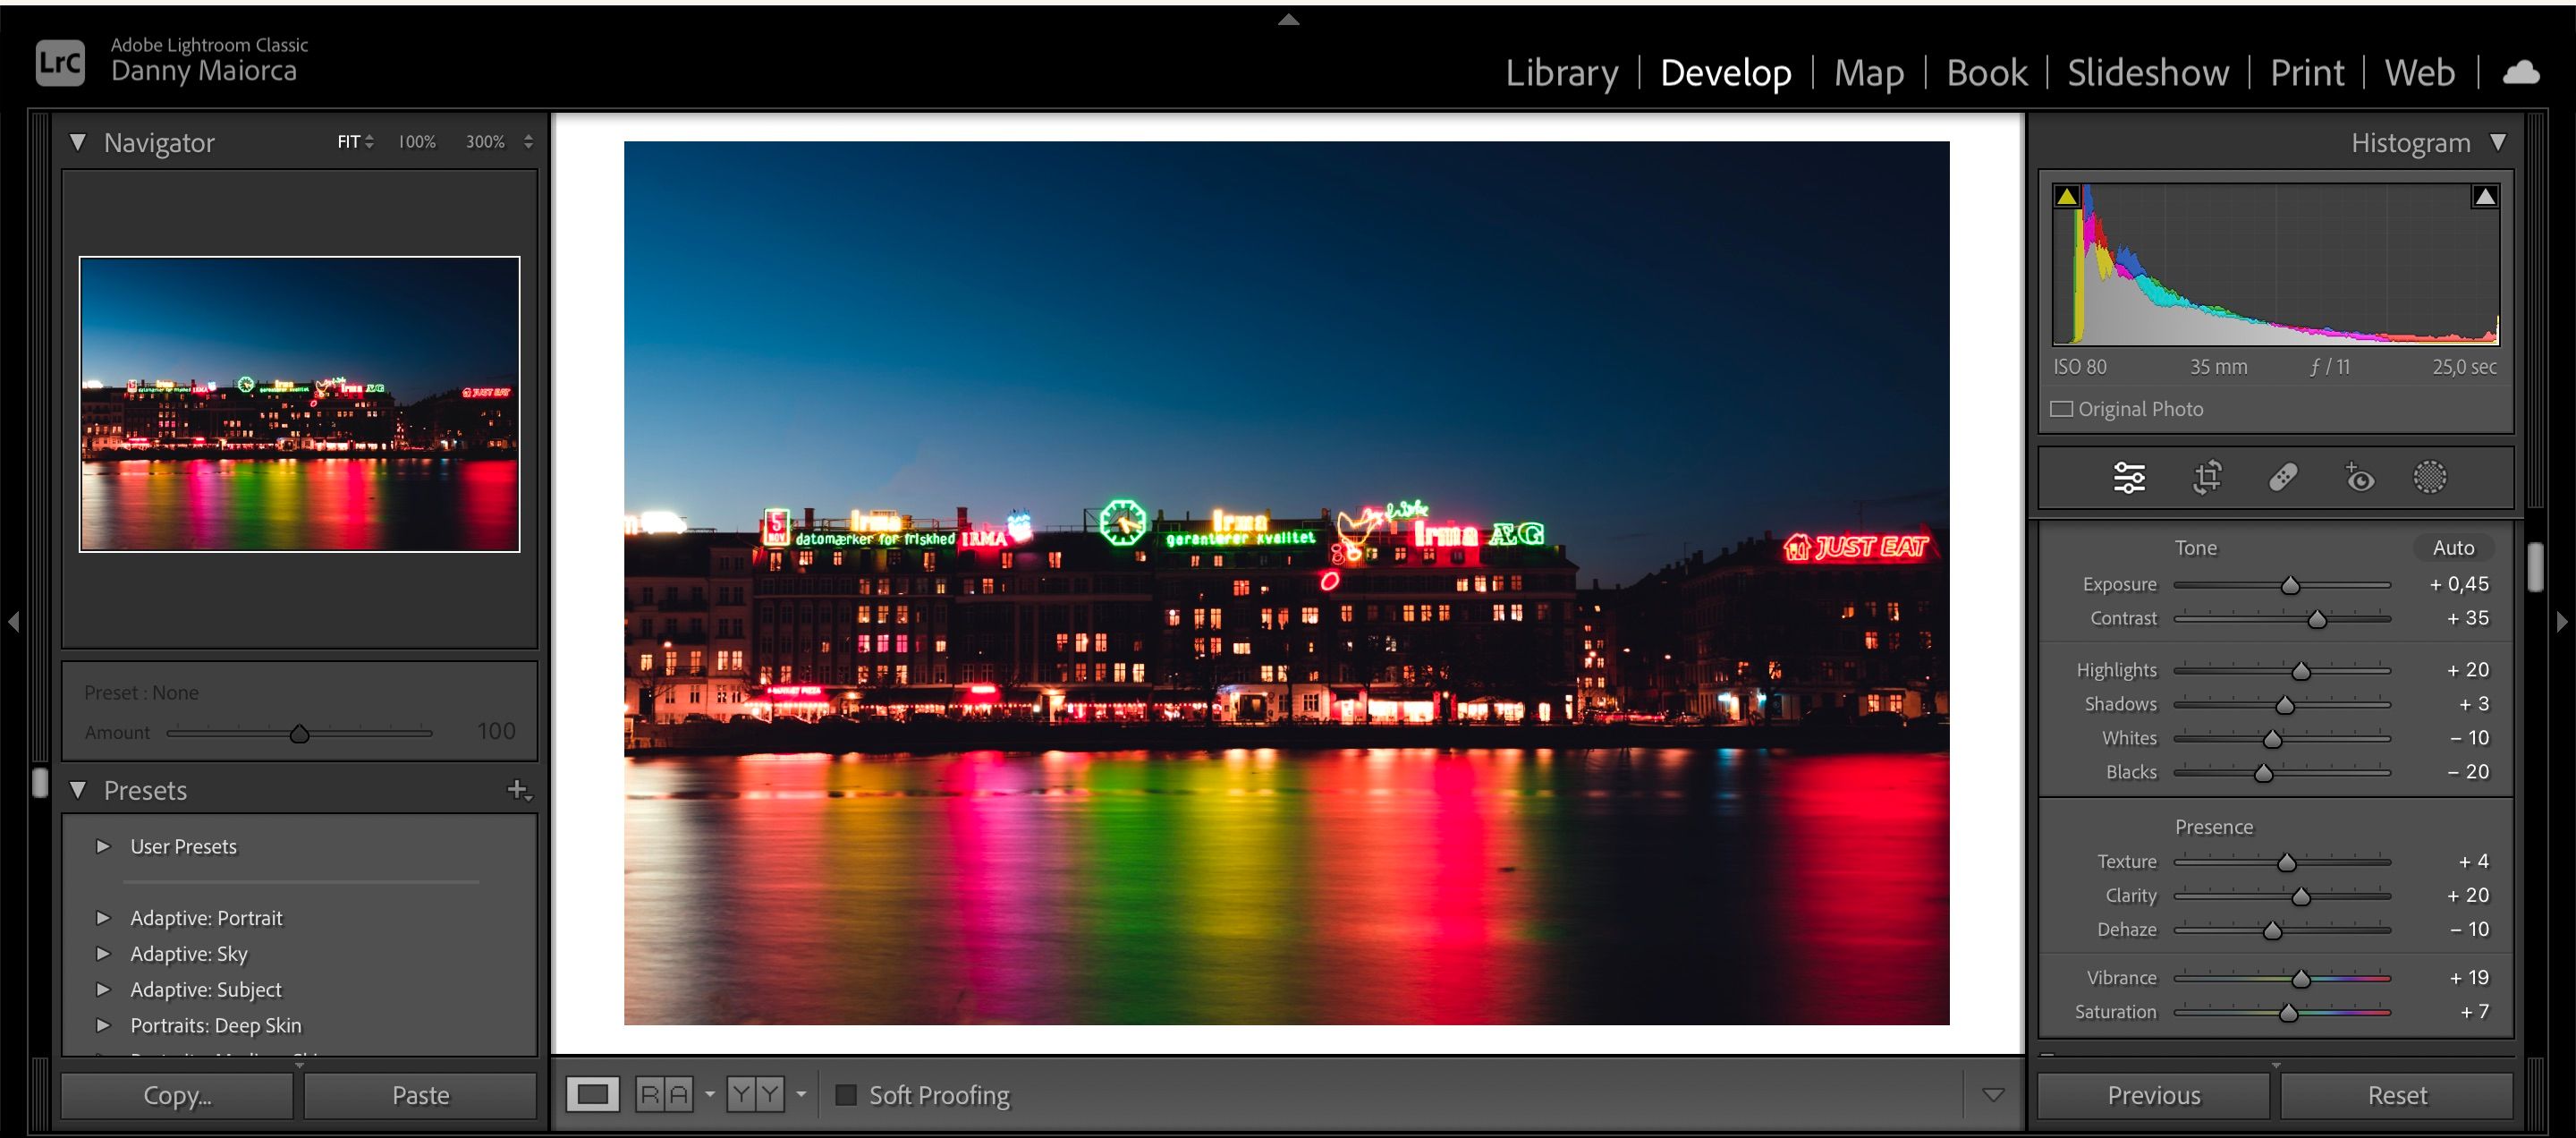
When you want to edit the initial parts of your photo, Adobe Lightroom is the best place to start. You can use the Vibrance and Saturation sliders to adjust the overall picture, for example. And to tweak specific colors, you can use the HSL section.
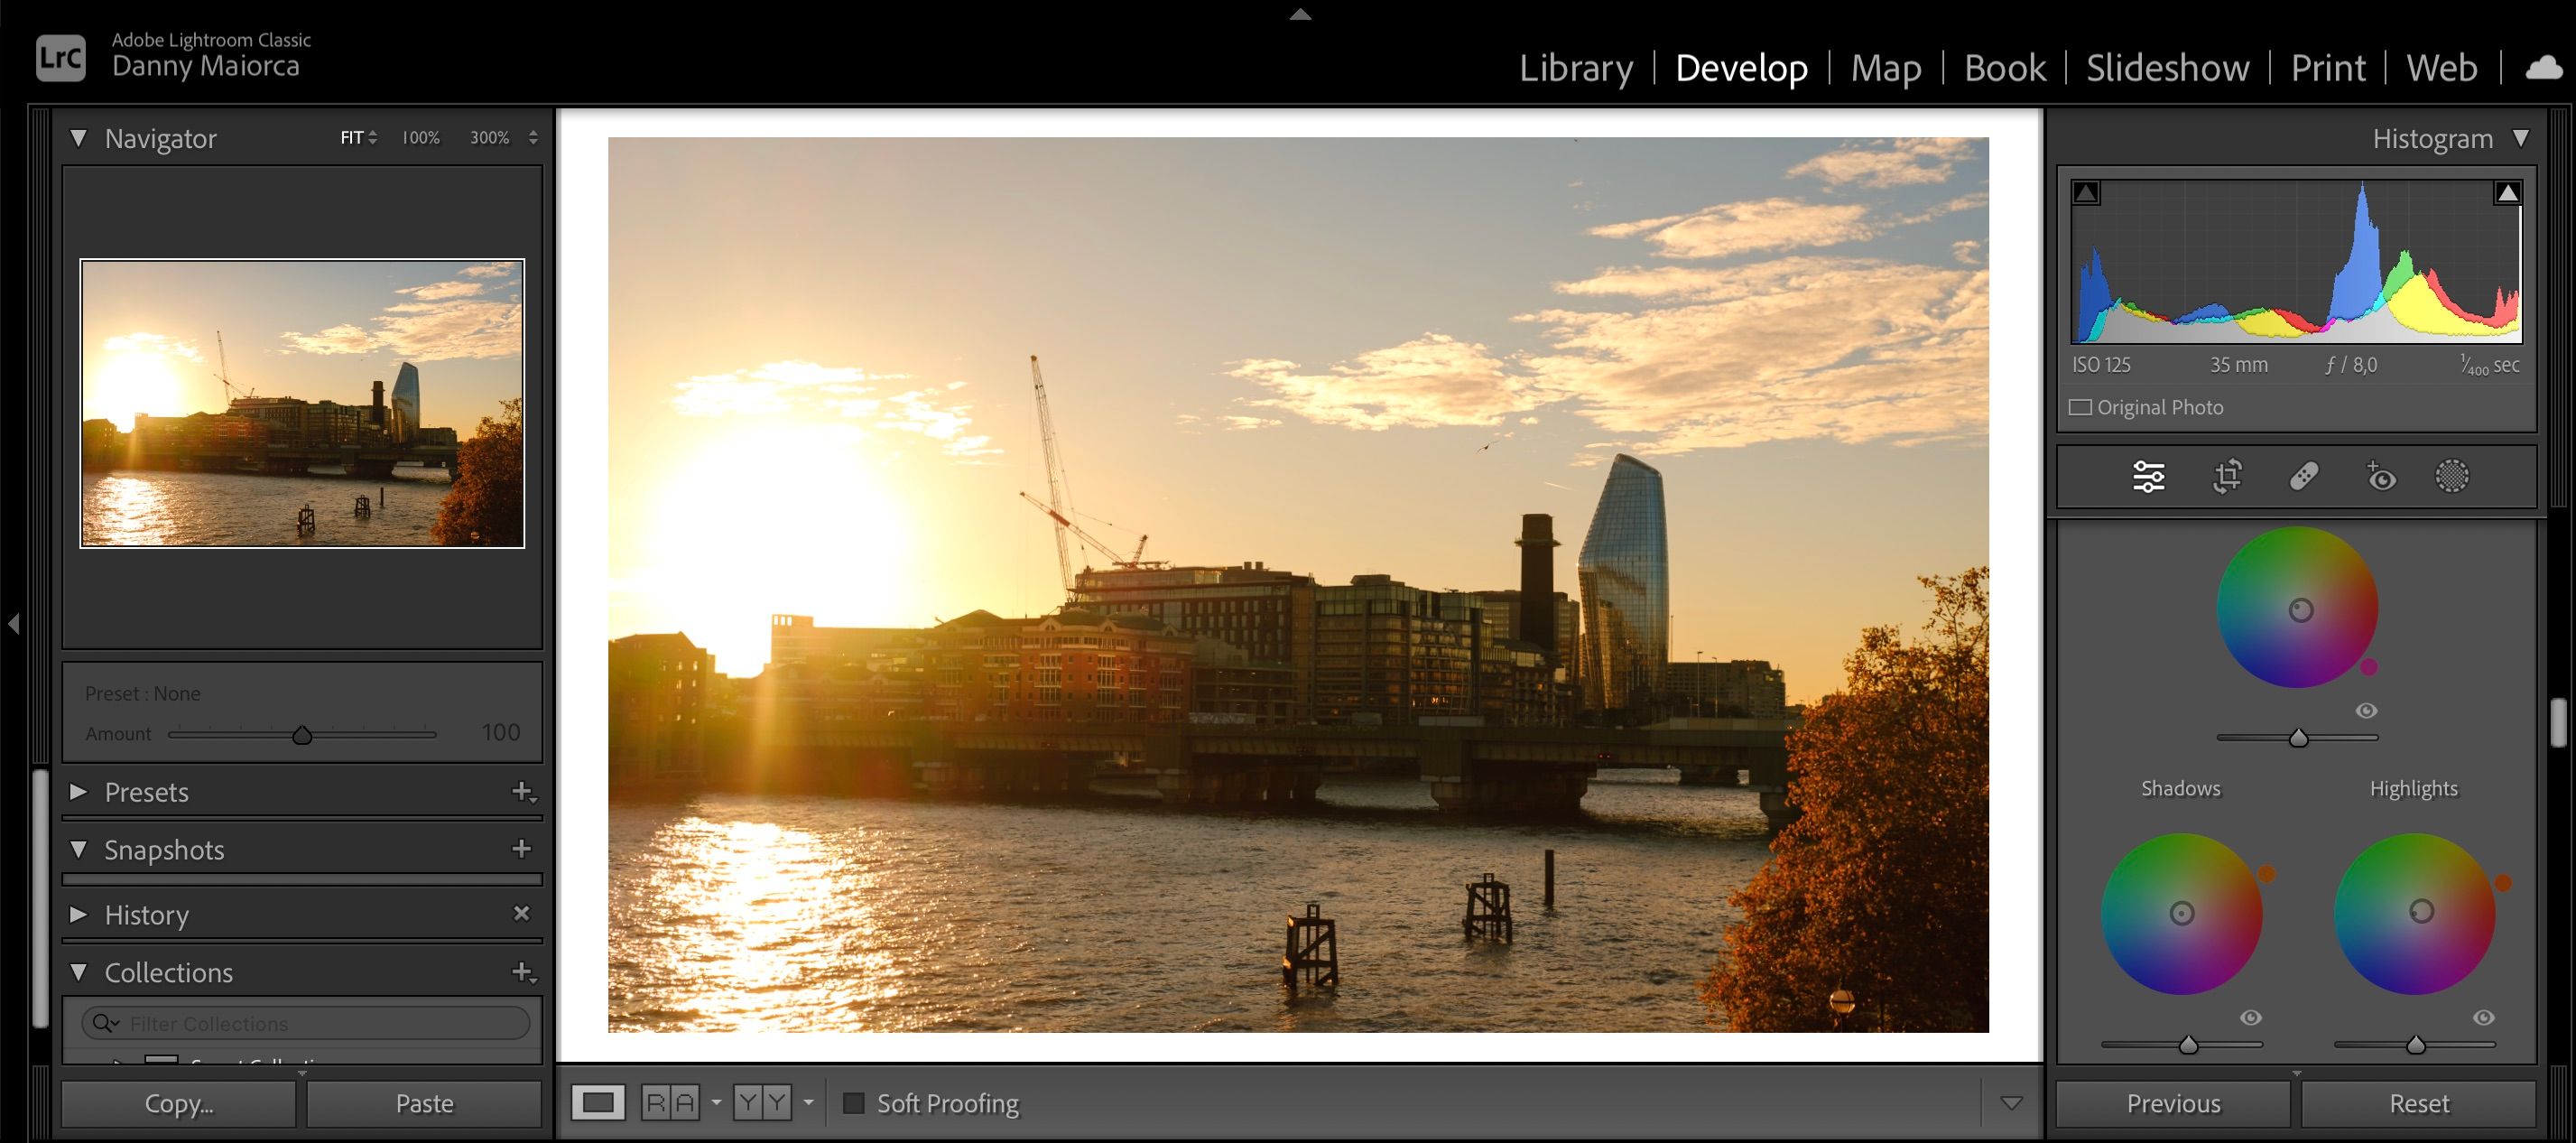
However, the Color Grading wheels are arguably Lightroom’s most powerful tool for altering how the colors in your pictures look. You can use these wheels to increase specific colors in your highlights, shadows, and mid-tones—and you’ll find a separate one for adjusting the entire picture.
Using the Color Grading wheels, you can also increase the luminance in certain parts of your photo. After doing this, your picture will be ready for further edits in Photoshop.
4. Making More Advanced Color Edits in Photoshop
Once you’ve edited your initial colors in Lightroom, you can take the colors in your pictures to the next level with Photoshop. You can use the Auto Color tool to adjust everything automatically, but it’s much more fun if you make the adjustments yourself.
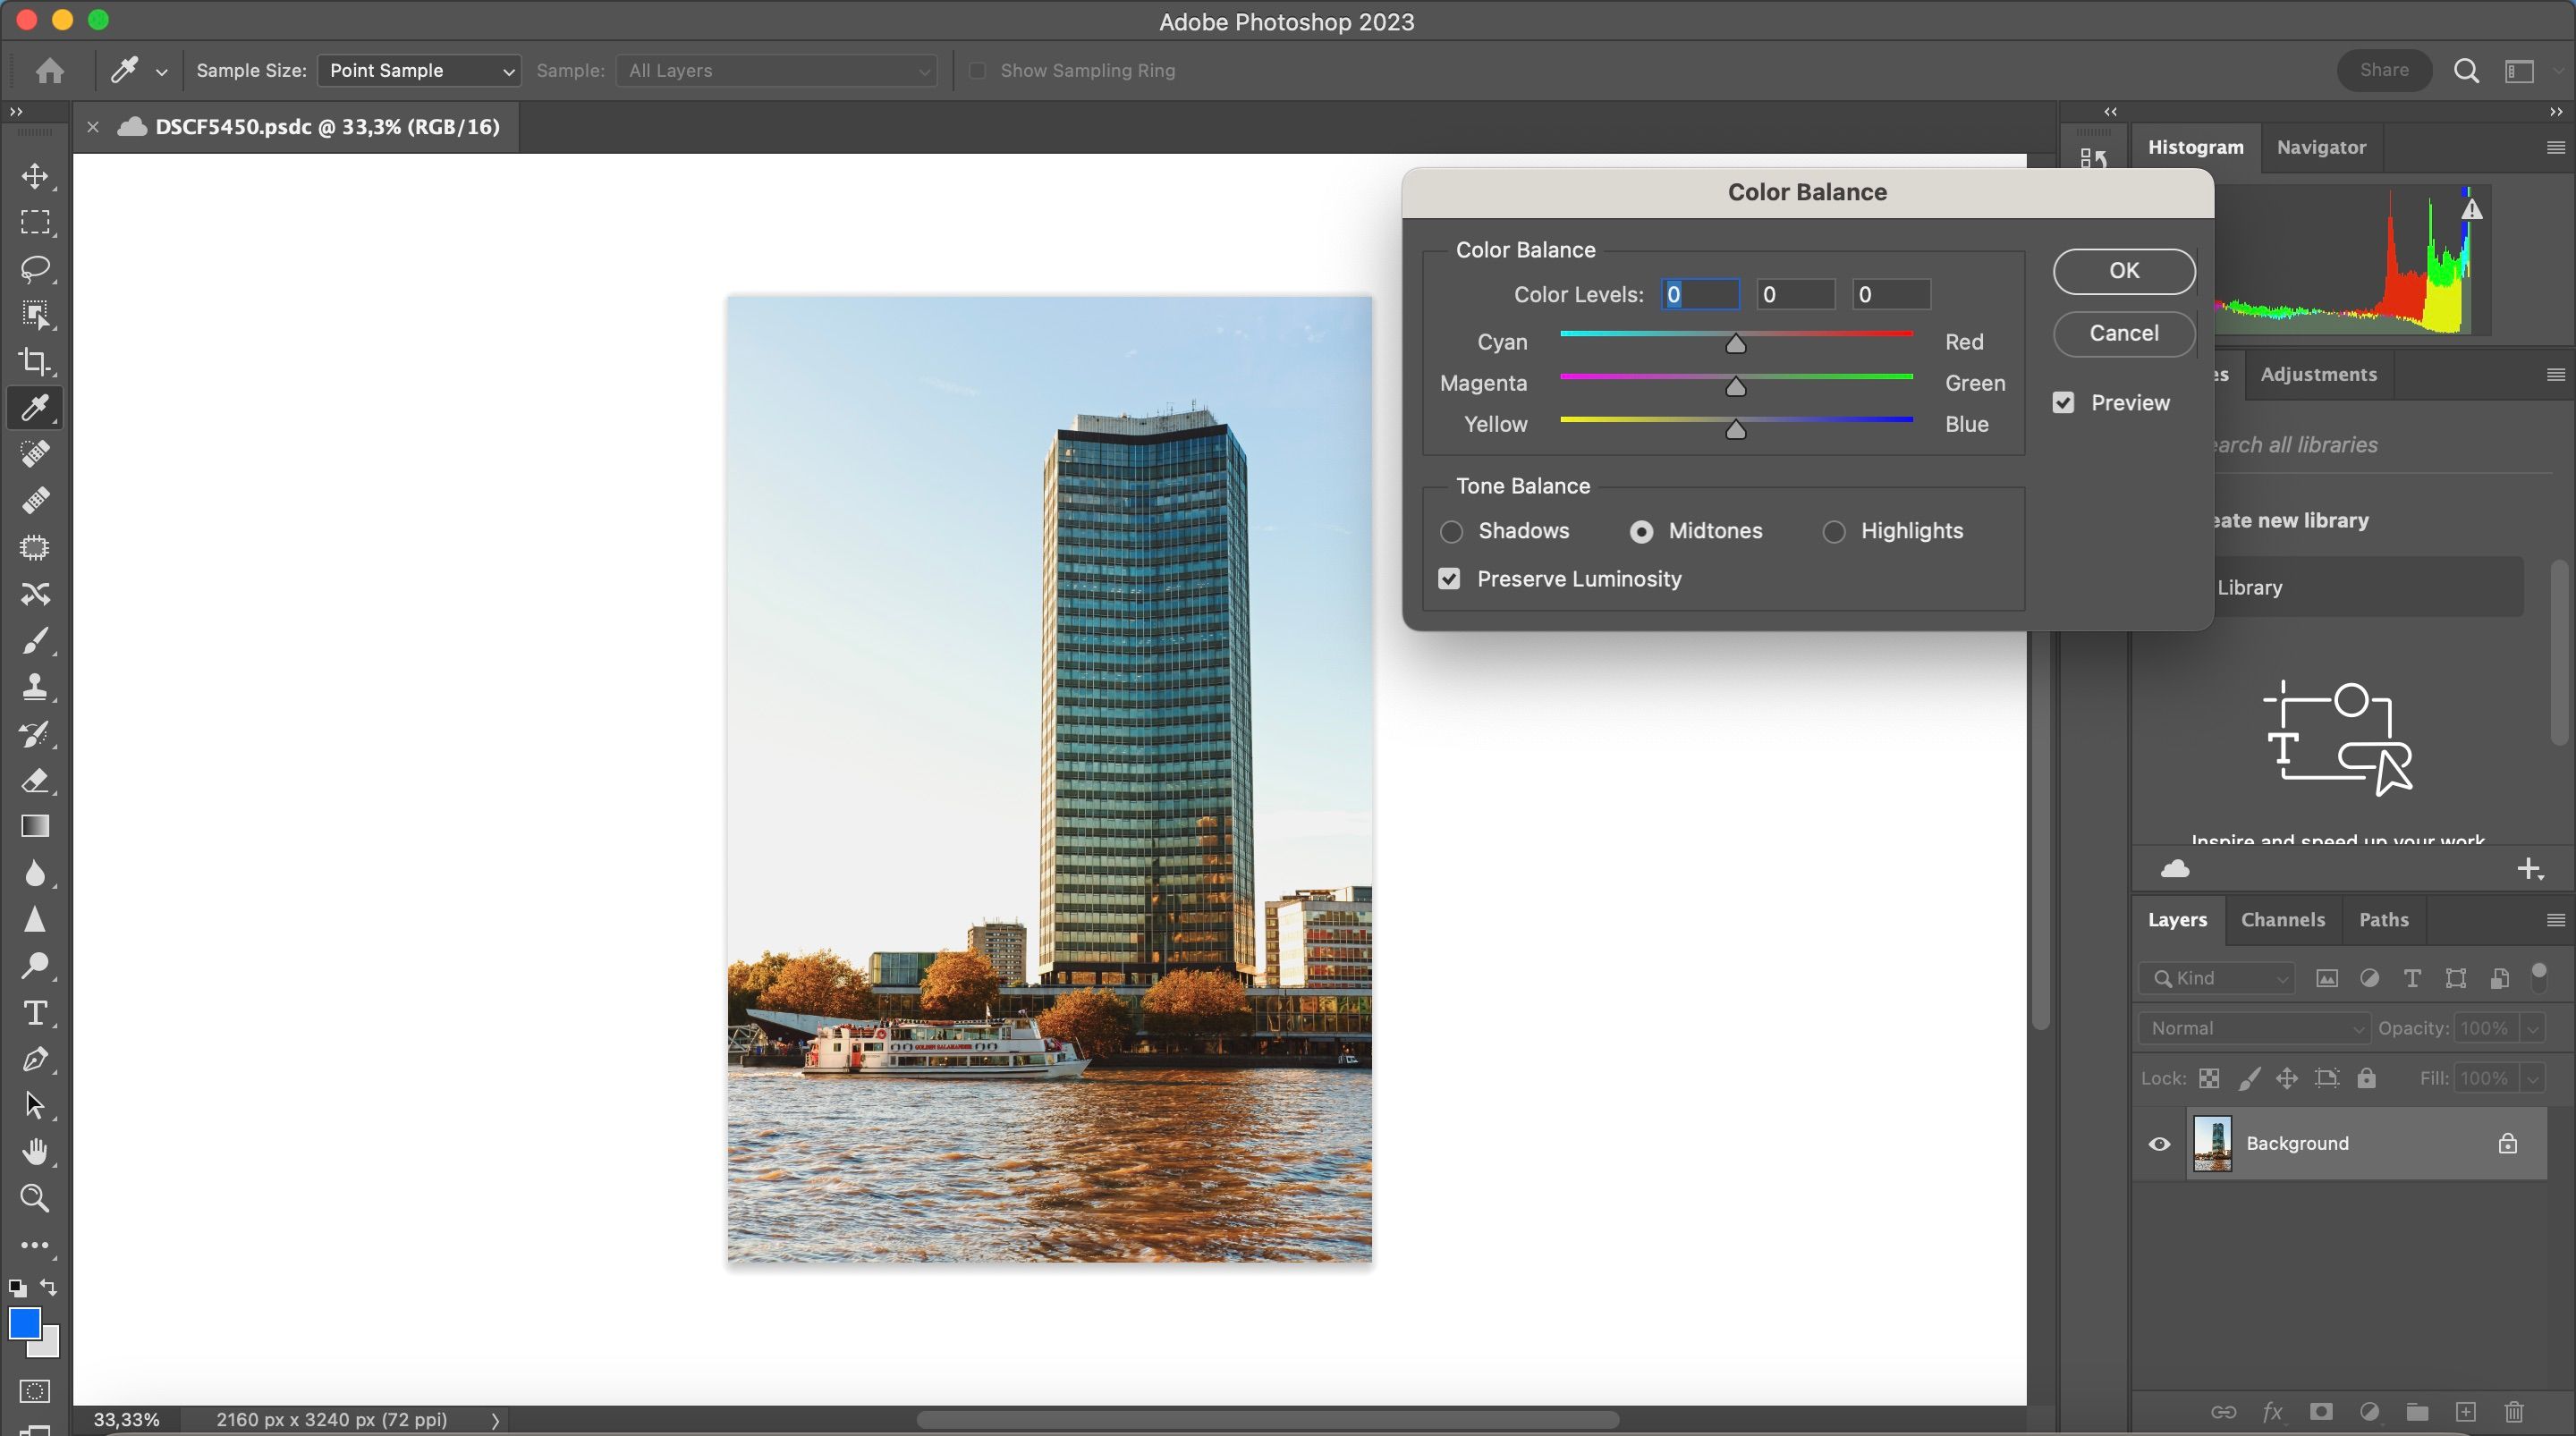
One of Photoshop's handiest tools for color editing is the Color Balance feature. Here, you can tweak the cyans, magentas, and yellows for your shadows, mid-tones, and highlights.
You can also match and replace colors in Photoshop, along with adding numerous warming and cooling filters. Go to Image > Adjustments in the top toolbar to access these tools.
5. Adding More Than One Photo to a Single Project
You might want to use your photos in multiple places, and depending on where you’ll use them, you need to get creative. For example, you can use Photoshop to create Instagram Stories.
If you want to create collages, Instagram carousels, or other forms of multi-image content, you’re better off using Photoshop. You can make the initial adjustments to your pictures in Lightroom before using tools like banners to get your desired end result.
Once you’ve completed your projects in Photoshop, you can export them in JPEG, PNG, and several other formats.
6. Making Simple Edits in Adobe Lightroom
We’ve already mentioned that Adobe Lightroom is handy if you want to make simple edits to your pictures. Let’s tell you more about what you can do in this respect.
When using Lightroom, you will find plenty of useful tools to help you with simple adjustments. For example, you can alter the exposure and contrast in your photos with just a few sliders. Similarly, you can easily tweak camera lens profiles and sharpen your photos.
Regardless of whether you use Lightroom Classic or Lightroom Creative Cloud, you can also change the texture, clarity, and how much (or little) dehaze you’d like in your pictures.
7. Importing Directly From Lightroom CC
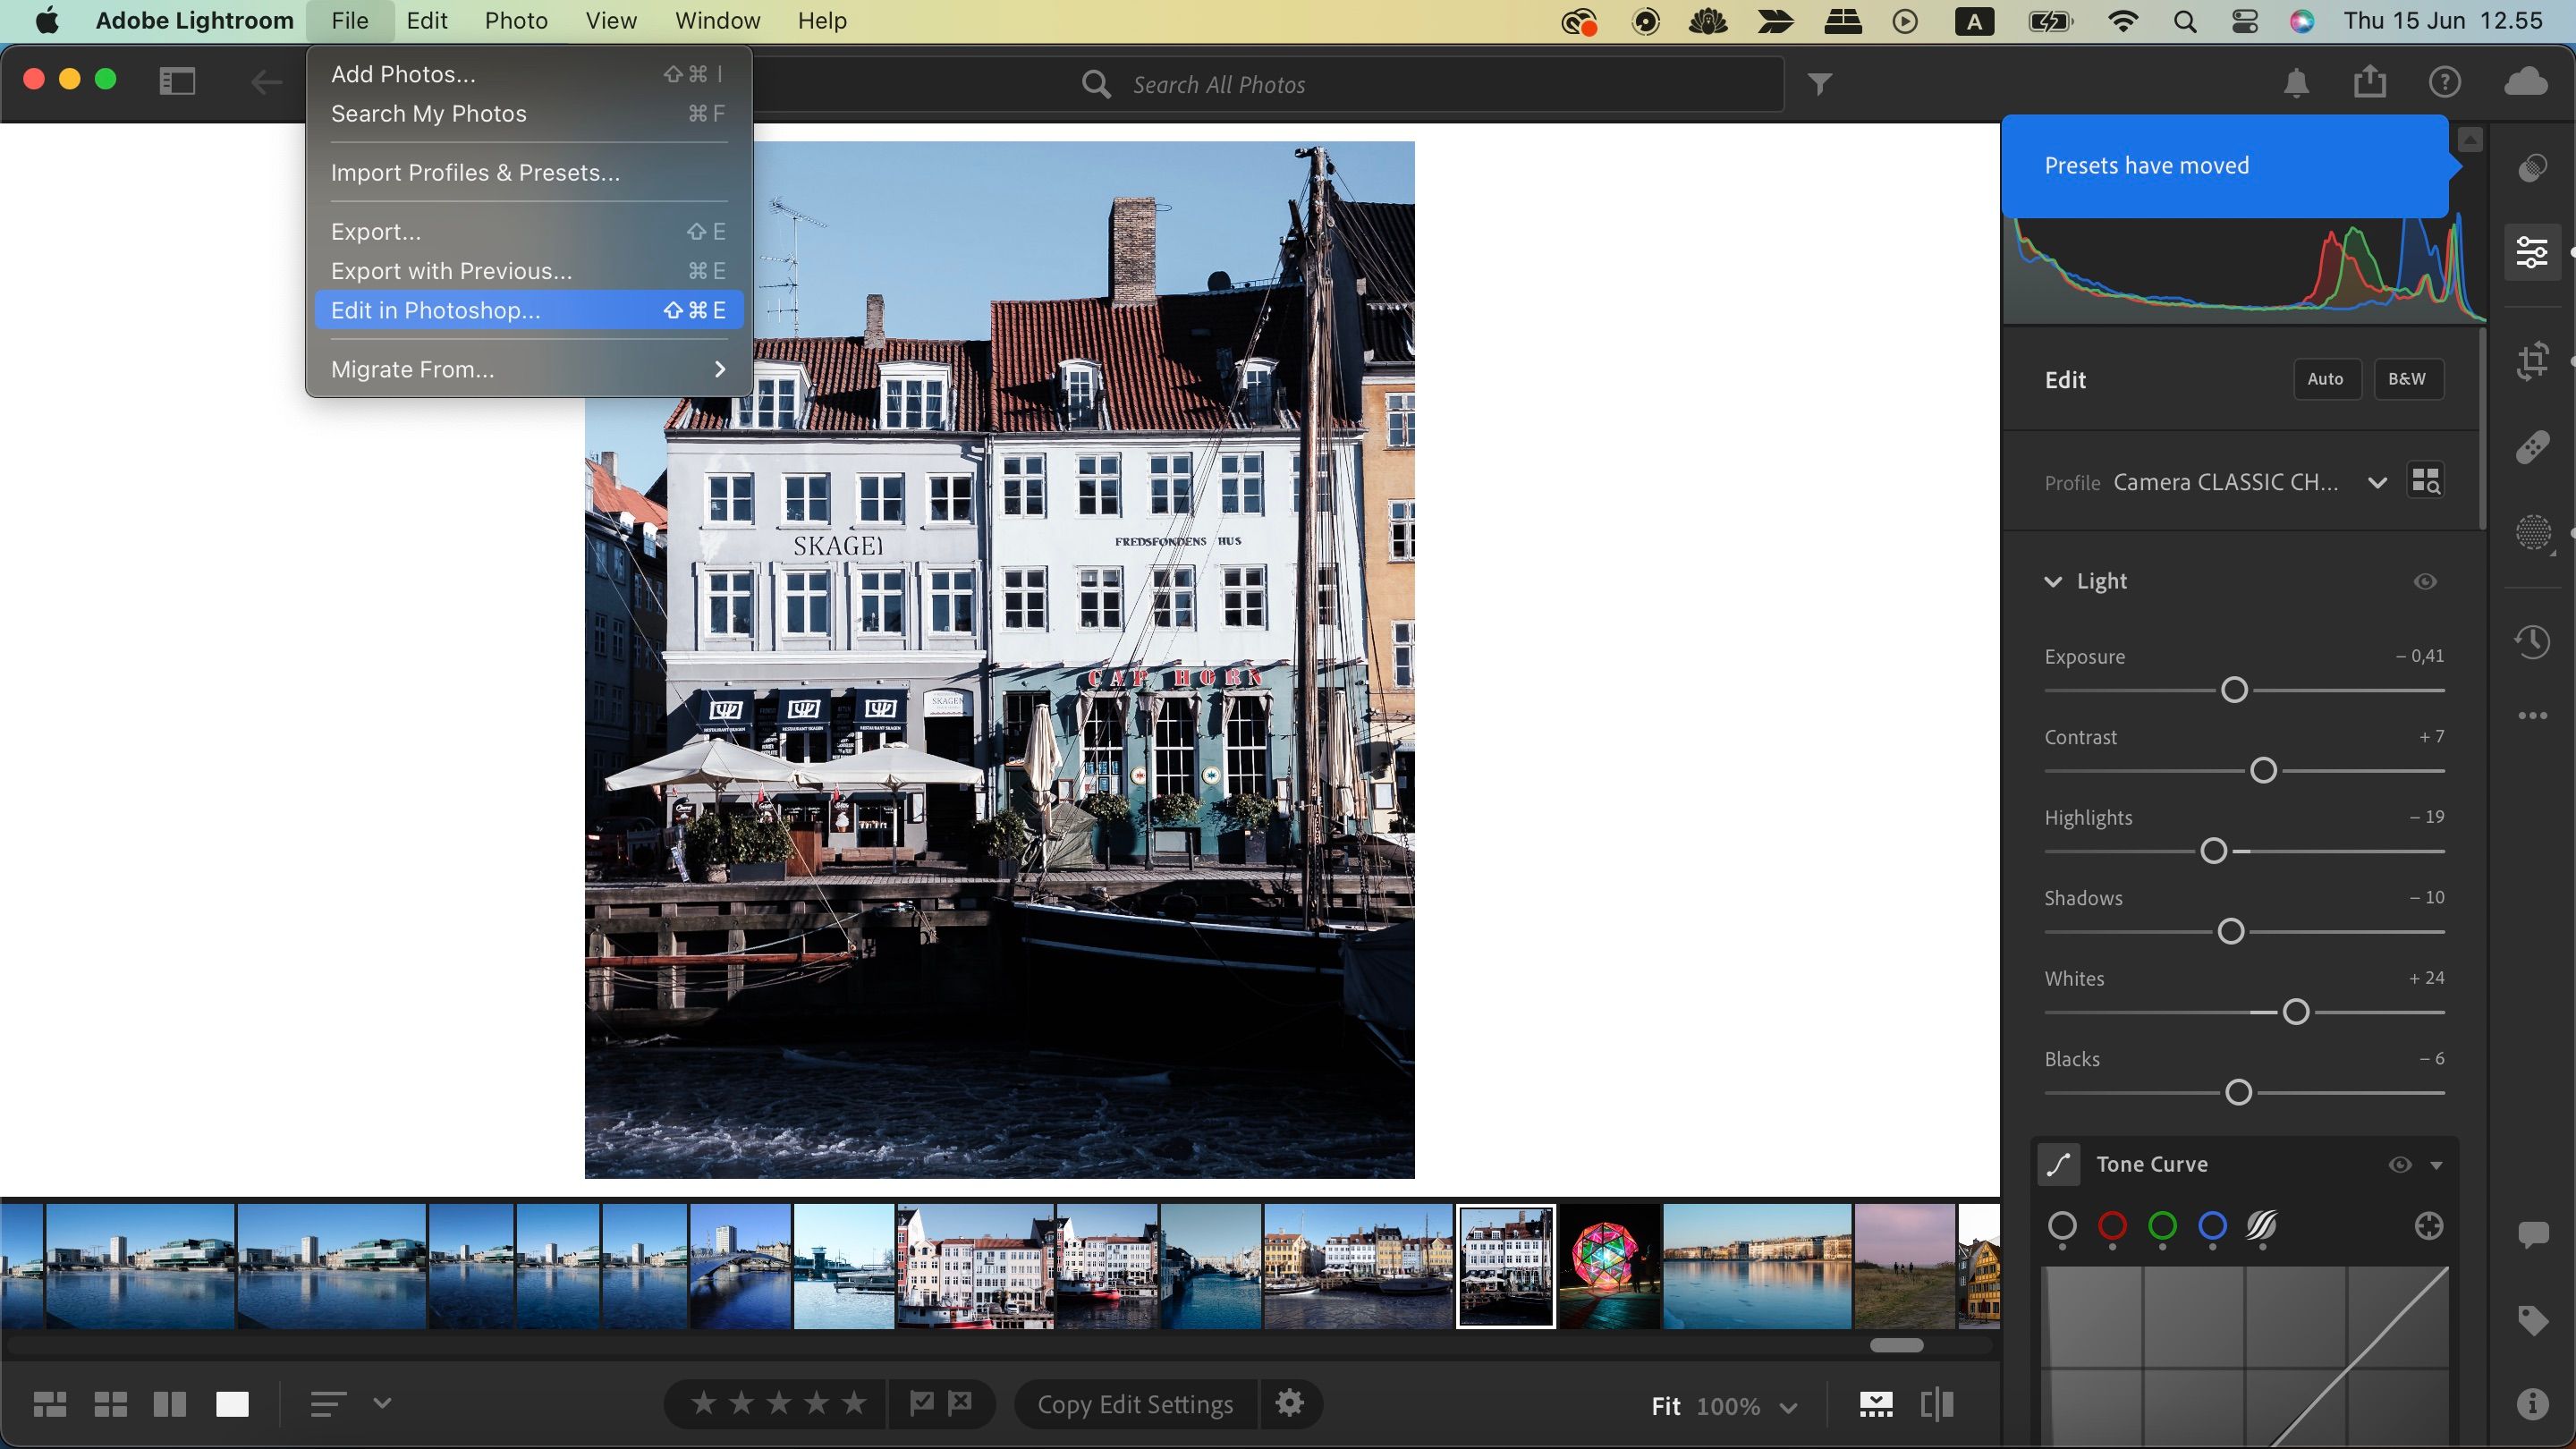
If you use Lightroom Creative Cloud, you can directly continue editing your pictures in Photoshop from the app. Though you'll need to keep Lightroom CC open for the editing process, you won't need to save your files and open a new program in the beginning.
To import a photo from Lightroom CC to Photoshop, go to File > Edit in Photoshop. Your computer will then open the Photoshop app, where you can continue editing.
Photoshop and Lightroom Are Even More Powerful Together
Once you’ve gained at least a beginner level of understanding of Lightroom and Photoshop, you can take your photo editing game to the next level. You will find many tools across these two platforms to help you alter colors, brightness, and much more.
With the Photography Plan on Adobe Creative Cloud, getting Lightroom and Photoshop is easy. So, why not purchase a subscription and start leveling up your edits?

