
Newer computers come with Unified Extensible Firmware Interface (UEFI) as the new standard. However, Legacy BIOS is still largely part of most active systems due to legacy software and hardware support. Switching from UEFI to Legacy BIOS is easy using the firmware utility. But what if the legacy boot option is grayed out in BIOS?
This can happen for a few reasons. A common reason for the grayed-out BIOS is if you have Secure Boot or Platform Trusted Technology (TPM) enabled. Issues with Modern Standby supported system is another reason that prevents you from switching from UEFI to Legacy BIOS.
Here is how to fix the Legacy Boot grayed-out in BIOS issue on your Windows system.
What Causes the Legacy Boot Grayed Out Problem?
You may find the Legacy Boot option grayed out if the UEFI settings, such as Secure Boot and TPM are enabled in the BIOS utility. In some instances, the BIOS utility can tell you why you can't switch to the Legacy boot option.
Boot into your BIOS utility and open Advanced Boot Options. Next, check the Enable Legacy Option ROMs option. You may see an error prompt explaining why the Legacy option cannot be enabled. It usually hints that PPT/TPM or Secure Boot is enabled.
If you don't have any such option, try the troubleshooting steps below to restore the Legacy boot option in BIOS.
1. Disable Secure Boot to Enable Boot
Secure Boot is a UEFI feature that protects your computer against malware by allowing only trusted system software to run on your computer. When enabled, it will perform a cryptographic check during the boot process to verify the integrity of the system image.
However, if you have Secure Boot enabled, it will likely disable Legacy Boot as well. You'll need to disable Secure Boot in your BIOS utility to fix the issue.
The below steps to disable Secure Boot are for an HP Pavilion computer. For other systems, refer to your system manual.
To disable secure boot:
- Click on Start and then click on Power.
- Press and hold the Shift key and click on Restart. Confirm the action if necessary.
- Release the Shift key as the PC shuts down and boot into the Recovery Menu.
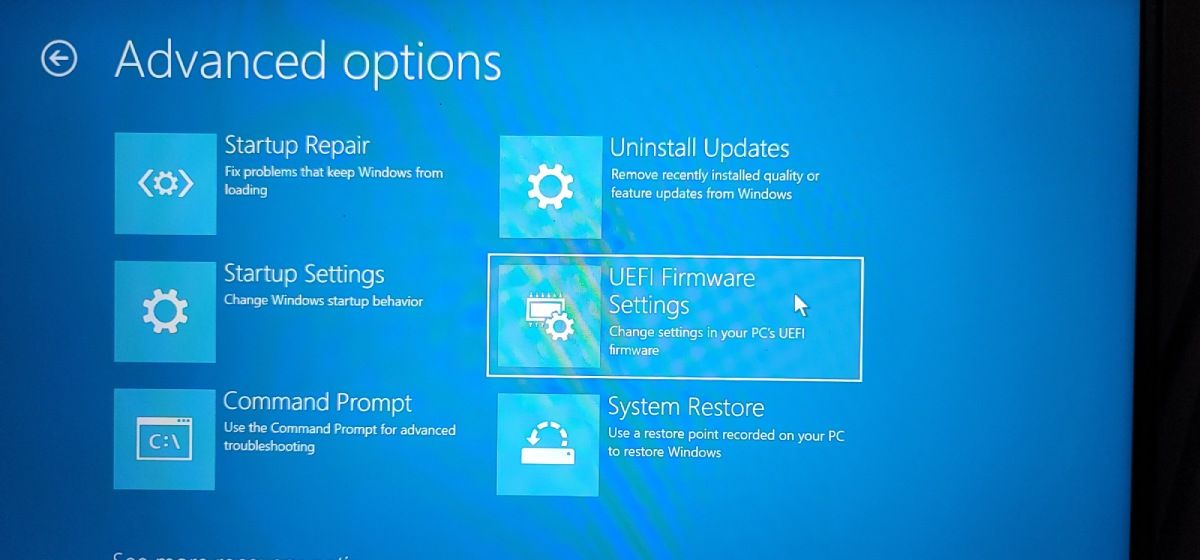
- Go to Troubleshoot and click on Advanced options.
-
Next, click on UEFI Firmware Settings.
-
Click Restart to boot into the Startup Menu.
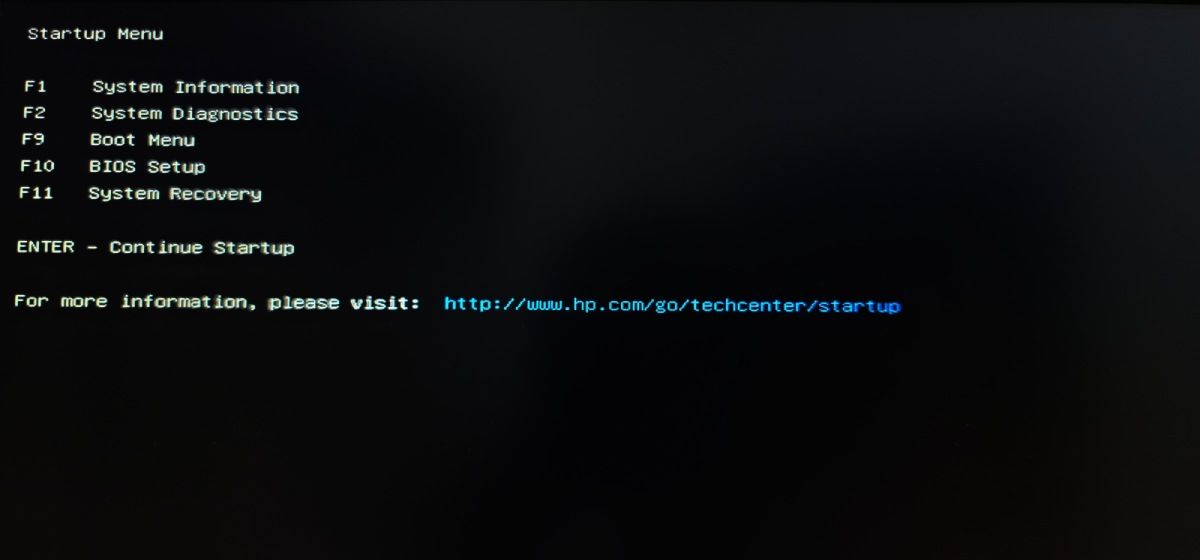
- In the Startup Menu, press F10 to access the BIOS Settings. You may see other options depending on your computer manufacturer.
- Use the right and left arrow keys to open the Boot Options tab in the BIOS Utility.
-
Next, use the up and down arrow key to highlight the Secure Boot option and press Enter to view more options.
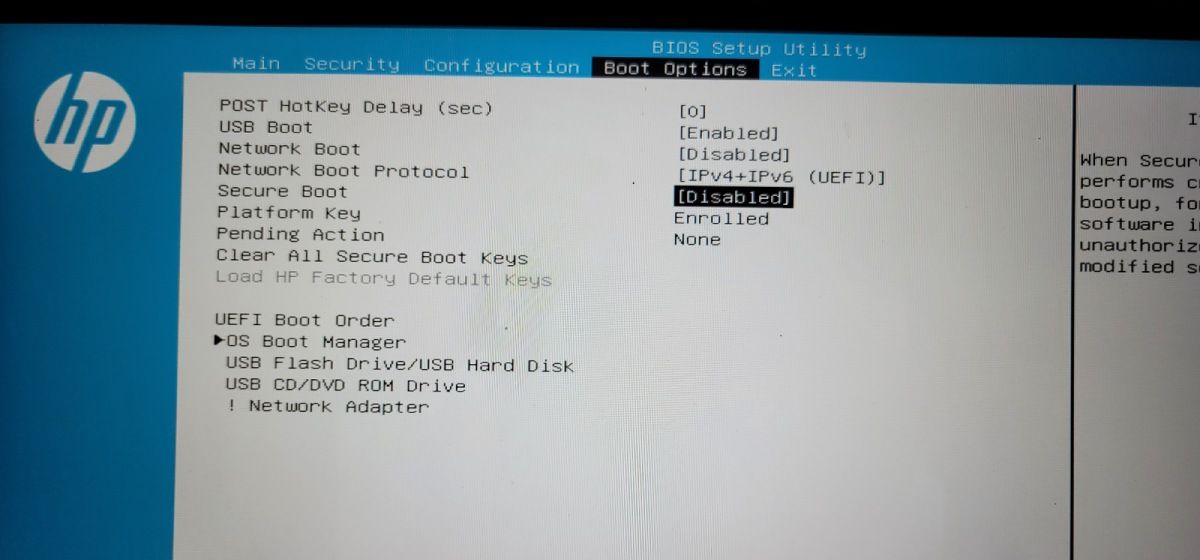
- Select Disabled and make sure the changes are shown in the Boot Options tab.
- Press F10 to save the changes and disable Secure Boot.


2. Disable Trusted Platform Technology (TPM)

In addition to Secure Boot, you may also have enabled Trusted Platform Module (TPM), disabling Legacy BIOS. To fix the issue, check if TPM is enabled on your PC, which is likely a case on a Windows 11 running system, and disable the option if necessary.
You can disable TPM from the BIOS setup utility. Here's how to do it.
- Boot into your BIOS utility using the Windows Recovery Menu.
- Next, open the Security tab using the right and left arrow keys.
- Highlight the TPM State option and press Enter. If no TPM option is available, look for the PTT option.
- Select Disabled to disable TPM on your device.
- Press F10 to save the change and exit.
3. Disable Modern Standby
Modern Standby (S0) is a newer power mode available on select modern computers. It is enabled by default on compatible systems but can cause issues with Legacy Boot.
To fix the issue, try to disable Modern Standby on your Windows computer. Once disabled, restart your PC to see if you can switch to Legacy Boot now.
Restore a Grayed Out Legacy Boot Option in Your BIOS
You can fix the grayed-out Legacy boot option in BIOS by disabling Secure Boot and Trusted Platform Technology. In addition, disable Standard Standby (S0) to fix the problem.