LaserPecker 2


The LaserPecker 2 offers a portable solution for laser engraving on demand. For those short on space or needing the option to engrave while traveling, it's perfect Professional users may find some limitations due to its working area and potential cutting area restrictions out-of-the-box, but its versatility shines with smaller-scaled jobs.
- 6-600 mm/s engraving speed
- Wireless transmission option via Bluetooth 5.0
- Three resolutions: 1K / 1.3K / 2K
- Brand: LaserPecker
- Laser Power: 5W
- Working Area: 100 x 100mm ; 100 x 2000mm (with rotary attachment)
- Screen: None
- Connectivity : USB, Bluetooth 5.0
- Software: LaserPecker Mobile App / Desktop Software
- Quick, simplistic assembly
- Portable enough to be stowed in a bag
- Variety of safety features to protect users
- Good for smaller on-demand use and batch production
- Different ranging methods and engraving modes
- Can be used outdoors or in situ
- App and software bugs and glitches
- Not ideal for cutting without modification (air assist not included)
- Small work area can limit applications
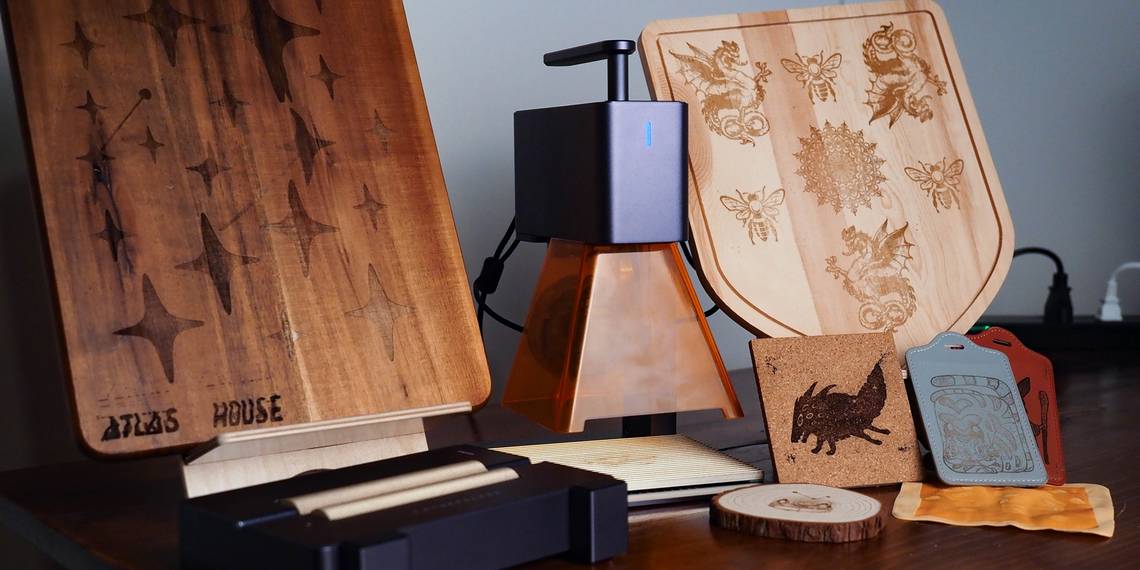
The LaserPecker 2 combines the many benefits of larger engravers while taking up a smaller footprint. While still maintaining the possibility to engrave across many materials using a variety of formats, its 5W laser and small size provides all-important portability.
But while the LaserPecker 2 can travel with you, is it an engraver you'll want for work, travel, or even outdoors?
Setting Up the LaserPecker 2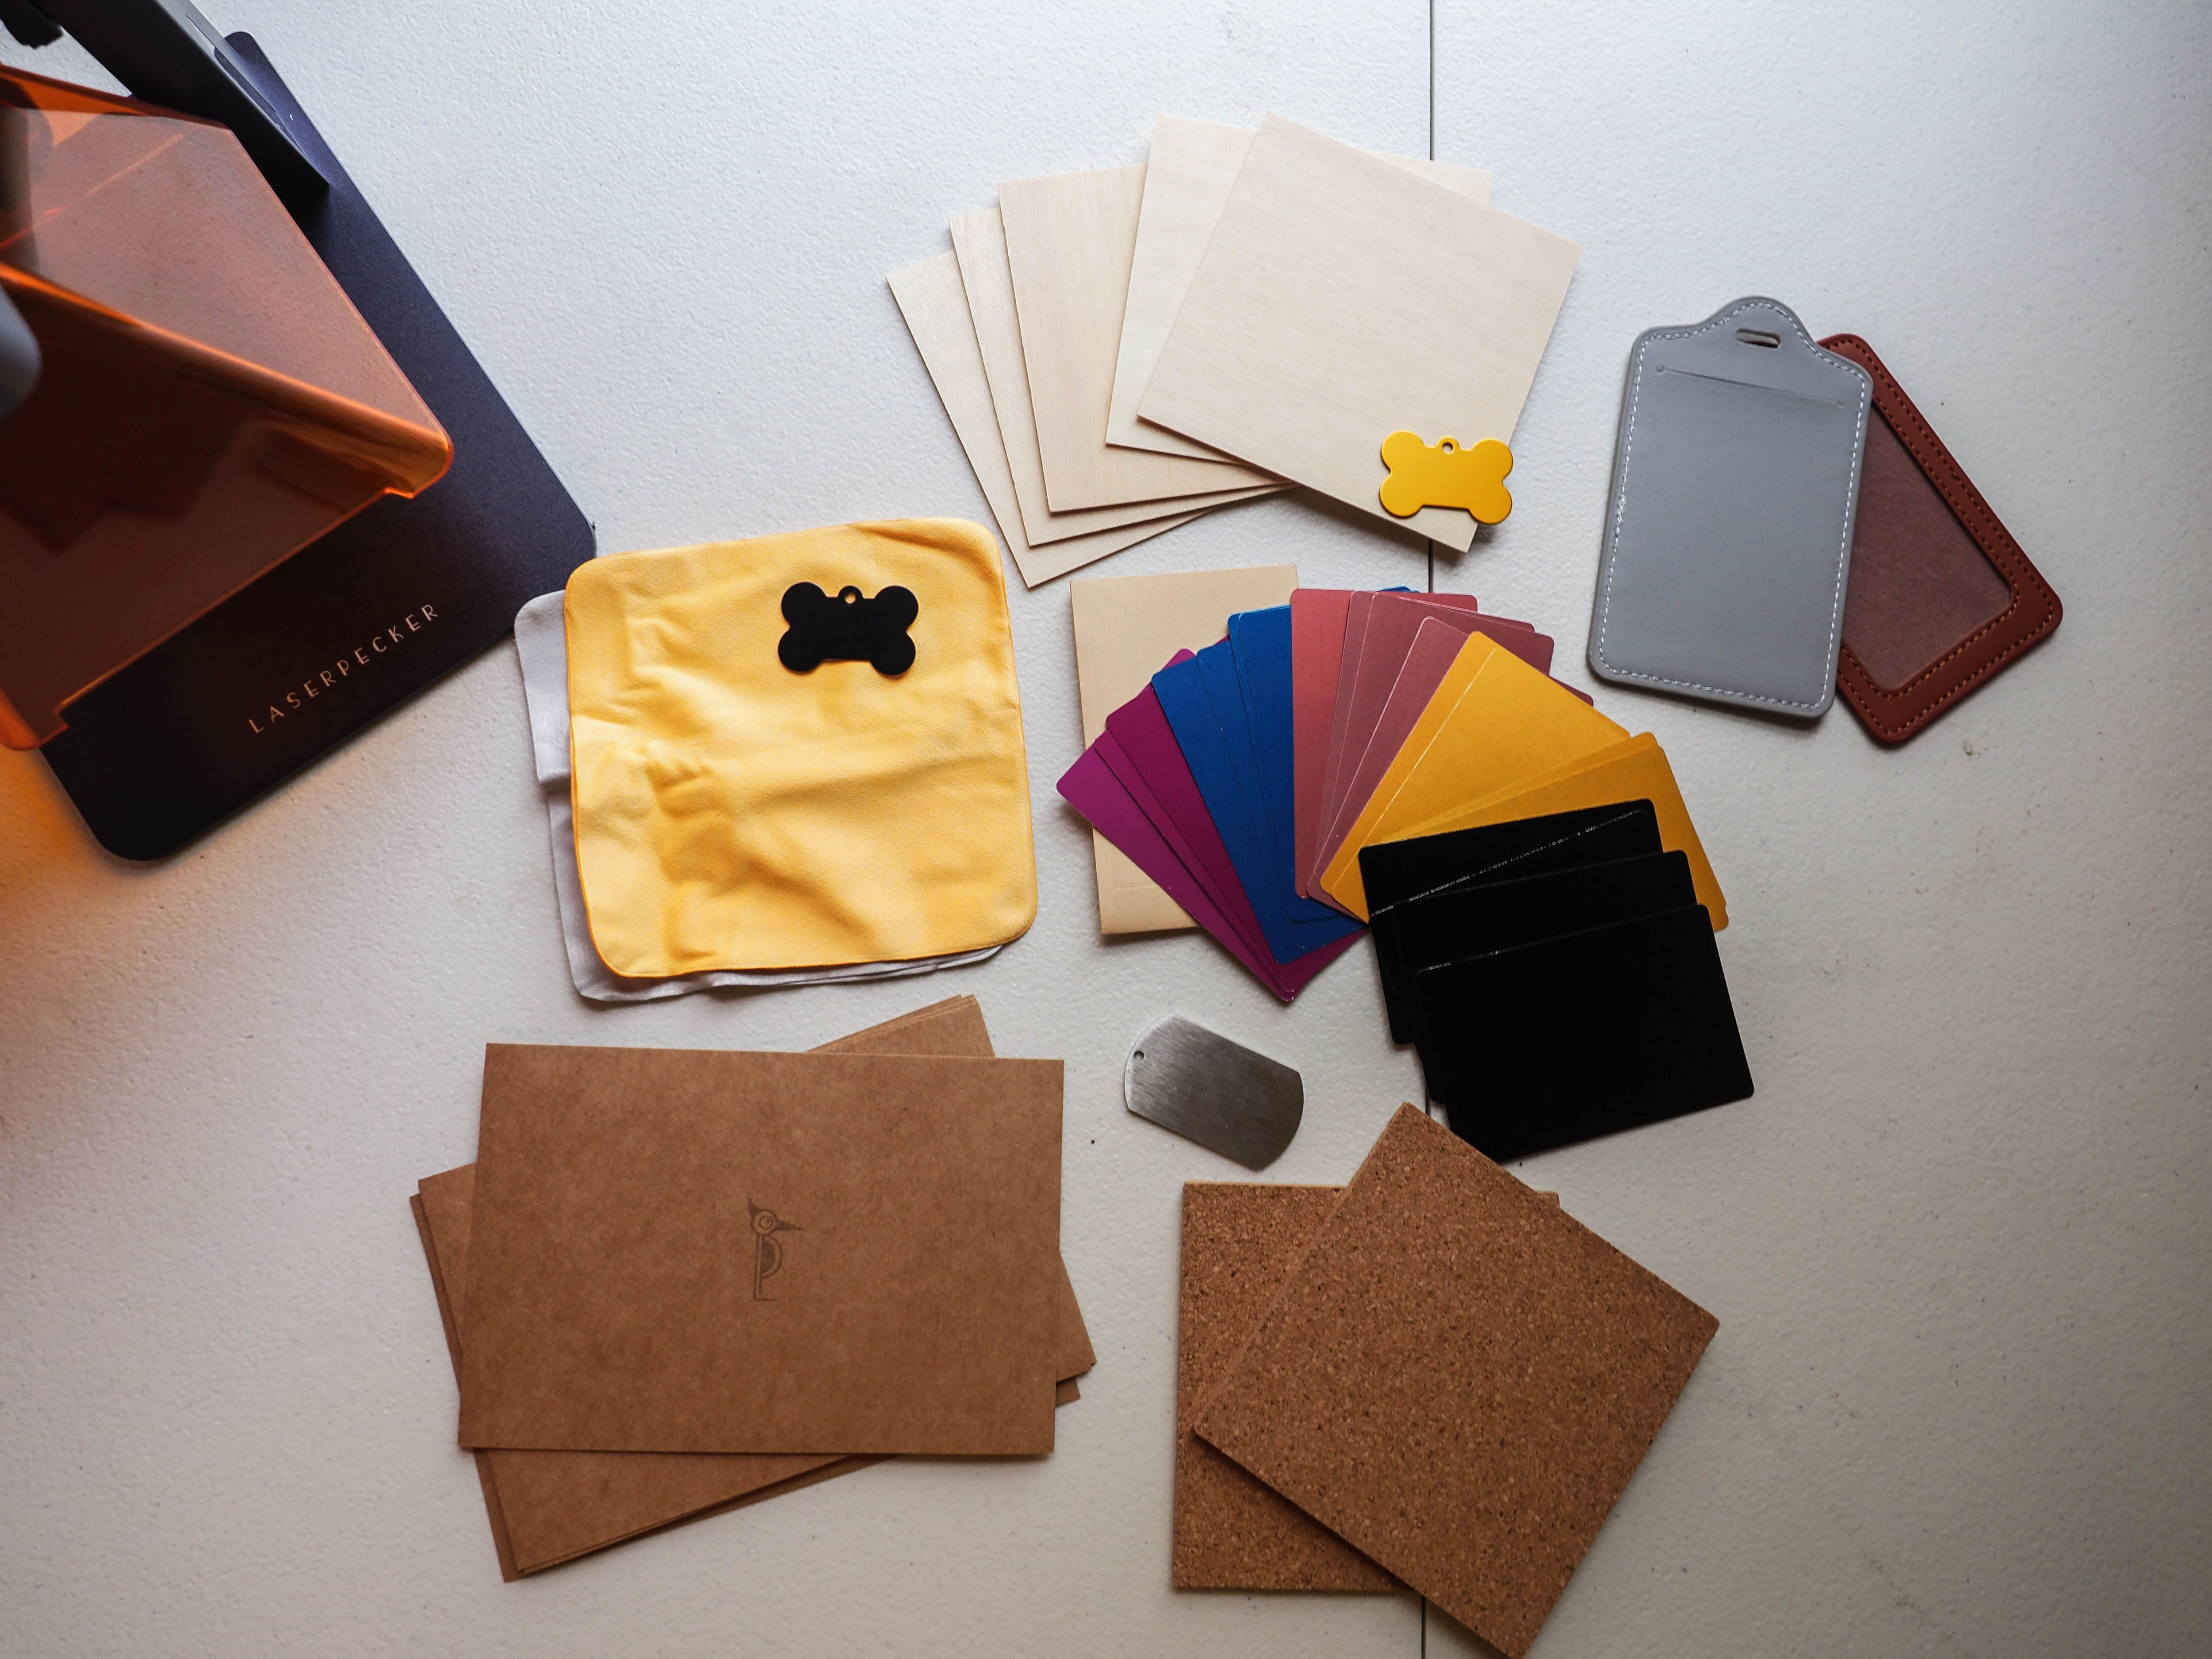
Unlike many laser engravers that require a more robust, multi-stepped installation, the LaserPecker 2 snaps together in a flash. The included electric lifting support's base connects via two screws and a wrench; the main laser body is connected via a simple screw-in nut. From here, users can connect the power supply and adjust the base height of the LaserPecker 2.
Before beginning any job, the LaserPecker 2 allows for a variety of ranging methods. The laser can be raised and lowered using the electric lifting support's buttons in 1mm intervals while tapping or long-pressing. From here, an optimal 110mm distance between the laser and the target surface can be established via the included ruler, the drop-down ranging rod, or by using the bottom edge of the attachable protective cover. It doesn't have automatic focussing; this needs to be done manually.
At this stage, most users will opt to connect to the LaserPecker app via Bluetooth 5.0, but desktop users can also connect to their computers via an included USB cable.
LaserPecker 2 Technical Specifications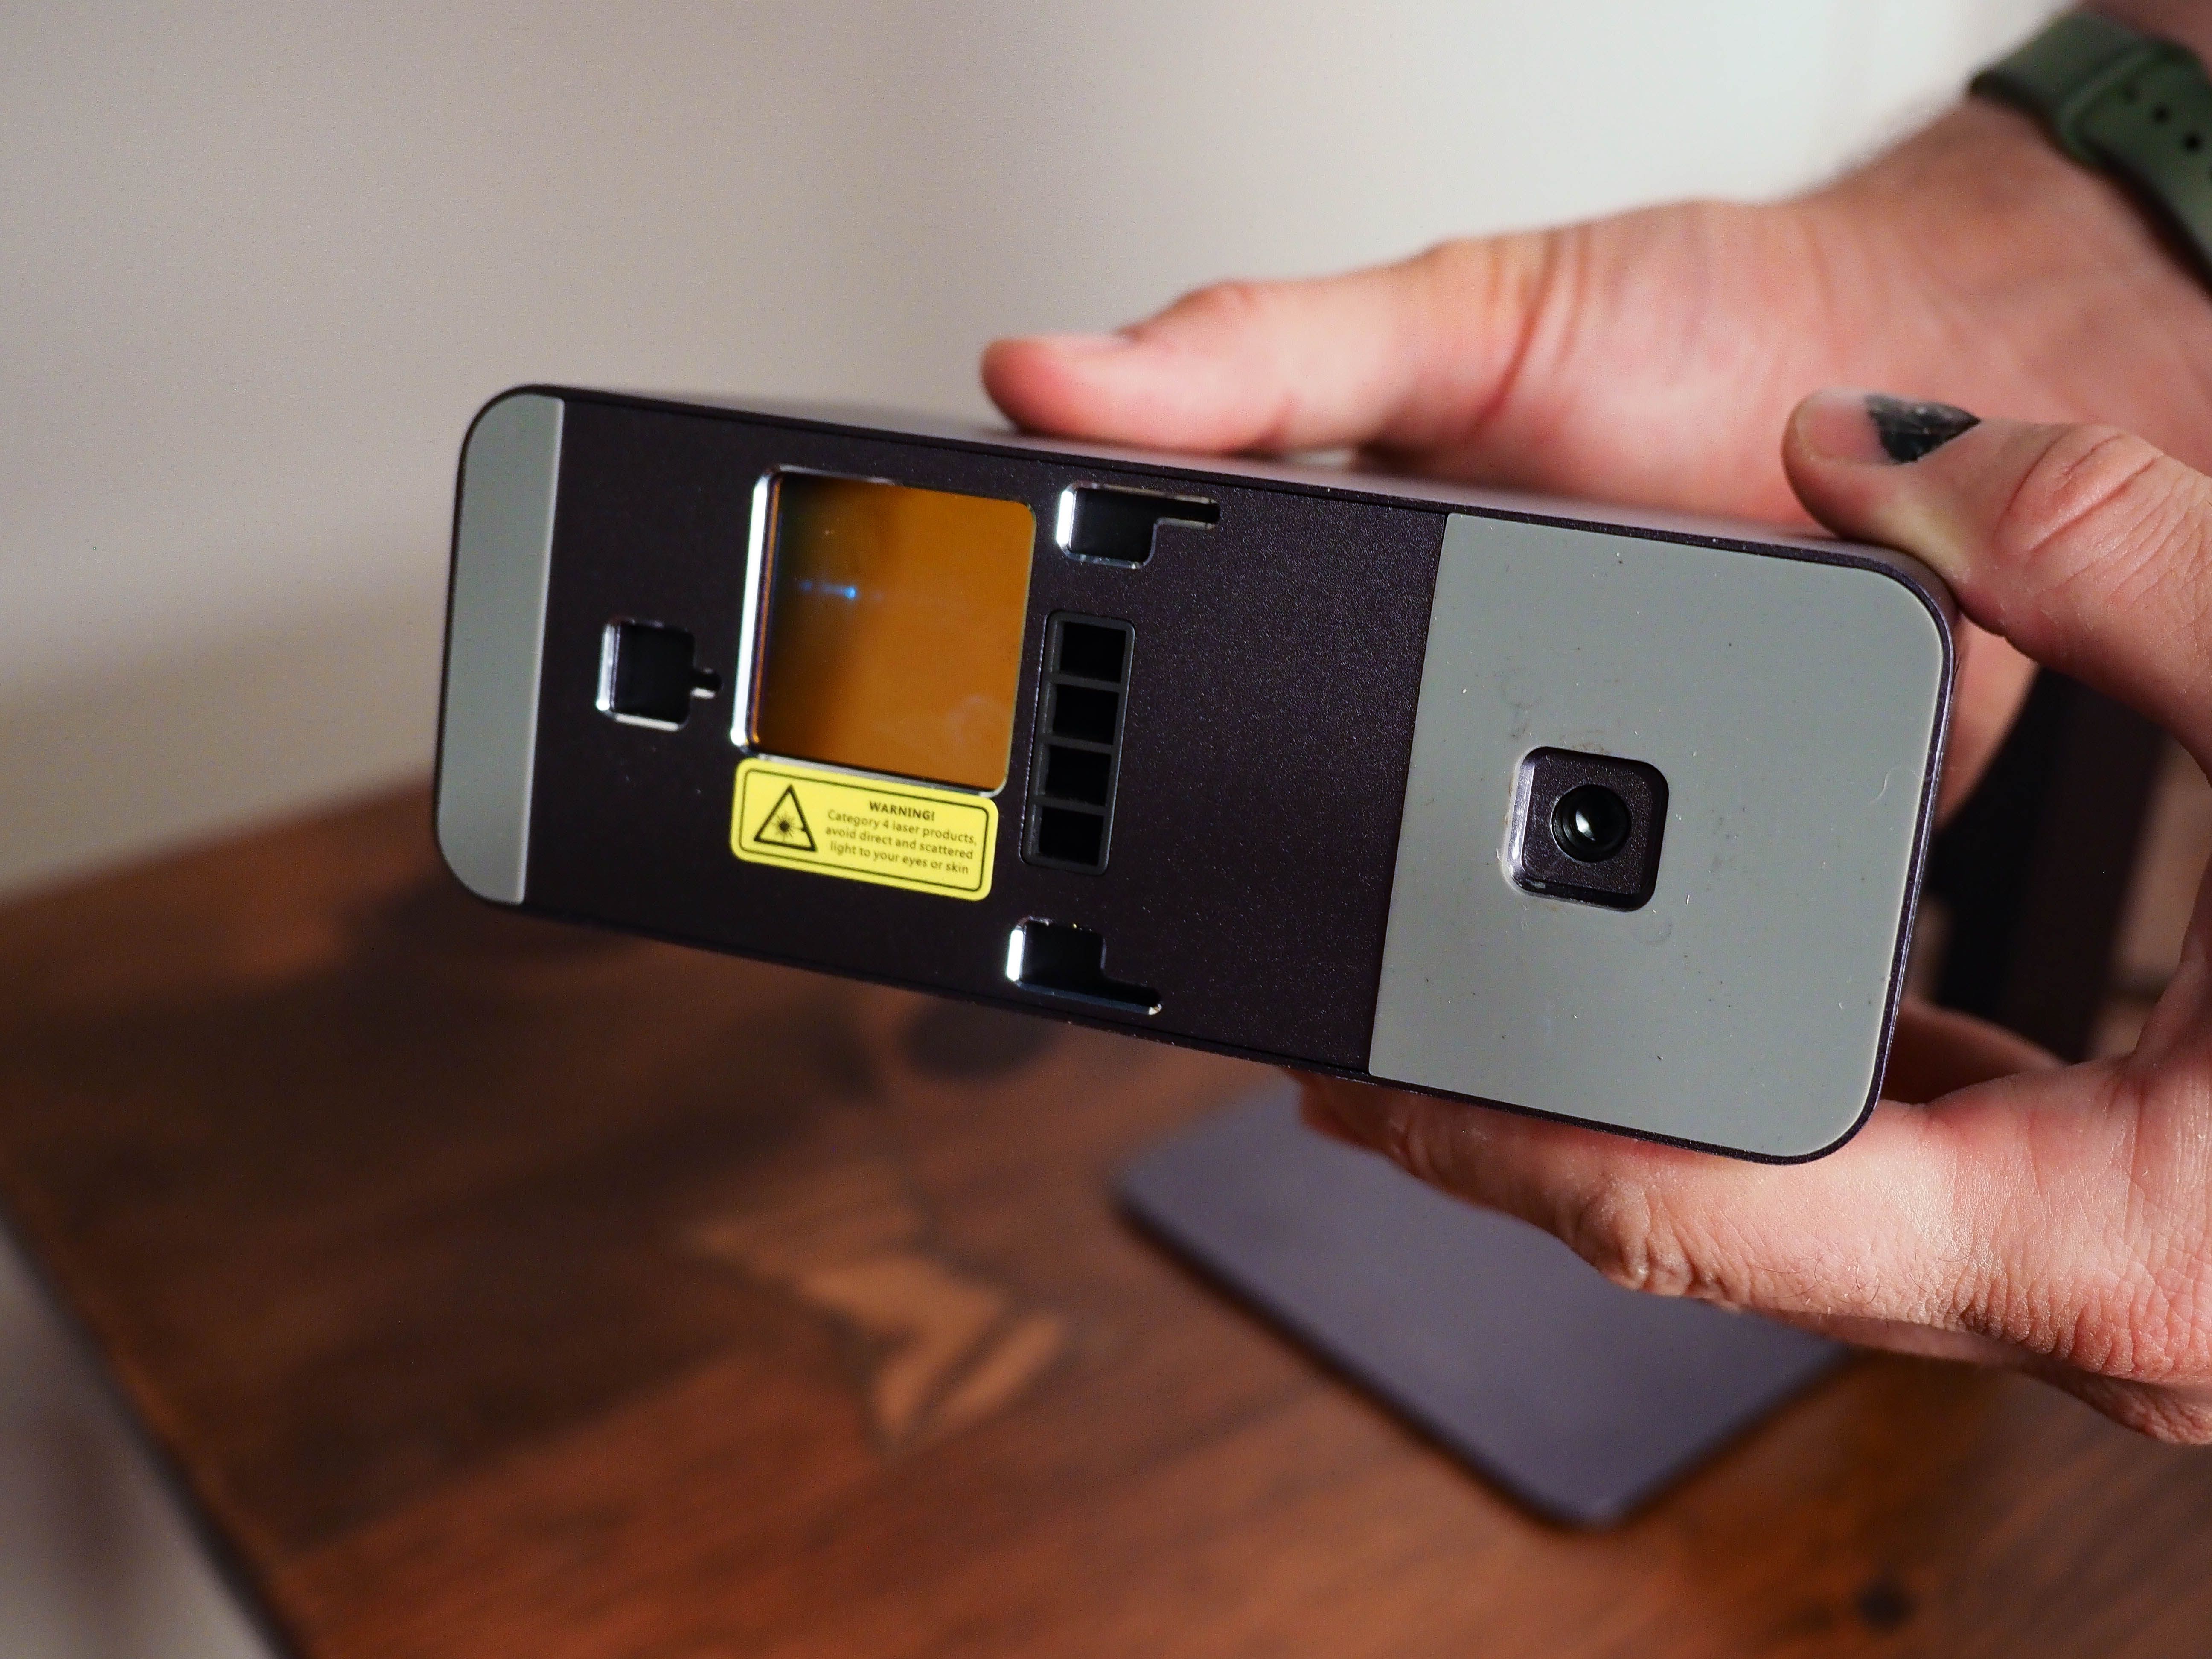
When considering the LaserPecker 2 for your use, it's important to note that portability does come with some trade-offs. The 450nm NICHIA diode laser's power is rated at 5W. To allow for the finer details, you can select 1K, 1.3K, or 2K resolutions, and the LaserPecker 2 utilizes a smaller laser spot that can achieve up to 0.05 mm accuracy using its dual optical lens.
In terms of speeds, the LaserPecker 2 can achieve a maximum engraving speed of 600 mm/s using its dual lens galvanometer. For previewing, the frame or graphic previews can run at speeds of up to 3750mm/s. At the lower end of its estimated engraving speed, the LaserPecker 2 does engrave at speeds of 6 mm/s.
As a smaller format laser engraver, the max engraving side of the LaserPecker 2 is 100 x 100mm, without taking advantage of the accessory third-axis add-on. The additional axis electric roller and its secondary sliders can achieve an expanded maximum of 100 x 2000mm.
For those interested in transportability, the LaserPecker 2 can be easily tucked away in a bag. The basic laser and lifting platform only weighs around 2.2kg (approximately 4.85 pounds) and can be disassembled for safer transit of its pieces. Overall, the accessories only add a little more weight, so it can go with you when required.
Safety Precautions with the LaserPecker 2

For newer users, the LaserPecker 2 attempts to instill a variety of safety checks to make working with it much safer. While standard laser safety glasses are included with the base package, the protective shield also features a built-in smoke extractor fan to offer a basic method of venting during its initial jobs.
A safety password must be input before beginning a preview or job to prevent accidental activation. The warning prompt reminding users to install the protective shield, inspect the work area, and wear their glasses is repeated for consecutive use cases. For those concerned about accidental pressing of the buttons at the top of the LaserPecker 2, their operation can be disabled via the app.
In addition to these protective measures, there's tilt and overheat protection to prevent accidents. While you'll still want to take your own preventative measures to improve both air quality and filtration, plus prevent incidental fires, the LaserPecker 2 does a better job in prepping users before beginning their next engraving.
LaserPecker App and Software Usage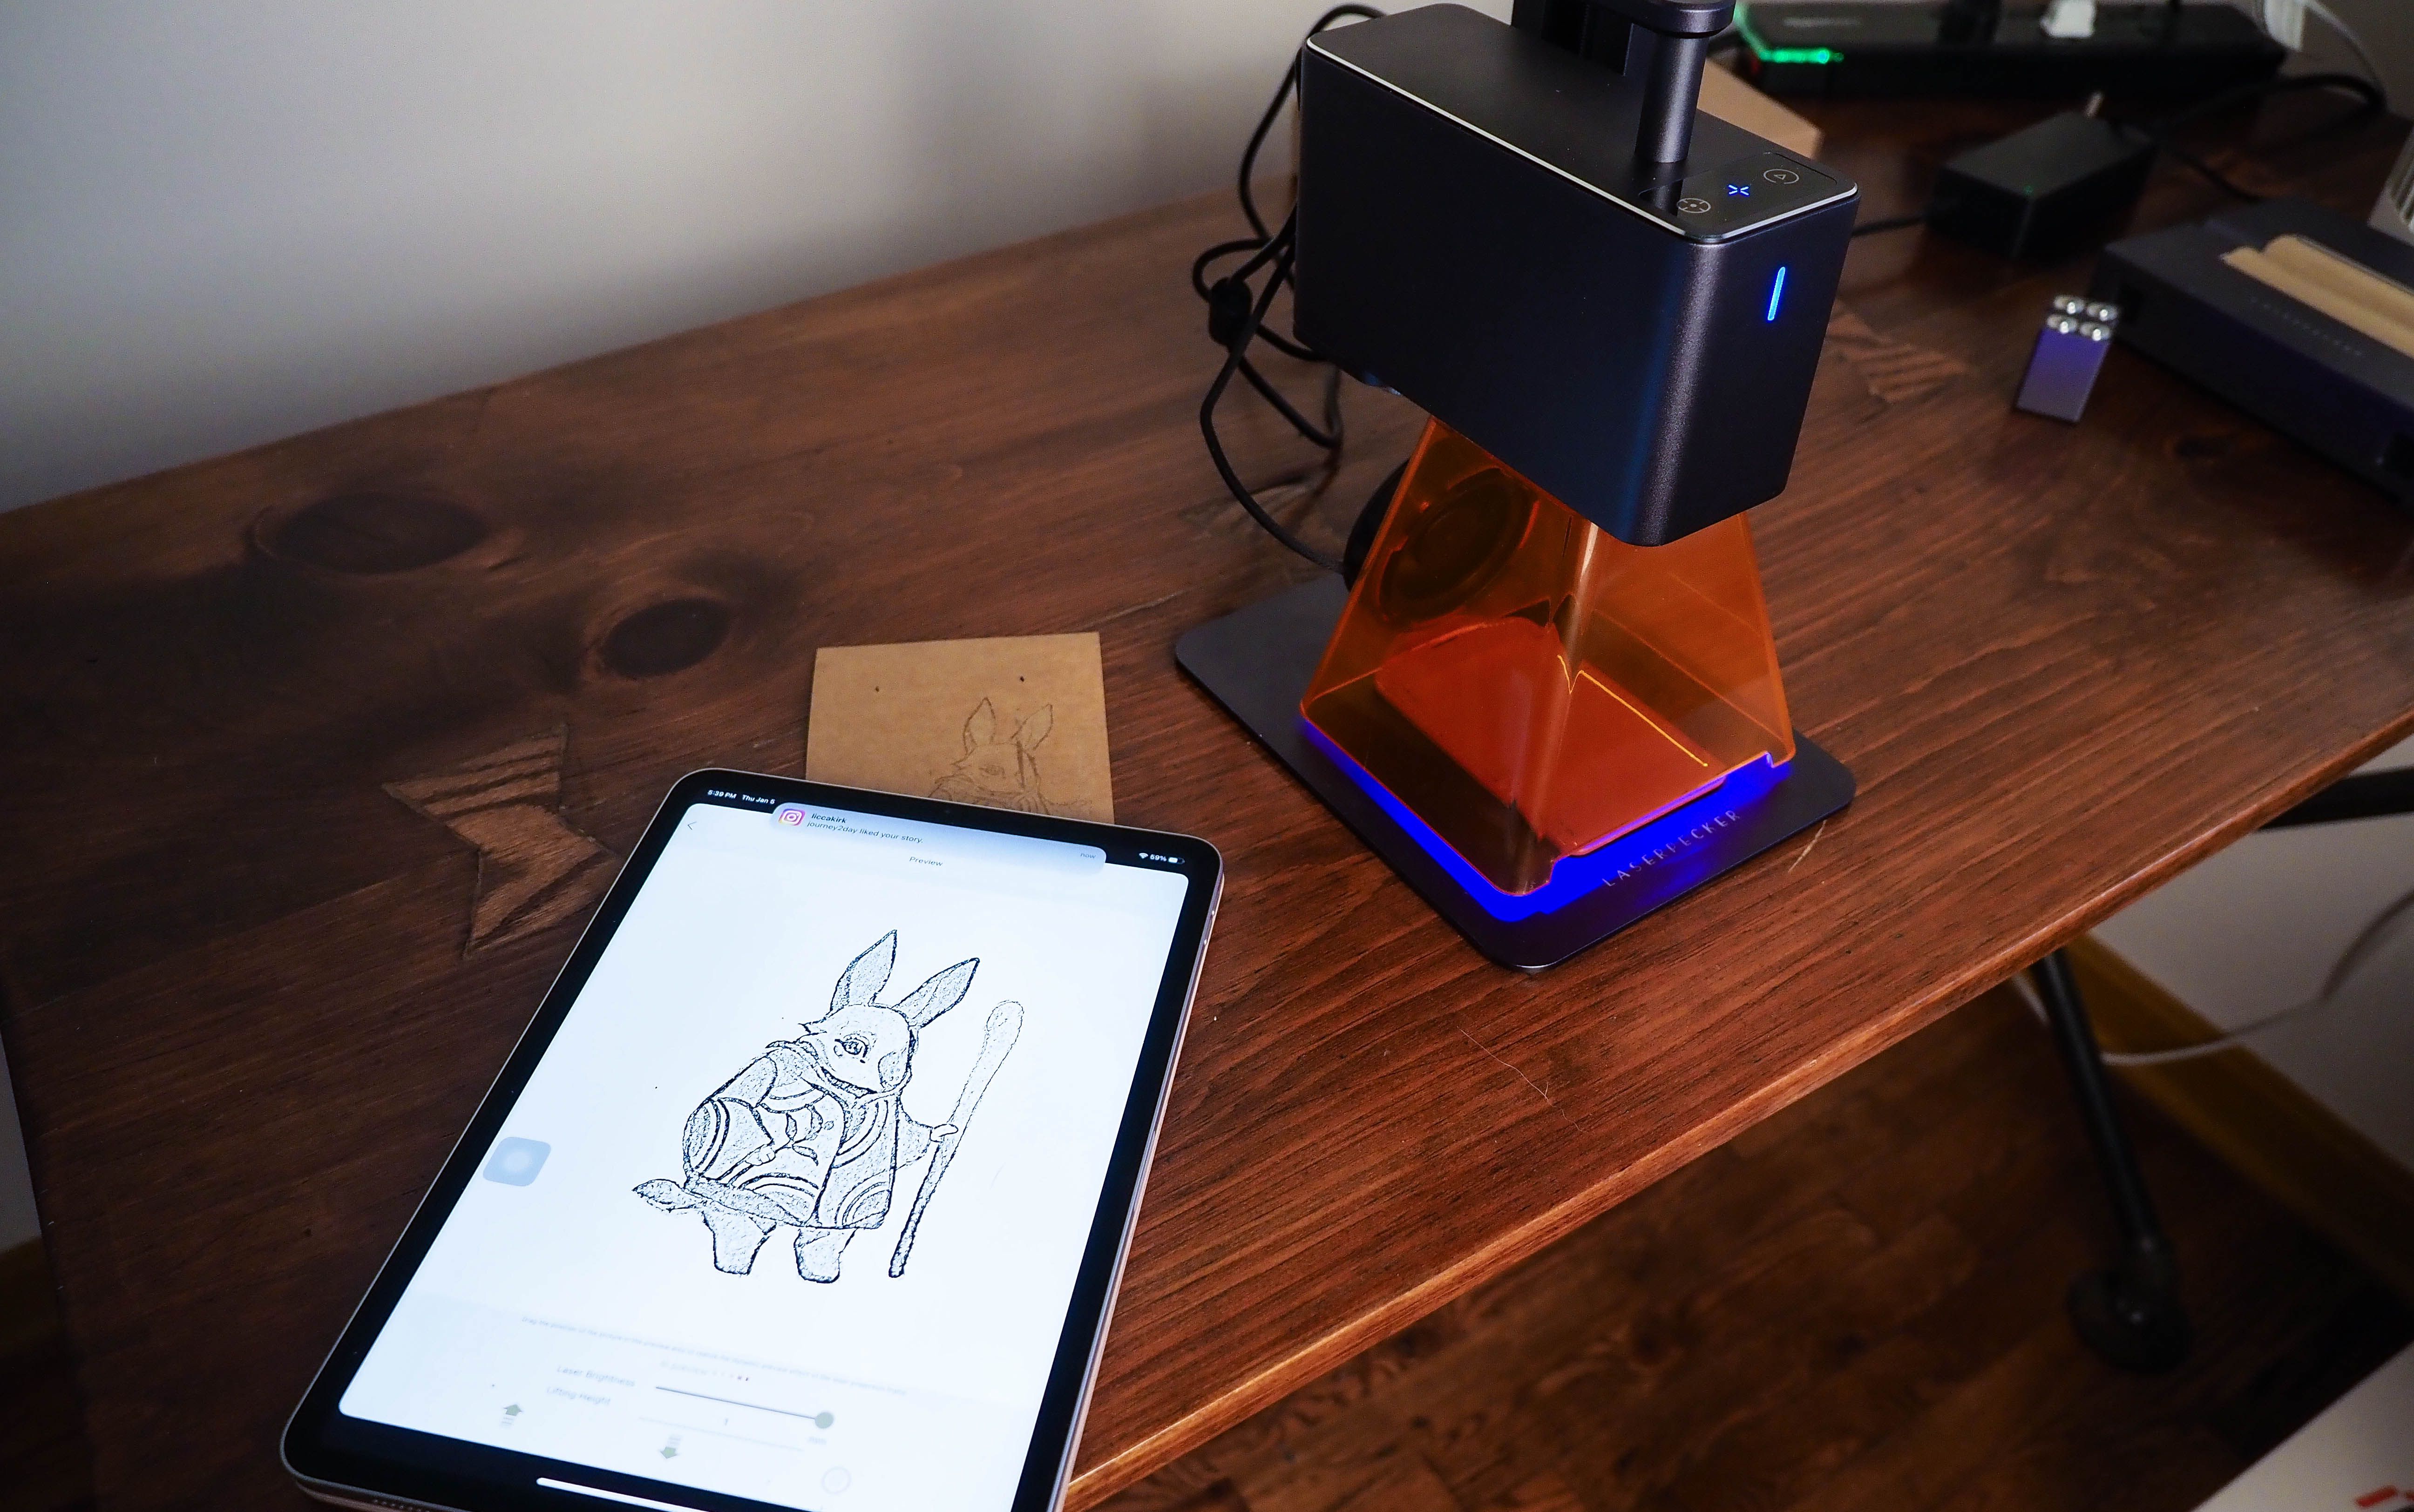
The LaserPecker 2 attempts to simplify usage by primarily relying on a smartphone app. From here, users can choose from their device's album, camera, clipart-style examples, or create their own text and artwork. That said, the interface is quite simple, so if you want to make your art, I'd suggest doing so elsewhere then importing it from your camera roll.
However, creating text using your system's fonts or generating QR and barcodes proves far more useful. To better acquaint users with different size scales, the included clip-art library provides examples for the default LaserPecker 2 work area and its expanded trolley-sizing. When importing your own material, the five presets (pencil, G-code, bin, gray, and seal) do also allow for some basic customization and clean-up.
But to ensure fewer potential artifacts and allow for a better translation, it's still advised to prep your files beforehand. Also, when starting with any new design, it's advisable to do a quick test on scrap material.
Orientating your design with the LaserPecker app isn't always obvious. In most cases, you'll either need to turn your device upside down to preview the correct orientation or rotate the image within the app. This isn't consistent, so you'll want to do a sample test to avoid printing the wrong way.
In addition, I found occasional issues with the Bluetooth connection. Sometimes, the LaserPecker app will report that there's an unstable Bluetooth connection and not operate as intended. To bypass this, you can typically restart the app and the device; it can occasionally linger on. You'll also sometimes not experience the error message directly; your file will hang in transit via Bluetooth when preparing to engrave.
In most cases, these are significantly reduced if you update the LaserPecker 2's firmware. However, upgrading does come with some risks (as outlined when using the beta desktop software and reading the downloadable manual) that need to be weighed against your current file uses.

For those wanting to connect the LaserPecker 2 directly to your computer, it can be done via the included USB cable and the separate computer software interface port at the back of the LaserPecker 2. Some connectivity issues can pop up when using the newer beta versions of the desktop software. However, for those looking for more of a LightBurn style of software, it's LaserPecker's closest software attempt yet.
If you do opt to downgrade the firmware of the LaserPecker 2 to an earlier version, previous versions of the desktop software can still be used. Overall, there's less incentive to bind the LaserPecker 2 to your computer; it's an option for those not wanting to deal with any mobile apps. In most cases, you're better off preparing files for the app with the proper dimensions, but you're free to work within the app as well.
Basic Engraving Methods with the LaserPecker 2

There are a few ways to tackle basic engraving for users with the core package of the LaserPecker 2. You can either take advantage of the top-down mounted electric lifting support or adjust the separate inside knob next to the ranging rod to fix the LaserPecker 2 at an appropriately distanced angle. Alternatively, the LaserPecker 2 can also be removed from the support base.
Regardless of which you pick, most basic engraving jobs within the 100 x 100mm area can be accomplished in a matter of minutes, depending on the design size. When beginning a job, you'll pick the power and depth (which controls the speed of the laser's operation). Remember that the more complex an image and the deeper you wish to engrave, the longer the overall processing time.

When deciding between engraving with the fixed stand or by hand, you'll mostly want to consider your materials. If engraving anything precut, you'll typically want to take advantage of handheld engraving just to ensure proper placement since the fixed lifting support area can prove limiting. In addition, those not wanting to create their own DIY ventilation set-up can take advantage of engraving outside while utilizing power via the LaserPecker's compact 6,400 mAh rechargeable power bank or via another suitable 12V output.
Using the LaserPecker 2 Rotary for Additional Engraving Options

In addition to the basic LaserPecker 2's default engraving modes, the electric roller add-on and its secondary sliders open up a variety of creative options. The trolley mode offers an expanded maximum working area of 100 x 2000mm for longer design jobs. Appropriate cable usage is required for all use cases, and the third-axis engraving mode is activated via the LaserPecker app.
Once everything is prepped, it's highly advised to begin a preview of each design. After getting a positional preview of the work area, you should continue with the preview to allow the rollers to begin movement. This is especially crucial with the trolley mode, which sets the LaserPecker 2 into motion.
While the metal roller works fine, the secondary sliders don't always work perfectly. So you'll ideally want smooth, level wooden surfaces to avoid accidental deviation during the trolley's operation. Additionally, some wood finishes can present issues.
This can also prove to be a similar concern when working with heavier materials that won't roll properly across the secondary sliders when using the slab mode. To test this, I worked with different slate pieces; the roller struggled with a heavier slate with a more jagged edge line.
Rather than waste any materials, you'll want to compare what you have on hand beforehand. In most cases, the basic rule is that the LaserPecker 2 works best with lightweight objects that are appropriately flat.

Beyond trolley and slab mode, you'll also want to consider cylinder mode for things like glasses. As with other use cases of the third axis add-on, you'll typically want to ensure a preview before completing any job. Since the rollers come with a small package of silicone rings, you can place these on both ends of your smooth objects to prevent skidding when placed atop the metal rollers.
When working with highball glasses, masking via black tempera paint provided a simple way to engrave safely. For longer and slightly heavier glasses or bottles, you'll want to pay attention to their position when placed along the metal rollers to avoid any accidental shifting. Lighter cylindrical objects work better, but effectively using the metal rollers can still require some trial and error.
Should You Use the LaserPecker 2 for Cutting?

For those looking to cut with the LaserPecker 2, it can cut up to 5mm materials; this requires tweaks for better results. With the default safety cover and exhaust fan, there is some relief to the potential build-up of heat and debris. However, it's still quite possible to see small flames and charring while the fan actively works to vent your work area.
With more experienced users and those used to running their own exhaust pipe for better extraction, it's less of an issue. However, an air assist option or including LaserPecker's smoke exhaust pipe via one of the included bundles would have been beneficial. Without modifications, you'll want to take even more care to clean the fan of any build-up via a cotton swab as you complete more engravings and cuts.
Another consideration when cutting is the working area of the LaserPecker 2. While certain designs may scale down appropriately, it's an extra step that needs to be followed through on. Additionally, suppose you're cutting parts individually at their regular scale for the likes of projects such as models. In that case, this can prove much more time-consuming versus doing so via a standard-sized laser engraver.

Overall, the ability to cut on the LaserPecker 2 is not ideal compared to its engraving process's simplicity. For those wanting to handle small-format engraving jobs quickly, the LaserPecker 2 is great. However, if you're willing to experiment and modify your surroundings for the 5W laser, it can still be used for cutting—albeit less effectively than the likes of 10W and higher diode lasers.
Should You Buy the LaserPecker 2?

When purchasing the LaserPecker 2, you need to weigh a few considerations. While it benefits from its portability foremost, it's a more expensive option and can require more tweaking for some operating modes. With that in mind, it can be a beneficial business investment if you're after a machine that can handle batch production for small items relatively quickly and on the go. The 5W laser won't be strong enough to cut through many materials, but it will engrave and mark most.
Overall, the LaserPecker 2 works best at small-format engraving projects. If you need to work outside or on surfaces in situ, it's perfect. If you don't have the space for a full-sized engraver, it's a space-saving option that can introduce you to laser engraving.
As long as the LaserPecker 2 lines up with your designs and intentions, it's a welcome option to explore.