Keeping a daily to-do list is an excellent way to stay on top of your tasks, but you’ll never feel like you’re making progress if you continue to add items as they come up. You can prevent this from happening by using a backlog.
In this article, we’ll explain what that is and how you can make one in Notion.
What Is a Backlog in Notion?
A backlog is a master list of your to-dos that aren’t urgent or current. When you learn about a new task, you park it on your backlog rather than writing it on your current to-do list or assigning it to a date right away.
The main benefit of using a backlog is you don’t forget about the task, but the new assignment also doesn’t become a distraction since you know you’ll get to it later. You can also use this master list, or a series of them, to help you get your to-do list back on track if you're feeling a bit disorganized.
Once you create your backlog, you refer to it when writing your daily to-list, moving items over based on priority, or as you see fit.
Additionally, keeping a backlog gives you time to consider the importance of a task rather than just doing it right away because you’re excited or anxious. Sometimes a task that seems like a great idea at the moment can turn out to be frivolous.
Choosing Between a Checklist or Database in Notion
There are many ways you can make a backlog in Notion. You even get the job done quickly by creating a new page and adding a bulleted list. However, it can be easy to forget details in your day-to-day busyness.
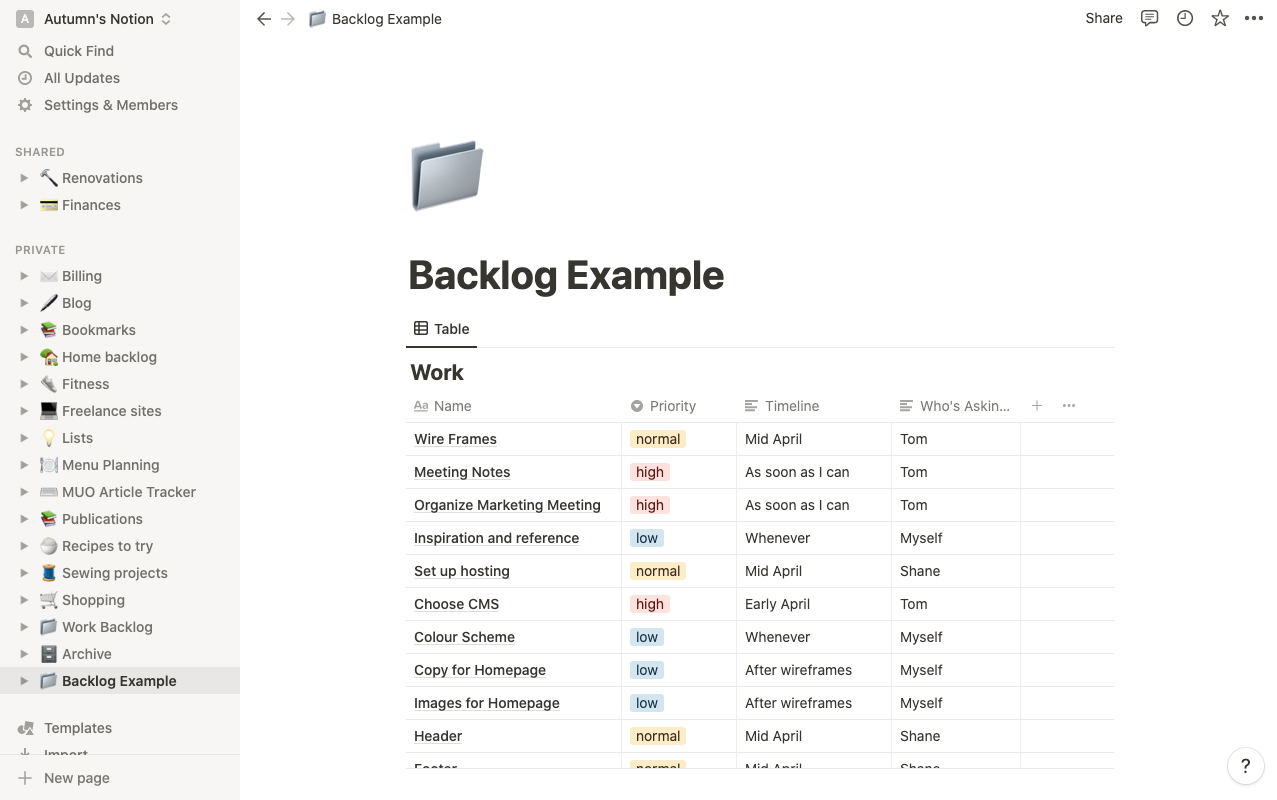
Including some prompts for extra notes will certainly help you later when referring to your backlog. Plus, Notion has all sorts of cool features available—so, why not use them? In this example, we’ll show you how to make a backlog using a Table Database.
As you're following along, think of how you would customize it to suit your workflow—and if you're new to Notion, you may want to read up on using databases to understand just how versatile they are.
How to Make a Backlog In Notion
To get started with your backlog, create a new page by selecting the option in the bottom-left corner and giving it a title. For this page, you won’t need a template. Press Enter on your keyboard to work without one, and now you’re in the text editor.
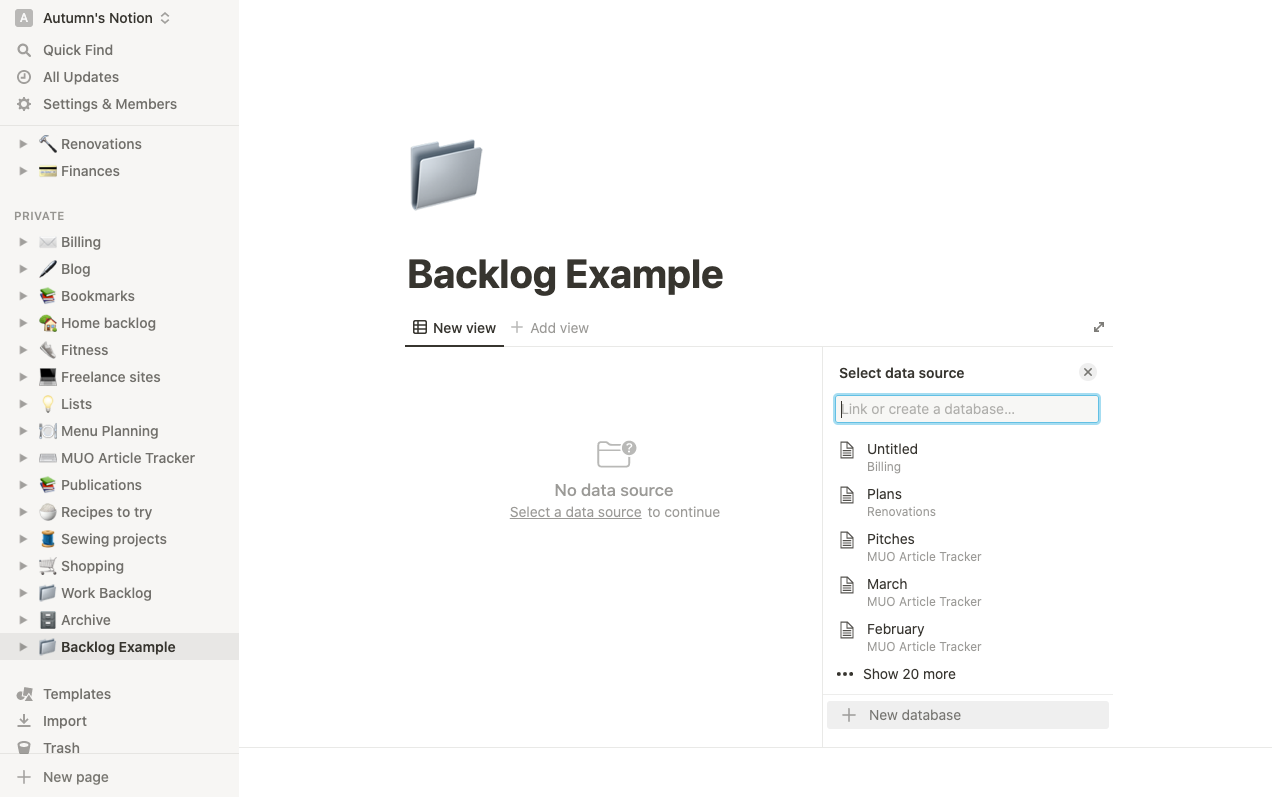
Within the editor, press the forward slash to bring up the commands menu and start typing table. Locate and select Table View and then New database at the bottom of the Select data source menu.
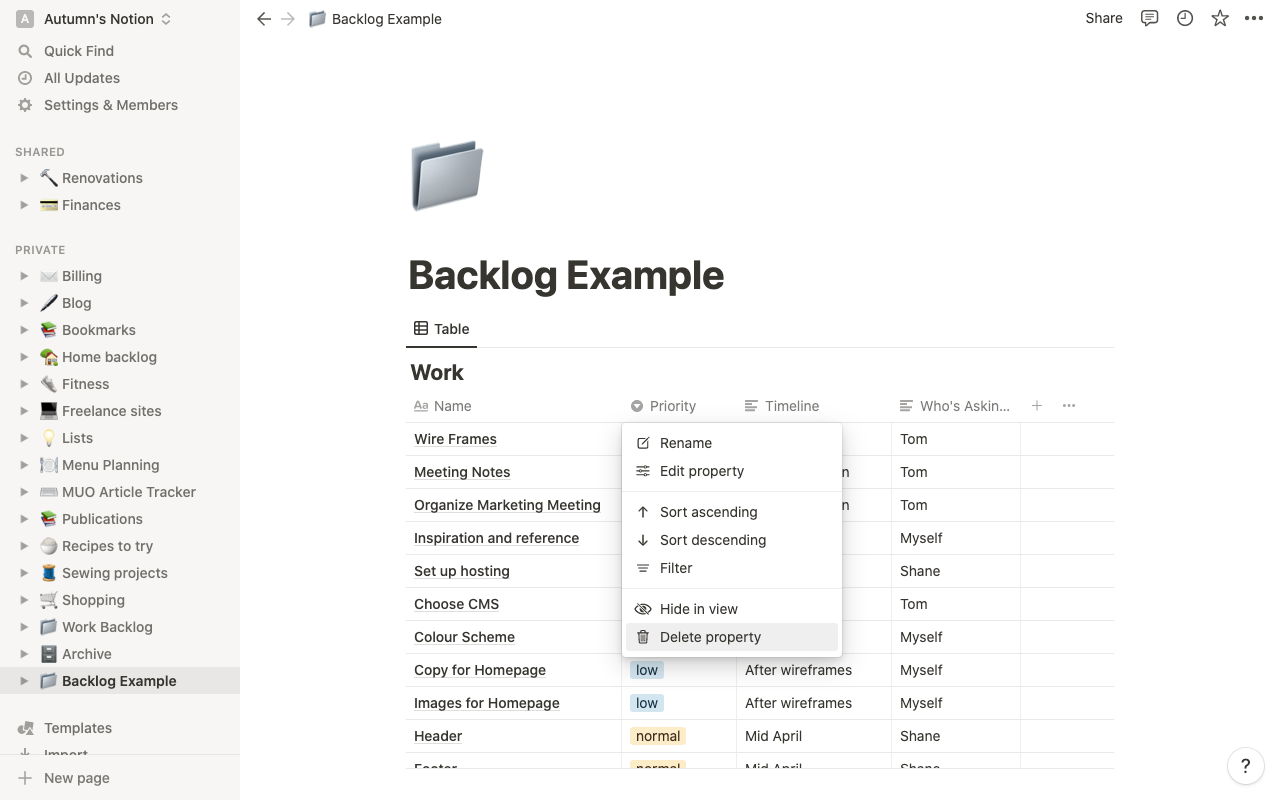
Your new table will appear with a Name and Tags column. Remove the "Tags" column by clicking its name and selecting Delete property.
The Name column you’ll want to keep. This is where you’ll include the title of your task—which becomes its own page if you need to add more notes about the project.
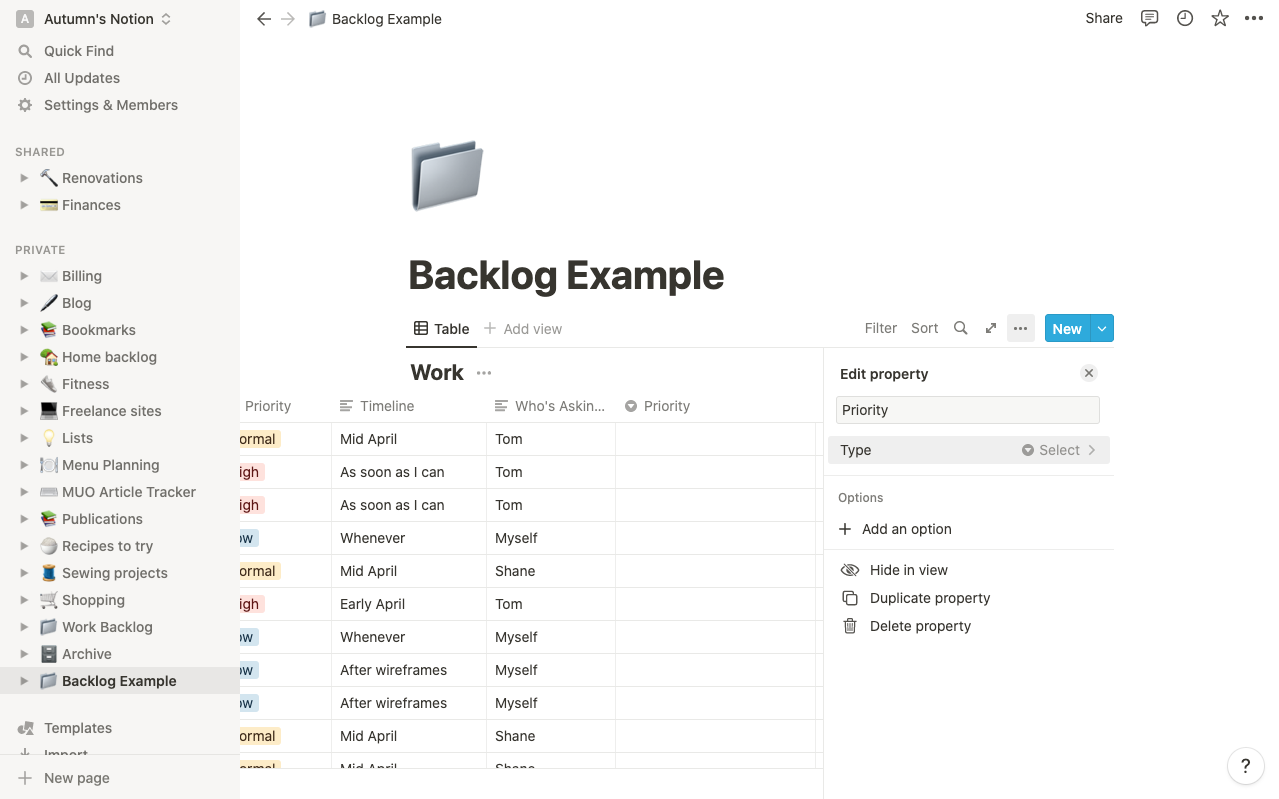
To create the Priority column, click the add symbol in the top-right of your table. Type the title in the field below Edit Property and under Type choose Select.
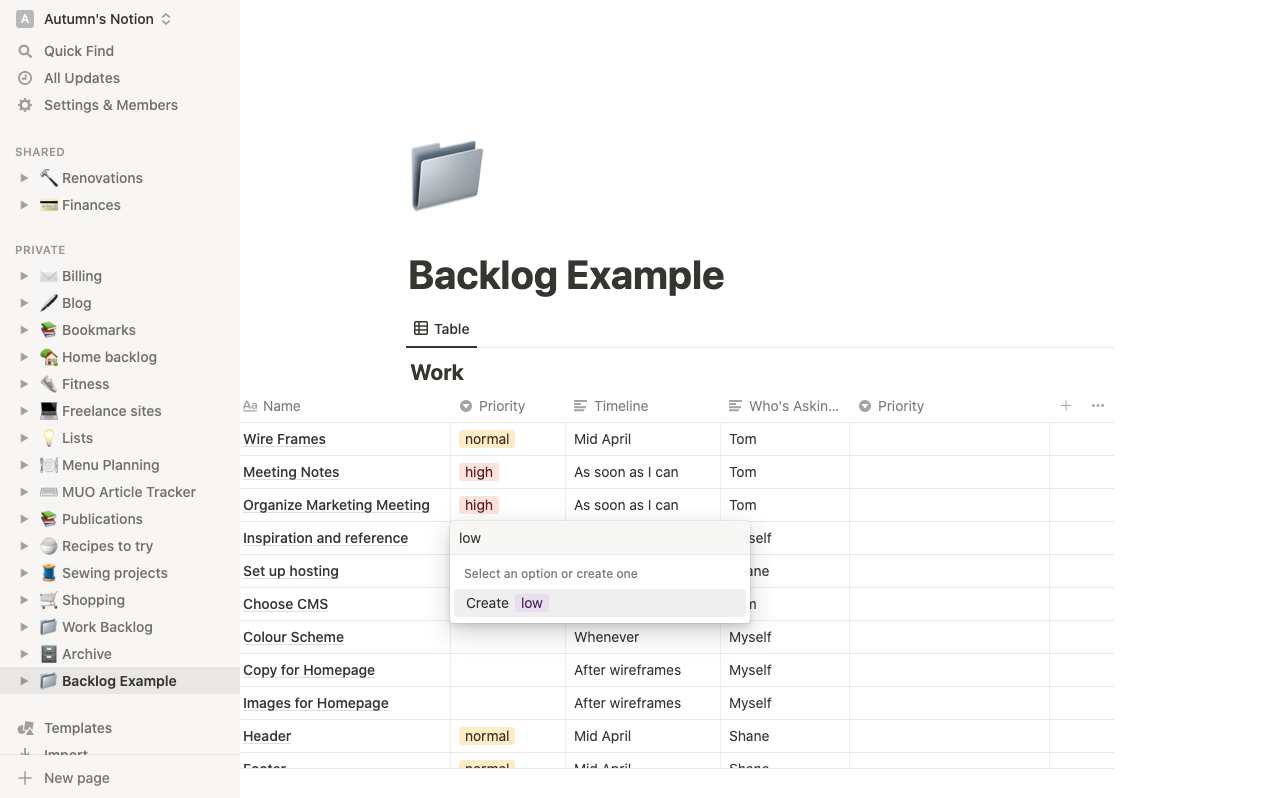
Now you're ready to make the select menu options. Within the Priority column, click into a cell and type low. You’ll see a prompt to create low as an option once you do.
This option will now appear in the list, where you can also click the three dots to change its color. Repeat with the other options and any additional ones you’d like to add.
For the Timeline and Who’s Asking? columns, add a new column as you did with the Priority column, but choose Text as the property type.
You can also use a Date property for the Timeline column. However, using a text field, you can enter looser timelines like next month, ASAP, or whenever, so you're not having to worry about assigning an exact date when jotting down notes.
The “Who’s Asking?” column is also there to help prioritize an item and to remind you who you’re accountable to, which may not be necessary if it's a personal to-do list.
Keep in mind that you can customize this in any way you’d like. Other suggestions for your backlog could be a Link column if you frequently need to check links, a Files & media column if you need to reference attachments or memos, or a Created time column if you want a quick way to check when you created a task.
When creating your columns, just think of the types of information you frequently need to reference when working. To avoid cluttering your table, you can fill in extra information by clicking on the task page.
How to Move Tasks Over in Notion
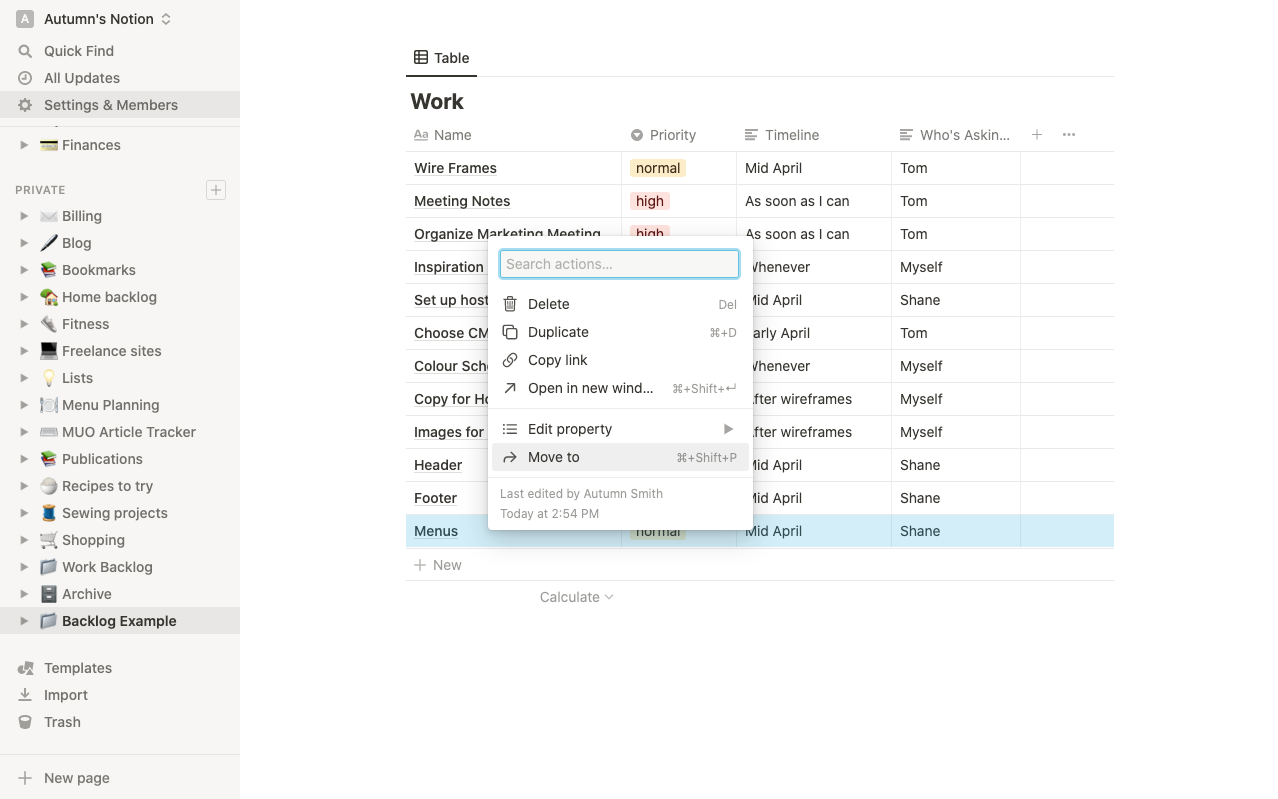
Once you’re ready to take on a task from your backlog, you can move it to your current to-do list in two ways. One way is to right-click the row and select Move to. From there, you choose the page from the list of options, and it will move over. You can find it at the bottom of your page, where you can drag and drop it wherever you’d like.
The other way to move items from your backlog is to drag and drop them right from the table into the sidebar, hovering over the page where you want them to go. Like the first method, it will also appear at the bottom of your page.
If you use a database for your to-do list and the properties match, the information will appear the same once you move the task into place.
The number of tasks you move over is up to you, however, if you’re looking for a suggestion, the Ivy Lee Method uses six tasks a day. The important thing to remember is to avoid piling more items onto your list once you’ve checked everything off.
Shorten Your Daily To-Do List With Notion
A backlog helps you keep your daily to-do list organized and current. By using one, you can be more intentional about choosing your tasks, and you can keep a shorter daily list without feeling like you’re forgetting something.
Why not give it a try with your current to-do list to see if it works for you?

