TeamViewer is one of the most popular remote access software programs. You might find TeamViewer to be a fantastic program for acquiring remote access. However, it's an easy way for hackers to benefit from your personal information too.
Besides that, this tool has also been used for support scams before. So, is TeamViewer safe to use? Certainly, hackers can abuse this program, but if used correctly, it's an amazing way to acquire remote access.
Here's how to make TeamViewer safer, more private, and more secure.
1. Turn On Two-Factor Authentication (2FA)
Curious about what two-factor authentication is? Two-factor authentication in TeamViewer offers accounts an additional layer of protection. This feature enables a verification step for the login ID and password.
When two-factor authentication is turned on, you get a unique code on your smartphone shortly after entering your username and password. This is an invincible barrier against tech support scams and other cyber crimes.
When someone tries to connect to the secured device, you then get a push notification on your phone with the device ID and a prompt asking if you want to let them connect or not.
To configure two-factor authentication, open the TeamViewer settings on your desktop and then click on Security > Two-factor authentication for connections > Configure. To add a new approval device for approving connections, simply follow the on-screen instructions.
2. Set Up a Unique Strong Password
Whether you are using TeamViewer or any other service, you should always use a password that contains both uppercase and lowercase letters, special characters, and digits. This simple method can protect your account and prevent hackers from accessing your information.
Follow these steps to update your TeamViewer password:
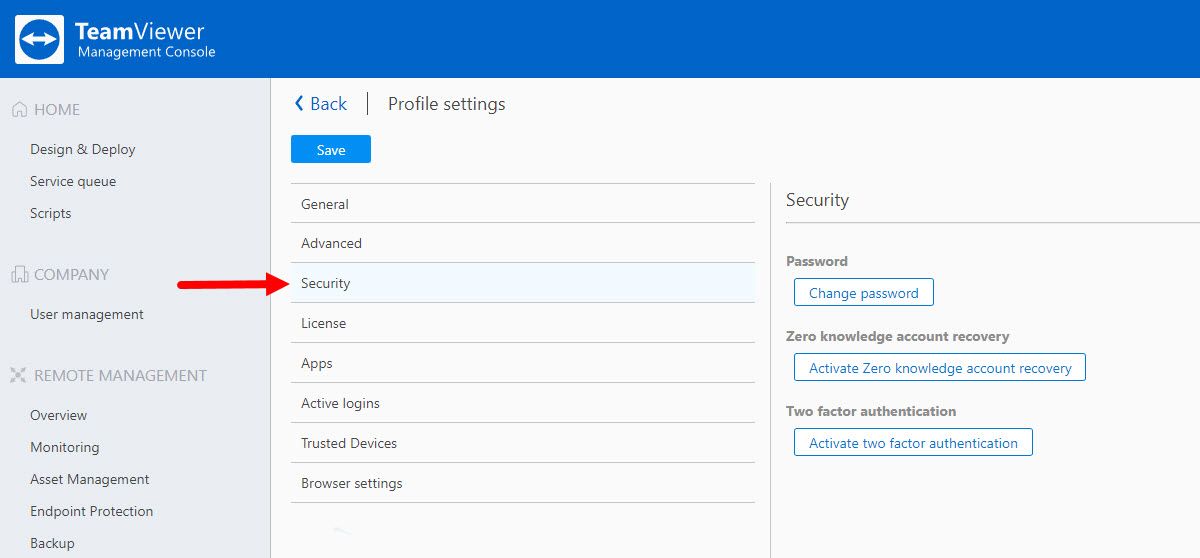
- Log into the TeamViewer User Management Console.
-
Open your Profile settings and click on the Security option.
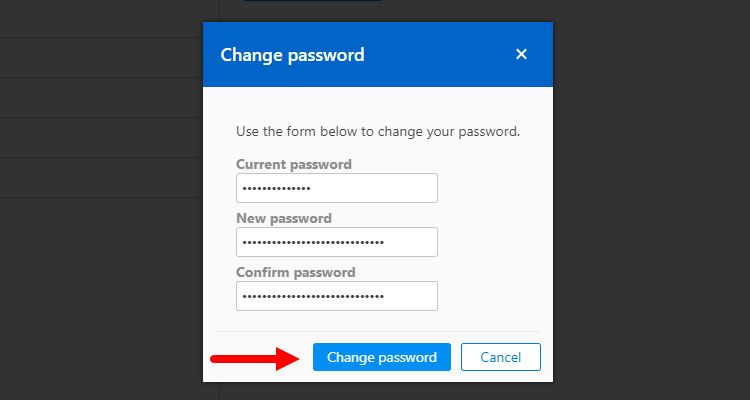
- Now, click on the Change password button.
- Enter your current password and a new password.
-
Once you're done, confirm the changes by clicking Change password again.


While entering your new password, you should avoid making some common password mistakes that could lead to your account being compromised. Don't use popular or easily guessed passwords such as "123456", "abc123", "qwerty", etc.
Use a password manager to generate and store your passwords, so you don't have to remember them all. There are numerous other benefits of password managers that make them essential for everyone.
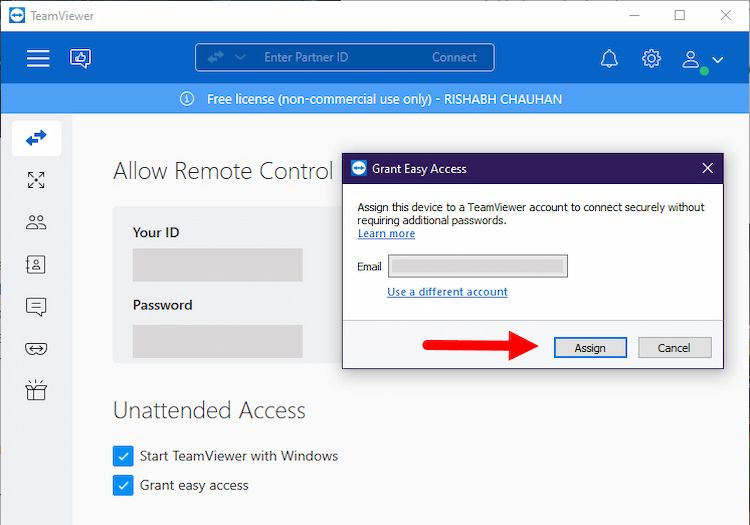
3. Activate Unattended Access in TeamViewer
Unattended access in TeamViewer allows you to remotely access or control your computer at any time without being physically there. This method is more secure than those that rely on passwords due to the presence of a powerful feature: the aforementioned two-factor authentication.
Using two-factor authentication to secure your TeamViewer account significantly reduces the likelihood that a third party will gain access to your devices. However, if the device isn't associated with your TeamViewer account yet, you'll have to first assign it.
Follow these steps to activate unattended access in TeamViewer:
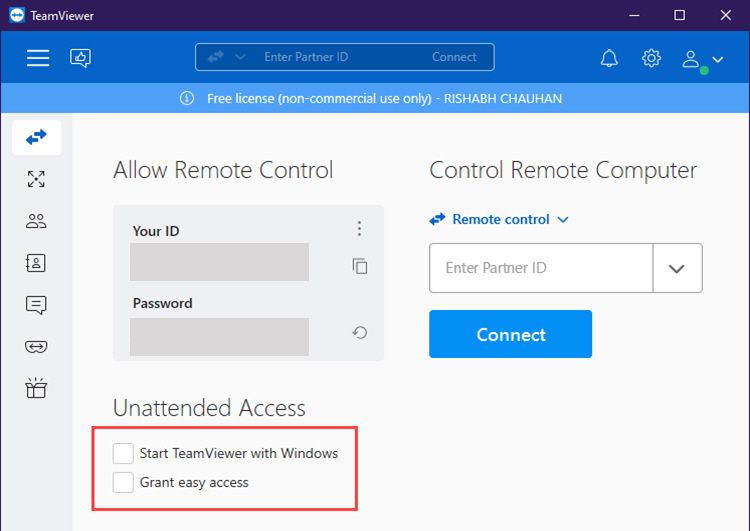
- Open the TeamViewer console.
-
Enable or toggle the Start TeamViewer with Windows and Grant easy access checkboxes.
-
Now, on the next following screen, click the Assign button to assign your device to your TeamViewer account.


4. Configure Block and Allowlist
You can easily track who can connect to your devices using TeamViewer by using the Allowlist and Blocklist options.
The Blocklist, as the name implies, allows you to restrict specific partners or devices from connecting to your computer. TeamViewer IDs or accounts on the blocklist won't be able to connect to your computer.
You can, on the other hand, configure your custom Allowlist to allow just specific partners or contacts to connect to your computer. As a result, even if the outsiders somehow get your TeamViewer email and password, they can't link to your computer.
Here's how you can set up your custom list to allow or block someone in TeamViewer:
-
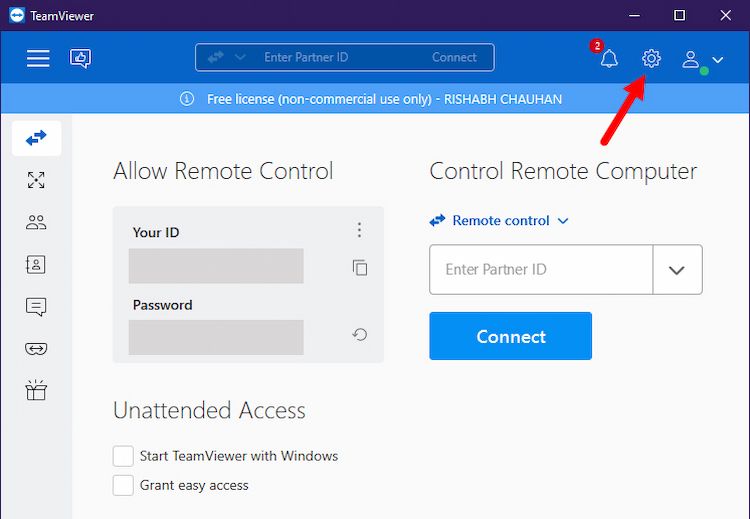
Open the TeamViewer console and click the gear icon or settings button in the upper right corner.
-
Next, navigate to Security > Block and allowlist > Configure...
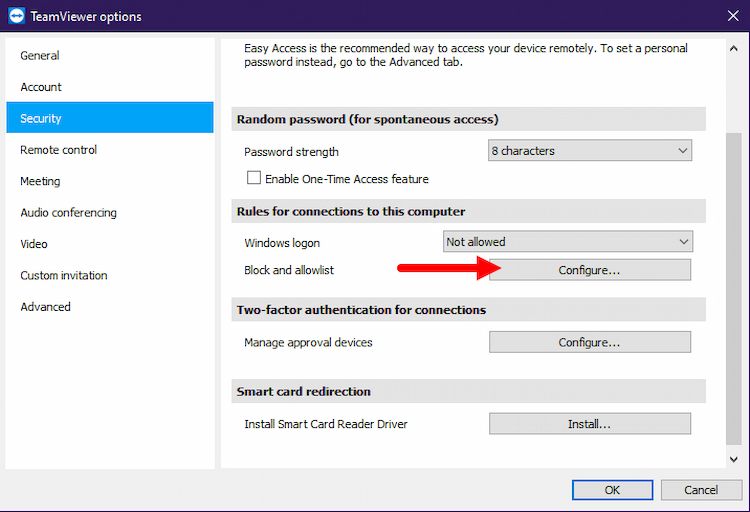
- A new window will open. Select whether you want to Allow or Deny access to the partners in your list.
- Once done, click the Add button.
- Add the partners or contacts in the list manually and save the changes by clicking the OK button.


Is TeamViewer safe for business use? Yes—given the fact that you follow the safety measures outlined.
To ensure greater safety, you can simply connect your business or company profile with your TeamViewer account, and you can also add the complete company profile to the Allowlist. This is useful if you just want certain people to have remote access to your device.
5. Disable TeamViewer Startup With Windows
Usually, the best way to keep hackers from getting into your computer is to log out of the application. So, to avoid any attack via TeamViewer while you're away from your PC, we recommend logging out of your TeamViewer account.
The same advice applies to all computer programs. Hackers are always looking for these kinds of remote access apps so they can use your computer as part of a botnet and launch DDoS attacks.
You should only run the TeamViewer program when you need it. But what if you need TeamViewer to be on all the time for your work? In that case, you don't need to log out—just disable the Start TeamViewer with Windows option from the TeamViewer console.

To ensure greater safety, you can also disable the auto-startup by using one of the numerous options to disable startup programs in Windows. This is the best way to keep someone from getting into your desktop.
If you use unattended access, you should keep this feature on because otherwise, it might not work the way it's supposed to.
6. Advanced Security Options in TeamViewer
You can control TeamViewer's remote access features in a lot of different ways with its advanced security options. This type of advanced security gives remote access sessions a wide range of minor permissions.
You can set these options to allow, after confirmation, or deny, depending on what you need. But we recommend choosing the "after confirmation" or "confirm all" tab so that it asks for access permission before transferring files or connecting to a VPN.
Follow these steps to make the recommended changes for enhanced security and a safer TeamViewer experience:
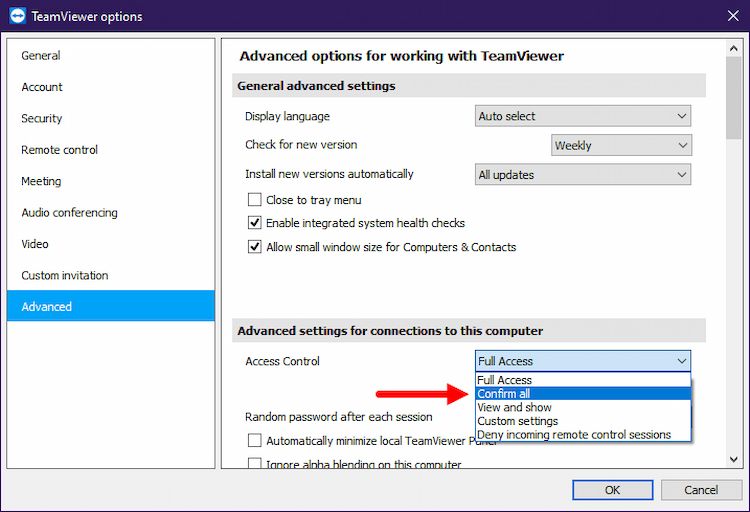
- Open your TeamViewer console and go to Settings > Advanced.
-
Now, click the Show advanced options button.
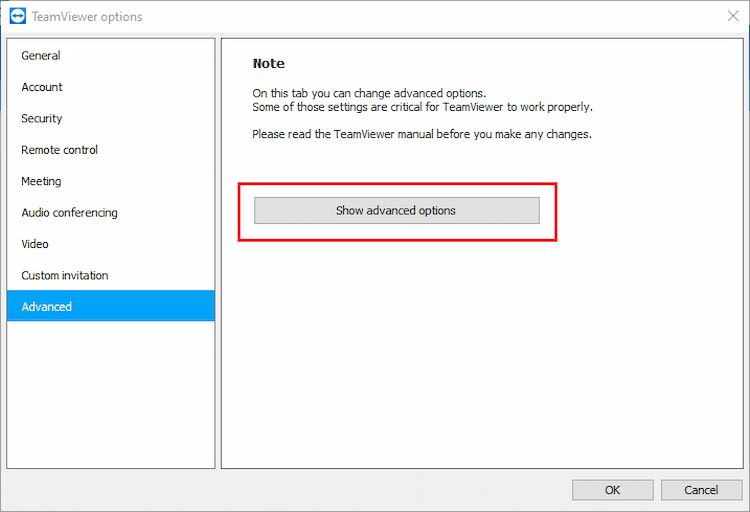
- Now, uncheck the checkboxes next to Close to tray menu and Clipboard Synchronisation.
-
Toggle the Access Control option to Confirm all in the drop-down list.
- Finally, apply the changes by clicking OK.


Above all, if you're wondering how to disable chats in TeamViewer, it's pretty much straightforward. Navigate to Settings > Advanced > Advanced Options and toggle the Disable Chats checkbox.
Is TeamViewer Safe?
Yes, TeamViewer is safe to use, as long as you use it properly and make it more secure. Besides following the mentioned tips, you should also update it routinely to prevent emerging vulnerabilities.
You must also check trustworthy devices to see whether your TeamViewer account has been hacked.