
Key Takeaways
- Auto-GPT is an automation AI model that uses GPT-3.5 or GPT-4 to complete tasks independently, making it like a personal assistant that can automate most of your tasks.
- Auto-GPT can be accessed on your PC by following a step-by-step guide that involves downloading Python, setting up API keys, and launching Auto-GPT through the Terminal.
- Auto-GPT with GPT-4 API is more accurate and better at crawling the internet compared to GPT-3.5 API, but both versions can automate tasks with simple defined goals, although it's recommended to verify the information after completion.
AI technology is accelerating fast, and we're moving towards artificial general intelligence that could change everything. We're not there yet, but ChatGPT-4 is widely considered the most advanced AI model.
Well, there is a new kid on the block that makes it even easier to use GPT-4: Auto-GPT. How does it work? And can you use it without GPT-4?
What Is Auto-GPT?

Auto-GPT is an automation AI model that uses GPT-3.5 or GPT-4 to complete tasks independently. In other words, Auto-GPT can develop its own prompts and answer autonomously to complete an objective. Auto-GPT differs from ChatGPT because it doesn't need a human agent to prompt it every step of the way.
What's more, Auto-GPT uses ChatGPT API to communicate with software, apps, and websites. This means Auto-GPT can reply to your emails, develop apps or websites, and even analyze the stock market autonomously with a single prompt.
Basically, Auto-GPT is like your personal assistant that can automate most of your tasks, and there are already several practical ways you can put Auto-GPT to use.
How Do You Access Auto-GPT on Your PC?

For starters, you can access Auto-GPT using Windows, MacOS, or Linux. You also need an OpenAI API account before you start.
Here is a step-by-step guide on how to install Auto-GPT on your PC:
-
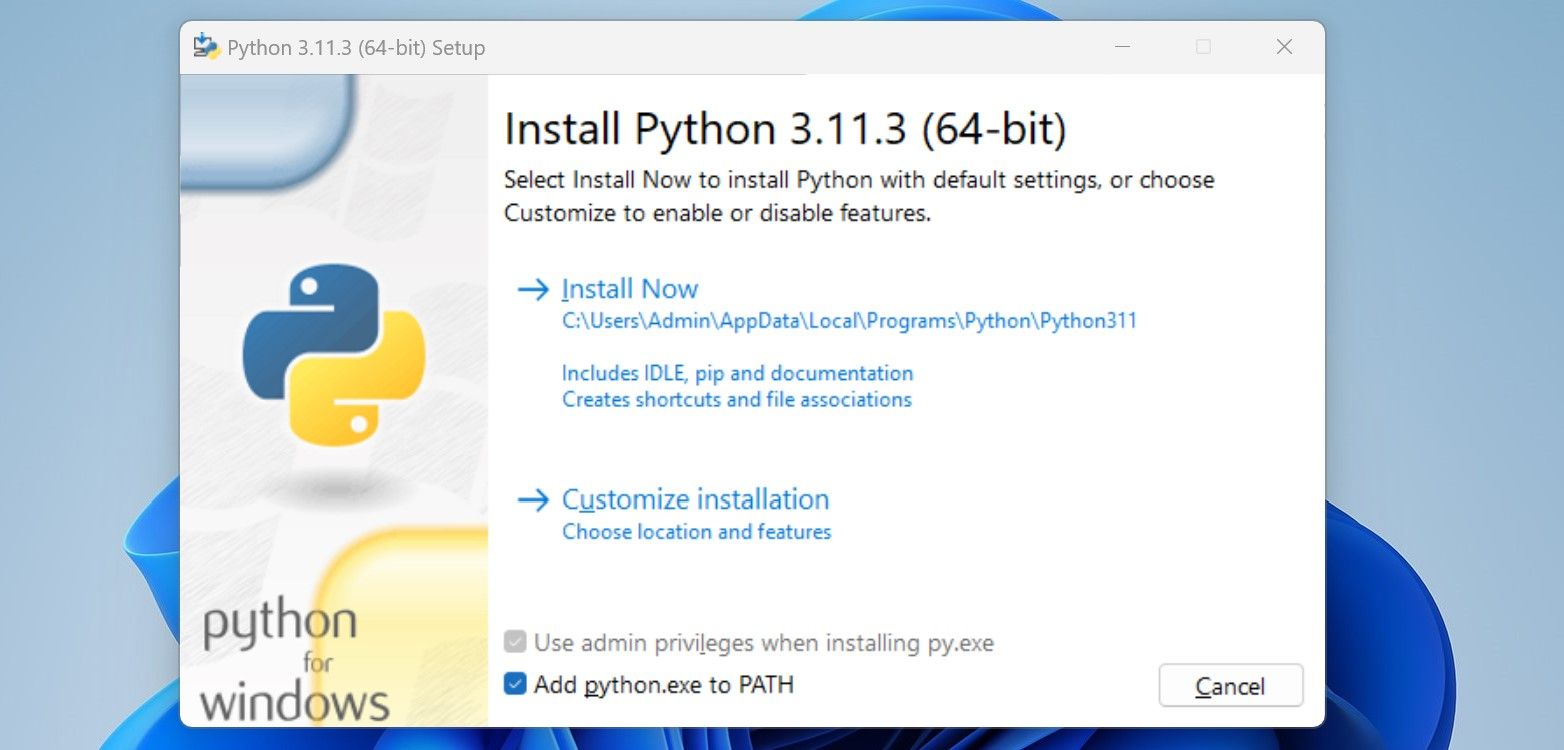
First, download the latest version of Python to your computer. Here is a guide on how to install Python PIP on Windows, Mac, and Linux. If you're using Windows, add Python to the Windows PATH variable before installation.
- Download Auto-GPT source code from GitHub.
- Extract the ZIP archive and copy the Auto-GPT folder to your preferred location.
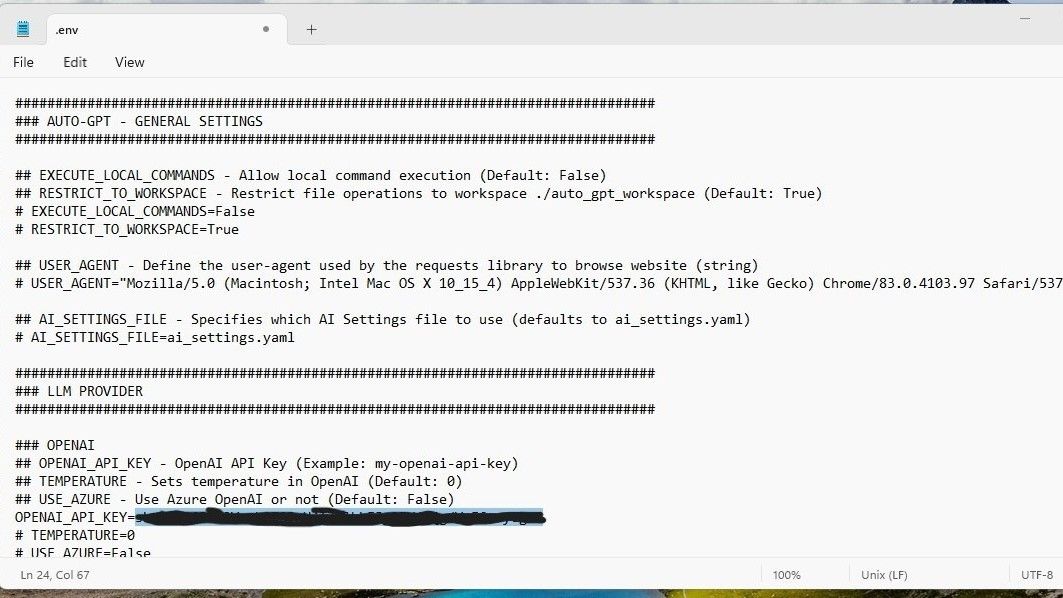
- Search for the ".env" file in the folder, right-click it, and select Open with Notepad.
-
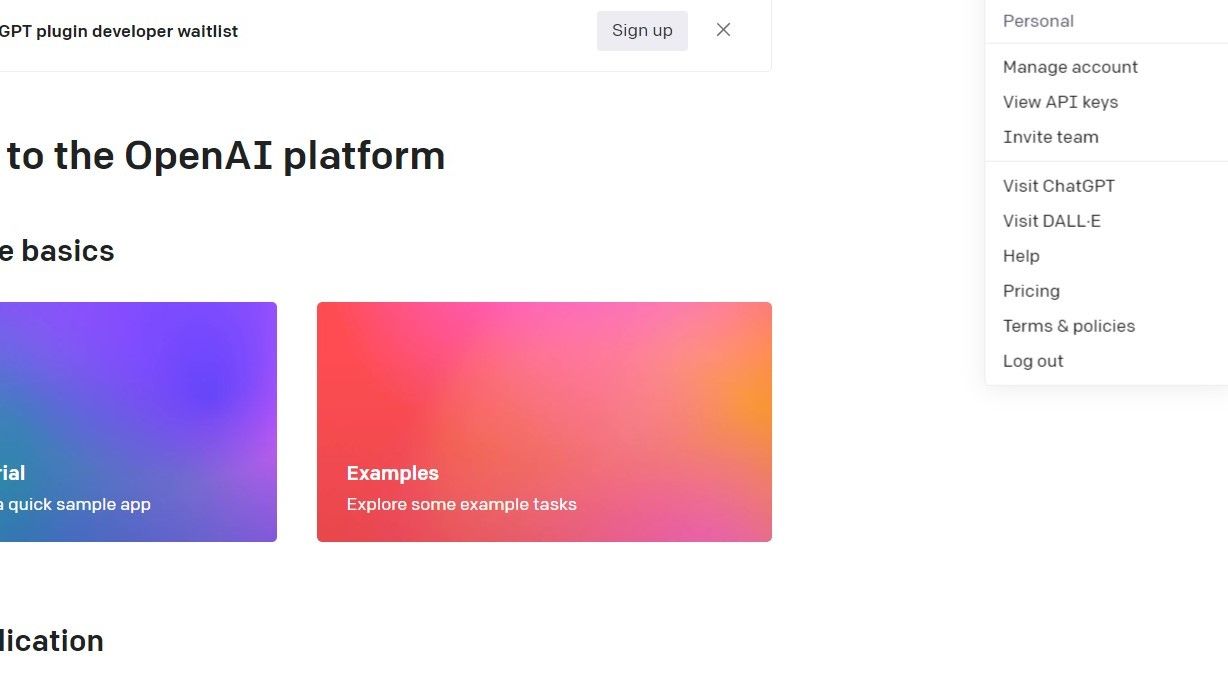
Visit your OpenAI account, and on the top right of your screen, click Personal and select View API keys. This should take you to the OpenAI API keys page while you're signed in.
-
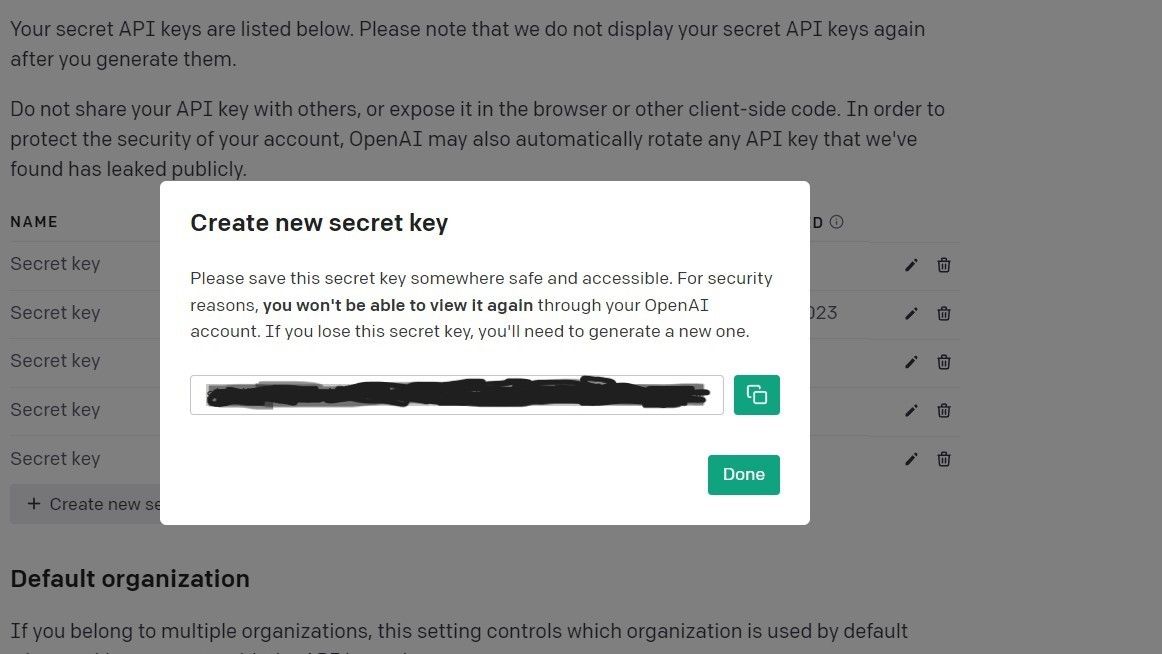
Copy your secret API keys from Open AI. If you don't have API keys, click on Create new secret key.
-
Replace the "your-openai-api-key" text in the ".env.template" file with the API keys.
- Create a free account on pinecone.io. Once you've signed in to your account, select API Keys and click Create API Key. However, it's not mandatory you use pinecone.io to install Auto-GPT—if you're put on a waiting list, you can skip to step 12.
- After naming and creating the new API key on Pinecone, copy the Key Value and paste it to replace "your-pinecone-api-key—this is on the third line under "PINECONE" on the ".env" file you've opened using Notepad.
-
On the pinecone.io account, copy the details under Environment and paste it on the ".env." file next to PINECONE_ENV—it should replace "your-pinecone-region".
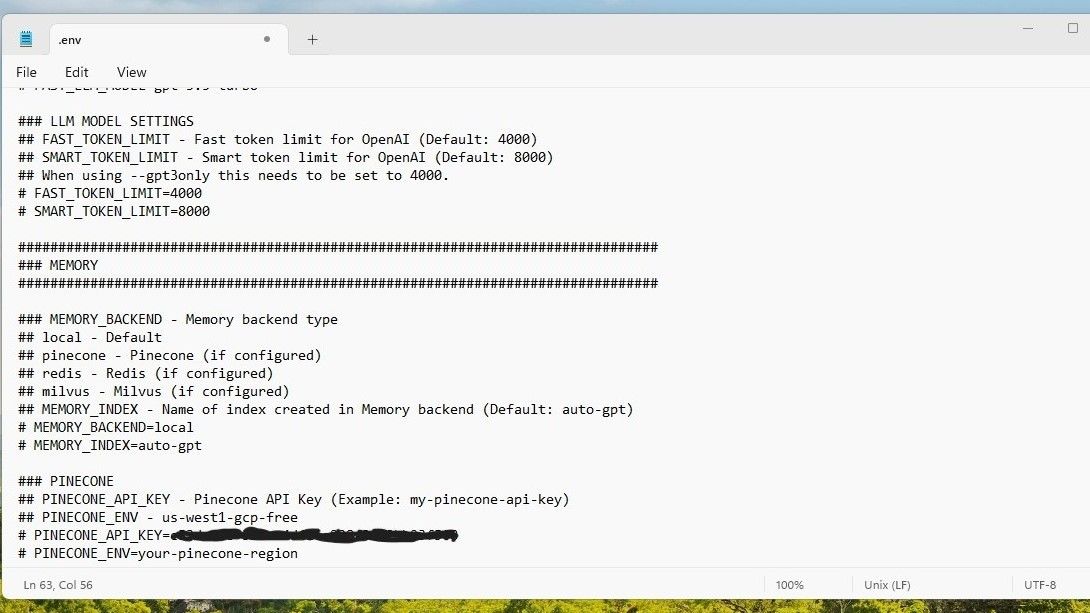
- Save the ".env" file.
-
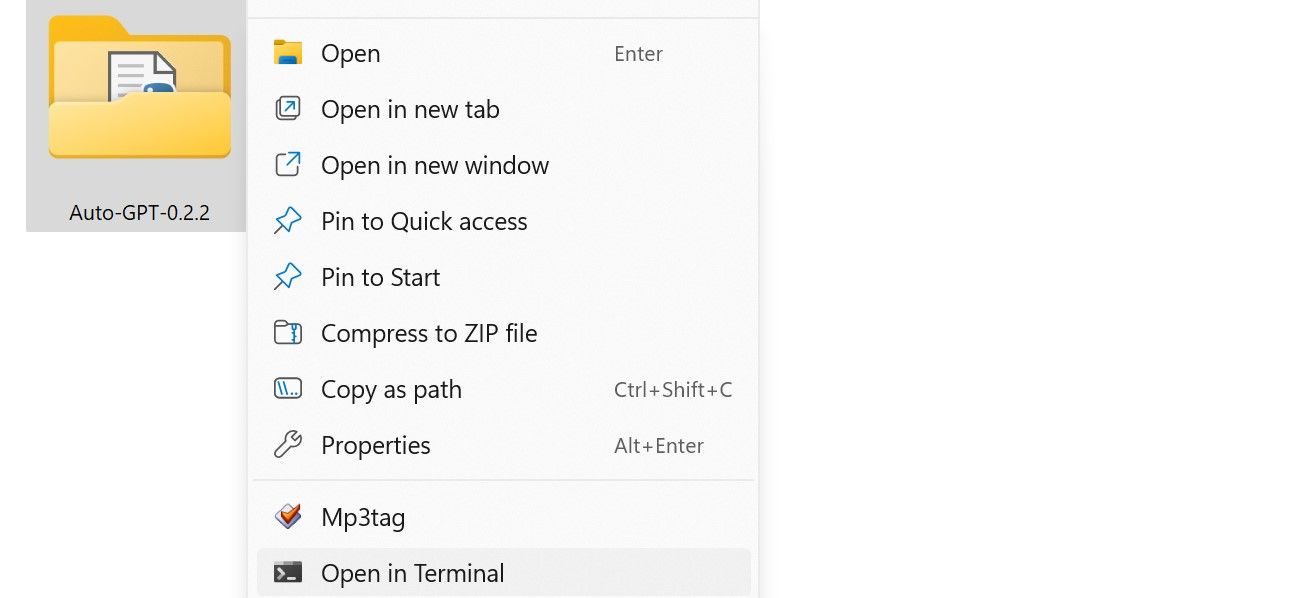
Right-click the Auto-GPT folder and select Open in Terminal.
-
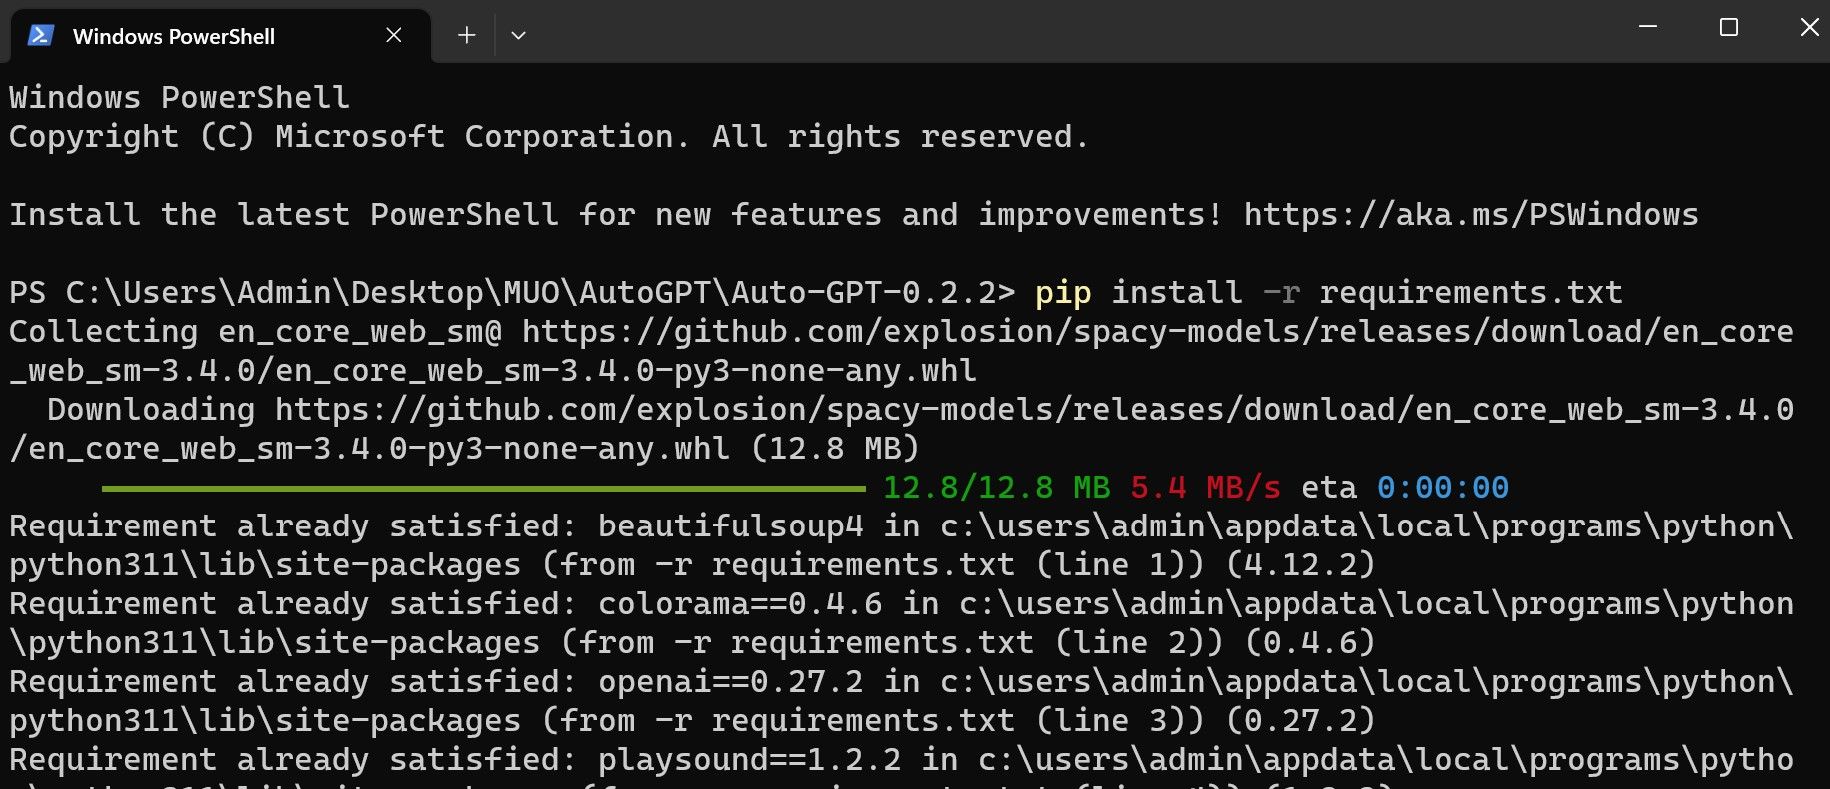
After you've opened the Terminal, enter "pip install -r requirements.txt" to automatically download and install the necessary libraries for Auto-GPT.
-
Launch Auto-GPT on your computer by executing the following command: "python -m autogpt".
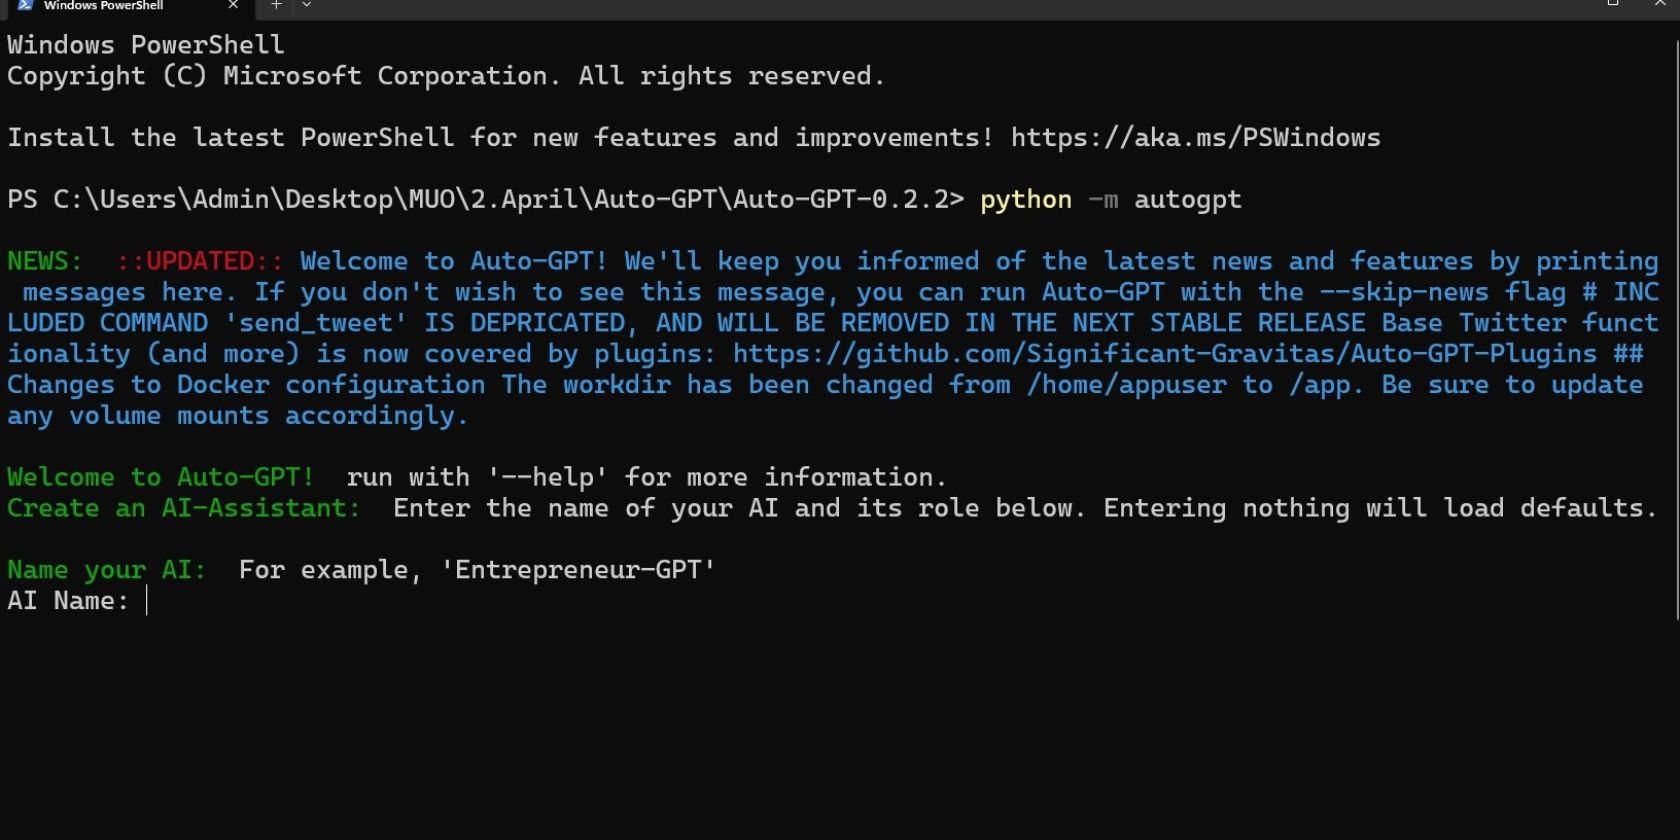
- Once you've launched Auto-GPT on your computer, the API will prompt you to give it a name and specific goals. For instance, you can define its role and tell it to analyze the stock market and save the report on a file.


Next, Auto-GPT will ask for your permission to start—you can approve it by pressing "Y" and the Enter key. Alternatively, you can press "y-(number of actions)". More succinctly, if you want Auto-GPT to perform ten actions without seeking your authorization, you can press "Y-10" and hit Enter.
If you want to stop an ongoing task quickly, you can utilize the Ctrl + C keyboard shortcut.
Auto-GPT Benchmarking Tool
The Auto-GPT August 2023 update introduced a new benchmarking tool designed to track the performance of the agents deployed. Auto-GPT Benchmarks is still in development, but it gives you an idea of how your automated agents are performing in areas like "code, retrieval, memory, and safety."
How Do You Access Auto-GPT on Your Browser?

If accessing Auto-GPT on your PC is too complicated, especially if you're unfamiliar with the Windows Terminal, you can still access it on your browser using AgentGPT. It could also be a safer option if you're concerned about privacy on your PC.
Here is a step-by-step guide on how to install Auto-GPT on your PC:
- Visit AgentGPT and select Settings in the lower-left corner.
- You will be prompted with a tab to input your OpenAI API key for GPT-4 or GPT-3.5-turbo.
- After saving the API key, you will be prompted to name it and define its goal.
- Click Deploy Agent to initiate the process.
Once it's done, you can copy or save the information.
Auto-GPT 3.5 API vs. Auto-GPT 4 API

If you've subscribed to ChatGPT-4, you can access the GPT-4 API. But if you're using the free version of ChatGPT, you will be limited to GPT-3.5 API. What's the difference between using GPT-3.5 and GPT-4 to access Auto-GPT?
The biggest difference is that Auto-GPT with GPT-3.5 API is much faster than GPT-4 API at completing tasks. However, in some cases, Auto-GPT with GPT-3.5 API is inaccurate with AI hallucinations. It also tends to go off-topic when you set up a goal.
On the other hand, Auto-GPT with GPT-4 API is less likely to hallucinate and go off-topic compared to Auto-GPT with GPT-3.5 API. Its responses are similar to GPT-4, but the biggest difference is that it can crawl the internet in real-time and prompt itself until the task is complete. It actually does a better job of crawling the internet and compiling a thorough report than Microsoft's Bing AI—even Auto-GPT with GPT-3.5 API can outperform Bing AI.
But the biggest shortcoming of Auto-GPT is that it can be stuck in a loop trying to complete a task—this happens whether you're using GPT-3.5 or GPT-4 API. For instance, if it prompts itself to "do nothing" in a planned action, it can be stuck on a loop instead of proceeding to the next course of action to complete a task.
Auto-GPT with GPT-3.5 or GPT-4 API is also not fine-tuned to complete complex actions in one session. This is because Auto-GPT doesn't retain its previous findings after completing a session. Also, you can only add up to five goals on Auto-GPT per session if installed on your PC.
However, the updated Auto-GPT has been improved with planning and task management capabilities that make it better to execute a task. In addition to that, the AI will let you know its thoughts, reasoning, plan, and criticism when performing an action.

In retrospect, Auto-GPT with either GPT-3.5 or GPT-4 API can automate some of your tasks with simple defined goals. Of course, Auto-GPT with GPT-4 API has the edge over GPT-3.5 because it's more accurate and better at making sense of images. Here are the key differences between GPT-4 and GPT 3.5 explained.
Is It Worth Using Auto-GPT Without GPT-4?
Even though Auto-GPT with GPT-4 API performs better than Auto-GPT-3.5, you can still use Auto-GPT 3.5 to complete tasks autonomously. For example, I prompted Auto-GPT with GPT-3.5 API to search the internet for the best laptops on the market and give me a report with pros and cons.

Similarly, I prompted Auto-GPT with GPT-4 API with the same goals, and it gave me a report.

Based on the results, we can deduce that Auto-GPT is still a useful tool without GPT-4 API. In fact, Auto-GPT-3.5 tokens are way cheaper than GPT-4 tokens. Here is what you need to know about the ChatGPT token limit.
Auto-GPT with GPT-3.5 API can also automate the process of developing apps, coding, organizing events, and analyzing the crypto markets.
However, according to its developers, Auto-GPT is not yet polished enough to completely rely on it without counter-checking the information—even if you're using GPT-4 API. It could also be expensive if you don't limit its token usage. Therefore, we recommend you terminate its connection after a task is complete.
Besides that, Auto-GPT's developers acknowledge that Auto-GPT is experimental and may not be ideal for real-world situations.
Auto-GPT Is a Game Changer
Auto-GPT is the closest thing we have to artificial general intelligence, consideringit'ss an AI agent that can perform most tasks autonomously with just a few prompts.It'ss also easy to set up, and you can use it with GPT-3.5 or GPT-4. However, Auto-GPT has its flaws, and it requires a human to verify the information after autonomously completing the tasks.