File Transfer Protocol (FTP) is a popular lightweight protocol used to transfer files over a network. Although it is an efficient mechanism for the transmission of data, there is one drawback to it: the data is transmitted and received in plain text. This means the data transfer is unencrypted, and it can be compromised.
Modern FTP servers such as ProFTPD allow support for SSL/TLS. This makes the file transfer between the two systems not only efficient but also safe by adding a security element. Let’s explore how to install and set up ProFTPD with TLS on Ubuntu 22.04.
What Is ProFTPD?
ProFTPD is an open-source and reliable FTP Server that allows you to establish an FTP connection between your local machine and the web server. It is easy to configure and compatible with Unix/Linux servers.
Prerequisites to Install ProFTPD
Before you begin with ProFTPD installation, you must fulfill the following requirements:
- Ubuntu Server 22.04
- Root privileges on the server
If your system meets these requirements, you are good to install the ProFTPD server.
Step 1: Update and Upgrade Ubuntu
To install ProFTPD, you first need to update Ubuntu via the command line. You can achieve this by executing the following command:
sudo apt-get update -y
The update command only updates the system packages list. To upgrade the packages, issue the following command:
sudo apt-get upgrade -y
For upgrade changes to take effect, you need to reboot your Linux system with this command:
reboot
Step 2: Install the ProFTPD Server on Ubuntu
It is now time to install ProFTPD. To install the server, run the following command:
sudo apt install proftpd -y
Once you have installed the server, verify if it was properly installed. One way to verify the installation is by checking the version of the installed service.
sudo proftpd --version
If the terminal returns a version number, this means that the installation of ProFTPD has been successful, and the server now exists on your system.
Step 3: Start and Enable the ProFTPD Service
You can now use ProFTPD. But first, you need to start it by running the following command:
sudo systemctl start proftpd
Once done, run the following command to enable it:
sudo systemctl enable proftpd
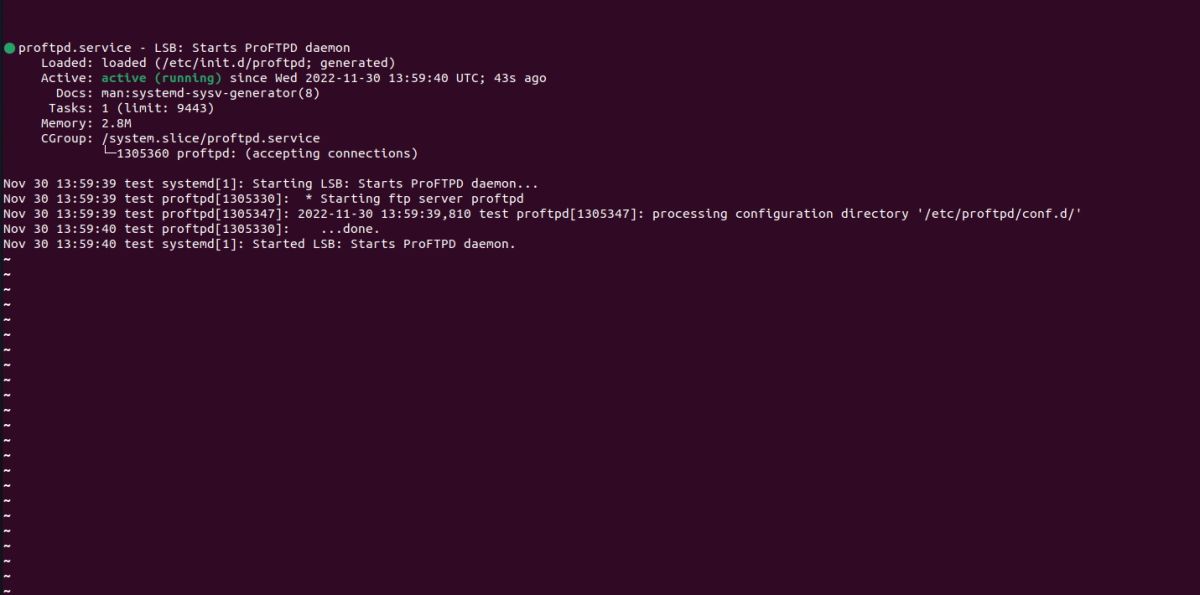
With the service started, check the status of ProFTPD to make sure it is running fine. Enter the following command to do so:
sudo systemctl status proftpd
As you can see the ProFTPD daemon is active and running fine.
Configuring ProFTPD on Linux
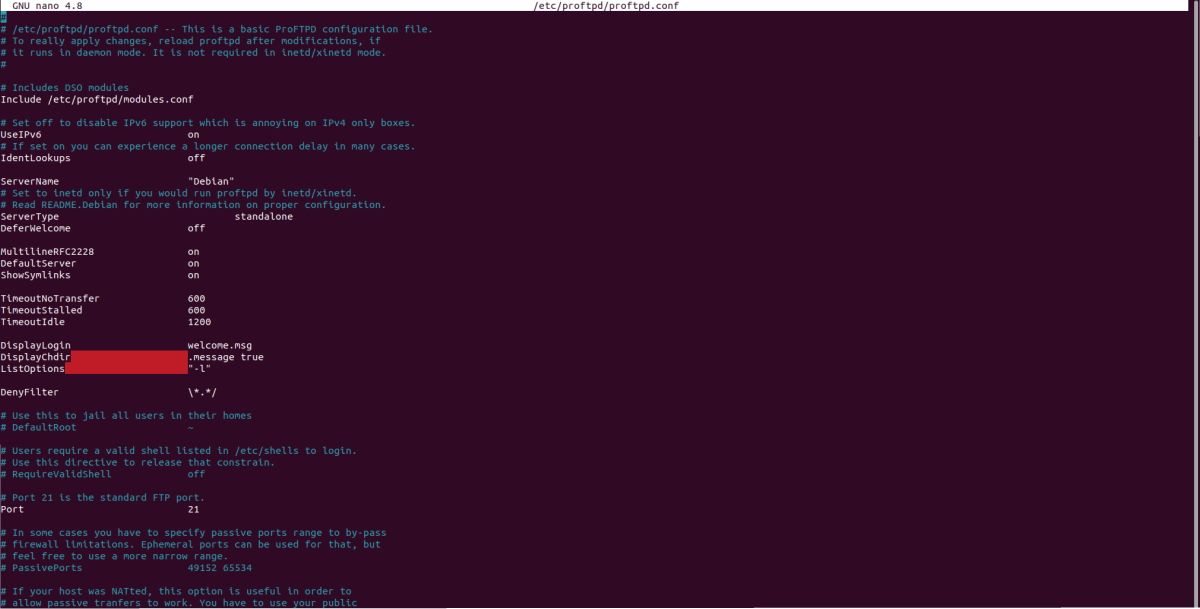
You will find ProFTPD’s configuration file in the /etc/proftpd directory. Open the file with nano by running:
sudo nano /etc/proftpd/proftpd.conf
You will find various directives in the file. The Default Root directive tells the FTP Server where to serve files from.
DefaultRoot /home/Linux/Docs
You can also restrict a user to a particular directory using the DefaultRoot directive like this:
        DefaultRoot /home/linux Tom
DefaultRoot / Emma
With these configurations, Tom will log in to /home/linux. However, Emma will have access to the entire system.
You can set a name for the server with the ServerName directive like this:
ServerName "My ProFTPD"
Create Users for the ProFTPD Server
It’s a good practice to have users on the FTP server with restricted permissions for security purposes. The users should only have access to their home directory where they can manage files by downloading or uploading them.
Create a ProFTPD user with the help of the command mentioned below. Make sure to provide the actual username in the command in place of username.
sudo useradd -m username
To set your user’s password, run the following command:
sudo passwd username
Configuring SSL/TLS With ProFTPD
To secure the FTP connection, you will make use of SSL/TLS. Here you will see how to configure ProFTPD with an SSL certificate.
To generate a certificate for the ProFTPD server, you need OpenSSL on your system. Run this command to install OpenSSL:
sudo apt-get install openssl -y
Generate a Certificate for the ProFTPD Server
Once OpenSSL has been successfully installed, you can generate a certificate for your server with:
sudo openssl req -x509 -newkey rsa:1024 -keyout /etc/ssl/private/proftpd.key -out /etc/ssl/certs/proftpd.crt -nodes -days 365
By executing the above command, you are asking OpenSSL to provide you with a certificate and a private key for the ProFTPD server. The certificate will remain valid for 365 days.
After you have issued the command, the system will ask you to provide details for the certificate, usually the organization name and address.
Once the details are accepted, you will get a certificate and a key. Now change the permissions of both files to read and write only by issuing these two commands:
        sudo chmod 600 /etc/ssl/private/proftpd.key
sudo chmod 600 /etc/ssl/certs/proftpd.crt
Open the ProFTPD configuration file with:
sudo nano /etc/proftpd/proftpd.conf
Locate the following line and uncomment it by removing the Pound character (#) at the beginning:
Include /etc/proftpd/tls.conf
Now close the file and save it. Next, open the TLS configuration file using this command:
sudo nano /etc/proftpd/tls.conf
Now locate the following snippets in the file and uncomment them:
        <IfModule mod_tls.c>
TLSEngine                         on
TLSLog                            /var/log/proftpd/tls.log
TLSProtocol                       SSLv23
And:
        TLSRSACertificateFile             /etc/ssl/certs/proftpd.crt
TLSRSACertificateKeyFile          /etc/ssl/private/proftpd.key
Uncomment these two lines as well:
TLSOptions AllowClientRenegotiations
And:
TLSRequired on
Once you have saved and closed the file, restart the ProFTPD service for the changes to take effect:
sudo systemctl restart proftpd
How to Uninstall ProFTPD on Ubuntu
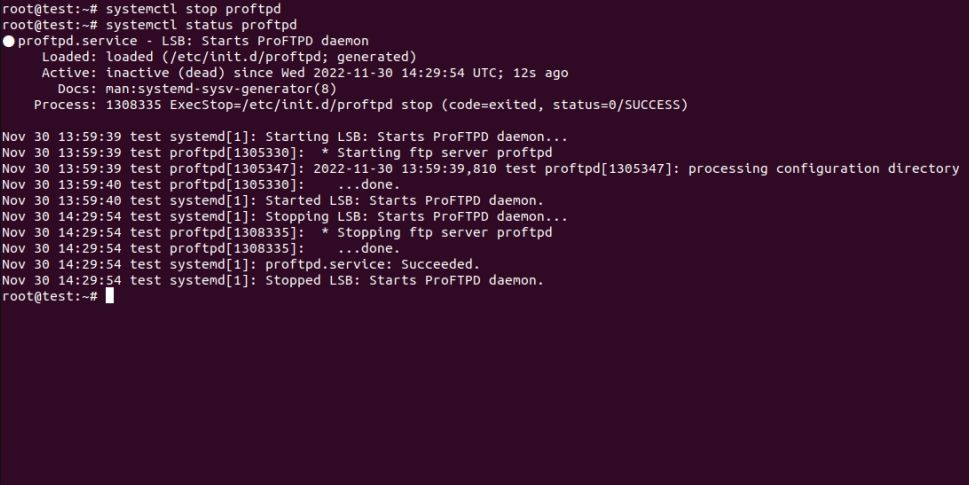
To remove ProFTPD from your system, you first need to stop the service.
sudo systemctl stop proftpd
You can now remove ProFTPD from your machine using the following Linux commands:
        sudo apt-get autoremove proftpd-dev
sudo apt-get purge proftpd-basic
These commands will completely remove ProFTPD from your system.
Transfer Files Securely With a TLS-Configured FTP Server
ProFTPD not only provides security but also makes sure the data exchange is fast and efficient. The best thing about ProFTPD is that it offers a lot of configuration options to its users.
Although FTP is a reliable way to transfer files, there are other methods that you can use for the same purpose. Make sure to choose the right technology that suits your system to make things easy for yourself.


