A version control system assists developers at every part of the Software Development Life Cycle. They help in managing changes to a project's source code over time by keeping track of every modification to the source code.
Currently, Git is the most widely used version control system in the world. We'll walk you through all the steps to successfully install Git and Git Bash on your Windows PC.
What Is Git?
Git is a distributed version control system used to manage the progress of a project. The project can be as simple as an index.html page or as complex as a complete full-stack application.
This free, open-source software was developed in 2005 by Linus Torvalds. When it comes to version control, Git is the name of the game.
What Is Git Bash?
Git Bash is an application for Microsoft Windows environments that provides an emulation layer for a Git command-line experience. Windows has a native command-line interface, Command Prompt, but to use Bash on a Windows computer, we need to download and install a program called Git Bash.
Git Bash is a simple package that installs Bash, some bash utilities, and Git on Windows. The main purpose of Git Bash is to provide a terminal Git experience.
Prerequisites for Installing Git and Git Bash
Before installing Git and Git Bash, you must have these in your system:
- Administrator privileges
- Command-Line access
- Coding text editor
- GitHub Username and Password (Optional)
Download and Install Git for Windows
You can download Git and Git Bash on Windows by following these simple steps:
Step 1: Go to the Official Git Website
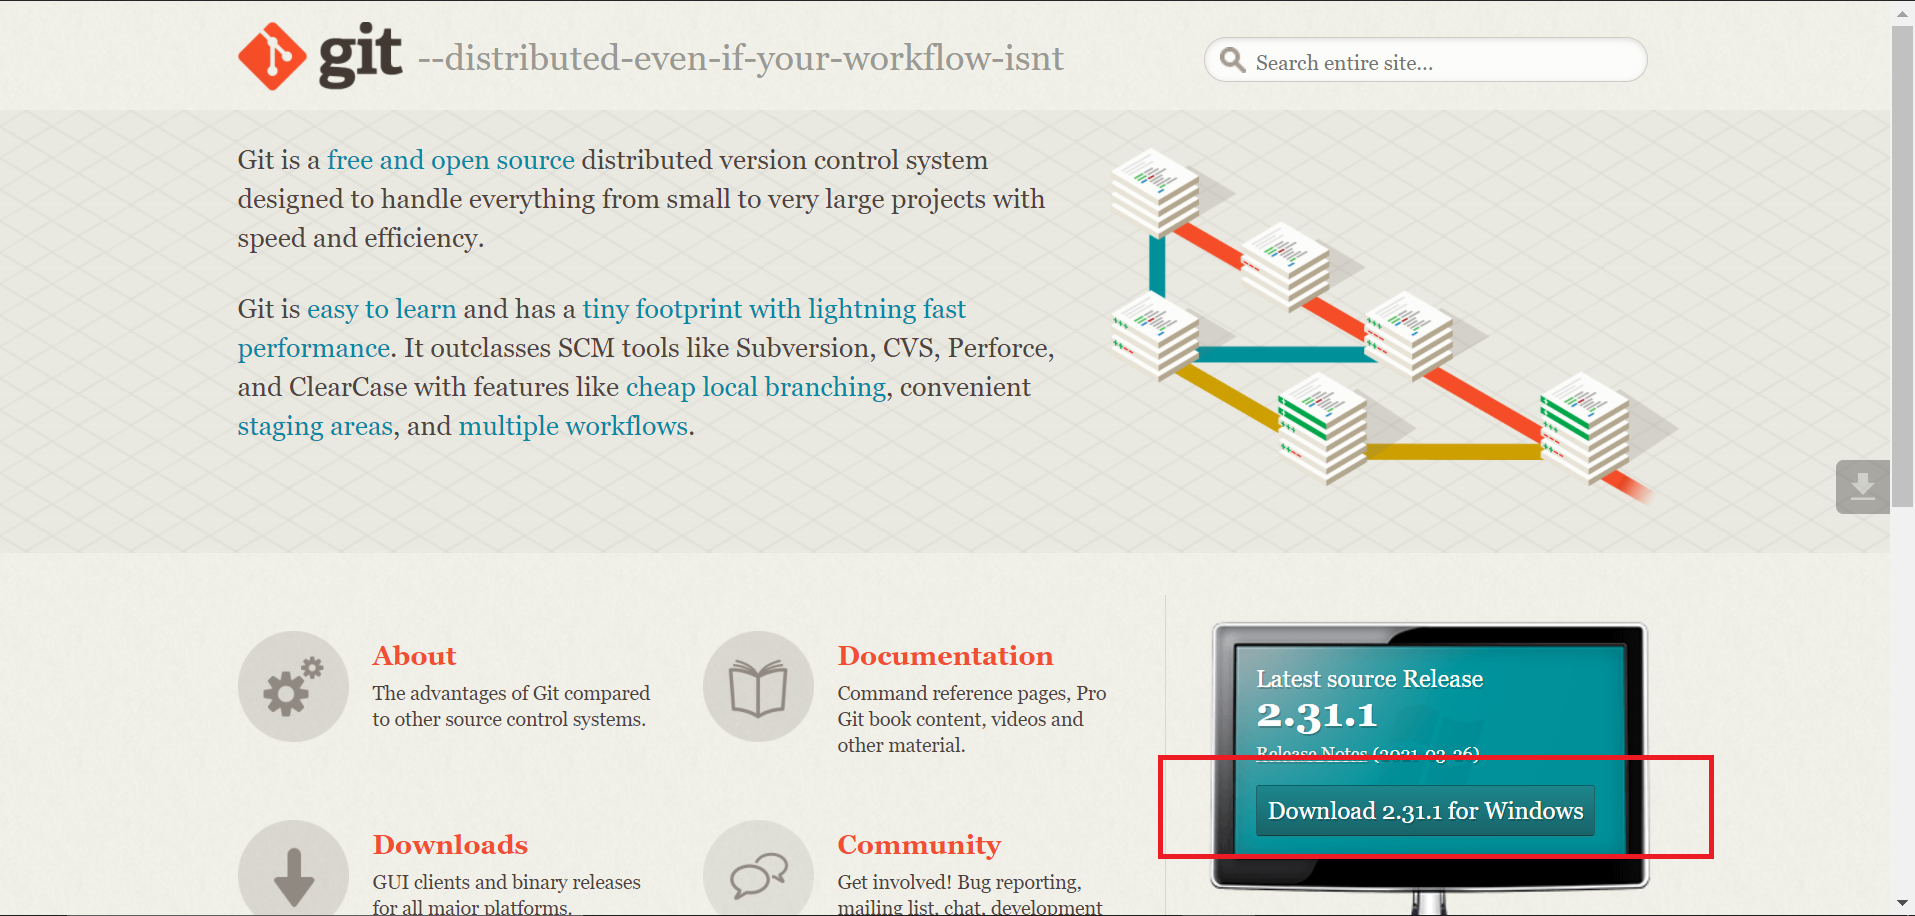
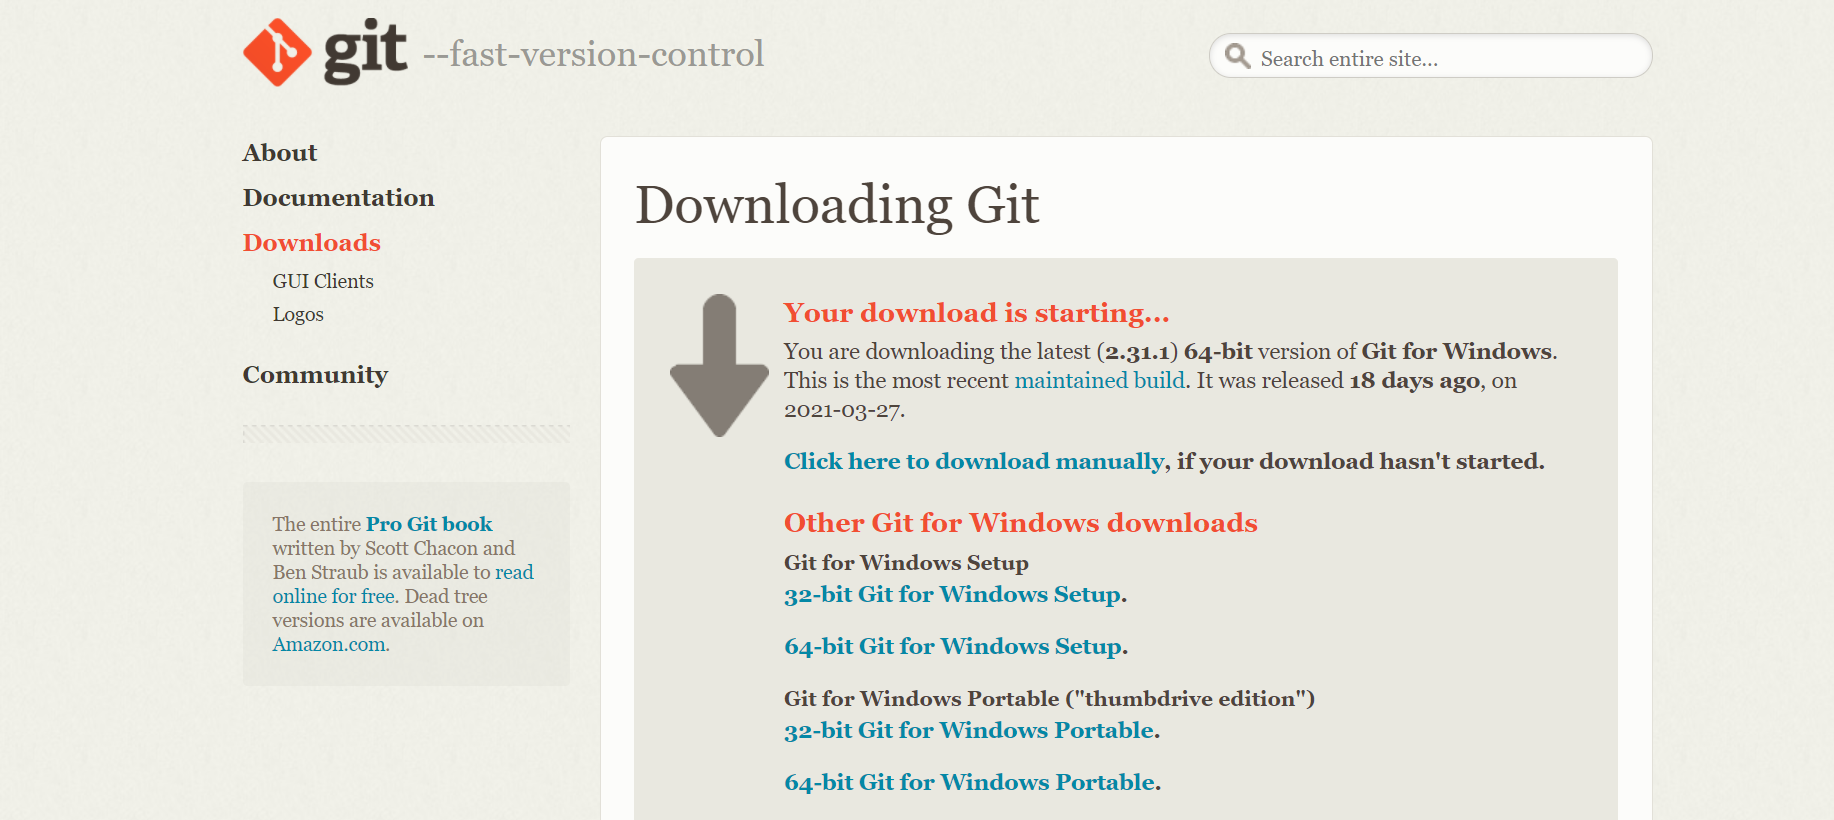
Visit the official website for Git and click the Download [version] for Windows button. The download will be started automatically after you click the button.
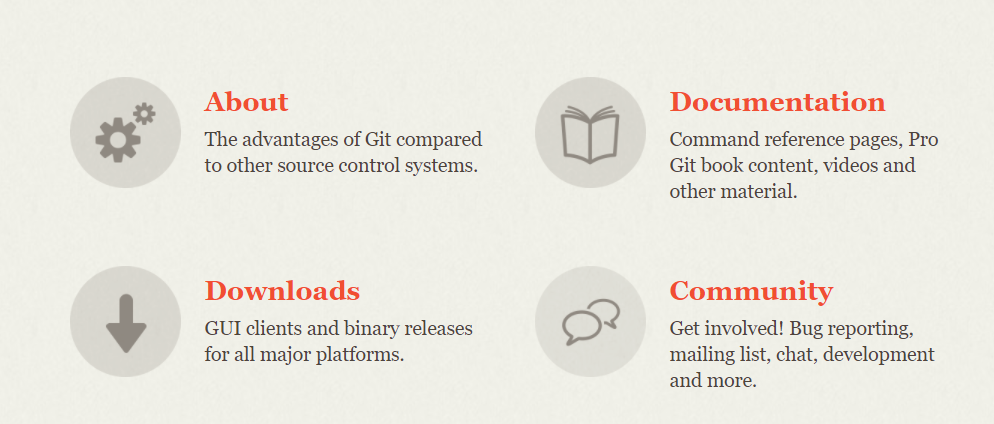
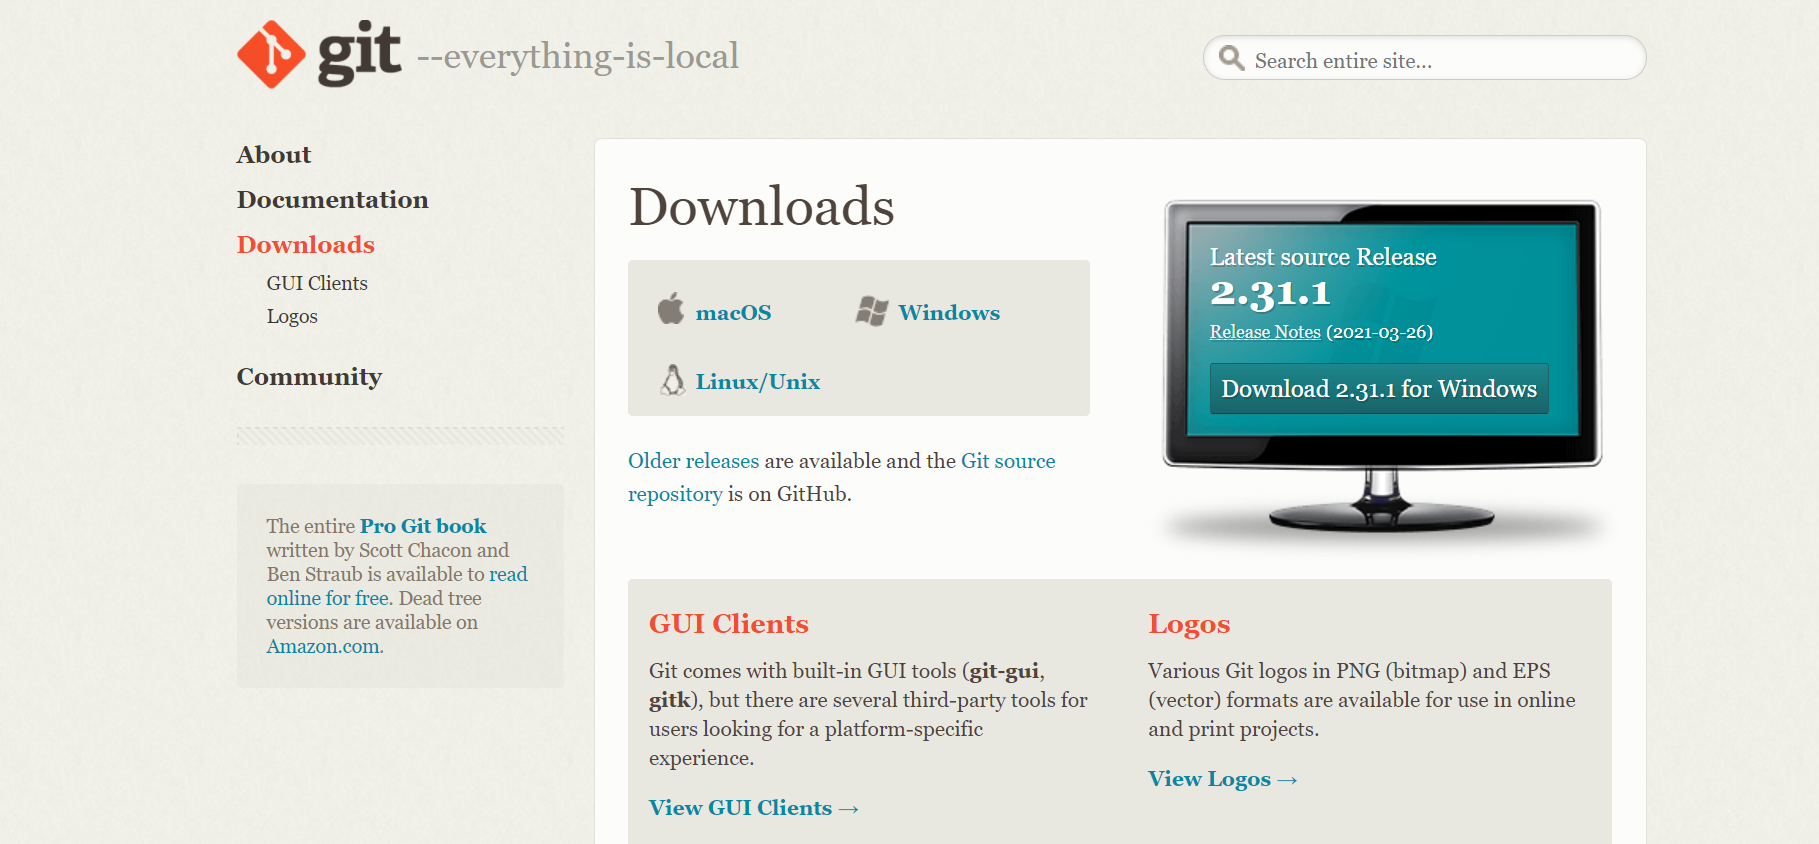
Alternatively, you can visit the downloads page of the official Git Website by clicking the Downloads button.
Click on the Windows button to start the download automatically.
If the download doesn't start automatically, click on the Click here to download manually button.
Step 2: Run the Downloaded File
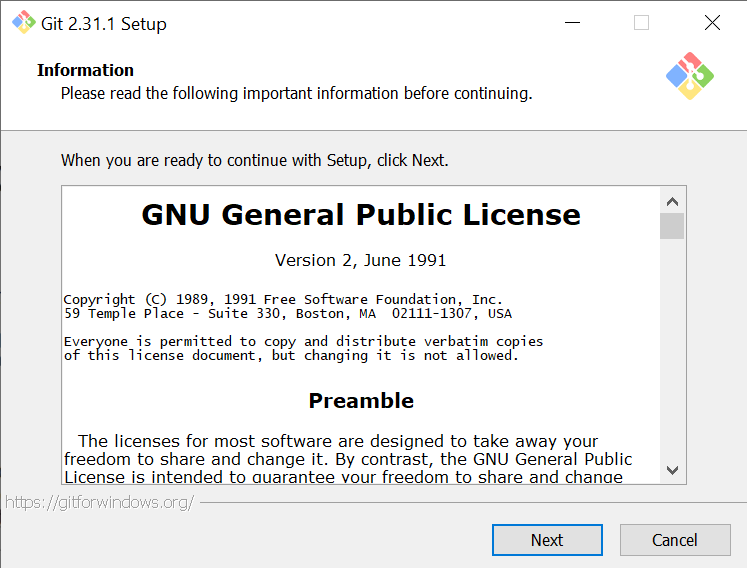
After you've downloaded the executable file, click on it to run the installer. A pop-up window asking permission to make changes to the device will be displayed. Click on Yes to accept the request. After that, the Git Setup window will be opened.
Carefully read the License and then when you're ready, click the Next button.
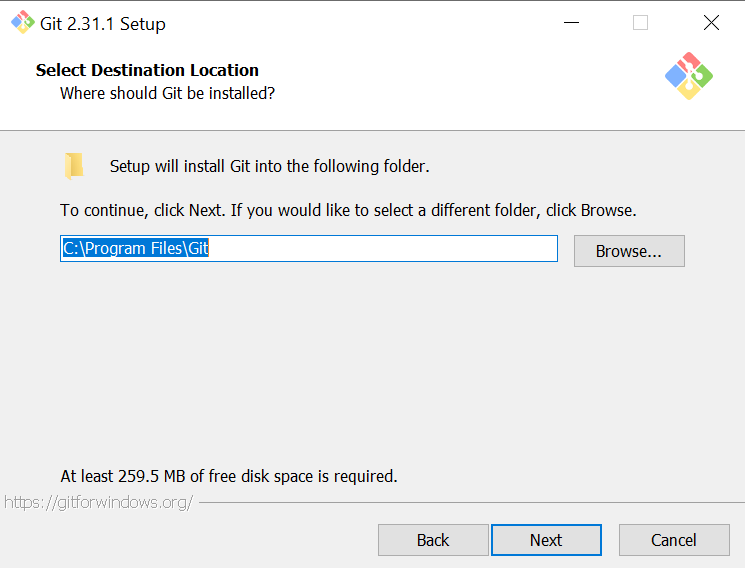
Step 3: Select Destination Location
Click on the Browse... button to select the destination location where you want to install Git. By default, it'll install to C:\Program Files\Git. Click on the Next button after you've chosen your destination location.
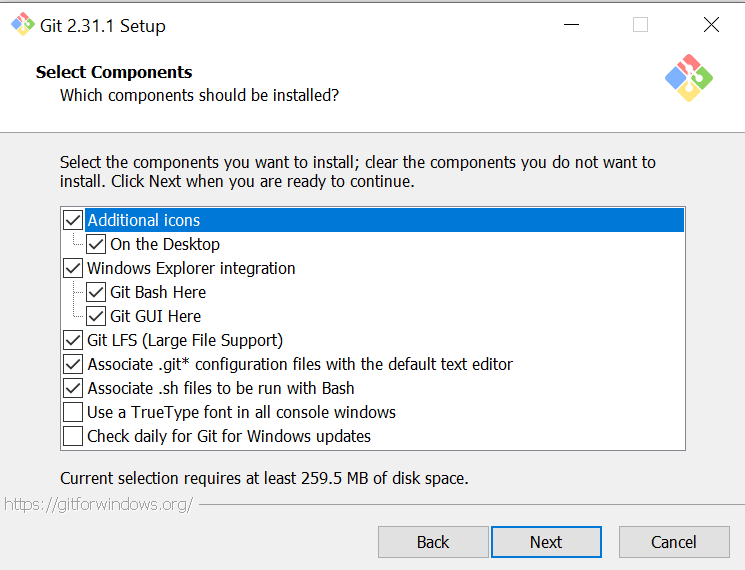
Step 4: Select Components
Click on the checkbox to install additional components such as a desktop icon. But if you prefer, you may proceed with default settings. Also, make sure that the "Git Bash Here" checkbox is checked. Hit the Next button to move to the next step.
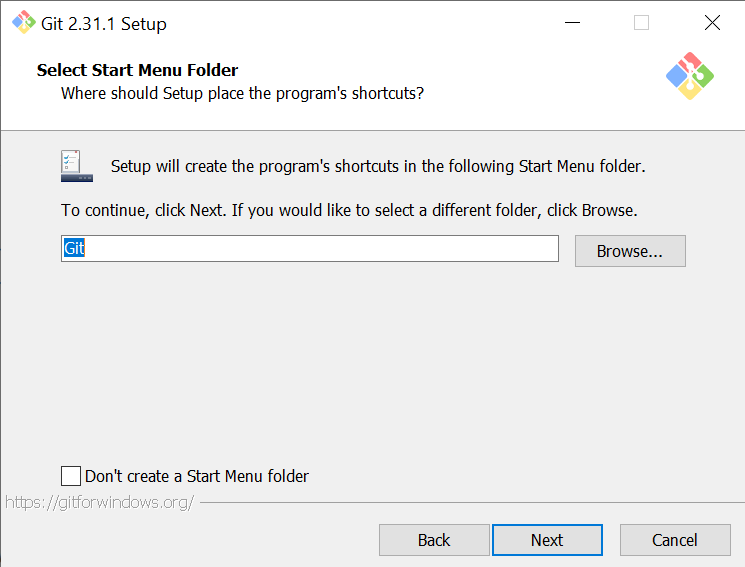
Step 5: Select Start Menu Folder
If you'd like, you may change the start menu folder name. It's headache-free to keep it as it is, however. Click Next to proceed with further steps.
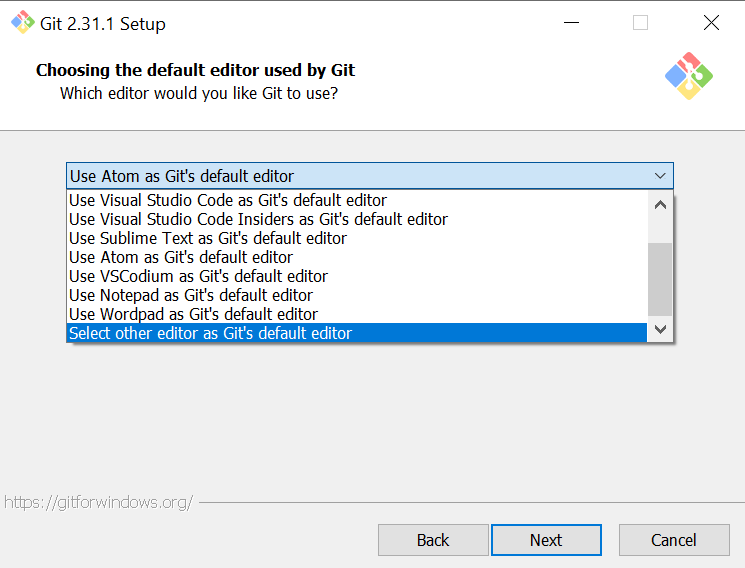
Step 6: Choose the Default Editor to be Used by Git
Choose the default text editor you want Git to use among various available options like Vim, Atom, Visual Studio Code, Sublime Text, Notepad, Wordpad, etc.
It's recommended to use Visual Studio Code or Atom as a default editor as they are the most widely used editors and have various cool features. Also, Vim is not recommended for beginners because it has a steep learning curve.
Click on the Next button to proceed further.
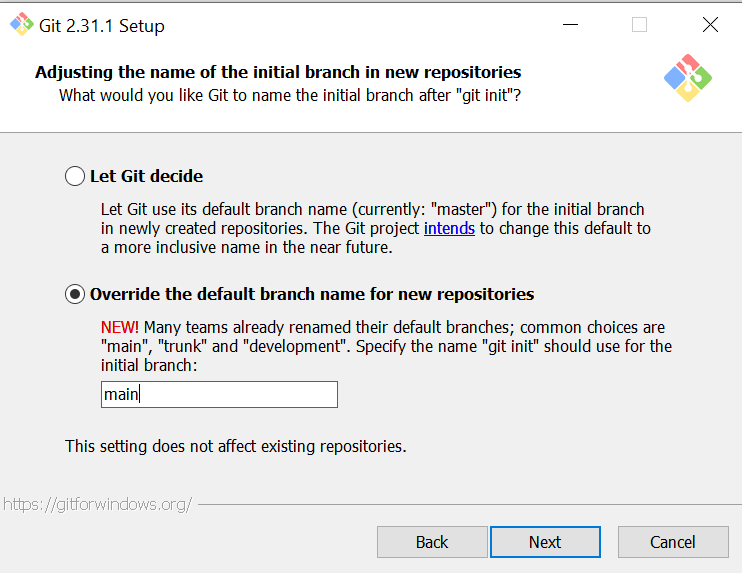
Step 7: Adjusting the Name of the Initial Branch in New Repositories
It's recommended to select Override the default branch name for new repositories and use main as the default initial branch name.
The "git init" command will use the same initial branch name while initializing repositories. You can also use any other initial branch names like "default", "primary", "develop", "stable", "release", etc. It completely depends on what suits you best.
Finally, click the Next button to proceed after specifying the branch name.
It used to be that "master" was used as the default initial branch name for GitHub repositories. But now it's changed to "main" as some people found "master" an offensive word. GitHub followed the Software Freedom Conservancy's suggestion and moved away from the term "master" when a Git repository is initialized.
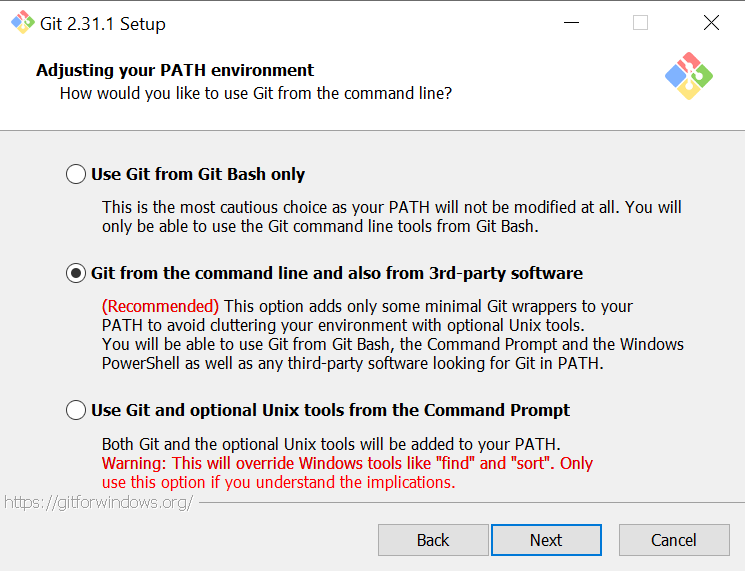
Step 8: Adjust Your PATH Environment
Select the 2nd option Git from the command line and also from 3rd-party software. By selecting this option you will be able to use Git from the Git Bash, the Command Prompt, the Windows Powershell, or any other 3rd party software looking for Git in PATH.
Hit the Next button to proceed.
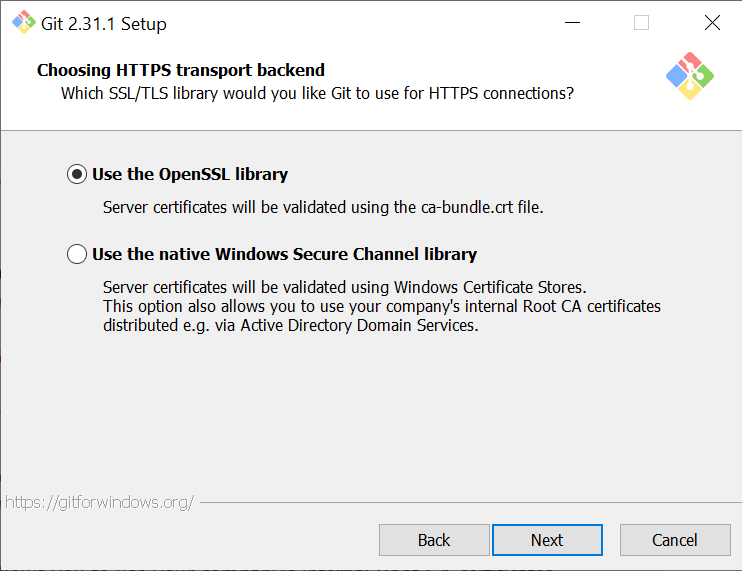
Step 9: Choosing HTTPS Transport Backend
Select the Use the OpenSSL Library option and click Next.
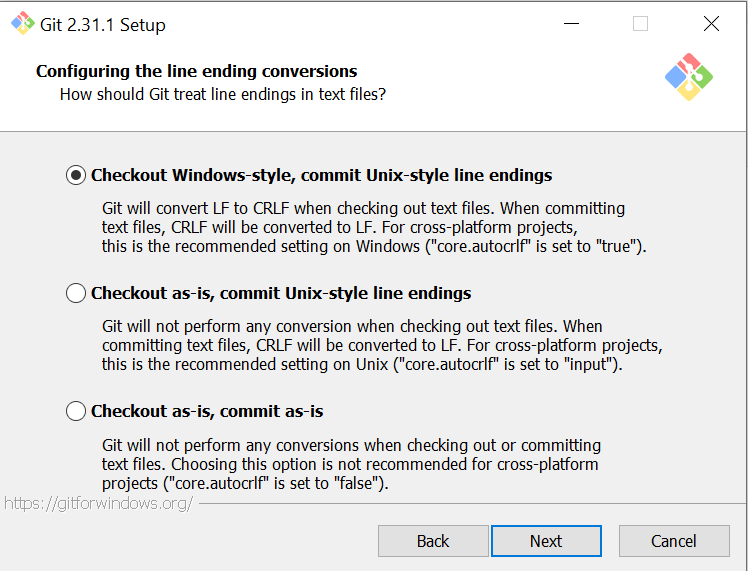
Step 10: Configuring the Line Ending Conversions
Proceed with the by default selected option Checkout Windows-style, commit Unix-style line endings and then click Next.
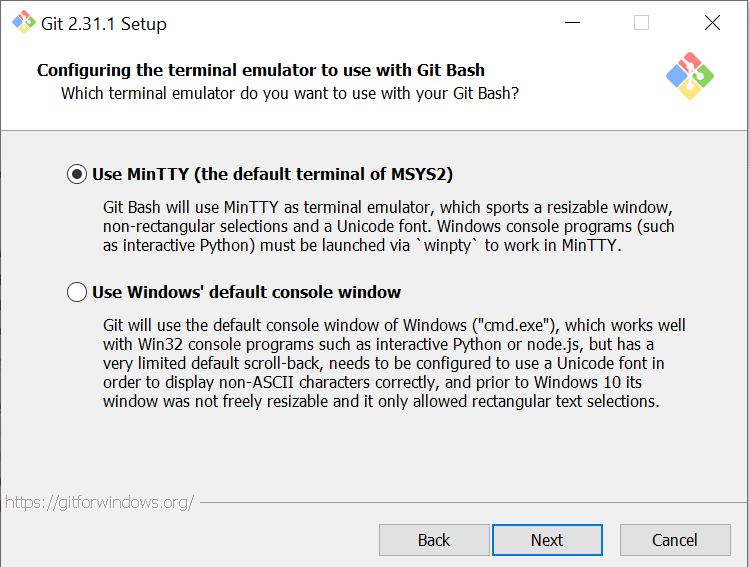
Step 11: Configuring the Terminal Emulator to Use With Git Bash
Again proceed with the default selected option Use MinTTY (the default terminal of MSYS2) and then click Next.
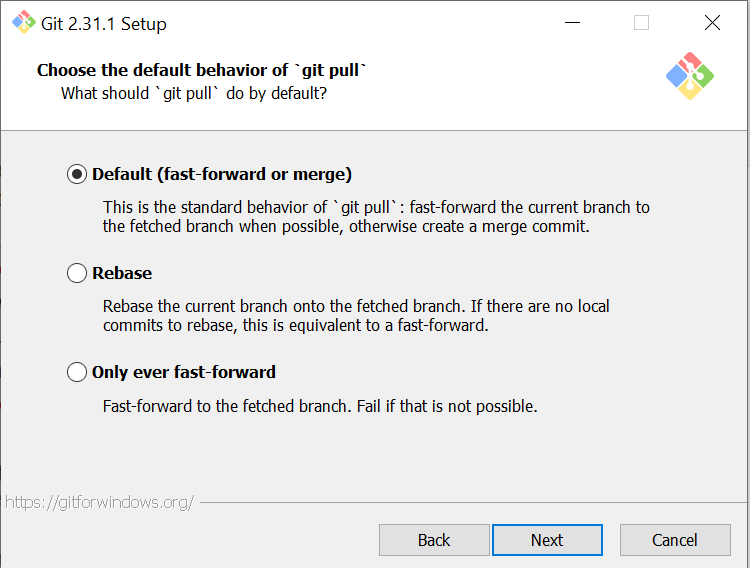
Step 12: Choose the Default Behaviour of "git pull"
Select the first option Default (fast-forward or merge). By selecting this option, when "git pull" is used, it'll fast-forward the current branch to the fetched branch. If it's not possible to do so, it'll create a merge commit.
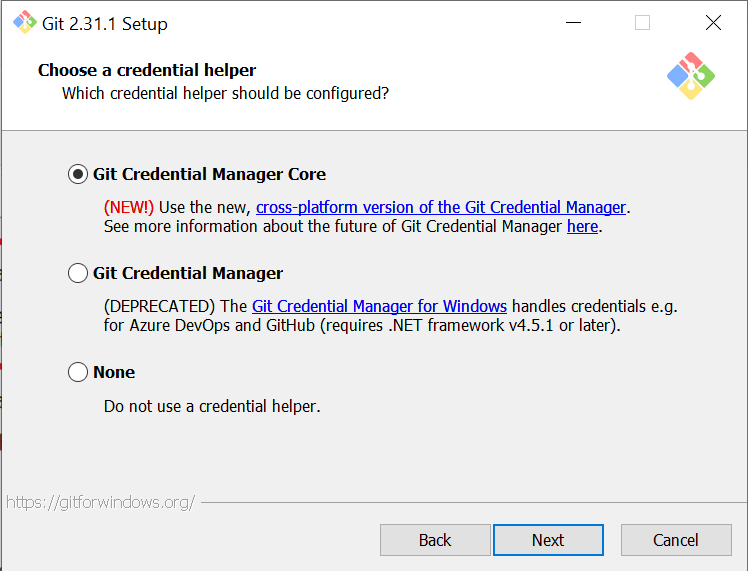
Step 13: Choose a Credential Helper
We highly recommended selecting the first option, Git Credential Manager Core, as it provides a consistent authentication experience across all platforms.
After that, click the Next button to proceed.
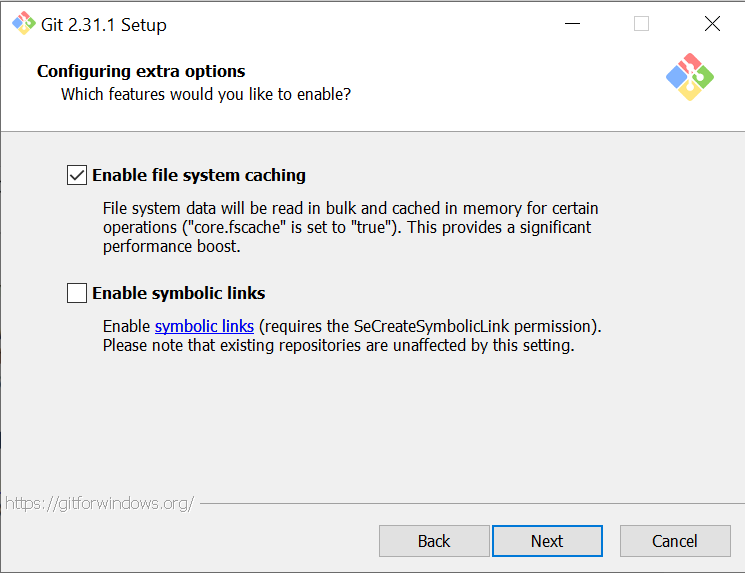
Step 14: Configuring Extra Options
Proceed further with the by default selected options and then click Next.
Step 15: Configuring Experimental Options
If you want to enable some bleeding-edge features with this installation then you can select any of the available options. Finally, click the Install button.
Step 16: Wait for Installation
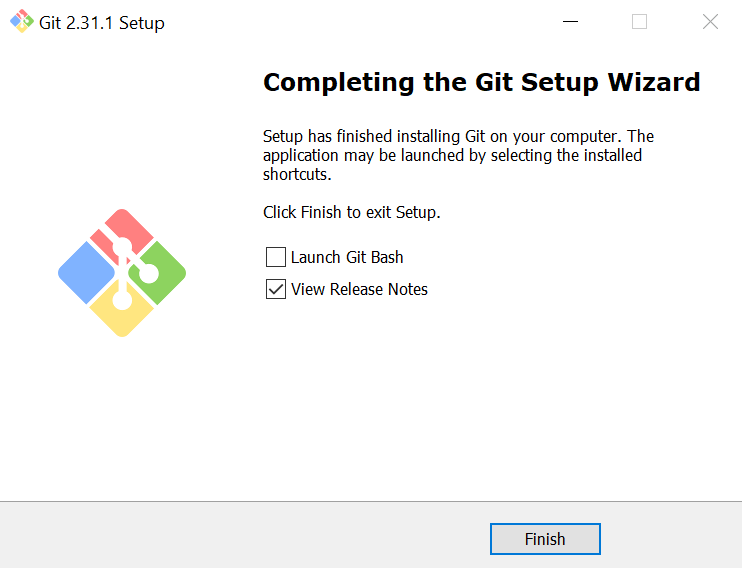
Wait for few minutes as the Setup installs Git and Git Bash on your system. After the installation is complete, click Finish to exit Setup.
Now Git and Git Bash is successfully installed on your computer!
Confirm That Git Is Successfully Installed
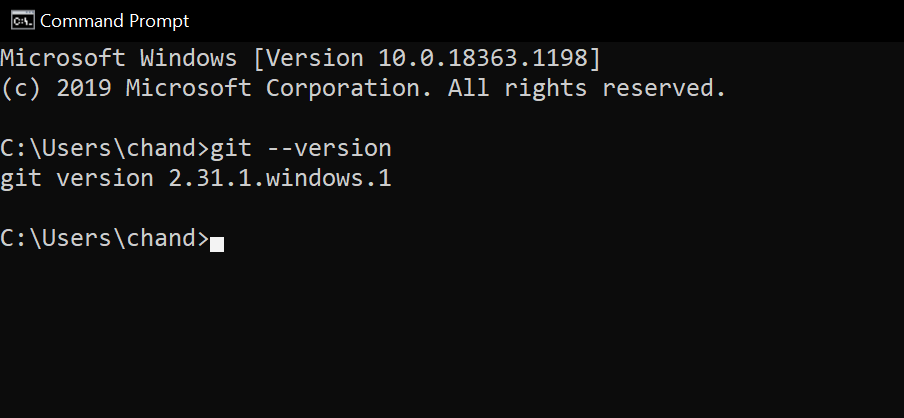
Open the Command Prompt and enter the following command to verify that Git was successfully installed.
git --version
Streamline Your Projects With Git
After installing Git on your Windows PC, you're ready to manage your projects using Git version control. Also, you can get started with GitHub by creating your first repository on GitHub.
Try contributing to open-source repositories; this is a great way to develop your skills and get recognized in the programming community.
Do you have a MacBook that you use for on-the-go development? You can install Git for Macs, too! Have your version control partner with you everywhere you go and never miss an update.

