Arch Linux is one of the most loved Linux distros famous for its complex installation process. In April 2021, Arch Linux introduced a guided installer to make Arch Linux installation easier for new users.
Here we provide a detailed guide on how to install Arch Linux using the guided installer on a VirtualBox virtual machine.
Step 1: Download Arch Linux
First of all, you need to download the Arch Linux ISO from the official Arch Linux webpage.
Download: Arch Linux ISO
This guide assumes that you have VirtualBox already installed on your machine. In case you don't, download it from the official website.
Download: VirtualBox
Step 2: Creating a Virtual Machine
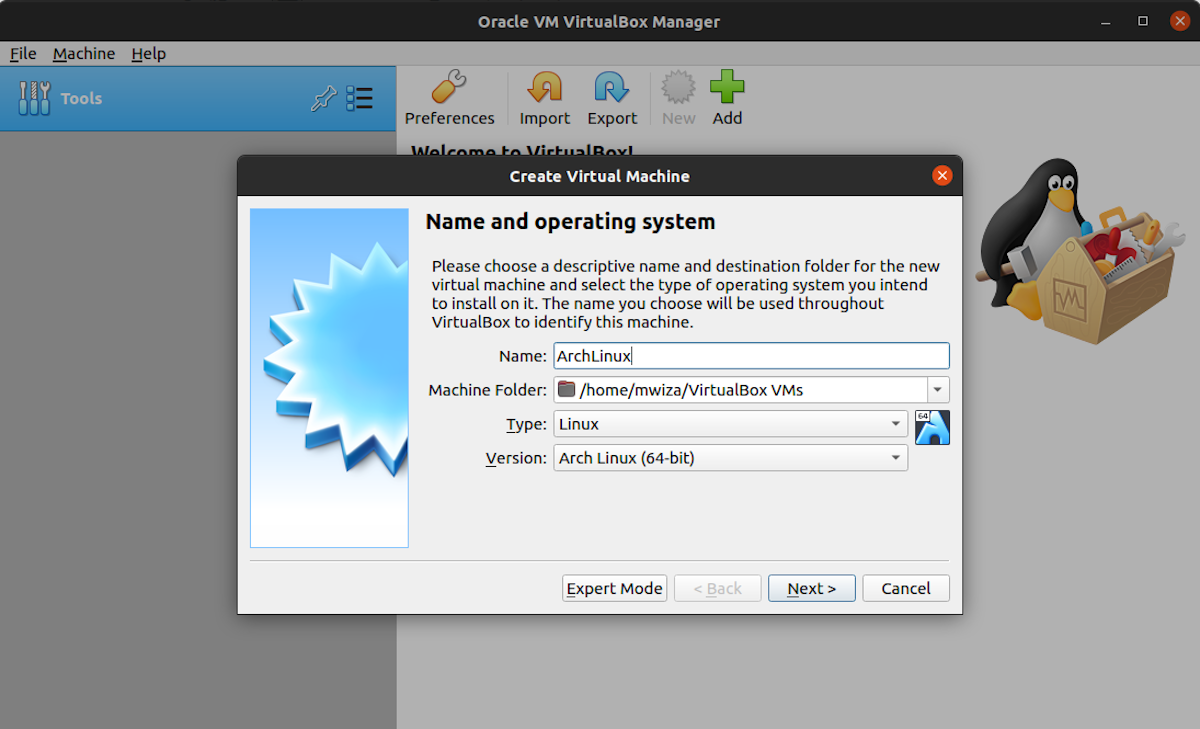
To create a virtual machine, fire up your VirtualBox application and click on the New button. Alternatively, you can use the shortcut Ctrl + N to do the same.
In the Name input box, simply type ArchLinux and VirtualBox will automatically set the Type and Version to Arch Linux (64-bit). Feel free to change the settings to your liking. Click on the Next button to proceed.
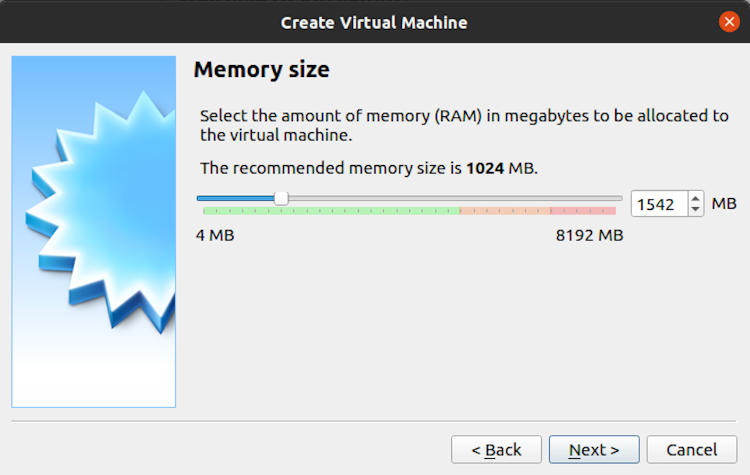
Now you need to configure the amount of RAM you want your virtual machine to use. To ensure smooth performance, make sure the memory size is greater than 1GB.
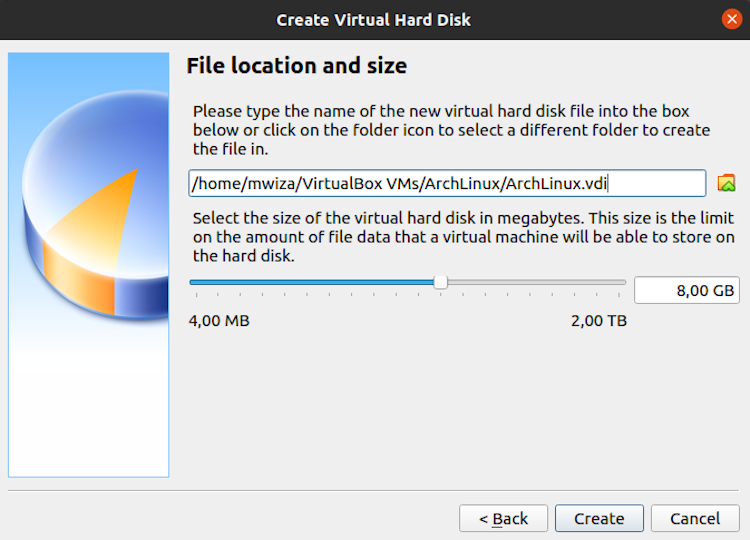
In the screen that follows, create the virtual hard disk that your virtual machine will use. Arch Linux requires minimum hard disk space of 8GB. Click the Create button to proceed.
On the next screen, you can go with the default selection, which is Virtual Disk Image (VDI).
By default, the next configuration will be set to Dynamically allocated hard disk space. With dynamically allocated space, the size of your virtual hard disk increases automatically as the demand increases. Click the Next button to use the default selection.
Leave the default virtual disk size to a recommended of 8GB but feel free to adjust it if you want more space. Click on the Create button to finish creating your virtual machine.
Although VirtualBox will display the entry for your Arch Linux virtual machine, it still lacks some life. This is because you need to install an operating system to be able to boot the machine.
Step 3: Configuring Your Virtual Machine
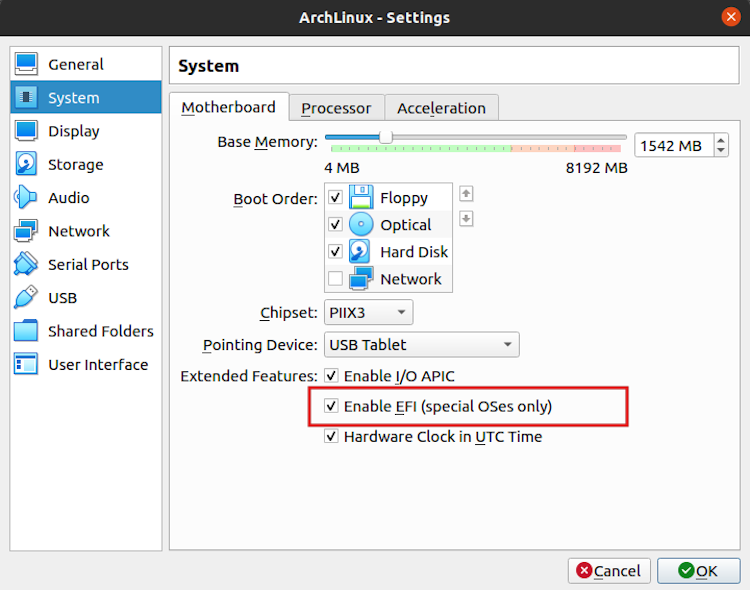
Click on the Settings button in the main menu to configure your virtual machine in readiness for installing the operating system.
Then select the System tab from the left pane. Under the Extended Features section, make sure to check the Enable EFI checkbox. Once done, click on the OK button.
Note: If you do not enable EFI, the installation will not work because ArchInstall, the guided installer for Arch Linux, only supports machines booted with UEFI at the time of this writing.
Attaching the ISO Disk
The next step is to attach the Arch Linux ISO image to your newly created virtual machine.
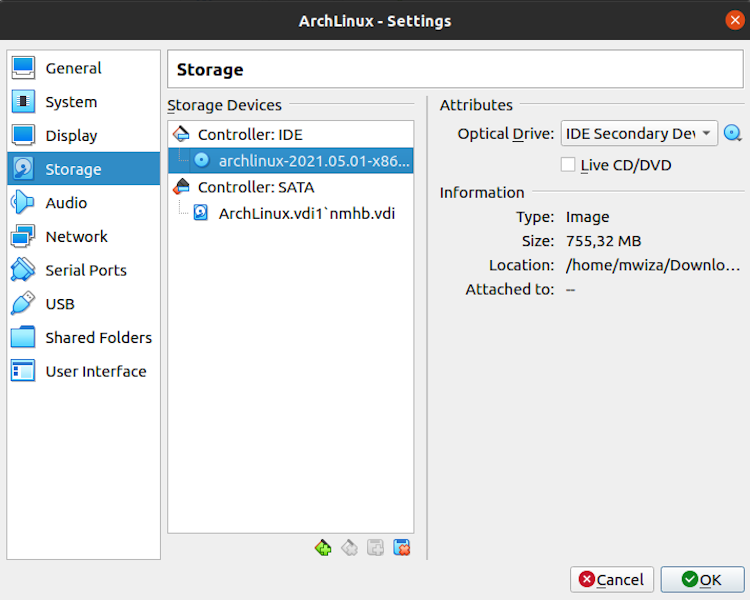
Click on the Storage tab and then select the Empty option under the Controller IDE section. To attach the Arch Linux ISO image, click on the small Disk icon next to the Optical Drive label. Now select the Arch Linux ISO image that you downloaded and click on OK.
Your virtual machine has now been configured to boot from the Arch Linux ISO that you have attached to the virtual machine.
Step 4: Starting the Installation
Click on the Start button in VirtualBox to boot from the Arch Linux ISO and start the installation. If you have several virtual machines, make sure that you have selected the correct virtual machine instance.
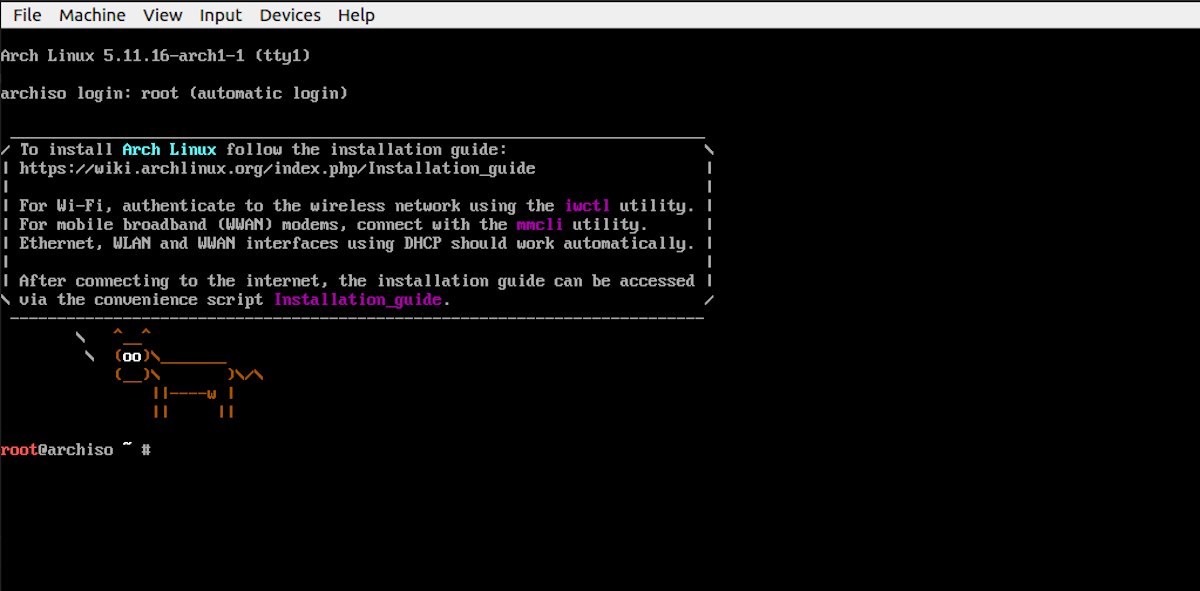
By default, Arch Linux will boot using UEFI and will display a shell as shown below.
To start the Arch Linux guided installer, simply type the following command in the shell.
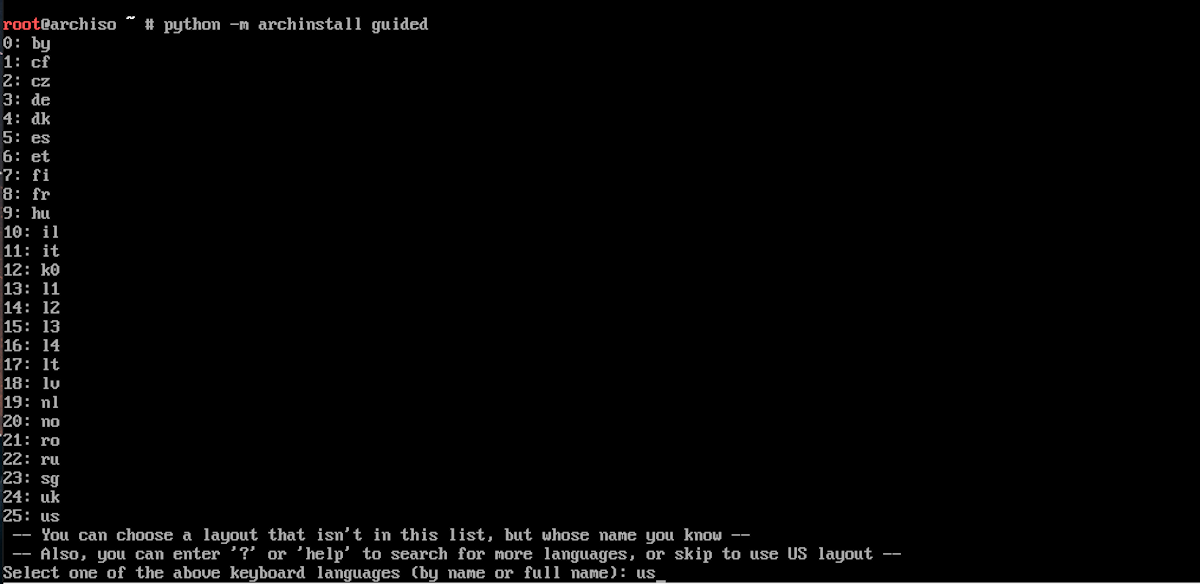
python -m archinstall guided
The first prompt that you will be presented with is the keyboard layout selection. Enter the name of your preferred layout from the list and press the Enter key to confirm.
To list more layout options, simply type help in the prompt and press Enter on your keyboard.
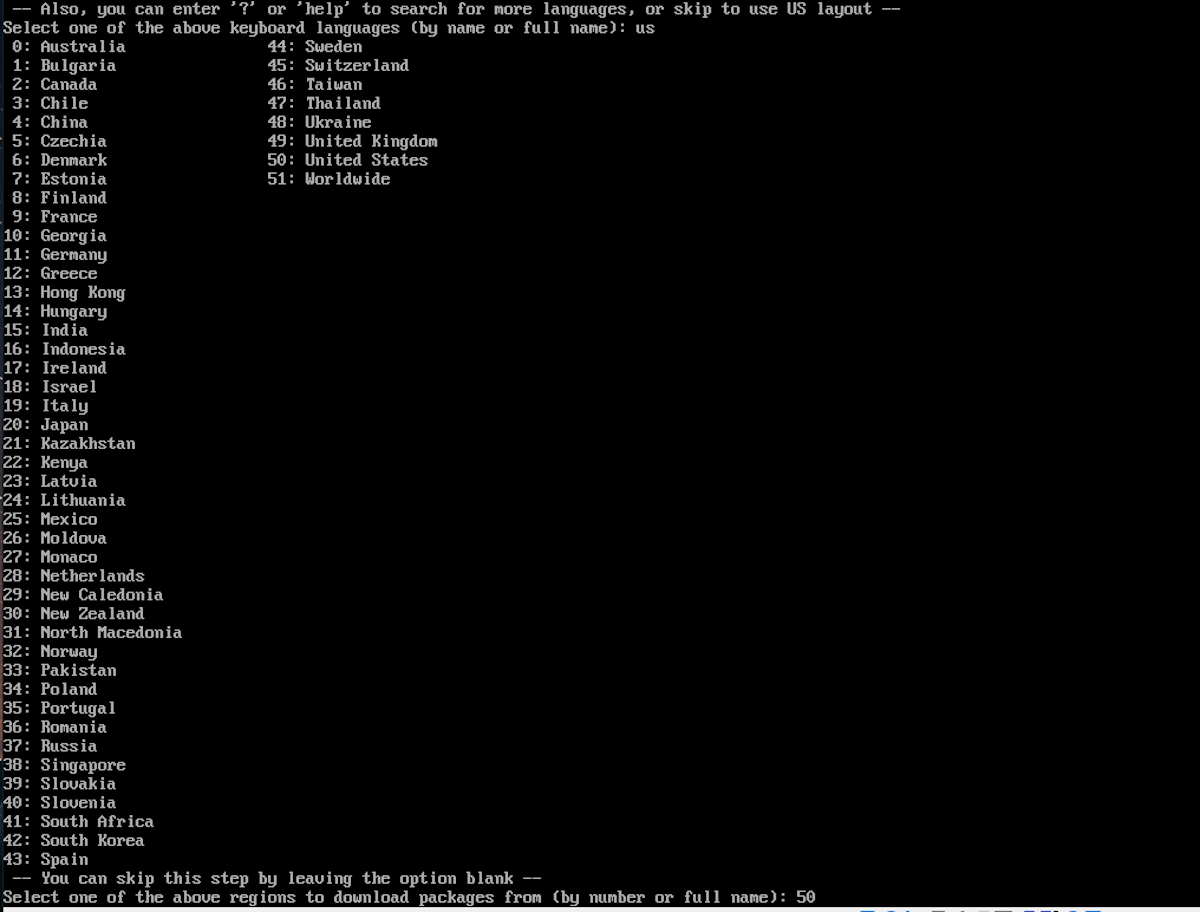
Next, you have to select the region from which you will download the packages during the installation. Here you can either enter the region name or the number listed against the region.
Select a region closer to you for faster download speeds.
Now select the disk on which you'd like to install Arch Linux. The 8GB disk partition we created before appears under 1: (/dev/sda). Enter the number 1 in the prompt and press Enter.
The next step is formatting the disk partition. To partition the entire disk, enter 1. You can also choose to abort the installation at this stage.
Now set the file format that you want to use with your installation. Four options are available and you can choose the one listed under option 0, which is btrfs.
Arch Linux will give you the option to encrypt the hard disk for security purposes but leave this option blank for now and press Enter to proceed.
The installer will now ask you to set the desired hostname for your machine. Use any name of your choice and press Enter.
By default, Arch Linux comes with a root user. Type the password you want for the root user and press Enter. If you do not enter the root account password, the installer will not create the account.
Arch Linux will prompt you to create additional users on our system. Leave this option blank and press Enter to proceed. You can always add a user using the useradd command after the installation.
Setting the Pre-Programmed Profile
The next step is to set the pre-programmed profile for your system. This guide will go for a desktop profile, so enter the number 0 in the prompt and press Enter to proceed.
Because you selected the desktop profile, the next option will ask you to set the desktop environment from 10 possible options. In this guide, we will use GNOME as the desktop environment. If you wish to install GNOME as well, type 3 and press Enter to continue.
Next, select the graphic card driver of your choice. You can choose option 4 which is Nvidia. Then select the driver type i.e. open-source or proprietary. We will use option 0, which is open-source.
The system will ask you to install the default audio service. We will use pipewire, which is the default selection. Enter Y and press Enter.
In the next prompt, you get the chance to install additional packages, for example, a web browser. Leave this option blank and hit Enter to proceed.
Moving further in the installation process, set what program will control your internet connection. Choose option 1, which is Network Manager.
Finally, configure your time zone by entering one of the options listed or just leave it blank to use UTC time.
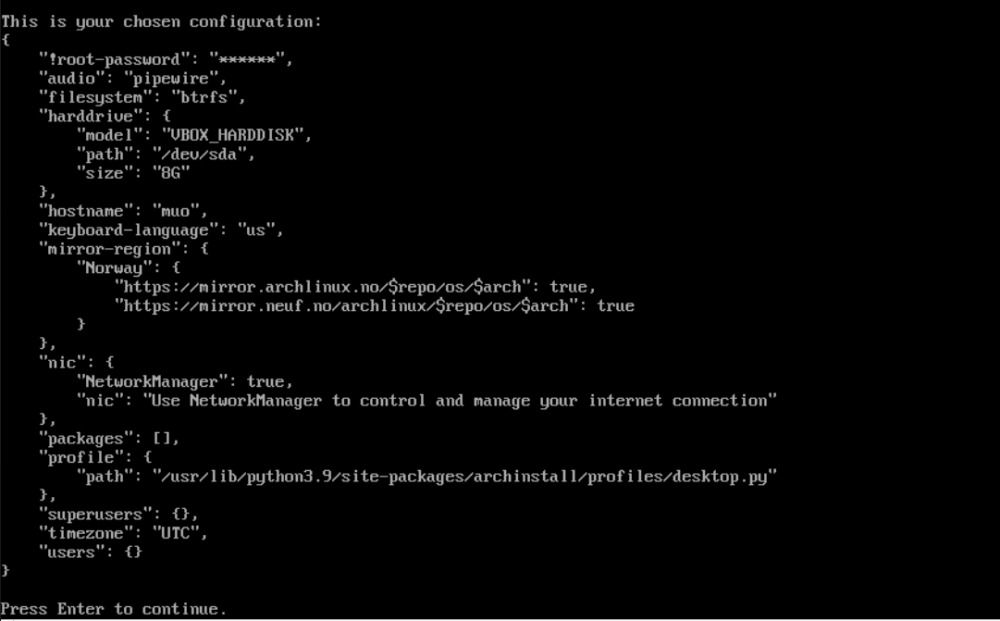
Arch Linux will present you with a summary of your installation configurations as in the image below. Press Enter to proceed with the installation and the guided installer will format your disk and install the operating system.
After the installation is complete, the system will ask you if you want to chroot (change root) into the newly created installation. Type n, and hit Enter to continue. You will be logged in into a shell as the root user. Run the following command to shut down the system.
shutdown now
You should remove the Arch Linux ISO in the virtual machine so that you can boot from the new installation and not the ISO image.
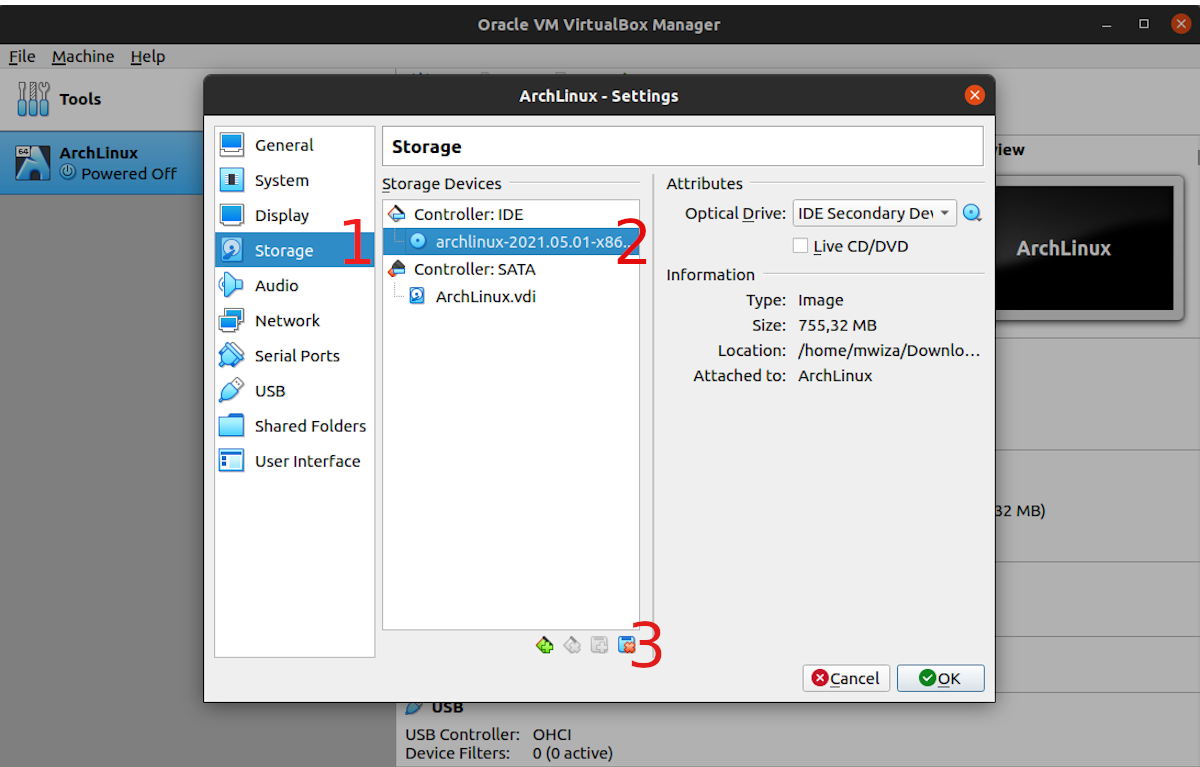
- After the system is shut down, open VirtualBox and press the Ctrl +S keyboard shortcut to open Settings. Then click on the Storage tab.
- Under Controller: IDE, select the Arch Linux ISO.
- Click on the Remove Selected Device Attachment button. Select Ok to continue.
Step 5: Starting the New Operating System
In VirtualBox make sure you have highlighted the Arch Linux virtual machine. Then click on the Start button to boot the machine.
The screen will ask you for login credentials. As we only have the root user on our system, type root as the username and press Enter. Next, type in the password for the root user.
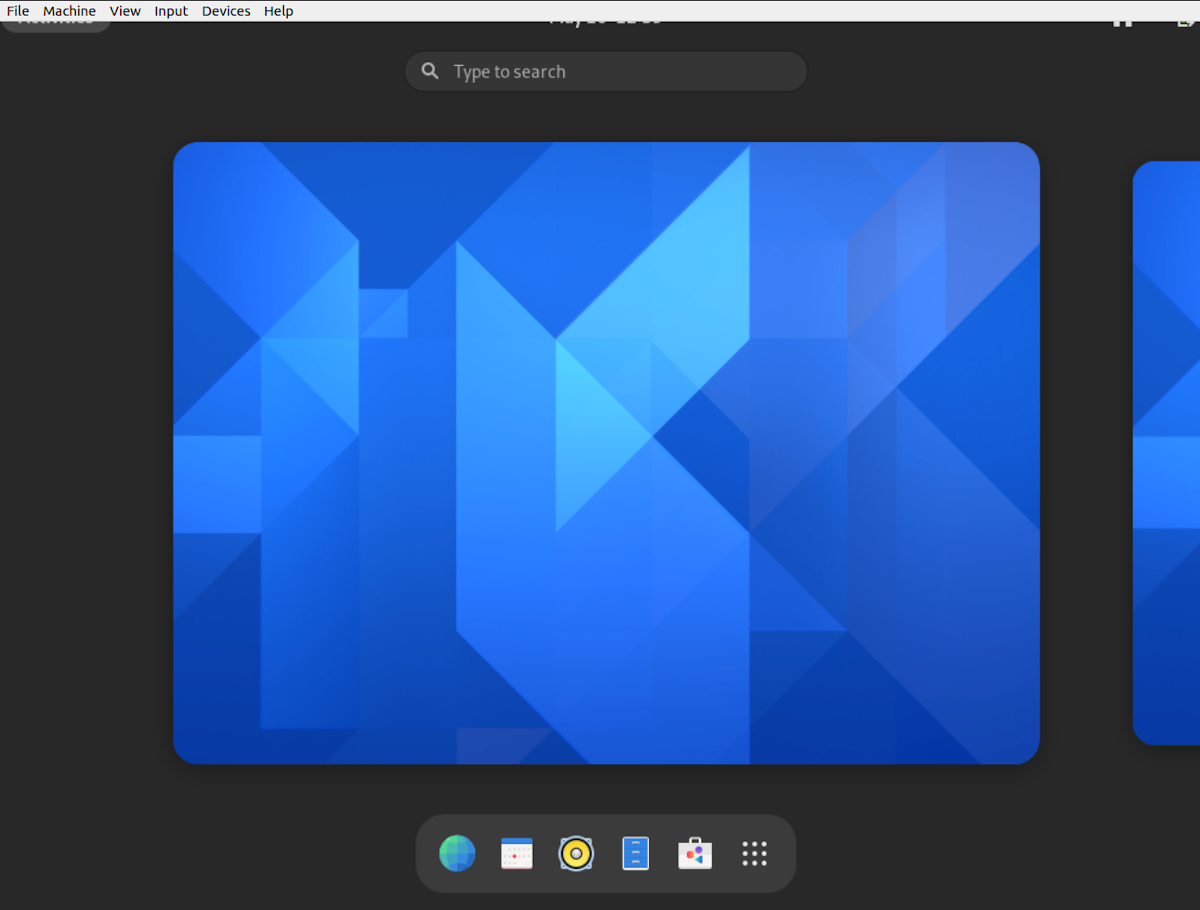
After logging in, you will be greeted with the beautiful GNOME 40 desktop. GNOME 40 is the latest release of Gnome at the time of this writing.
Installing Arch Linux on a Virtual Machine
This guide has shown you how to install Arch Linux on a VirtualBox virtual machine. The introduction of the guided installer has greatly simplified the installation of the Arch Linux OS for beginner Linux users.
You can also use other virtual machine hypervisors such as VMware Player to install Arch Linux on your computer. Although VirtualBox and VMware are both popular and widely used hypervisors, they do have some differences when it comes to the features.


