Lines in a document are used to construct a particular flow. Whether you want to separate sections, organize your content, or simply want to add to the design of your document, inserting lines can make a big difference.
Adding a line to your file in Google Docs is simple, and there’s more than one way to do it. Here, we'll show you four ways you can add lines in Google Docs.
1. How to Insert a Horizontal Line
If you’re looking for ways to make more professional documents in Google Docs, this is one of them. Adding a horizontal line is easy; simply follow these steps:
- Open a file on Google Docs.
-
Click Insert in the toolbar.
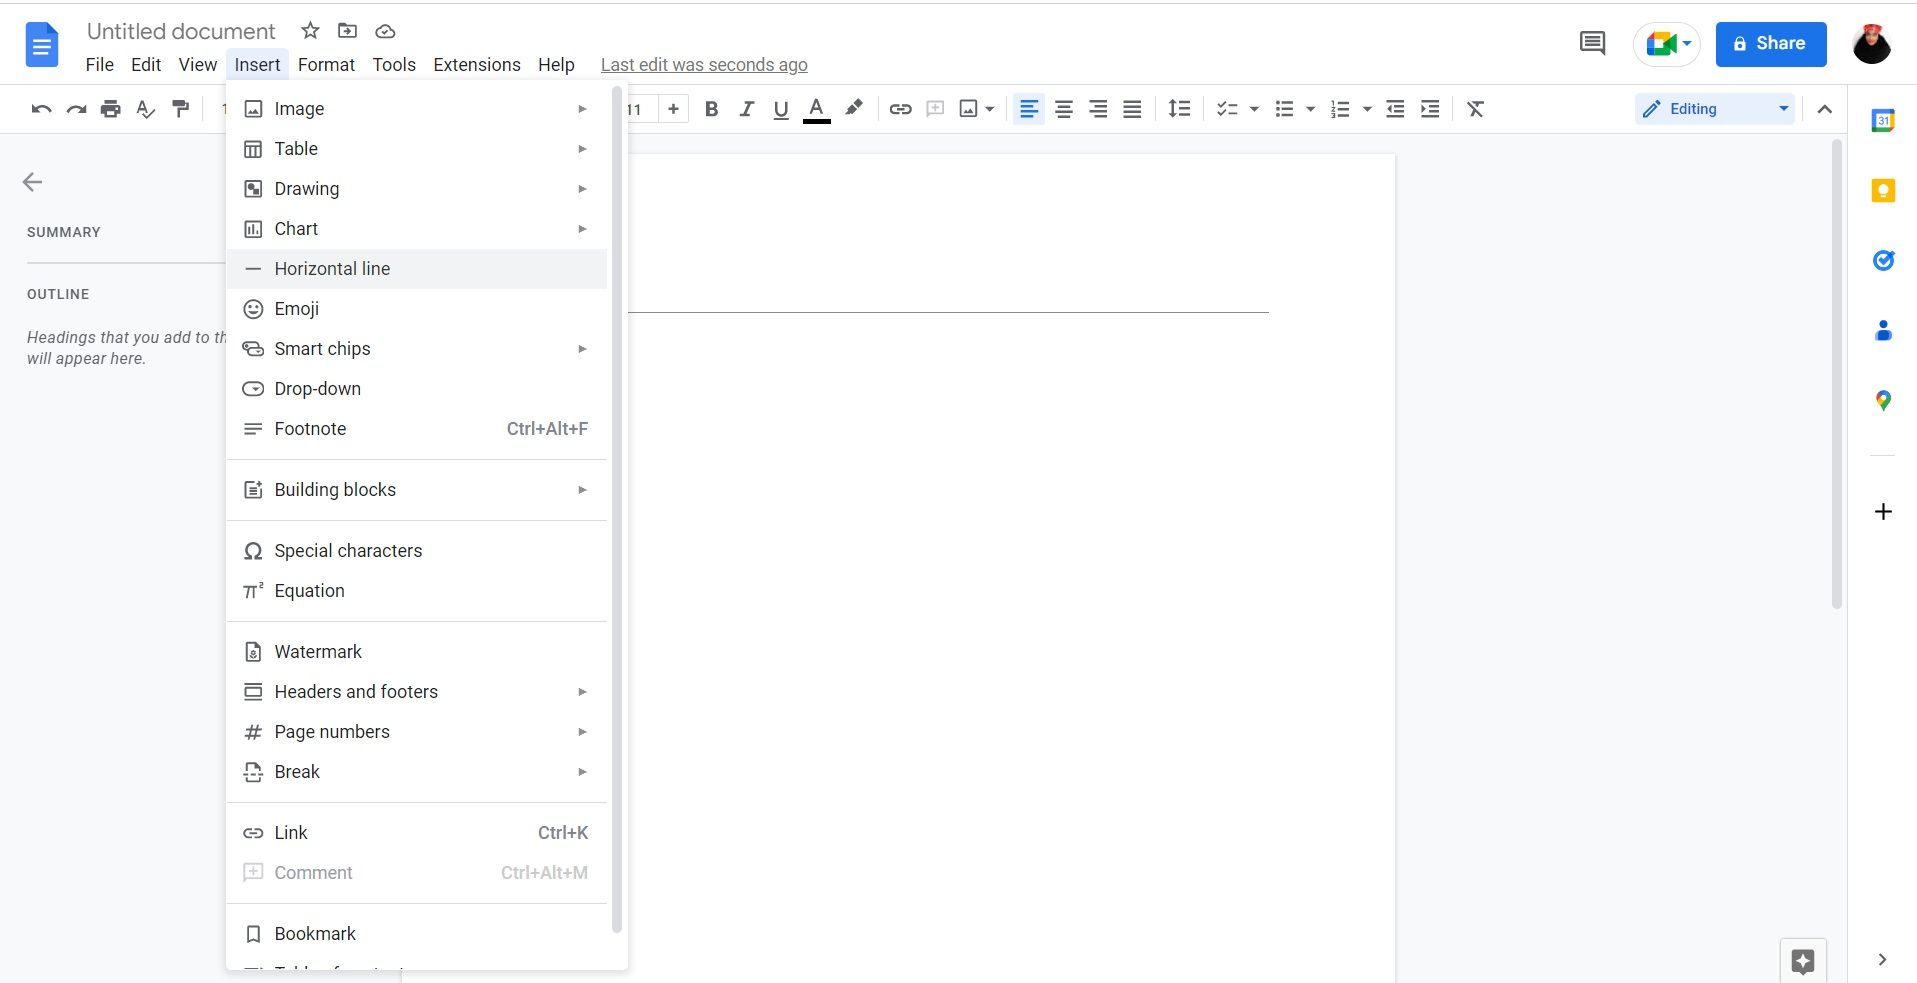
- Select Horizontal Line and see the line appear on your screen.

This option doesn’t allow much customization, so it works well if you just need a simple line. Luckily, there’s another way of inserting a horizontal line.
2. How to Insert a Horizontal Line Using Paragraph Styles
If you want to insert a horizontal line that gives you the option to change the size, or you want to choose different line styles, you can use paragraph styles in Google Docs. To do this, follow these instructions:
- Open a file in Google Docs.
-
Head to Format in the toolbar.
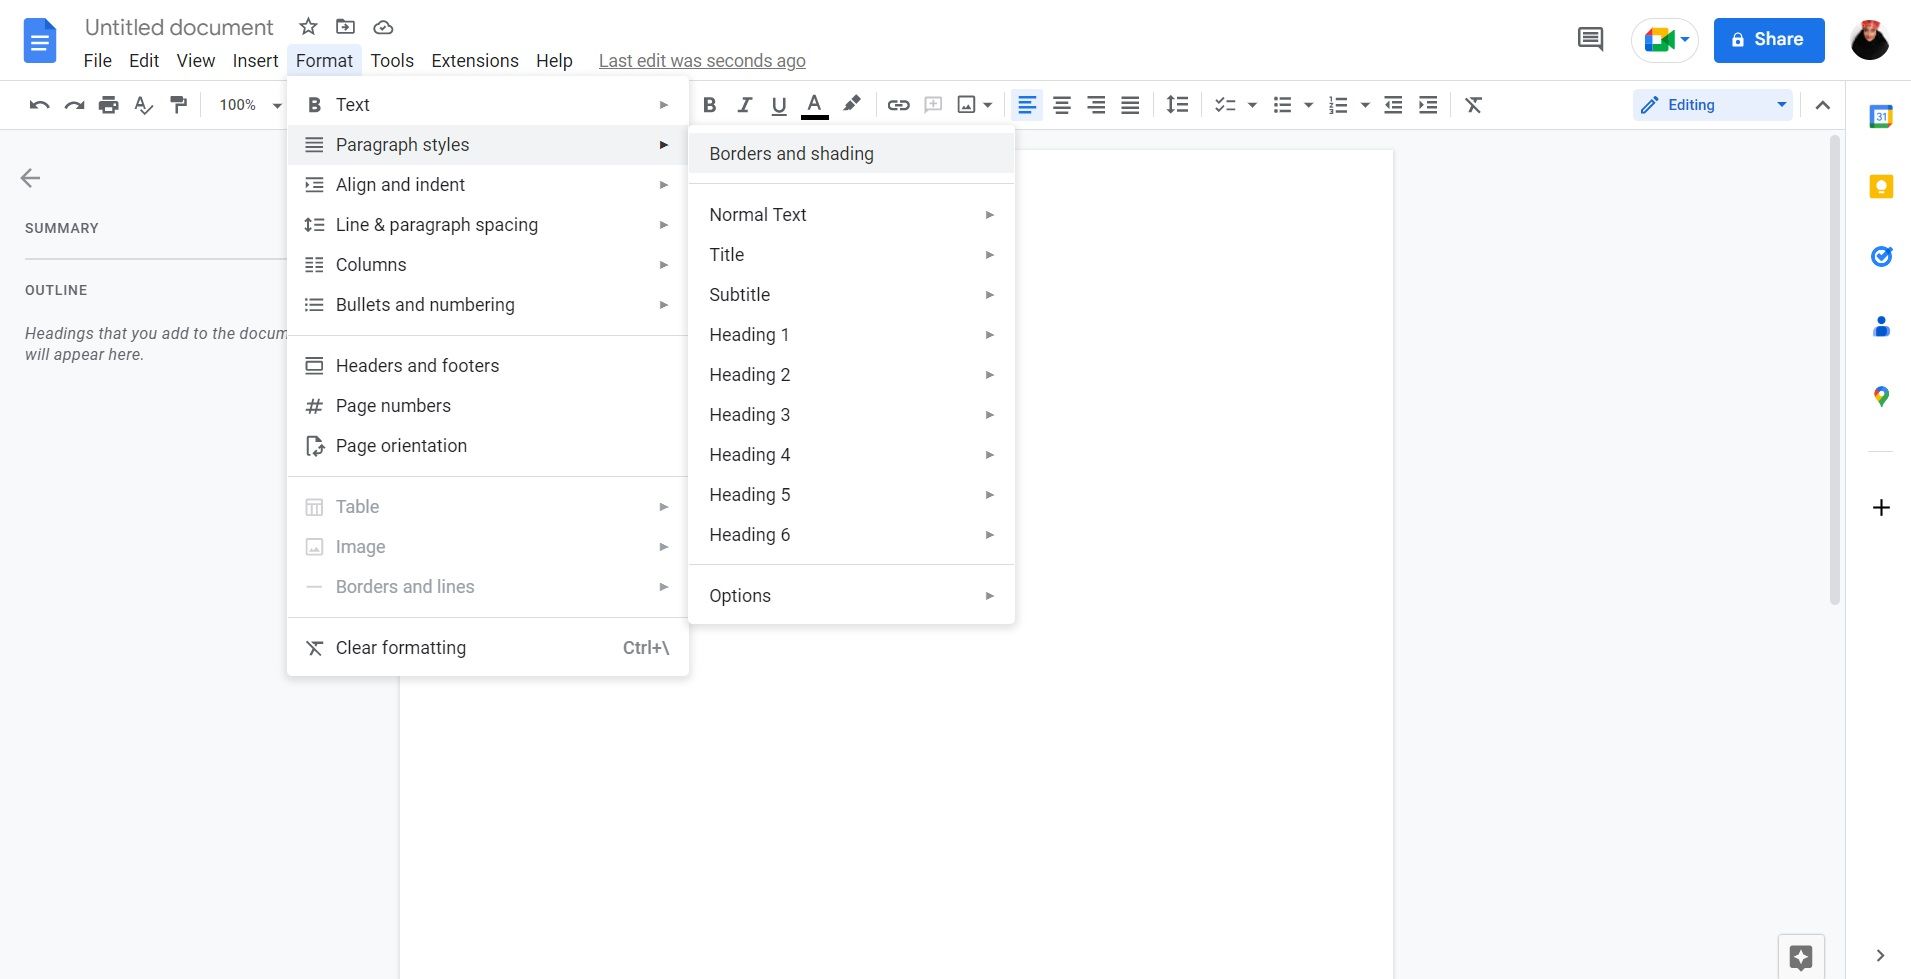
- Click on Paragraph styles.
-
Select Borders and shading.
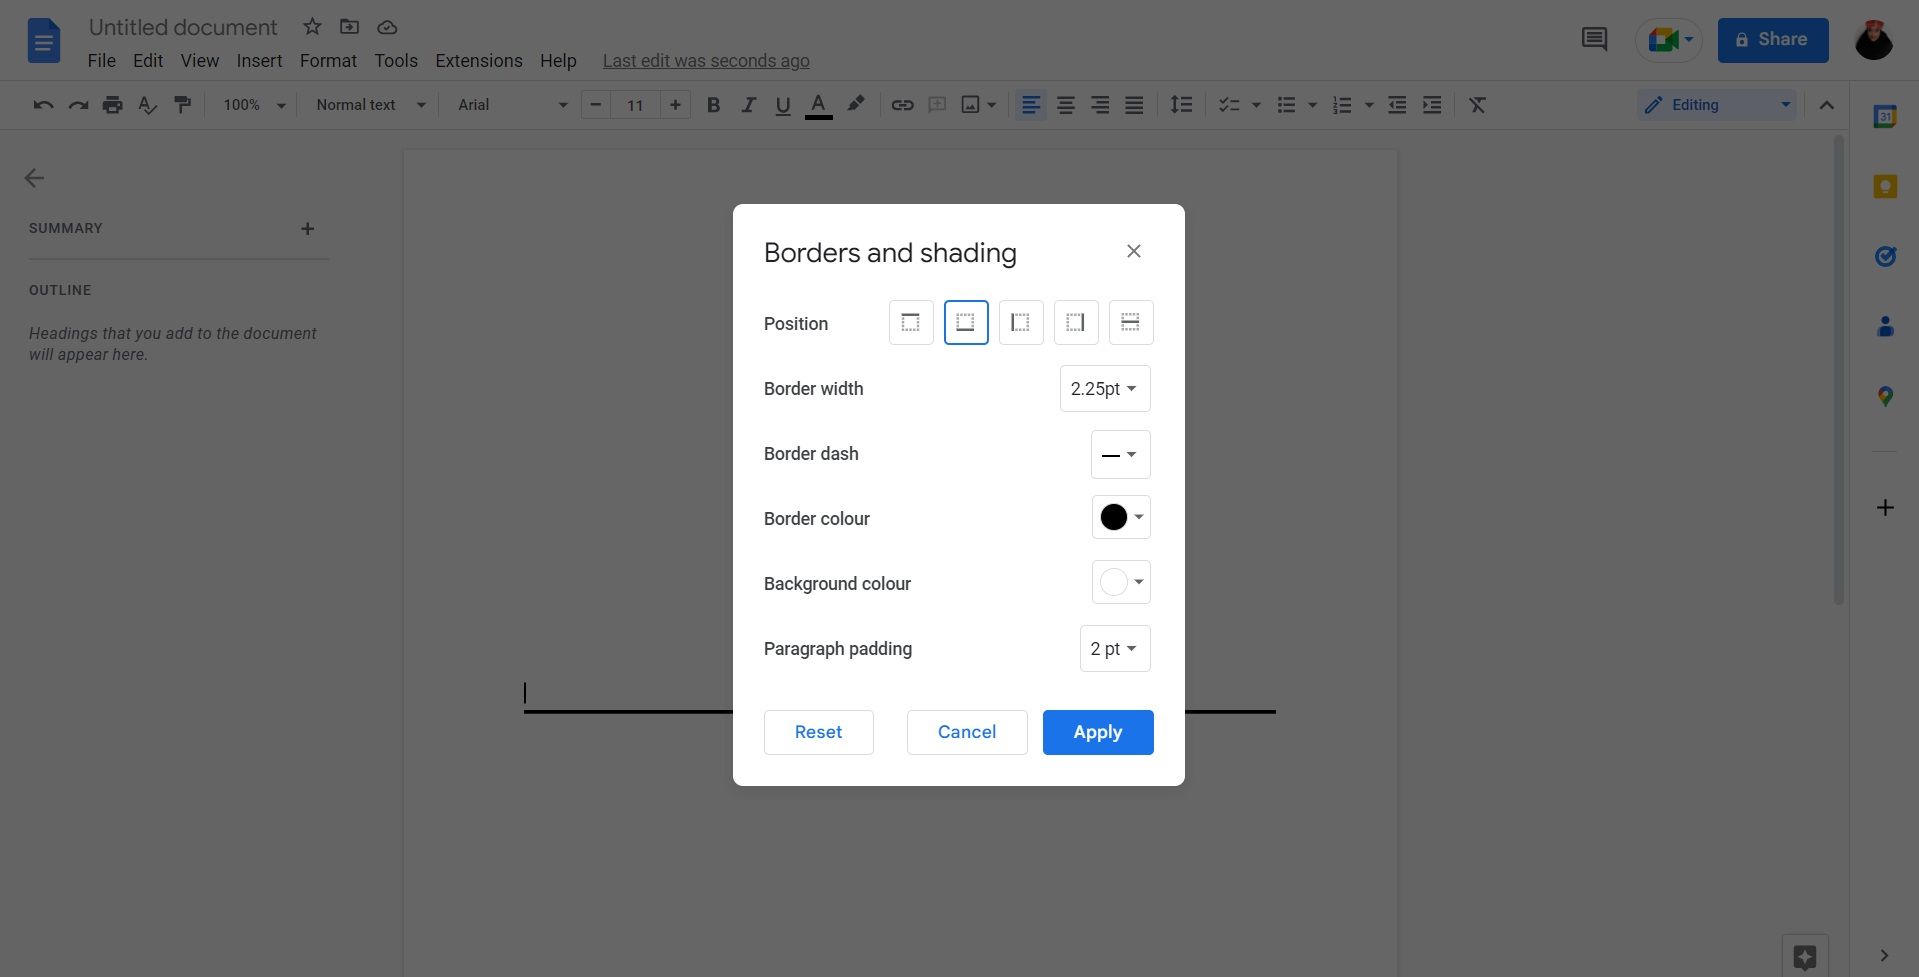
- Adjust the position, width, dash, and color as you wish, then select apply.


3. How to Use the Drawing Tool to Insert a Vertical Line
To insert a vertical line in Google Docs, you can use the drawing tool. Here’s how:
- Open a file in Google Docs.
-
Head to Insert in the toolbar.
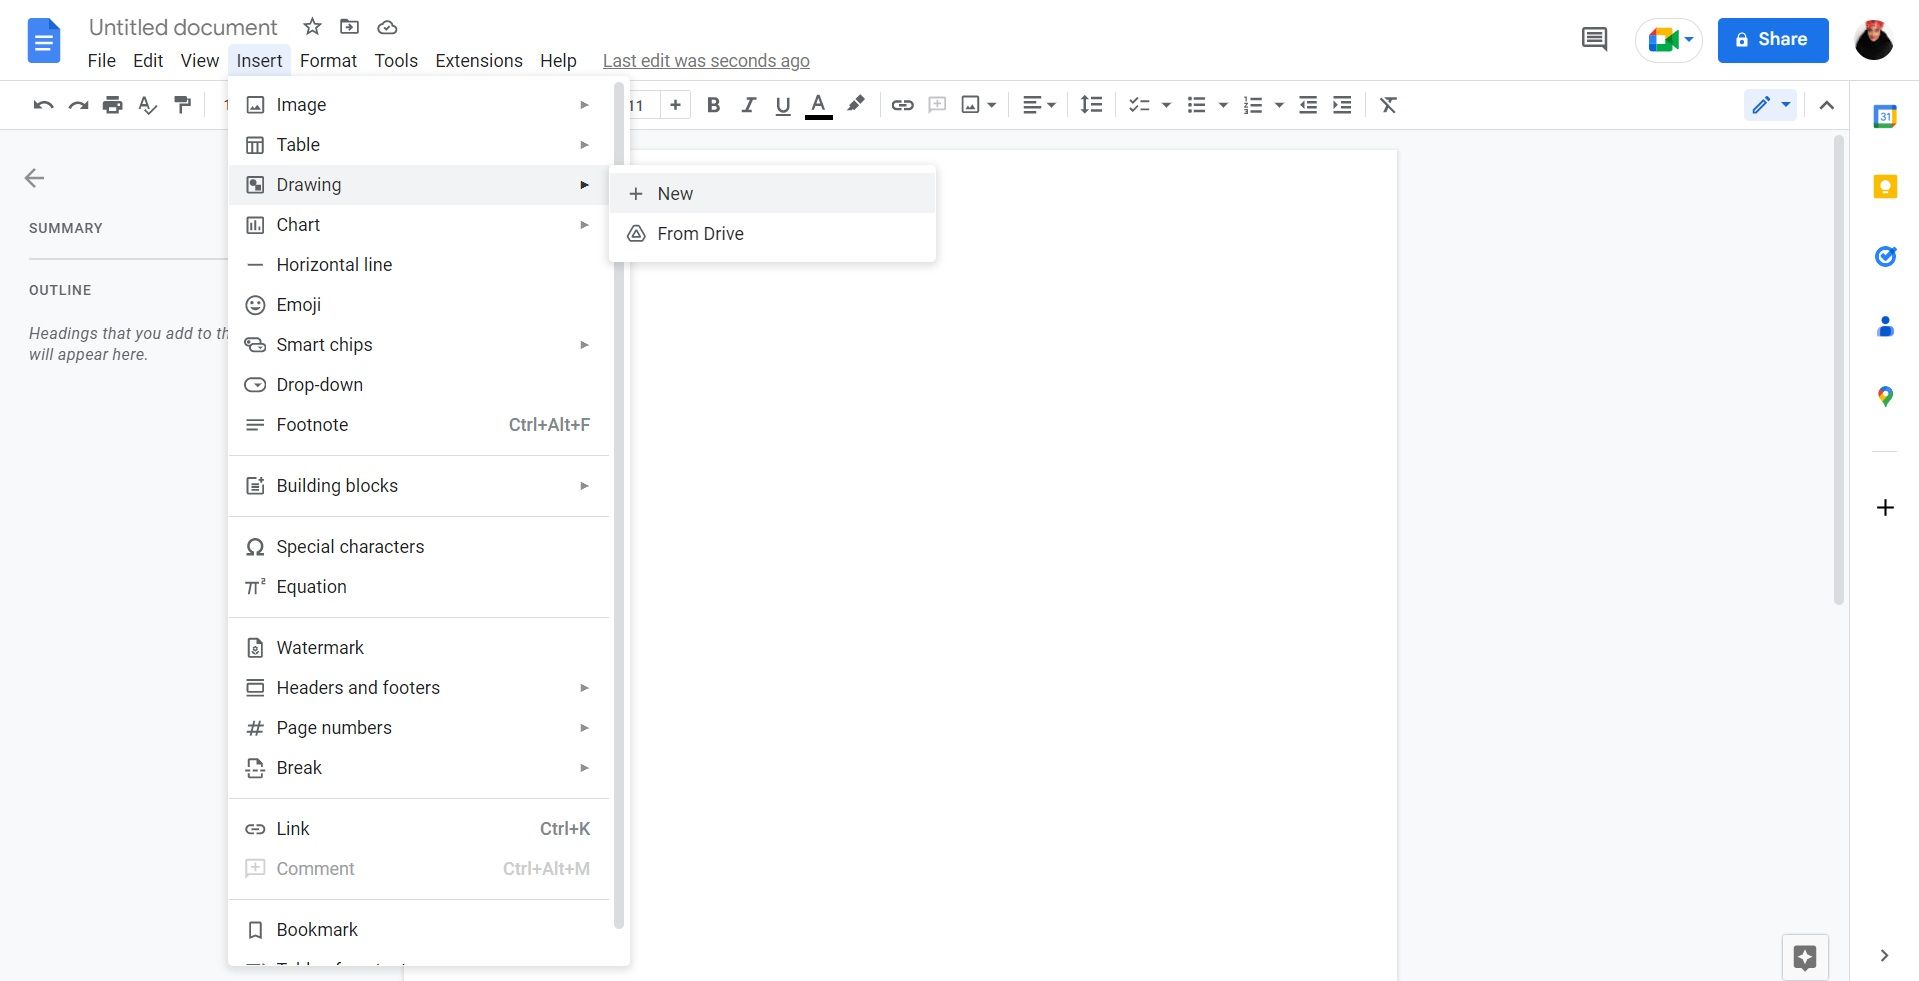
- Click on Drawing, then click New. If you have a vertical line format saved in Google Drive, you can click on From Drive.
-
After clicking on New, a drawing box will appear. Here, head to the drop-down line icon in the toolbar.
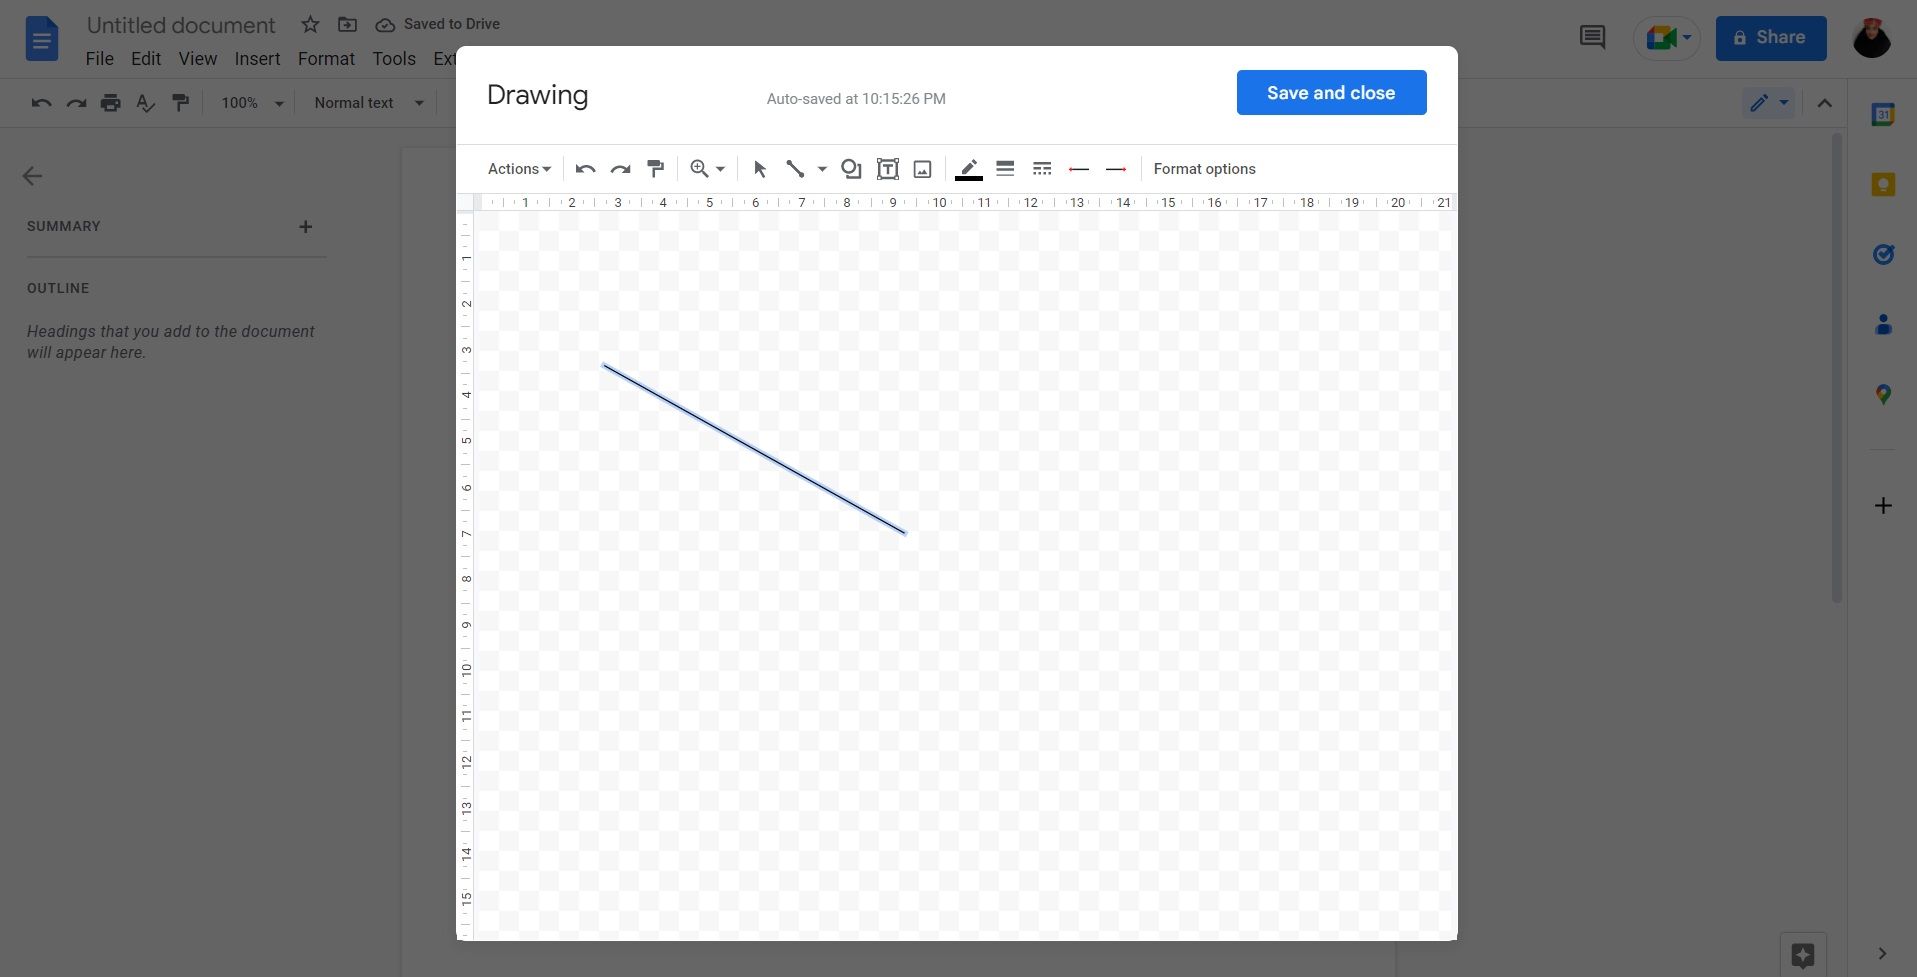
- Select Line.
- Click on the screen and drag the cursor to draw a vertical line. You can edit the line using the options on the right side of the toolbar.
- When you’re satisfied with the line, click on Save and close.


4. How to Use Columns to Insert a Vertical Line
If you want to create a neat Google Document, you can do so by splitting text with a vertical line. To do this, follow these steps:
- Open a document in Google Docs.
- Highlight the text you want to split into columns.
-
Click Format in the toolbar, then head to Columns.
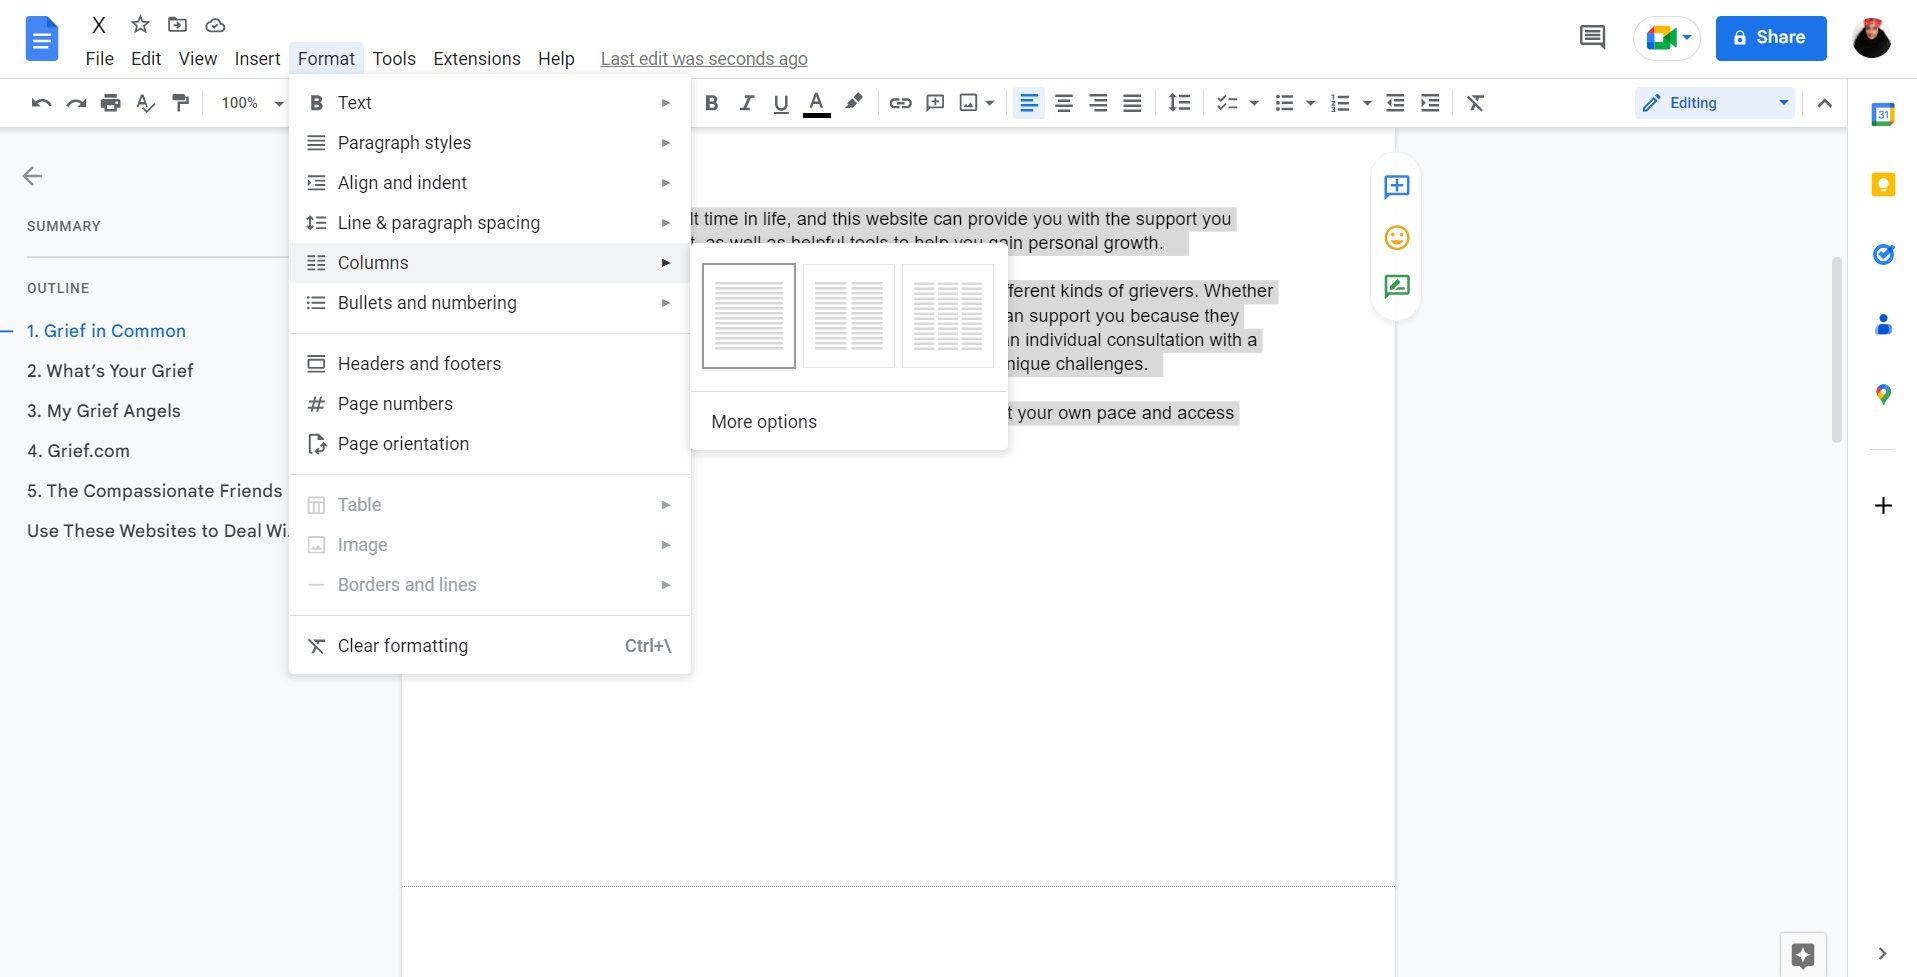
- Go to More options.
-
Choose the number of columns, depending on how you want to split the text.
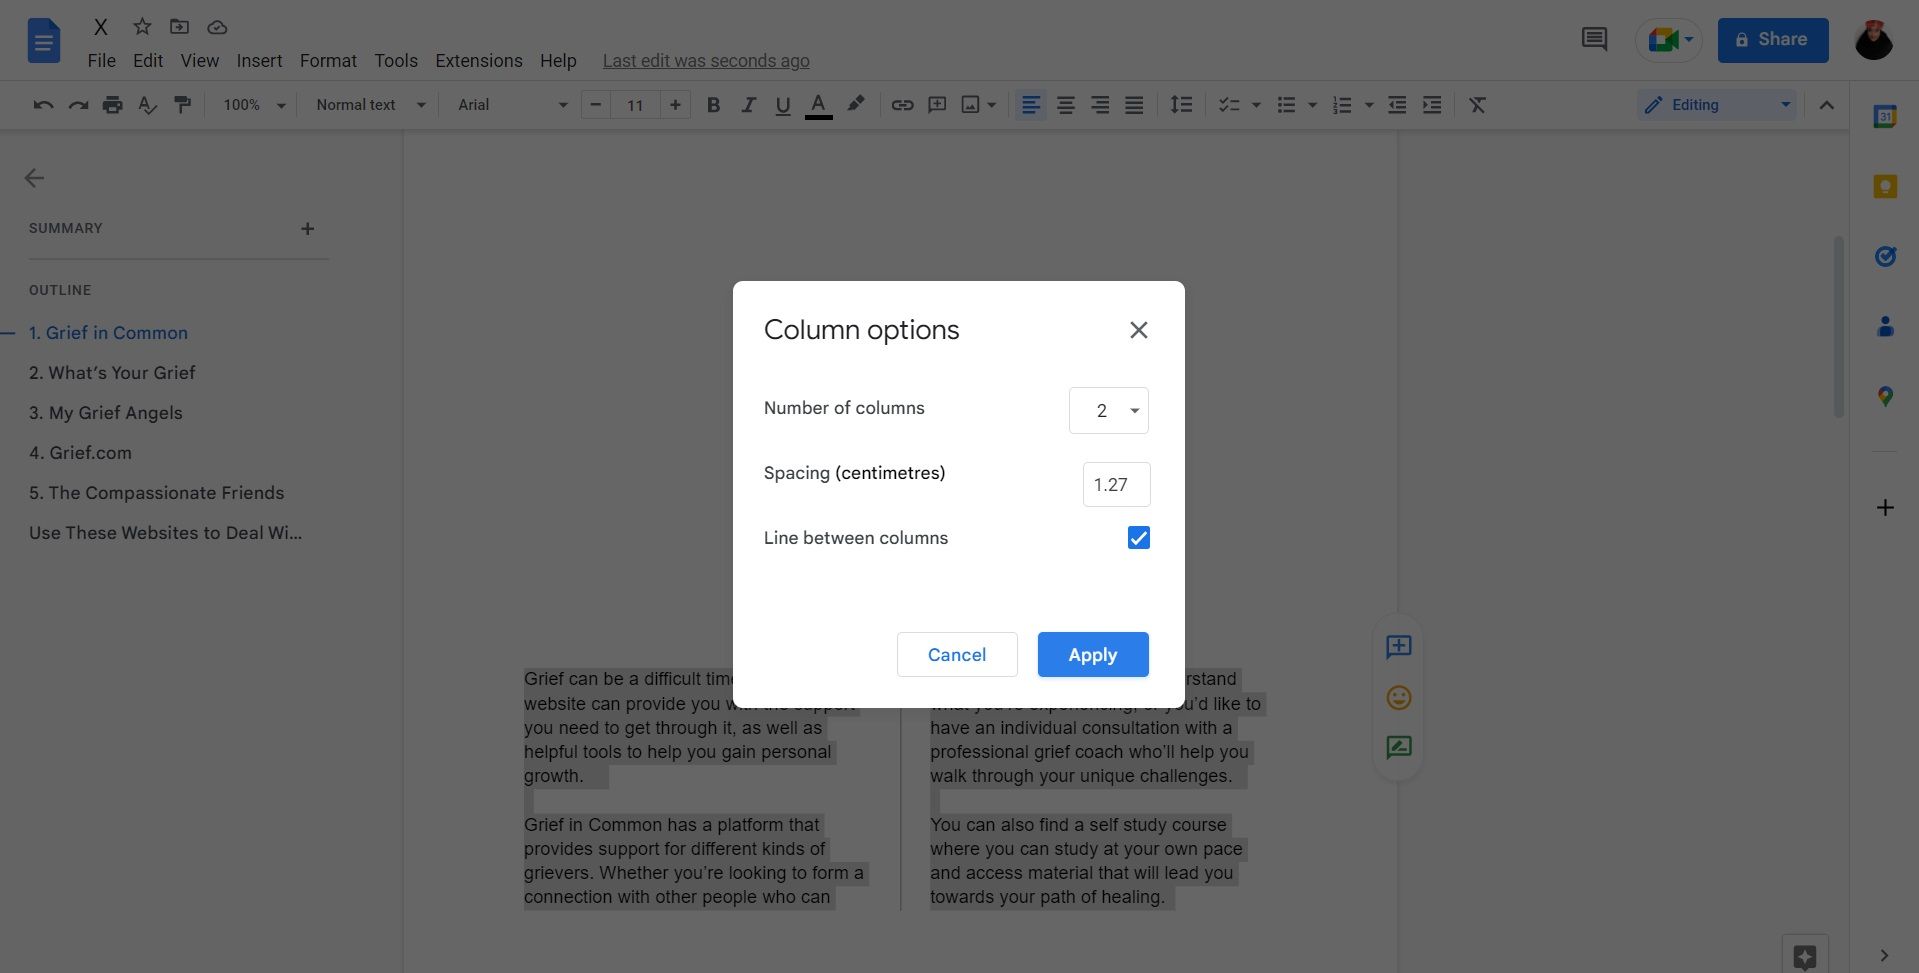
- Make sure the box next to Line between columns is checked.
- Click on Apply.


Insert Lines in Your Google Docs Files
Lines are simple but play an important role in the flow of your document. Now that you know how to add vertical and horizontal lines in Google Docs, you can share your documents knowing that they were thoughtfully created. If you want to create other visually appealing documents, there are plenty of ways to do that.