
Using forms in Microsoft Word to gather information is pretty simple and convenient. The major challenge lies in transferring the collected data to your Excel spreadsheet.
It can be overwhelming to manually enter all the data you have collected. Fortunately, there are several ways to automatically fill in data from your Microsoft Word forms into your Excel spreadsheet.
Understanding Forms in Microsoft Word
Before we begin, let's discuss forms in Microsoft Word documents. You may be wondering how Word forms work, but it is pretty straightforward.
With Word, you can create standardized documents that can be used to collect data. It does this by providing you with a template of your choice.
The template includes all the relevant fields that you may want your users to fill in. Once you specify the questions, users will have the option of filling out these templates. These responses are then stored in Word forms, which can be accessed at any time.
Creating an Excel Spreadsheet From a Microsoft Word Form
You can use any of these methods depending on the number of forms you have or the kind of data you want to export from your Word forms.
Method 1: Single Cell Import
It's best to use this method if you want to import data from an individual cell to an Excel spreadsheet. Here are the steps you need to follow to use this method.
- On your computer, open a new Excel spreadsheet.
- Click on the Insert tab and select the Object option.
-
Upon clicking it, the Object option will lead you to a window, as seen in the screenshot.
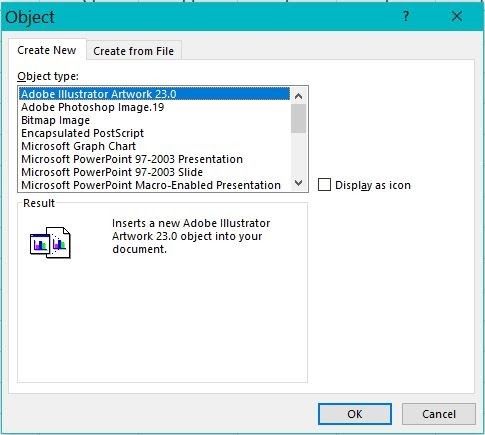
- There, select the Create From File option.
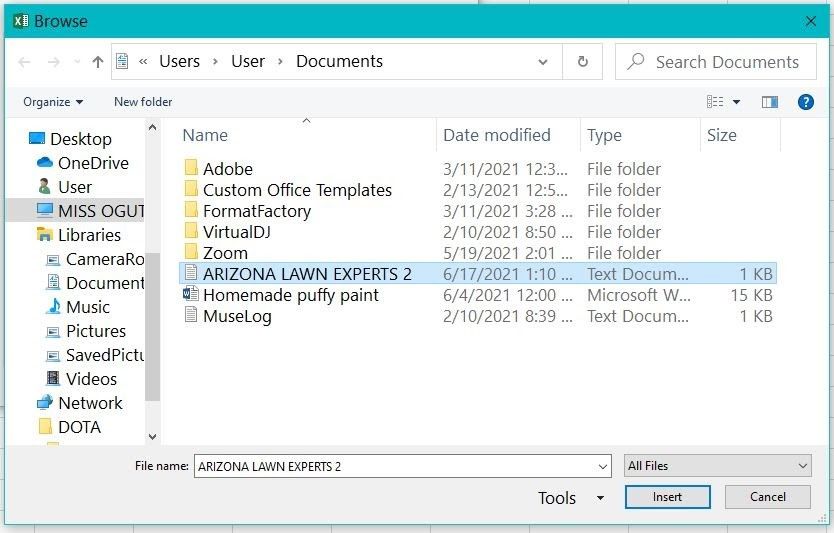
- Search through Microsoft Word documents to import your desired file.
-
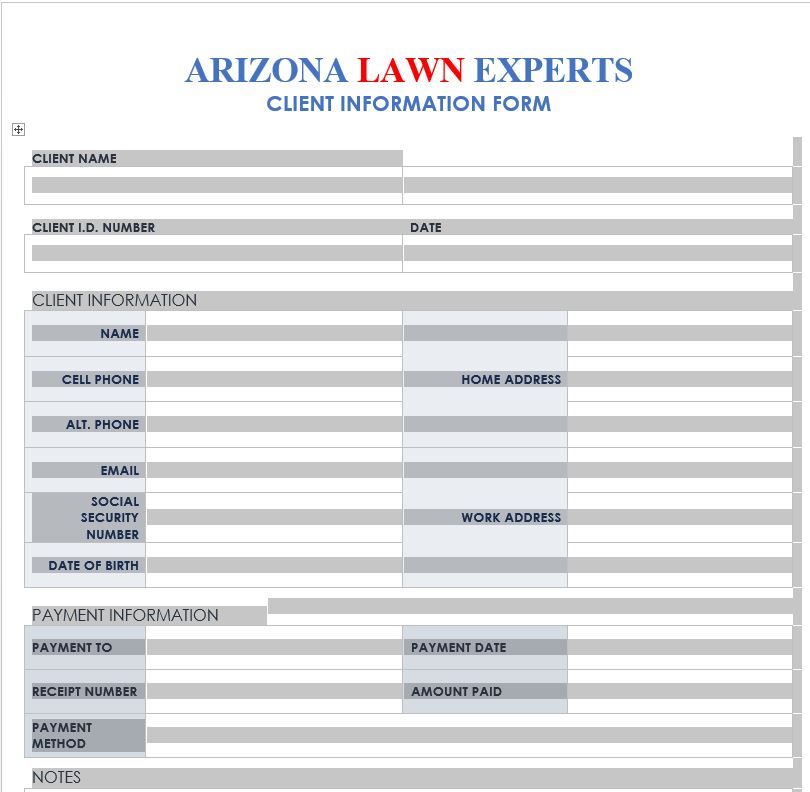
Select it by double-clicking the file name, then close the window by clicking on the OK button. This process will merge the Word file to your Excel spreadsheet.
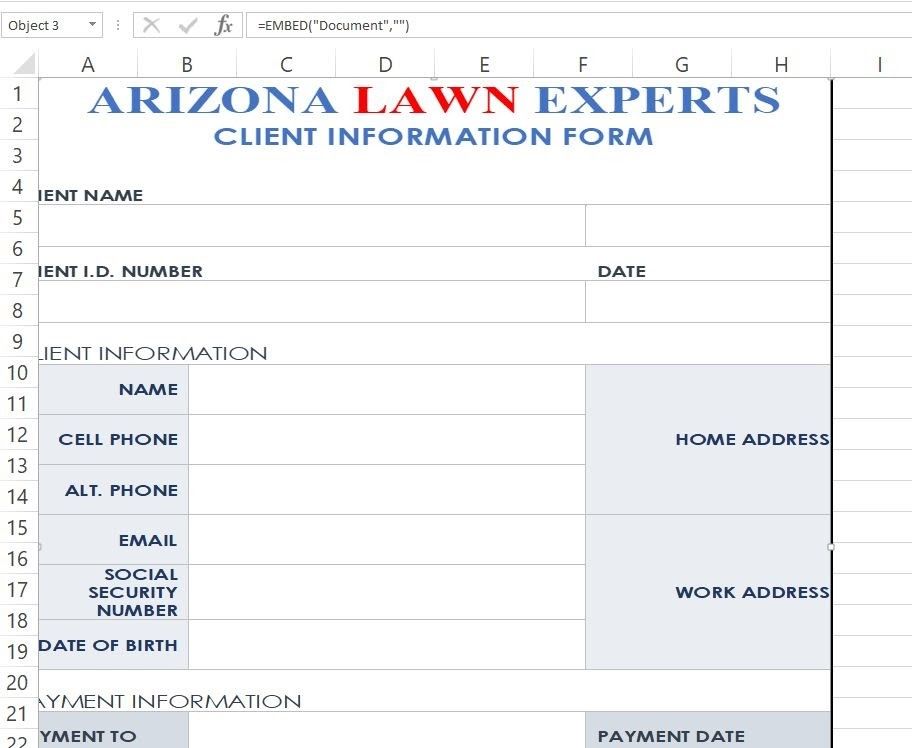
-
Your cell text box should now display =EMBED ("Document") under it, as shown in the picture. This can only be performed if the source Word document editing permissions are enabled.
- Click on the File tab > Save As, and rename your Excel file instead of overwriting your previous unmerged document.
- Click on Save again to finish the process.


Method 2: Cell by Cell Data Import
This second method allows you to import your data cell by cell. Here are some steps to guide you through.
- Open the Word document with the intended data for transfer.
-
Click on the hatch marks that are on the table.
- Copy the table by pressing Ctrl+C.
- You can then close your word document.
- Open an Excel spreadsheet and click on the first cell grid.
-
Paste the data you copied by pressing Ctrl+V. Your data will be pasted as seen in this picture.
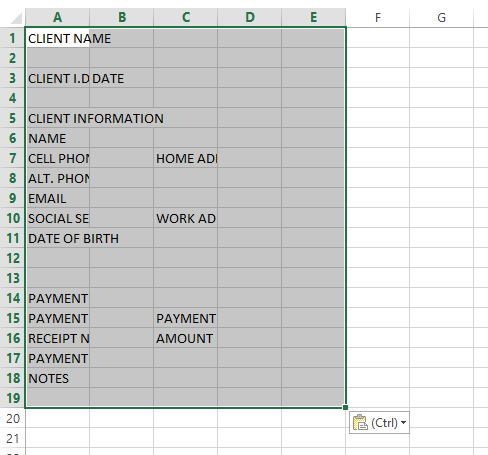


If you choose to use this method, please ensure that the Excel table has the same layout as the Word table that has the details.
This means that if your word table has ten columns, your Excel table should have the same.
Method 3: Convert Word to Excel Using CSV Files
Another simple method of converting information from your Word form into your Excel spreadsheet is using a comma-separated values (CSV) file. A CSV file is a delimited text file that uses commas to separate values in a file.
Using this method is simple. Word distinguishes relevant data from other text within your form. This means that your client's responses can not get mixed up with additional details from the template.
Converting Word to CSV
Before using CSV to transfer data into your Excel spreadsheets, you may need to convert your Word form into the CSV format. To convert your files, you can use either of the following methods.
Option 1: Using Options to Convert Your Word to CSV
You can use the Options tab to convert your form into CSV by following these steps.
- Open your Word form. Make sure it contains all the information you need.
- Select File > Options.
- On the Options panel, select Advanced. You will find this on the left side of the dialogue box, as shown in the picture below.

4. Check Save form data as delimited text file.
5. Finally, close the dialogue box by clicking on OK.

You can now either export your data to Excel or save the document as you like.
Option 2: Using "Save As" to Export Your Data to CSV
Alternatively, you can use the Save As option to save your document in CSV format. If this is your ideal method, then here are some steps to guide you through.
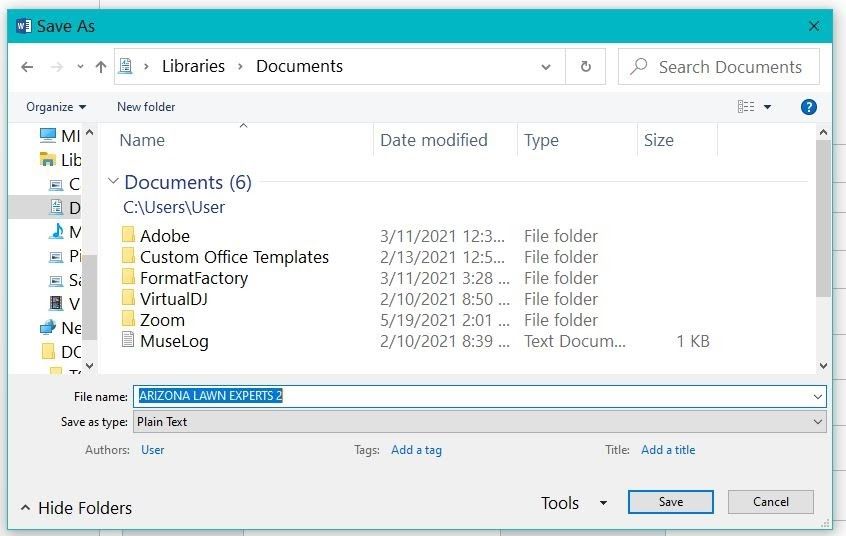
- While still on your Word form, click on the File menu > Save As option.
-
You will see a dialogue box containing Plain text selected by default, as shown in the picture.
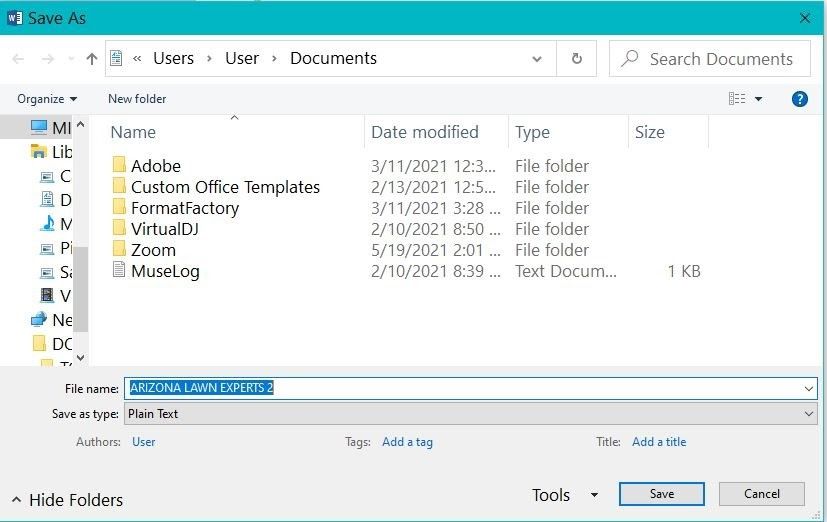
- If you made any changes, you need to rename your file and click Save.
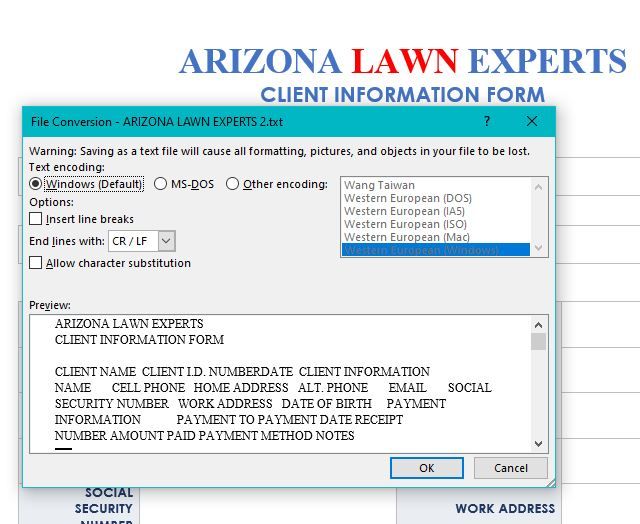
-
A preview dialogue box like the one in the screenshot will pop up, displaying the data you intend to export into your CSV format. To export the data, click OK.


By following these steps, Word will extract the data within the form into a .csv file. CSV files are compatible with Excel. They give you the freedom to access them on any version of Excel.
To separate the different fields within the document, Word inserts commas. Excel uses these commas to separate data belonging to various cells.
Option 3: Using Export to Save Data to CSV
If you do not want to use the Save As option, you may want to consider the Export option. Here is how to export data to a CSV file.
- While still on your form, click on File.
- Select the Export option.
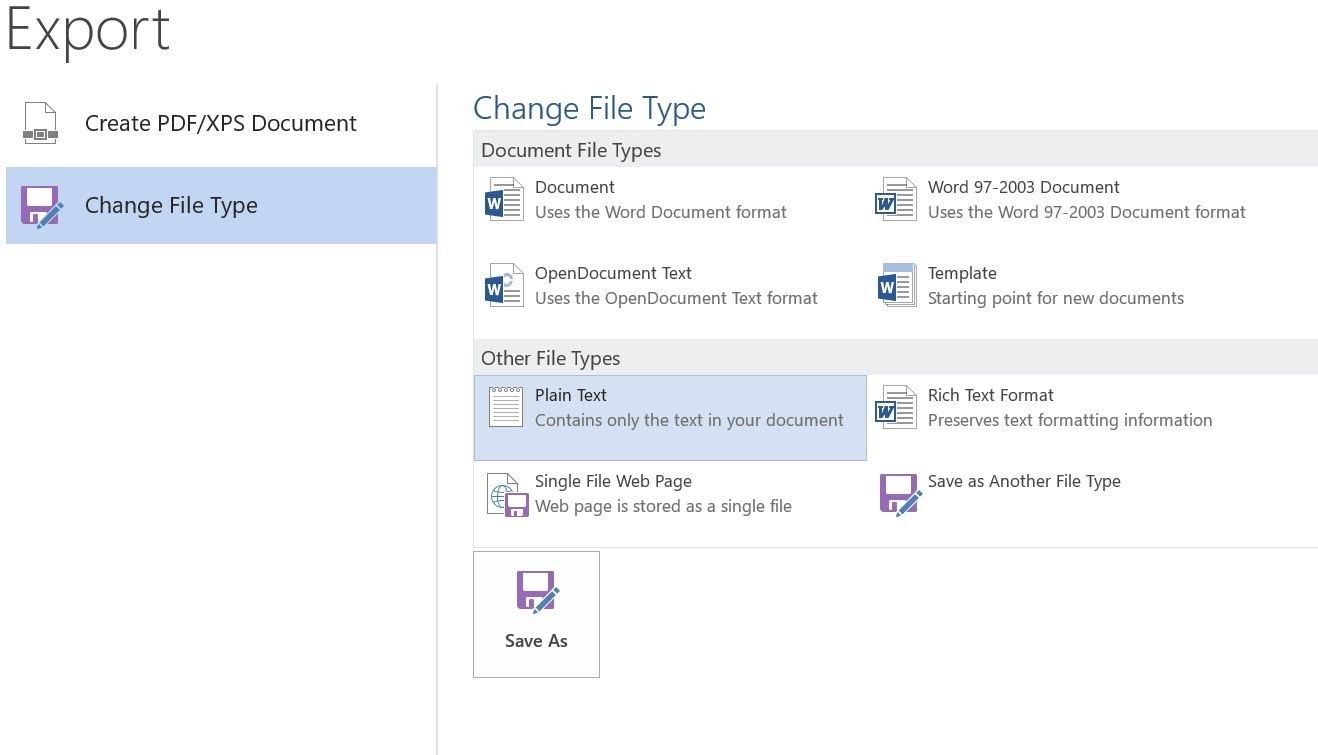
-
Click on Change the File Type, then on the File Types, and choose Plain Text (*.txt). It is as simple as it looks in the screenshot.
-
Click on Save As. By doing this, you will open the Save As dialog box, which will allow you to edit the file's properties.
- Select the preferred location for your file.
- Name your file as desired and click on Save. This will then export the data.


Importing Form Data Into Excel
Now that you have converted your Word form data to its CSV format, the next step is to import it into your Excel spreadsheet.
Your file may not be visible on Excel because Excel only displays Excel files by default. To access your CSV file, follow these steps.
- Open up a new Excel spreadsheet.
- Click on File > Open.
-
Choose the Browse icon and select All Files in the types drop-down list.
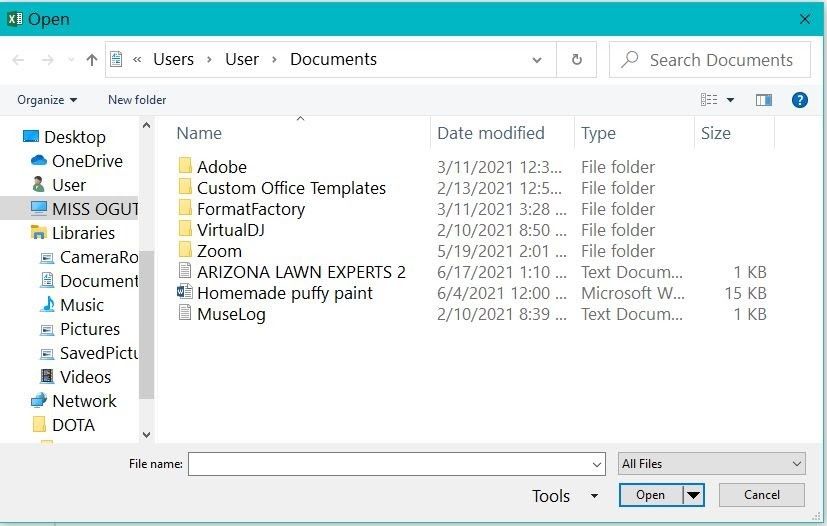
- Find the location of the file and select it.
- Click on Open. This will prompt Excel to open the Text Import Wizard, as shown below. Click on Delimited > Next.


Dealing With Many Forms
Sometimes you may need to convert plenty of forms in a single day. Going through this entire process may be strenuous in this case.
The best option is to create code connections to the spreadsheet using ADO when dealing with many forms. ADO (ActiveX Data Object) will automate the transfer process. This way, it becomes easier to transfer data.
Why Use These Methods
Even though learning these new techniques can be intimidating, they will pay off in the long run. You can save a lot of time by using these methods.
They also increase your accuracy when it comes to data entry. This way, the risk of errors becomes slightly lower since data is lifted from one software to another rather than keying it manually.