If you need to install an operating system from USB or flash storage, you first need to copy the ISO image file to the media.
But simply copying the old-fashioned way isn’t enough. You need the ISO file to be bootable, and for that, you need dedicated ISO file writing software.
While operating systems have the feature built in, it is difficult to use. That’s where Etcher from Balena comes in. This guide will show you how to write an ISO file to USB with Etcher, whatever operating system you use.
What Is the Best Way to Write an ISO to USB?
All operating systems have their own methods for writing an ISO or IMG disk image to USB or SD flash cards. For example, Linux, macOS, and Windows installations can be converted into a disk image. This can then be used as a backup, ready to image one or more new computers.
Meanwhile, you can use the dd command to write data to a USB stick in Linux and macOS.
To many users, the dd command is the pinnacle of writing a disk image to USB or other flash storage.
But if you use Windows, or simply don't want to mess around in the terminal, there's a great piece of software called Etcher.
This is a desktop app that allows easy, intuitive, mouse-controlled creation of a bootable USB or SD card with an ISO or IMG file. It's also available for all desktop operating systems. Whatever method you choose for writing data to USB or SD flash, knowing how to use Etcher can save you time.
Balena Etcher Is a Free Tool to Write an ISO to USB or SD Flash
Developed by Balena, Etcher is available free for macOS, Windows (installed and portable), and Linux (32-bit and 64-bit AppImage).
Download: Etcher (Free)
Simply click the Download button. The website will detect your operating system and ensure you grab the right version.
On Windows and macOS, you'll need to install Etcher. For Linux users with a system that accepts AppImage files, you can simply double-click the downloaded file and Etcher will run.
Flash an ISO File to USB or SD Flash With Etcher
To create a bootable USB stick or SD card from an ISO file that you have downloaded to your computer:
- Connect the USB stick or insert the SD card into the card reader
- Launch Etcher
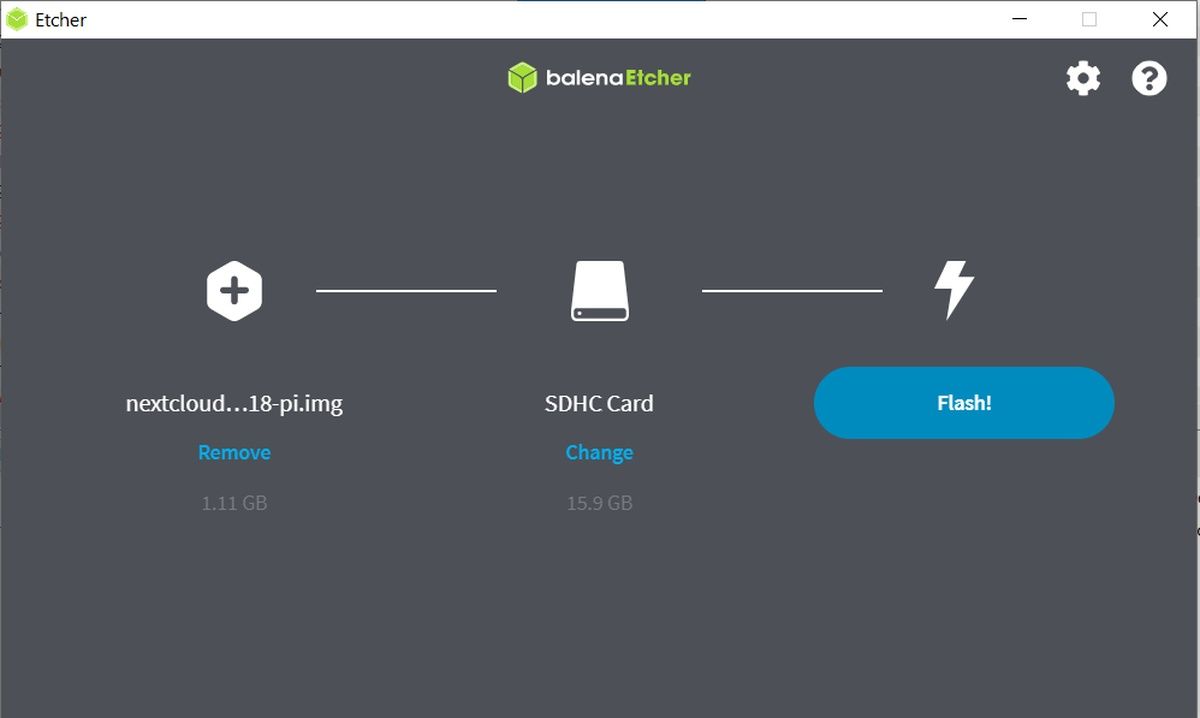
- Click Flash from file
- Browse your computer for the downloaded ISO file
- With the file selected, click OK
-
Next, click Select target

- Find the USB or SD card
- Click OK
-
Click Flash


Etcher will then proceed to write the ISO file to the selected media. Wait while this completes, as there will also be a verification stage.
The app will inform you when the process completes. Only then should you eject the USB stick or SD card.
How to Write an ISO File to USB from the Internet With Etcher
Sometimes, you won’t have the ISO file on your computer. Instead, it will be available as a downloadable file.
Rather than download it to your computer first, you can instruct Etcher to grab the file directly from the internet and write to your USB or SD card.
- Open your browser on the web page that provides the ISO file’s URL
- Connect a USB stick or insert an SD card into the card reader
- Launch Etcher
-
Click Flash from URL
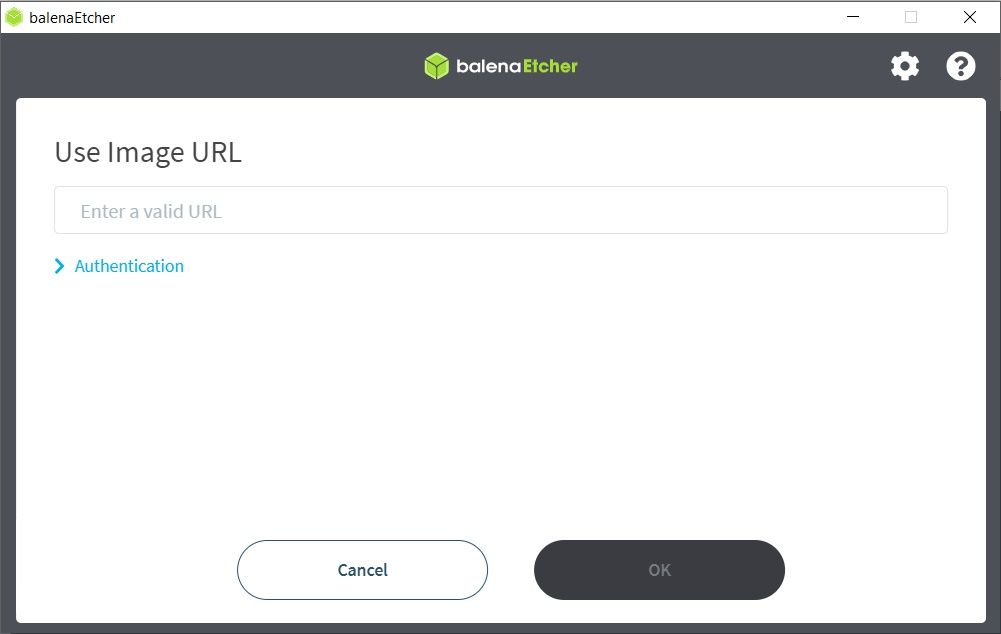
- Copy the file URL into the Enter valid URL field
- If credentials are required, click Authentication and enter a username and password
- Click OK
- Click Select target
- Browse for the USB or SD card
- Click OK, then Flash

Wait until the process has completed without attempting to eject the USB or SD flash media.
Clone a Flash Drive With Etcher for an Easy Backup
In addition to writing ISO files with Etcher, you can create them, too. This has various uses, from creating a disk image of your PC’s SSD, to backing up a USB flash drive. You could even use Etcher’s clone feature to back up a Raspberry Pi’s SD card.
Begin by ensuring the drive you’re writing to has the capacity to hold the contents of the source drive. Also, check that both devices are connected to your computer. Then:
- Launch Etcher
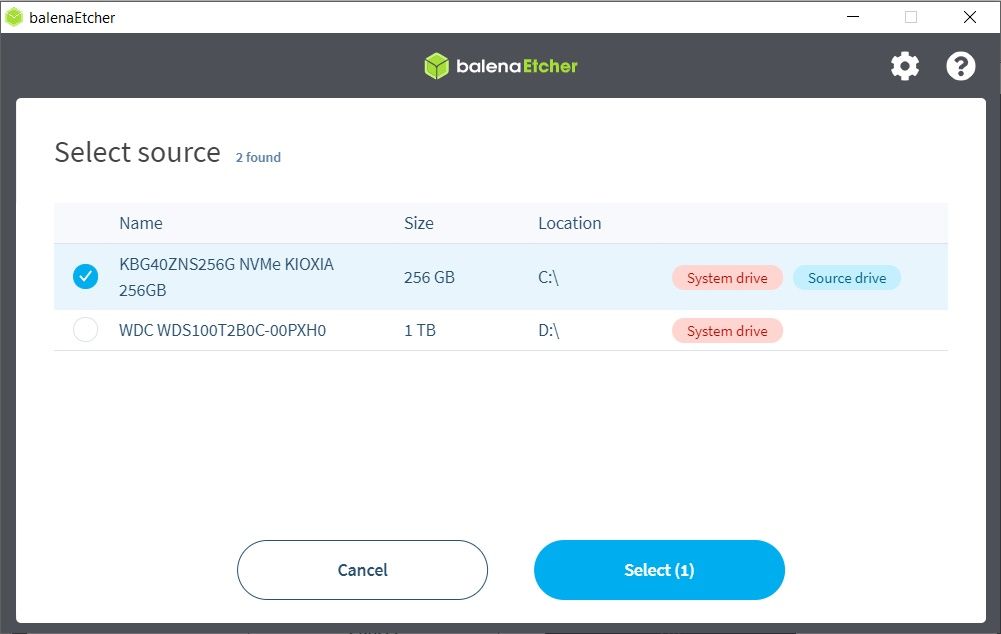
- Click Clone drive
-
Click the source drive radio button, then Select
- Click Select target
- Choose the target USB or SD card
- Click OK, then Flash

Wait for the process to complete. If you’re intending to clone an internal SSD, this might take a while, so patience is vital here. When the process completes, the target drive will have a complete clone of the source drive. This can be used to restore the disk in the event of failure, for example.
A Look at Etcher's Settings Screen
In addition to the three main ISO-creation features, Etcher has a couple of extra settings. These are accessed by hitting the cog in the top-right corner of the app window.

The first of these settings is a privacy option. You can disable this, but by default, Etcher is set to Anonymously report errors and usage statistics to balena.io.
The other setting is for updates. It’s worth setting Auto-updates enabled to on, as this ensures the app is kept up-to-date, protecting you from bugs, or vulnerabilities that might be exploited in the app
Etcher Is the Best ISO to USB Writer Around
If you want to know the best way to write an ISO file to a USB or SD flash device, you’ve found it. Etcher makes the process effortlessly simple, in most cases requiring just five clicks of the mouse.
Capable of flashing from a downloaded file, an online file, or even cloning a flash storage device and creating an ISO file from it, Etcher is the type of app that everyone should have. You might not use it regularly, but when you need it, Etcher does exactly what you want.
However, Etcher won't allow you to mount or browse an ISO disk image. But that's not a problem, as your operating system should do that for you.