Topaz Sharpen AI is a professional sharpening tool that can operate as a stand-alone and a plugin. It tackles difficult sharpening jobs on out-of-focus and blurry images.
In this article, we’ll take a look at the functions of Topaz Sharpen AI and demonstrate a simple workflow to get you started with the software.
Who Is Topaz Sharpen AI For?
Topaz Sharpen AI is for professional photographers and enthusiasts alike who need sharpening power that even advanced photo editing software like Photoshop can’t provide. Instead of one or a couple of sliders, Topaz Sharpen AI is comprised of a suite of tools dedicated to just one task: sharpening.
How to Use Topaz Sharpen AI
You can try Topaz Sharpen AI for free to decide if the software is for you before purchasing. This is quite the bargain since the trial lasts for 30 days.
It works on both Mac and Windows, and you can re-download and re-install the program on two computers. You'll also have access to live support chat and a 30-day refund guarantee.
Step 1: Adjust the Settings
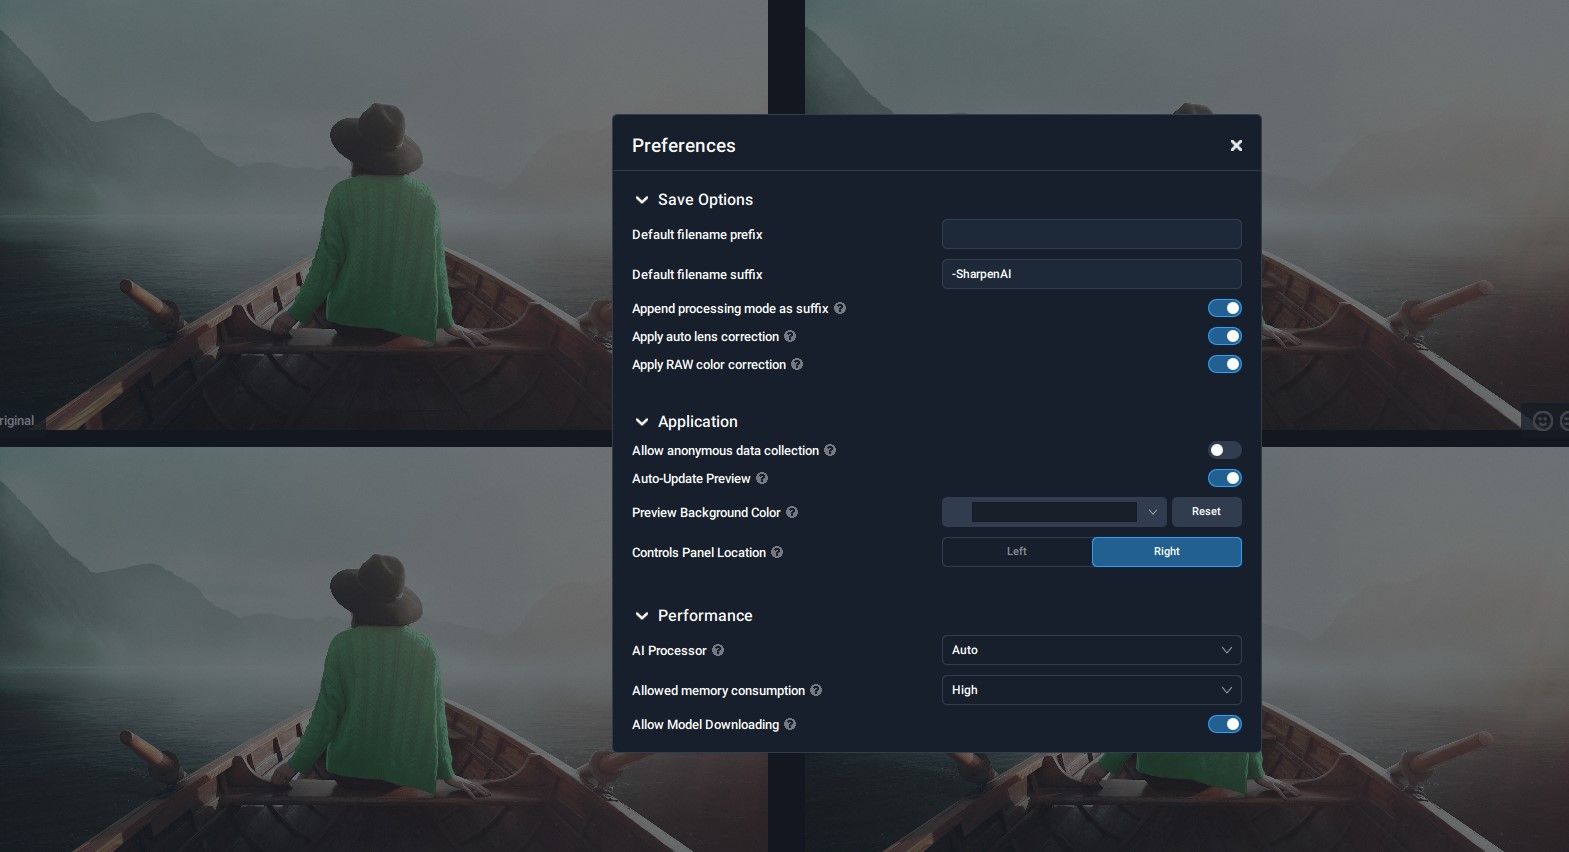
Before getting started, we recommend checking out the software preferences and make any adjustments necessary based on what computer you have and how you plan on using the software. First, go to File > Preferences, and let’s take a look at the options.
Once you’ve worked with Topaz Sharpen AI for some time you may want to revisit Preferences and adjust according to your needs. But if you’re new to the software, we recommend the above settings to get started. Let’s discuss one of these settings before moving on.
Under Performance and Allowed Memory Consumption, we recommend setting it to High. But if you experience program crashing during the use of Topaz Sharpen AI, you may want to change this setting from High to either Medium or Low.
To further improve performance, close any programs you’re not using, especially video games and other applications that consume graphics memory.
If you’re using Topaz Sharpen AI as a Photoshop plugin, you may run into scratch disk errors and other issues that slow down your overall editing experience. Therefore, ensure that the preferences in your main photo editing application are also up to par.
Step 2: Consider ISO and Visible Noise
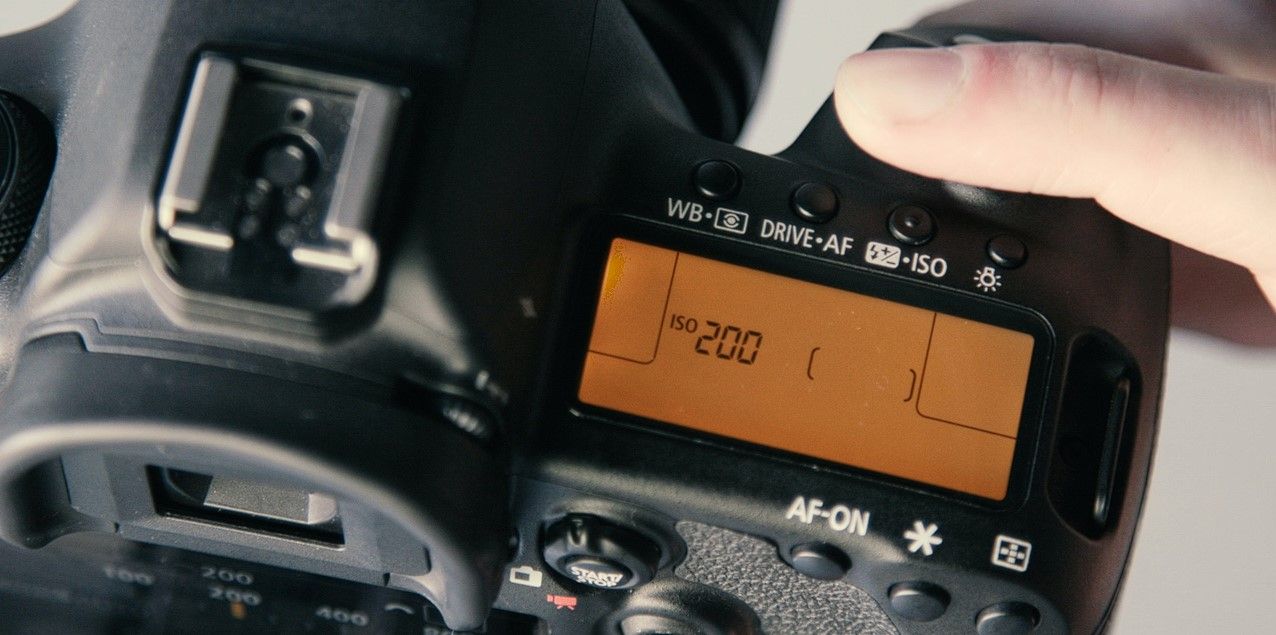
Another thing to consider before getting started is the amount of noise in the image caused by a high ISO setting on the camera. A lower ISO (usually under 1000) means there will be less visible noise. In this case, only Topaz Sharpen AL is necessary for sharpening the image.
If your ISO setting is more than 1000, or if there’s a lot of noise that needs to be removed, consider using Topaz Sharpen AI in conjunction with another denoise application, such as Google Denoise.
Step 3: Start in Comparison View
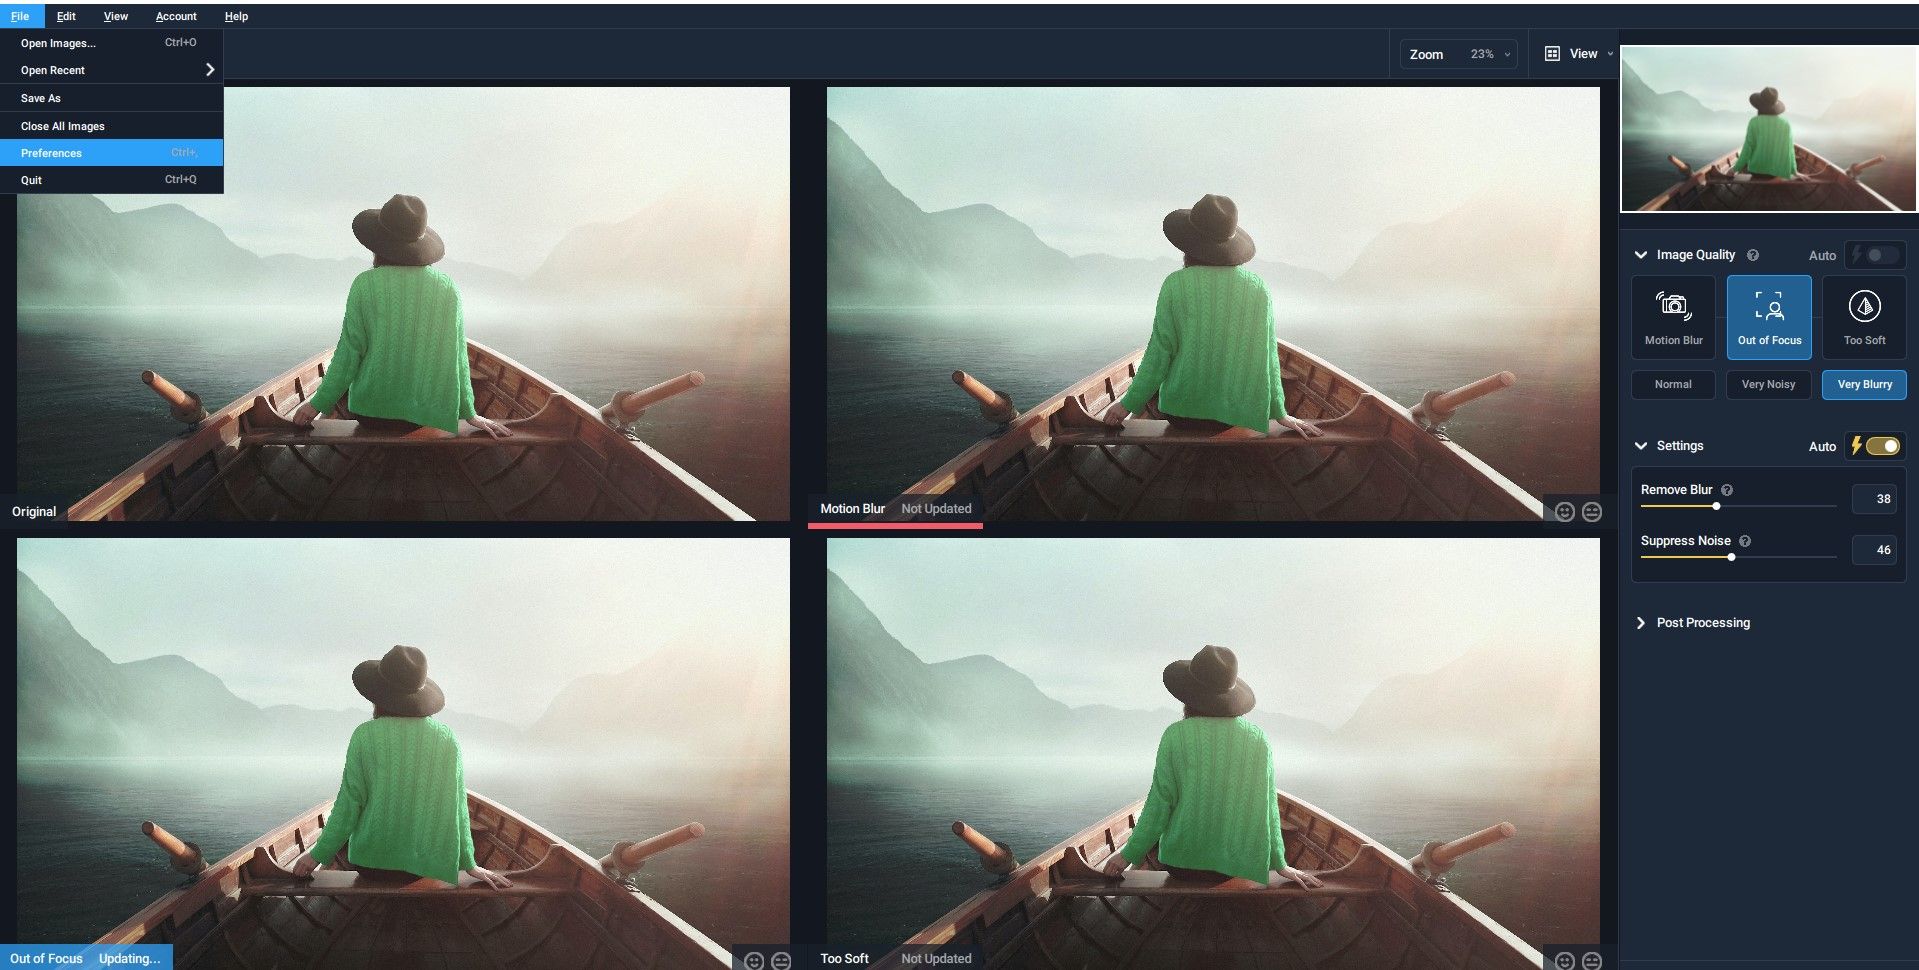
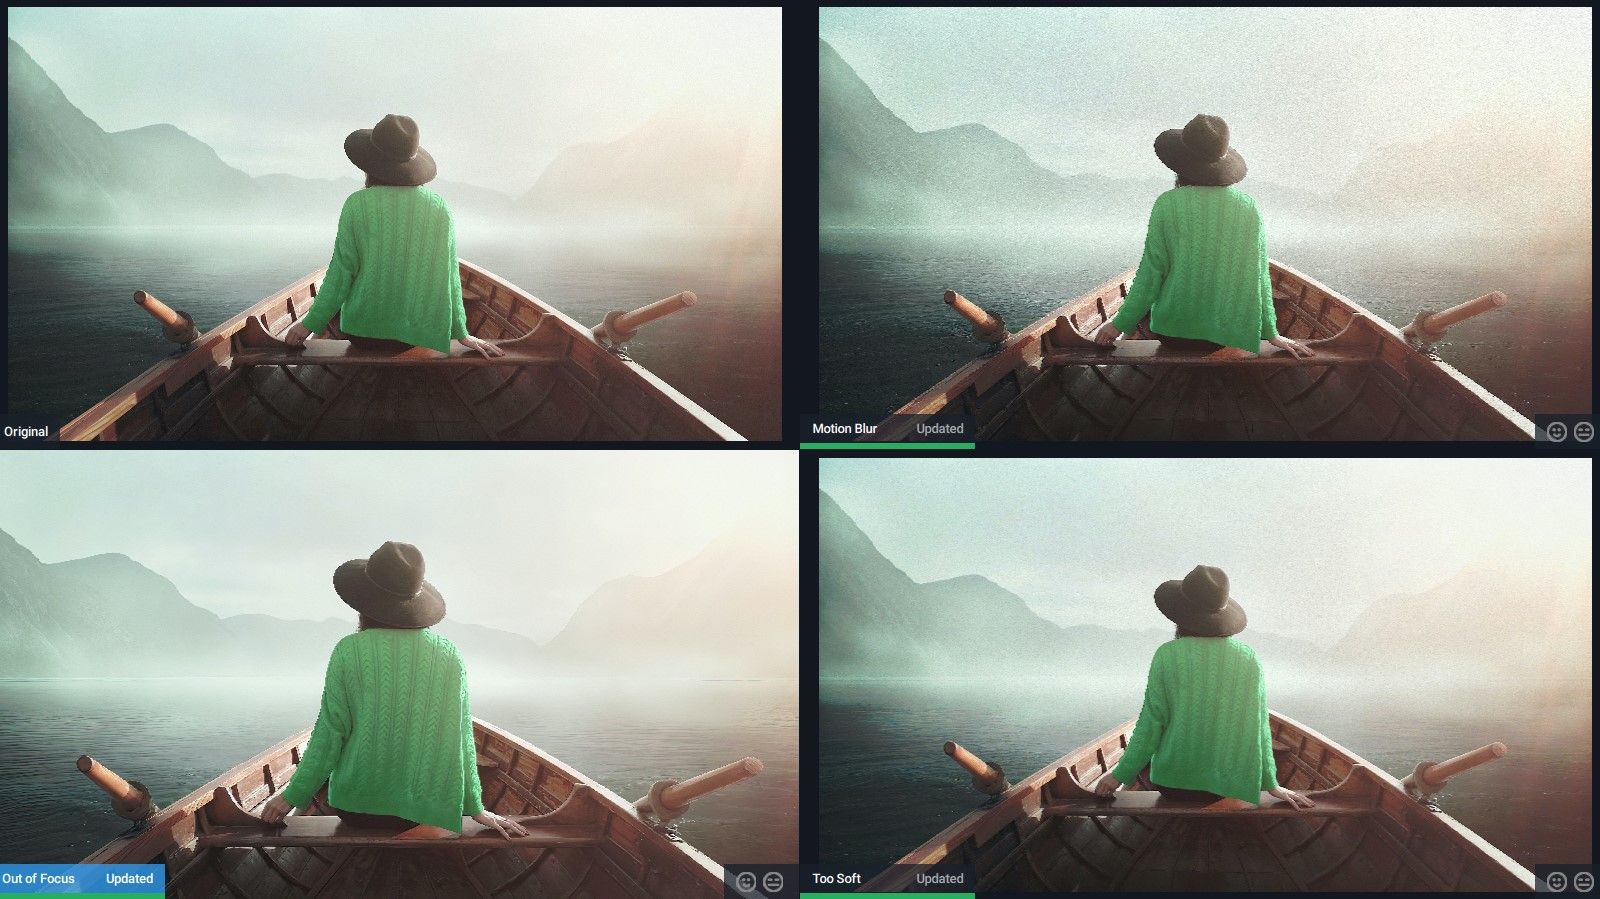
To get started, import an image to Topaz Sharpen AI, then go to View > Comparison View. This will give you a four-image view, including the original image and three other views, namely Motion Blur, Out of Focus, and Too Soft.
In this viewing mode, the Image Quality setting for Auto is off by default. We recommend toggling it to Auto as shown above.
This is how you want to start your workflow if you’re a first-time user or even an advanced user who wants to see all the auto options before fine-tuning any additional sharpening settings.
Step 4: Decide Which View Looks Best
While in the Comparison View, examine how the other three views look compared to the original image at the top left. Here’s what to look for:
- Which image is the sharpest?
- Which image is the sharpest while maintaining detail?
- Which images can be safely discarded as unusable?
- Which image is the “keeper”, whether or not it may need additional editing/masking?
It’s worth mentioning that you can use the mouse wheel to zoom in and out of these views. But whenever you do this, Topaz Sharpening AI will update each View and this can take some time, depending on your computer’s performance.
Let’s take a closer look at the abovementioned views for the example image and see which one would work best as a starting point.
Motion Blur
The Auto settings for the Motion Blur View have produced an image that is very noisy and perhaps even over-sharpened. Compared to the rest, it’s not the obvious choice unless you were going for a more artistic look.
Out of Focus
This image looks better than the previous one in terms of the sharpening and noise. And compared to the Original, the Out of Focus version is a contender.
Too Soft
The Too Soft version is also comparably better than the Motion Blur image. This is where you may run into your first major decision. Is it better than the Out of Focus View?
There’s more noise in the Too Soft View but it’s very subtle and would likely go unnoticed by the casual viewer, especially if the primary use is for social media and on smartphones.
But if you look closely, you’ll notice that the sharpening is harsh around the edges. It’s still usable but perhaps the Out of Focus View would be the better choice because the sharpening isn't over-pronounced.
Step 5: Make Manual Adjustments
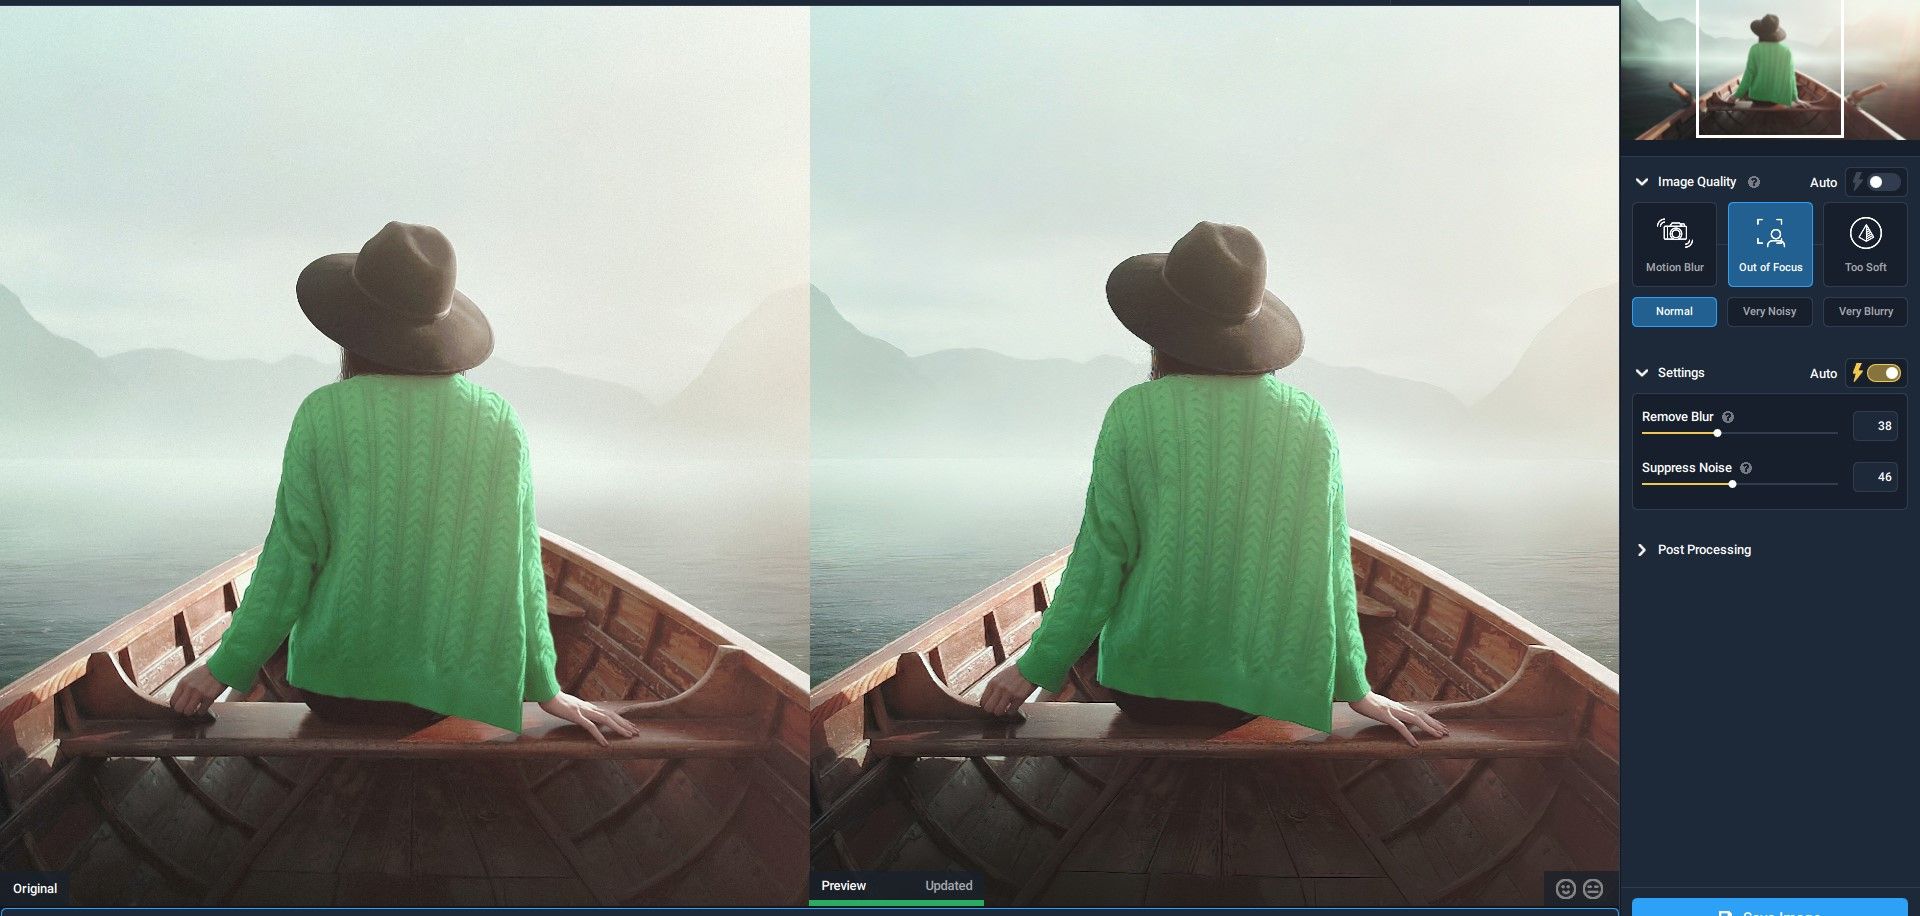
Once you've decided which view is the best, you can go to View > Side by Side for any manual adjustments that may be needed.
Choose the View that you wish to use. In this case, we selected Out of Focus. Check Normal, then wait for the preview to update once again. Now, you can manually change any settings to discover what looks the best. You can experiment with the Remove Blur and Suppress Noise sliders.
There are also options to see what the image would look like if you were to check Very Noisy or Very Blurry. Once you're happy with the results, click Save Image.
If you’re using Photoshop or any other photo editor to further refine your image, there are various tools available to improve the sharpening, including layers and masks and opacity sliders.
Get Crisp Images With Topaz Sharpen AI
Topaz Sharpen AI is a robust tool for sharpening, and its several automated and manual features enable a professional workflow. If you ever end up with a blurry photo, follow this guide to fix them up.

