Markup is one of the most useful built-in features in the Apple ecosystem. If you need a quick fix for your media or need to annotate documents before sending them over to someone’s email, this feature has your back.
While the feature is often heavily utilized in iPhones and iPads, the same is not true for Macs. This may be because there are other apps available that serve the same purpose. But it may also be because people simply don’t know how to access Markup tools.
If you’re part of the latter group, below is a short guide on how you can access and maximize the Markup feature on your Mac.
How to Enable Markup on Your Mac
The Markup feature is accessible in several of Apple’s built-in apps. But to be sure that you can access it, enable the feature by doing the following:
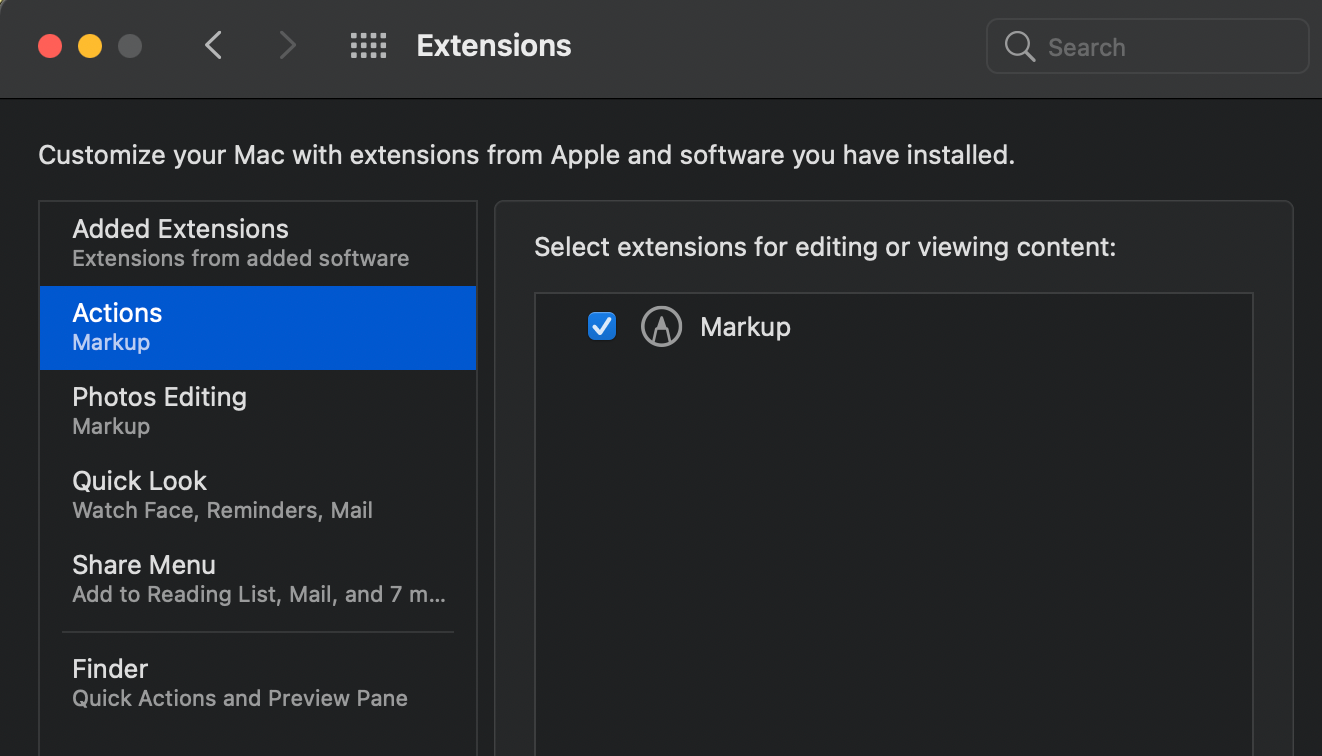
- Open System Preferences > Extensions.
- Choose Actions. Click the box beside Markup.
- Do the same for Photos Editing.
Now that’s done, you can use the feature with several native applications on your Mac, including Photos, Mail, Text Edit, and others.
Do Quick Photo and File Edits Before Sending Your Mail
While there are many messaging platforms available, emails are still one of the primary ways we send files—more so if they’re for professional use. If you need to fill in forms or annotate documents in PDF format before sending them, there’s an easy way to access the Markup feature.
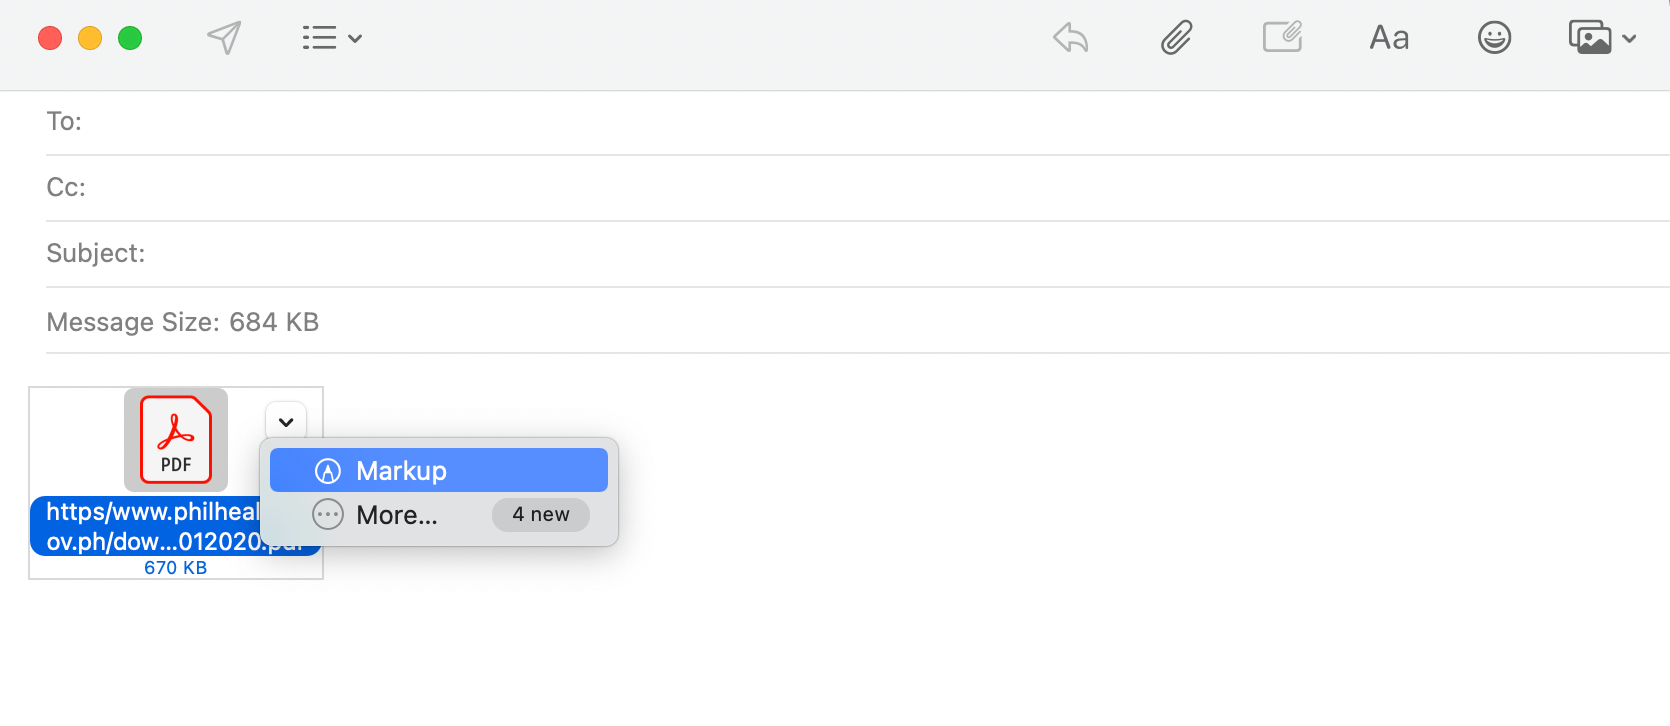
Simply drag the photo or the document onto the body of the mail. You should see an arrow on the upper-right side as you hover your mouse over the image or the file.
Click the arrow, then choose Markup. A popup window with the image will appear, allowing you to touch up the image or the document. You can draw, add shapes and texts, add a signature, rotate, and crop images.
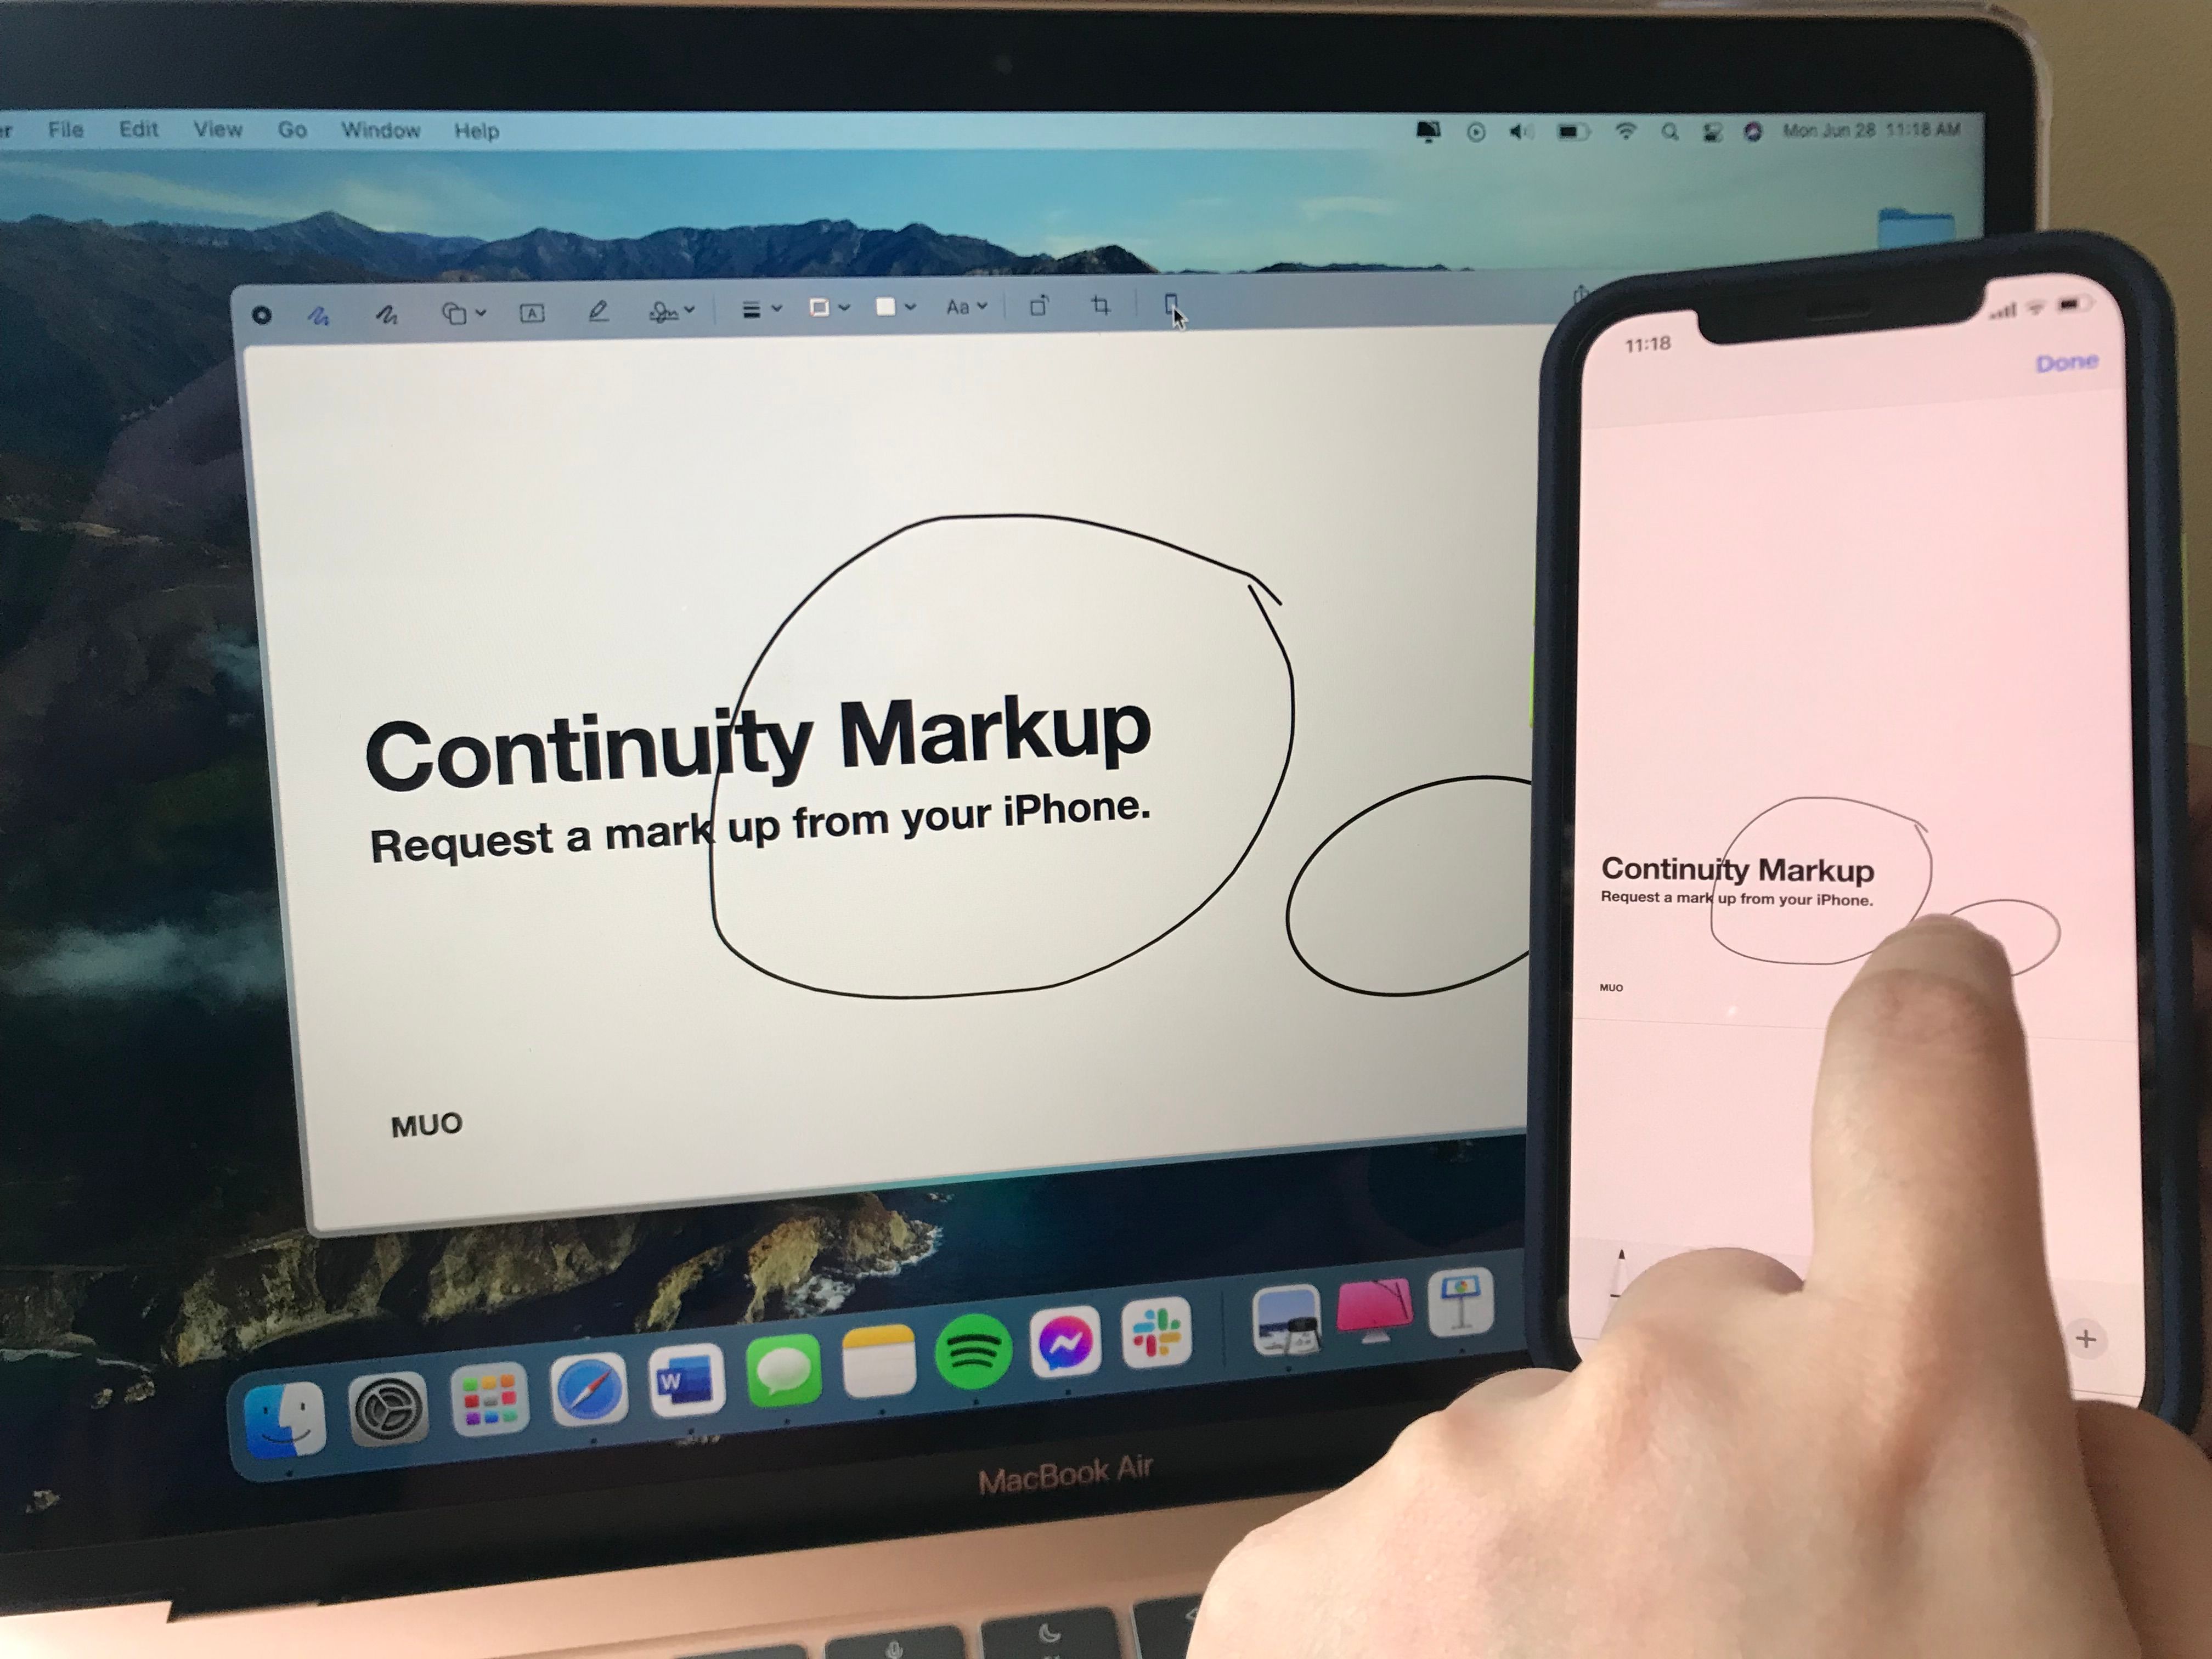
You can even add sketches using your iPhone with the Continuity Markup feature. Once finished, hit Done, and send your email.
How to Access the Markup Tool to Edit PDF Files
If you have a PDF file that you need to fill in and sign, and you don’t have a third-party app to modify them, just use the Markup tool to get your document is ready to go.
There are several ways to do this:
- Control-click on the document, choose Quick Look. Once a popup window appears, click the Markup icon. Edit your file. Click Done once you’re finished.
- Control-click on the document, choose Quick Actions > Markup. Similarly, just click Done once you’re finished with your file.
- Control-click on the document, hover over Open With > Preview. Click the Markup Toolbar on the upper right side of the window. Aside from the usual annotation features, Markup in Preview also allows you to select text in PDFs.
When finished editing in Preview, just click the blue Markup icon. You’ll notice that it will turn gray, indicating that you’re not actively using the Markup tools anymore.
Editing Photos and Images
Similar to the above, you can simply use Quick Look and Quick Actions to render quick image edits to your photo with Markup. Alternatively, you can also use Preview.
While Preview is the default app for viewing images, people often ignore it when it comes to editing images. But the Preview app is actually a handy tool for editing images and comes with several useful functions, like converting images from one file type to another, batch resizing of photos, and adjusting image colors.
Aside from its usual tools, the Markup toolbar for editing images in Preview has several extra tools, including Instant Alpha, Adjust Size, and Adjust Color.
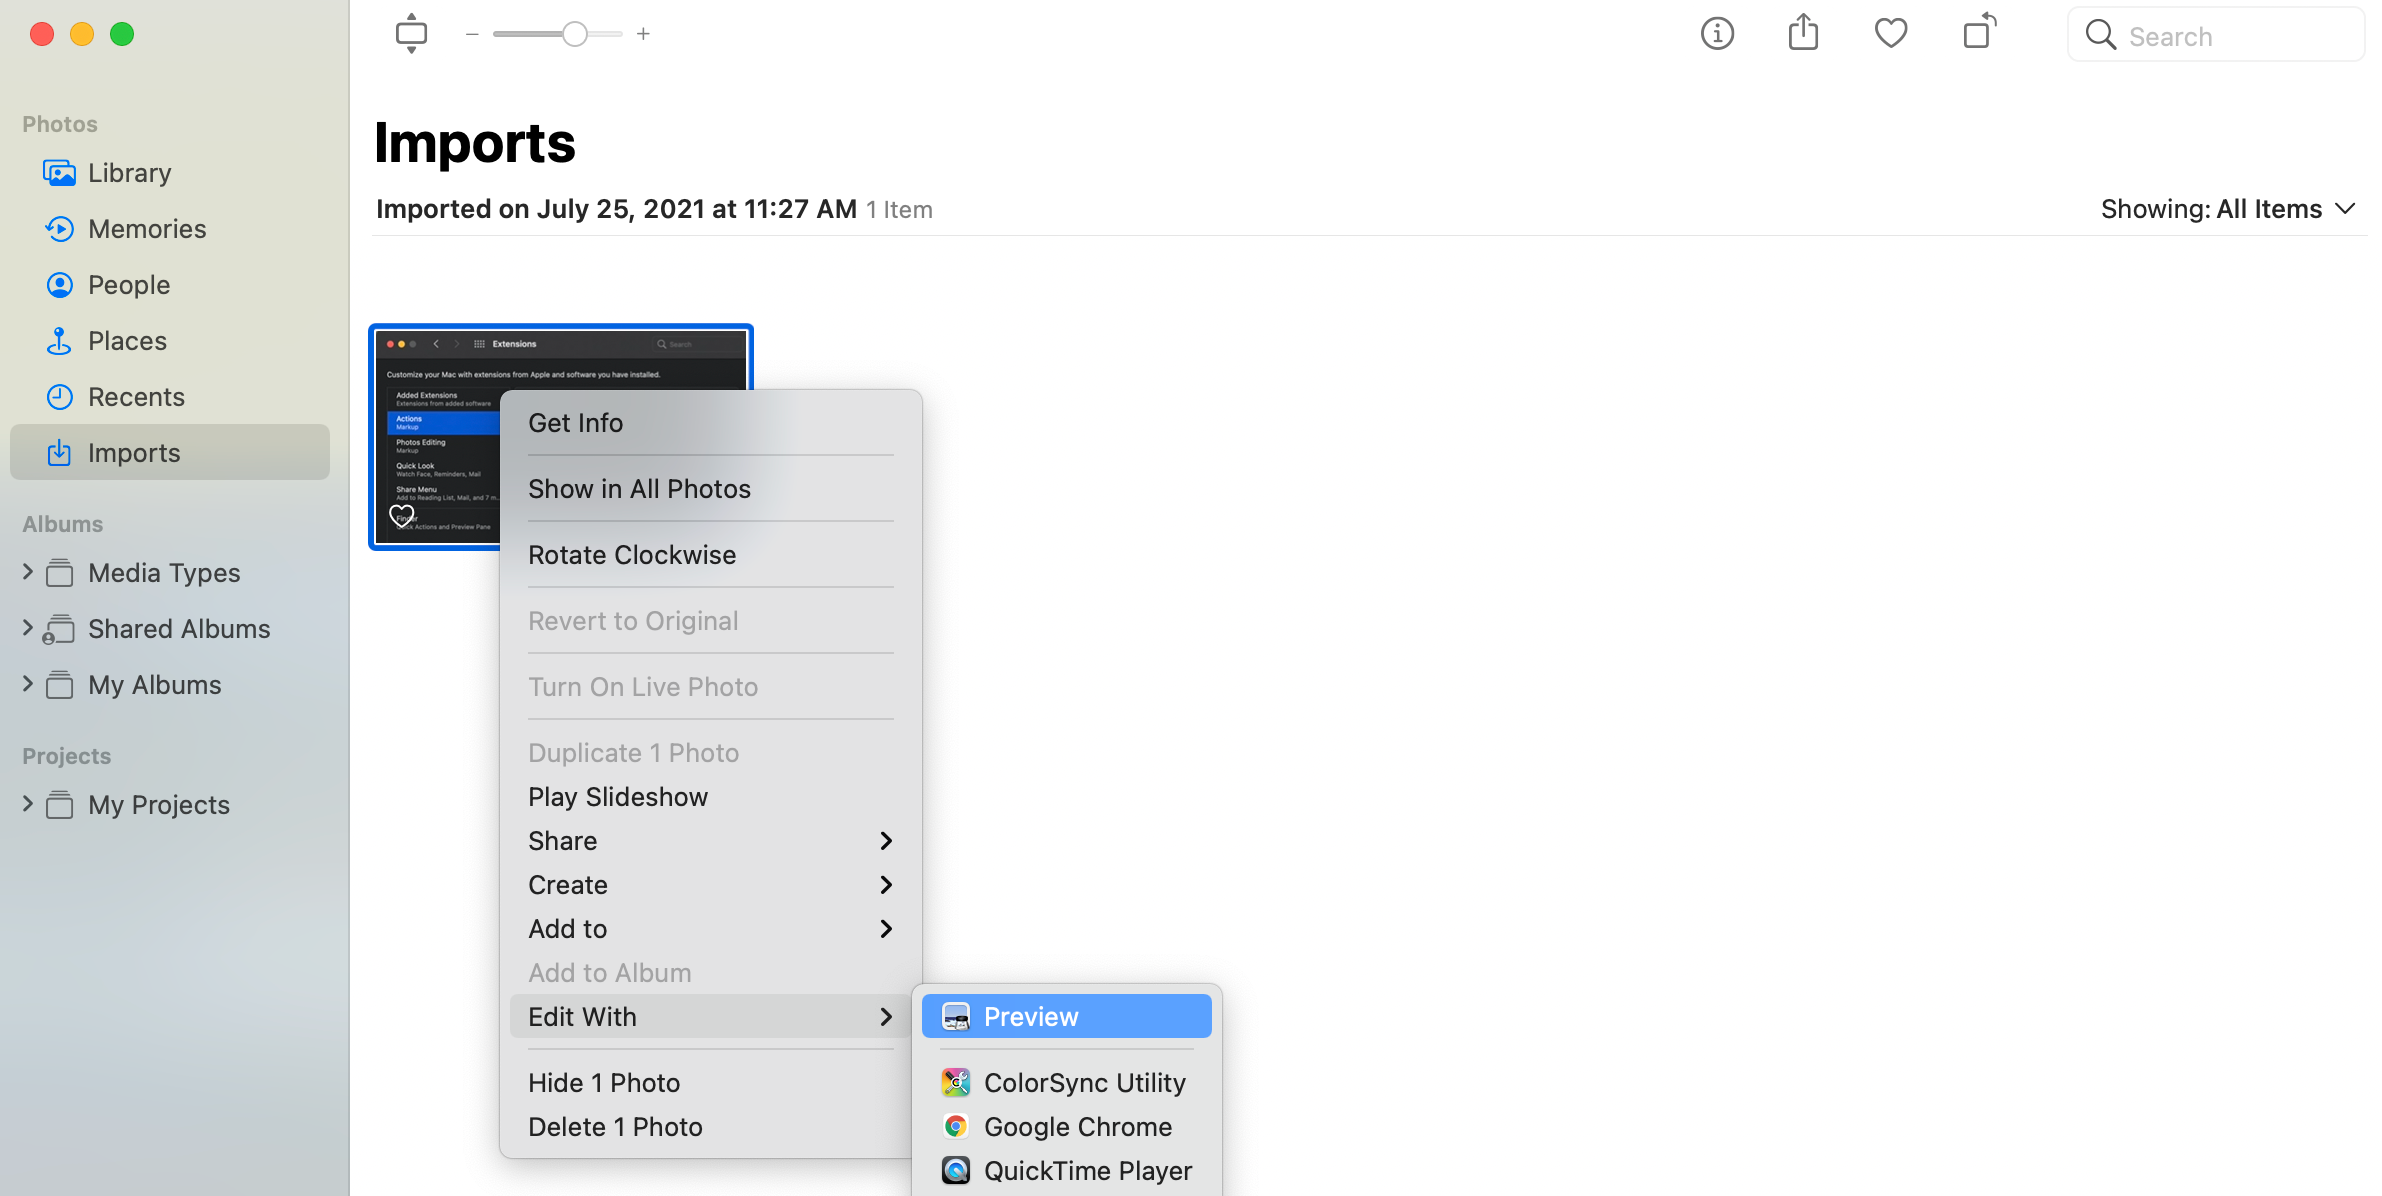
If your image is in Apple’s Photos app, simply choose the image, then click Edit With > Preview. Find the Markup icon on the toolbar on top of the pop-up window.
There’s one more option for editing images with the Markup tool. Apple has another built-in app called TextEdit. Aside from opening rich text documents and converting word documents to different file types, you can also use TextEdit to modify images.
Just open TextEdit, drag in the photo you want to edit, and hover your cursor over the image until a small arrow appears. Then click on the arrow, choose Markup, and begin editing.
Maximize Your Devices With Continuity Markup
Annotating and sketching may be challenging when you’re using your Mac’s trackpad. If you have other Apple devices, you can make use of Apple’s Continuity features to use your devices to add annotations on your files of images.
It’s straightforward. Just make sure that both your devices are set up to let you use the Continuity feature. Once you’re in the Markup window, look for a device icon and click on it.
Once you do, an editing window will automatically appear on your iPhone or iPad screen. It will render annotations in real-time. When you’re finished, just tap Done on your device.
Quickly Edit Screenshots
Sometimes, the easiest way to share information is through screenshots. However, with too many details in a screenshot, some annotations encircling or boxing buttons or placing arrows on certain features may help direct a person’s attention to what you want to show them.
To do this, create a screenshot as you normally would by pressing Shift + Cmd + 4 for just a portion of the screen or Shift + Command + 3 for a screenshot of the entire screen.
After taking a screenshot, open the preview box that appears. You should immediately be able to edit with the Markup tools present.
No Need for Third-Party Apps
Carrying out major edits require the use of more sophisticated tools and apps. But if you simply need minor annotations for your files, then your Mac’s built-in Markup tool should do the trick.


