Managing contacts can be overwhelming, if not daunting, especially if you have many contacts. However, Apple's Contacts app helps organize all of them tidily in one place. It also has many features you can use to sort and edit them—and one of them is Smart Lists.
Smart Lists essentially allow you to easily group your contacts by specific criteria like job titles, companies, and location. Here, we'll show you how to take advantage of it and make your contact management swifter and relatively stress-free.
What Are Smart Lists in the Contacts App?
If Smart Lists sound somewhat vaguely familiar to you, you probably know the feature as Smart Groups. It's an old Address Book feature introduced in 2007 alongside Mac OS X Leopard (10.5).
While it received a name change in 2020 through macOS Big Sur, its primary function has remained the same. With Smart Lists, you can create a list (or group) of contacts based on various parameters and fields you have attributed to your contacts. For example, you could create a Smart List of everyone in your contacts that works at a specific company.
But don't mistake Smart Lists for regular lists because, unlike regular lists, Smart Lists will automatically update based on your parameters as you add new contacts. Also, regular lists can only be built on one criterion, while Smart Lists can use multiple.
If you're looking for similar features in other Apple apps, the Reminder app has Custom Smart Lists you can check out.
How to Create a Smart List in the Contacts App
Before you create your Smart List, you might need to sync or add more contacts or fill up the fields in your existing contact cards. If you think you're good to go, follow the steps below:
- Launch the Contacts app from the Dock or Launchpad.
- Click File from the menu bar and select New Smart List from the dropdown.
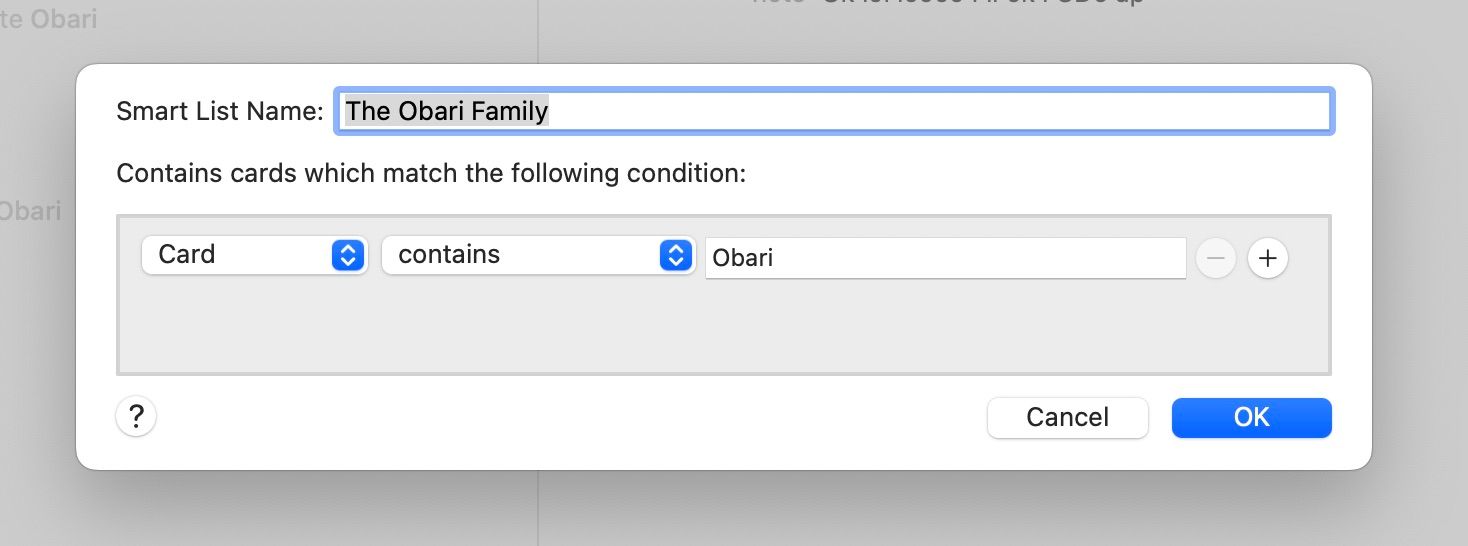
- You'll be prompted to give the Smart List a name and the information you want it to look for or exclude.
- If you have multiple parameters, don't forget to select any or all in the part of the prompt that says, Contains cards which match any/all of the following conditions.
- Click OK after you're finished, and you'll find your list under the Smart List section on the left pane of Contacts.
How to Manage Your Smart Lists
After you create your first Smart List, you can edit it to add some extra parameters or change the name. Here's how:
- Find the Smart List in the left pane of Contacts.
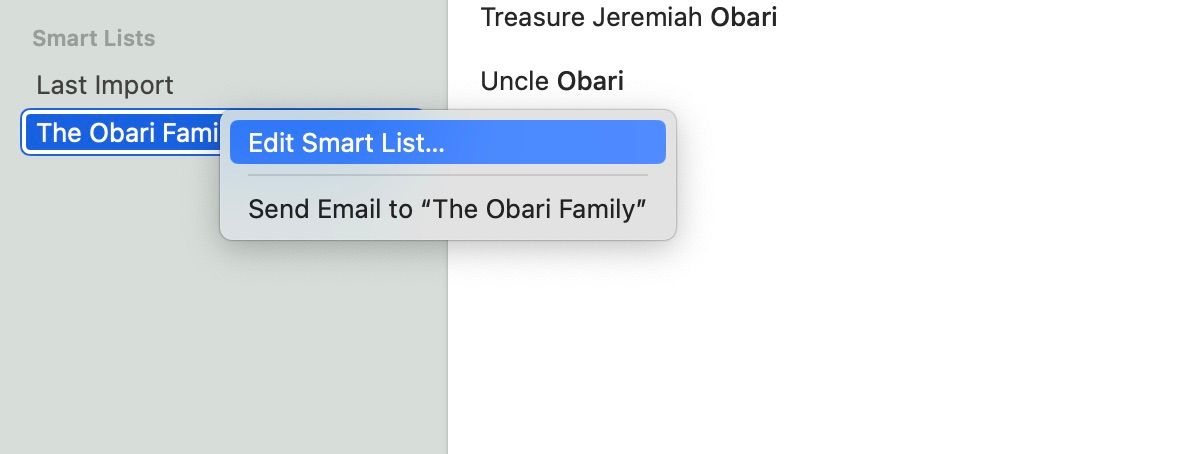
- Control-click (or right-click) the Smart List to open the context menu.
- Select Edit Smart List to open the same prompt window you see when you want to create the list for the first time.
- Change the parameters as needed and click OK.
If you want to delete a Smart List, select the Smart List from the left pane and hit Delete on your keyboard. When the prompt comes up, click Delete again. And don't worry if you delete a Smart List you need by mistake; you can still bring it back by pressing Command + Z.
Manage Your Contacts Easily With Smart Lists
Smart Lists is a handy feature that can make grouping contacts a more straightforward process. Thanks to this feature, you can find contacts quicker, automatically group them, and interact with them in an ever-updating group.
Thankfully, Apple has made Smart Lists easy to set up and use in just a few steps. Whether you're sending bulk emails or just trying to organize your contacts, you can save a lot of time using Smart Lists.


