Epic Games owns Unreal Engine, which allows developers to create powerful 3D graphics. However, creating 3D items manually and one by one is time-consuming.
But with Epic's new RealityScan app, creators can now scan 3D objects in real-life and turn them into virtual 3D assets through photogrammetry.
So, if you're interested in making your own 3D assets, we'll teach you how to create one using the RealityScan app for iOS devices.
Download RealityScan
To start scanning objects, you must first download the RealityScan app. It's readily available on the App Store for the iPhone, iPad, and iPod touch, as long as you're running iOS 16, iPadOS 16, or later.
It's also free to download, so you don't have to worry about paying a one-time fee or monthly subscription to use it. But if you don't feel like using RealityScan or don't have an iPhone, you should check out some of the best photogrammetry software for creating 3D models.
Download: RealityScan (Free)
Start Your First Scan in RealityScan


When you open RealityScan for the first time, the app will ask permission to access your camera. Tap on OK to let it use the camera on your iPhone or iPad. Since RealityScan is a photogrammetry app, it will only use your iPhone's camera and not its LiDAR scanner. It will then show a photo slideshow that contains the basic instructions on how to start capturing objects.
At the end of the slideshow, you'll also see a YouTube video showing a more detailed guide on capturing objects. We highly recommend you watch this to help you better understand how to get an accurate 3D map of the object you want to capture.
Also, note that you need a data connection to use the app effectively because it uploads your images to the cloud for processing. While you can use RealityScan in offline mode, you will lose its AR features and be unable to export the final 3D object.
Choosing the Proper Object and Environment
While you can scan almost any object, you should know that you can't easily scan all kinds of material. Items with glossy surfaces, like reflective tiles, metals, and plastics, and those with wet surfaces, aren't great candidates for photogrammetry, as their surfaces could confuse the app.
You should also avoid shooting in environments with direct sunlight. You could get the best results when you capture your 3D object under an overcast sky or shade, where lighting is consistent in all directions.
Getting Your First Images in RealityScan


After you finish going through the instructions and watch the instructional YouTube video, you can immediately start capturing your first 3D item. For this example, we'll use a black garbage bin with a green lid.
You can start capturing from any angle; just ensure that your item covers the frame as much as possible. Also, don't go to town with your photos, as RealityScan limits the number of images to 200. A good solution is to select an initial angle and take eight images while walking around the object—that's one image every 45 degrees.
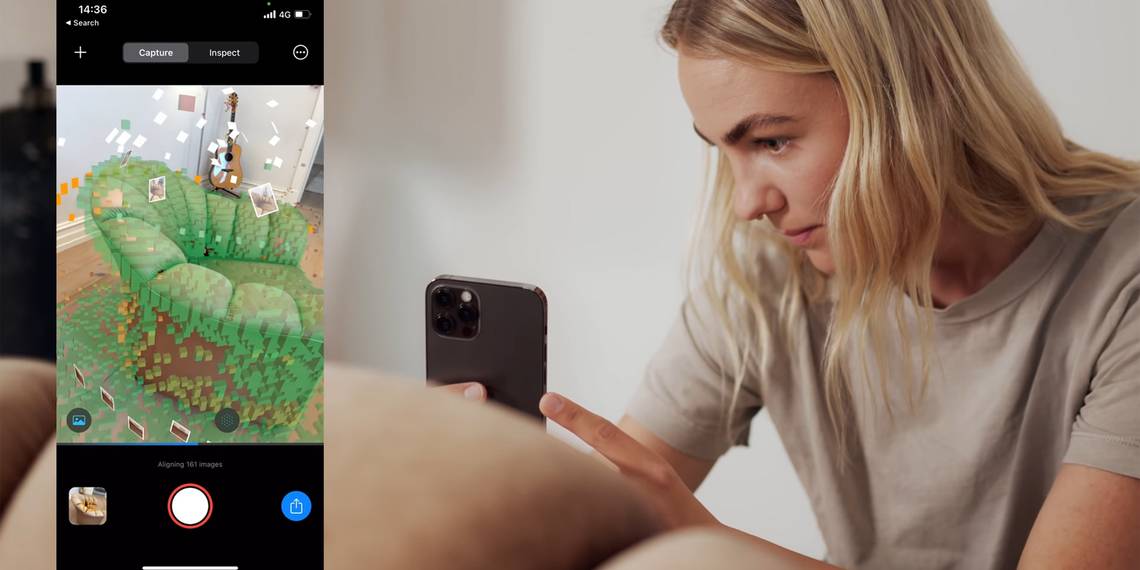
Beneath the frame, you should see a progress bar that tells you what the app is doing. It will upload the photos as you take them, allowing RealityScan's servers to read and process the data you capture.
As you take images, you should see the photos you captured floating in AR mode. This will help you know what angles you've already covered, allowing you to take angles you haven't yet covered.
Working With Point-Cloud Data


Once you've captured enough images and the server has processed them, you should see point cloud data appear on your screen. These dots show how much 3D data a specific area has—green dots mean the app has enough information to render it accurately.
In contrast, yellow dots mean the app has adequate information for a rough render, which is suitable enough for flat surfaces but won't be enough to capture texture. However, red dots mean that that area needs more coverage; otherwise, it will render poorly.
If you want a highly-detailed model with accurate textures, you should aim to cover your object with green dots.
Cropping Into Your Source Object


RealityScan will capture and render everything your camera sees. However, that means it will also render other objects in the background. To ensure that it will only work on the item you want to capture, you can crop the view.
To do so, tap on the Crop icon at the lower-right corner of the capture screen. You'll then see a virtual box on the screen, with six boxes and a ball at the center. To adjust the sides of the capture area, tap and hold any of the boxes to move them. You can also rotate the crop box along the Z-axis by tapping and dragging the ball.
If you want to change your view, walk around the object you're capturing to ensure it doesn't have a part left outside the cropping area. You can also crop the image in Preview Mode if you prefer a static view. Just tap and hold outside the bounds of the cropping box to rotate the object.
Viewing Your Previews


Once you've captured enough images, you can preview the output by tapping the Preview button at the top. If the preview doesn't load immediately, you can check the progress bar at the bottom of the frame to see its status.
Once the RealityScan server completes processing your preview, you should see the rendered 3D object appear on the Preview tab. You can also switch the Preview Model between Quality and Color, allowing you to see how much information your 3D model has on each surface.
You can then add more images in predominantly yellow and red areas to capture more information, thus allowing the app to make a more accurate model.
Export to Sketchfab

Once you're happy with the render, tap on Export to Sketchfab in the Preview mode. This will finalize your model in the cloud, and once the render is complete, RealityScan will add it to your SketchFab account.
If it's your first time exporting a 3D object, the app will ask you to sign in to your SketchFab account. After signing into your account, the app will return to the Scans menu, where you'll see all your projects.
You should find your project named with the date and time you started capturing it and its processing status. You can safely leave the app while the 3D model is processing, as this is done on the cloud. Once the export is complete, you'll receive a confirmation email that it's now available on SketchFab.
Once it's in SketchFab, you can make changes to your 3D model and 3D render it for easy viewing and sharing.
Scan Your World With the RealityScan App
RealityScan will make it easier for creators to generate 3D models. You no longer have to build them manually piece by piece, so recreating an item in SketchFab will take you much less time.
So, whether you're capturing an item for use as a 3D asset in a virtual world, a reference for a different item altogether, or recreating it on your 3D printer, RealityScan will simplify and speed up your process.