Premiere Pro, much like the rest of the Adobe suite of creative offerings, is celebrated for how customizable it is to different types of projects and workflows. There's a workspace for every occasion—VFX, graphics, coloring, and even metalogging. No part of the production pipeline is forgotten; it's truly an all-in-one system.
Beyond all of the different default workspaces that Premiere offers, there are so many options when it comes to refining your own custom layout. Premiere's Button Editor is one of these extraordinarily versatile functions. Picture a television remote control, only you get to choose which buttons are included on its surface.
What Is the Button Editor in Premiere?
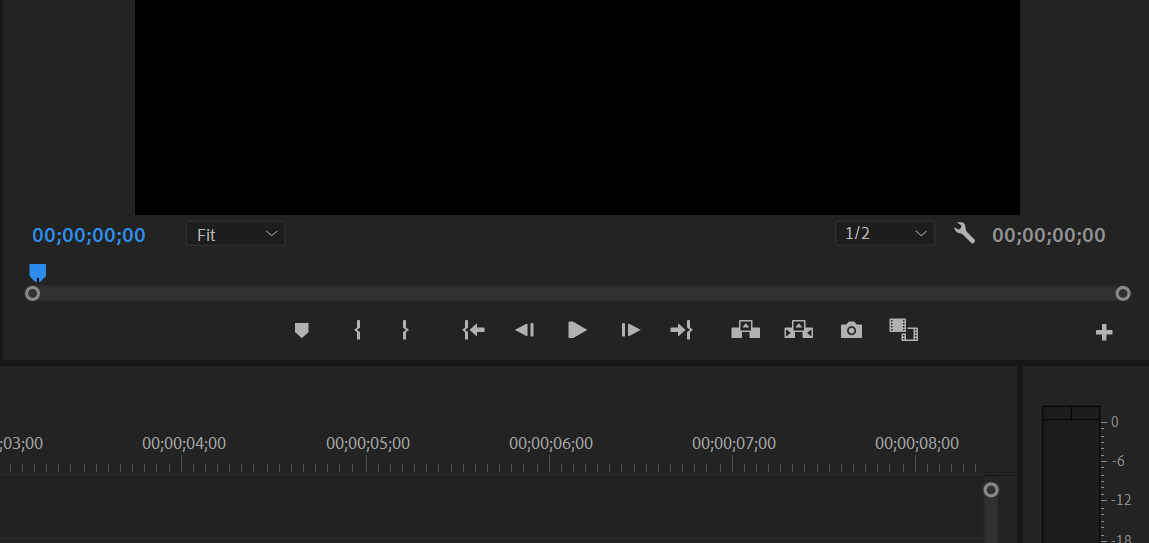
Underneath the Source and Program monitors, you'll find all of Premiere's transport controls. This covers your standard playback options and some jogging controls that allow you to explore each clip frame-by-frame. There's also a button that lets you lay down a marker and a toggle that turns Comparison View on and off.
In the Source monitor, you'll find the Insert and Overwrite buttons right next to the group of transport controls; they get replaced by the Lift and Extract buttons in the Program panel. Both monitors offer an Export Frame button which lets you grab a still frame if needed.
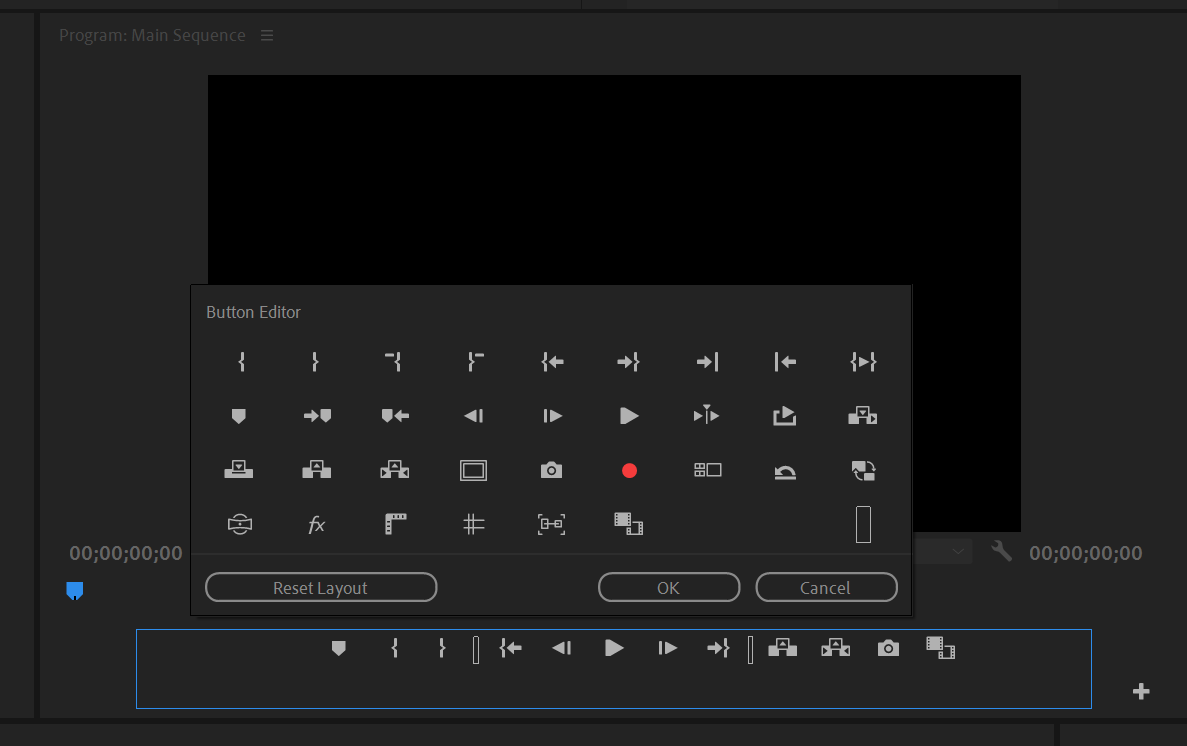
At the bottom right-hand corner, you'll see a little plus icon, your ticket into Premiere's Button Editor. Click it to see the other button options that you can use to customize your Premiere workspace.
Once the Button Editor is open, you can add buttons by dragging them into the actual button bar. You can remove those that are already there by default by dragging them into the Button Editor option panel.
Once you're satisfied with the layout, click OK to resume your session.
A List of Premiere Buttons and Keyboard Shortcuts
Hovering over any of these buttons will show you a tool tip that reveals its name, and some of these functions are a bit more straightforward than others. Most of us know what "Toggle Proxies" means, but what about some of these others? What is "Play Around" even supposed to be, anyway?
Here's a list of Premiere buttons explained in order of appearance, along with their default keyboard shortcuts:
- Mark In (I): Marks an In point on your timeline or clip.
- Mark Out (O): Marks an Out point on your timeline or clip.
- Clear In (Ctrl + Shift + I): Delete the In point on your timeline or clip.
- Clear Out (Ctrl + Shift + O): Delete the Out point on your timeline or clip.
- Go to In (Shift + I): Snap the playhead to your In point.
- Go to Out (Shift + O): Snap the playhead to your Out point.
- Go to Next Edit Point (Down Arrow): Snap to the next break in clip continuity on your timeline.
- Go to Previous Edit Point (Up Arrow): Hop back to the previous edit point.
- Play Video In to Out: Play the span bracketed by your In and Out point.
- Add Marker (M): Add a Marker to a clip or to the timeline.
- Go to Next Marker (Shift + M): Jump to the next marker in front of the playhead.
- Go to Previous Marker (Ctrl + Shift + M): Navigate to the marker just behind the playhead.
- Step Back One Frame (Left Arrow): Jog one frame backward per click.
- Step Forward One Frame (Right Arrow): Advance the playhead one frame forward.
- Play-Stop Toggle (Spacebar): Play the clip or sequence; hit it again to pause playback.
- Play Around (Shift + K): Adds a preroll and a postroll to your playback; a specified number of frames before and after the playhead's starting position. You can adjust this setting under Preferences > Playback.
- Loop Playback: Play your sequence back on repeat.
- Insert (Comma): Insert the contents of the Source monitor into the timeline, shoving anything behind it back.
- Overwrite (Period): Overwrite what's on the timeline already with your source footage.
- Lift (Semicolon): Copy your timeline selection to the clipboard, removing it from your sequence.
- Extract (Apostrophe): The same as Lift, only the hole is healed over by advancing everything behind your edit point to meet the opposing seam.
- Safe Margins: Enables title-safe overlays.
- Export Frame (Ctrl + Shift + E): Grabs the still currently displayed on the monitor.
- Multi-Camera Record On/Off Toggle (0): Allows you to record a multi-cam cut in real-time.
- Toggle Multi-Camera View (Shift + 0): Toggles multi-cam view on or off.
- Revert Trim Session: Undo a trim while the handle is still active.
- Toggle Proxies: Switch the monitor displays between proxies and full-res original footage.
- Toggle VR Video Display: Turn the VR display on or off.
- Global FX Mute: Bypasses all of the effects in your sequence, which may be useful for those experiencing performance issues during playback.
- Show Rulers (Ctrl + R): Enables two rulers along the sides of your frame. You can use these rulers to pull out perpendicular guides.
- Show Guides (Ctrl + Semicolon): Toggles guides on and off.
- Snap in Program Monitor (Ctrl + Shift + Semicolon): Snaps objects in your monitor to the center or to one of your guides as you move them.
- Comparison View: Compares the frame under the playhead with a reference frame. Useful for coloring footage.
Finally, we arrive at the enigmatic and oddly narrow Space entry. This is a placeholder that lets you refine the design of your button bar, giving you a bit of breathing room between groups of related buttons.
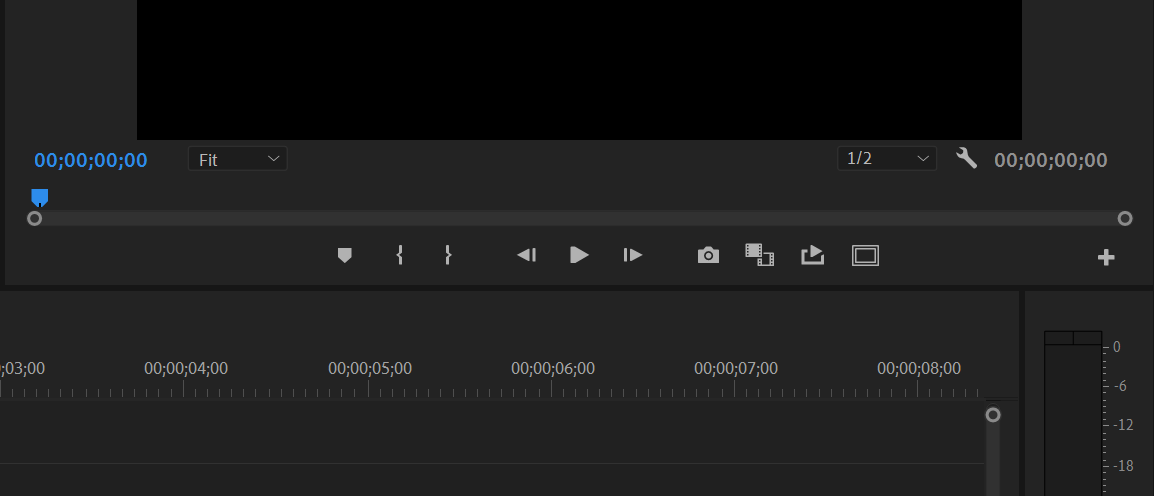
Hey, we didn't change much. If it ain't broke, why bother fixing it?
Customize Your Workspace in Premiere
This list was a doozy, but now you'll be able to utilize the Button Editor with confidence. All of them have a place in one workflow or another.
Are you a live-event editor? A colorist? Chances are, you already know which buttons you're going to grab for your own toolbar. A custom monitor button bar is something that every editor should have situated in their Premiere workspace.
This handy little feature puts everything that you need at arm's reach for those times where you really are just clicking around in there.


