The days of using fancy software to censor information on your photos are gone. The Markup feature on every iPhone and iPad allows you to doodle, draw, and insert shapes on your photos in any size and color. There’s not much you can’t hide when you put it to use.
Read on to see how you can use Markup to hide information in your photos or screenshots.
Use an Opaque Pen in Markup
The Markup feature is easily accessible and under the Edit option when viewing an image on an iPhone or iPad. There are plenty of ways you can use Markup on your iPhone. You can use it to scribble freehand or insert an opaque shape over all the information you want to hide.
To scribble over your photo, follow these steps:
- Open the image you want to make changes to and tap on the Edit button.
- Select the icon with the marker, and the Markup popup will appear.
- Select the pen or highlighter tool. You can choose the thickness and color of the lines you will be drawing. Whatever color you choose, make sure the opacity is all the way to the right.
- Draw lines over your information to block it out. Make sure you scribble enough lines over it that no one can work out what’s underneath.


If the lines you draw aren’t 100% opaque, it will be possible for people to adjust the colors of your image and see your hidden information. Make sure the opacity slider is all the way to the right for this reason.
It is important to note that using dark colors and re-drawing over your lines in a coloring motion will achieve the best possible results. People often tend to overlook this, which results in information not being adequately hidden. If you’re using Markup on a Mac, use the trackpad to do the same.
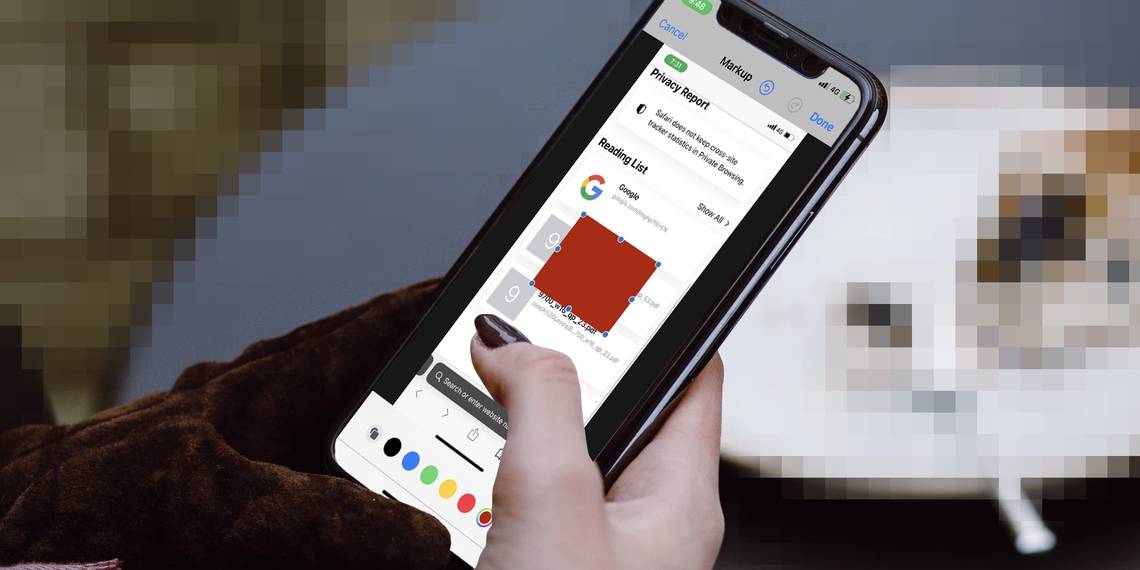
Add Shapes in Markup to Hide Information
If you want to insert a filled-in shape, here’s what you’ll have to do:
- After you tap on Edit and open Markup, tap on the plus (+) icon.
- From the list of options, choose the shape you want.
- To fill the shape with color, select the icon with a square on top of a circle. A popup with different options will appear.
- Select the filled-in shape and choose any color of your choice.
- Tap the multicolored button to make sure the shape is set to 100% opacity.


A good hack is to use the color of your background when using Markup to draw or use a filled-in shape. For example, using the color white to make changes against a white background does not show that information has been censored. This increases authenticity and ensures maximum privacy.
Censor Sensitive Information With Just a Few Taps
Sending over important documents without your private information is quite hassle-free when using the Markup feature on an iPhone or iPad. When done with care, there’s not much you can’t expertly hide.
And that’s not all the Markup feature can do. You can even use it to quickly add a watermark to your photos before posting them online. Pretty cool, isn’t it?