In macOS Ventura and later, you can take advantage of a nifty feature called Live Captions to generate real-time captions while playing media or talking into a microphone. It even works the other way and converts typed text to speech.
Sounds useful, right? Here's how to use Live Captions on your Mac to transcribe audio anywhere.
How Live Captions in macOS Works
Live Captions is a built-in macOS accessibility feature that transcribes system and microphone audio to text in real-time on the Mac. It also comes with a Type to Speak mode that speaks whatever you type out loudly. Transcription happens locally on your Mac, so it works even when there's no internet access.
If you're deaf or hard of hearing, you should find Live Captions handy while watching videos, listening to podcasts, or interacting with people nearby. Even if you don't have a hearing impairment, you should still find it helpful when you need to keep the volume low.
That said, we'd like to quickly point out that Live Captions is in beta at the time of writing, so it is only sometimes accurate. Apple explicitly mentions that you must not rely on it in "high-risk or emergency situations." Also, Live Captions requires the neural engine in Apple silicon to work, so you won't find the feature if your Mac packs an Intel chipset.
How to Enable Live Captions on Your Mac
Live Captions is inactive by default, so you must enable it via the System Settings app. To do that, follow these simple instructions:
- Open the Apple menu and select System Settings.
- Go to Accessibility > Live Captions (Beta).
-
Turn on the switch next to Live Captions. If this is the first time you're turning it on, you must wait until your Mac downloads language data from Apple's servers.
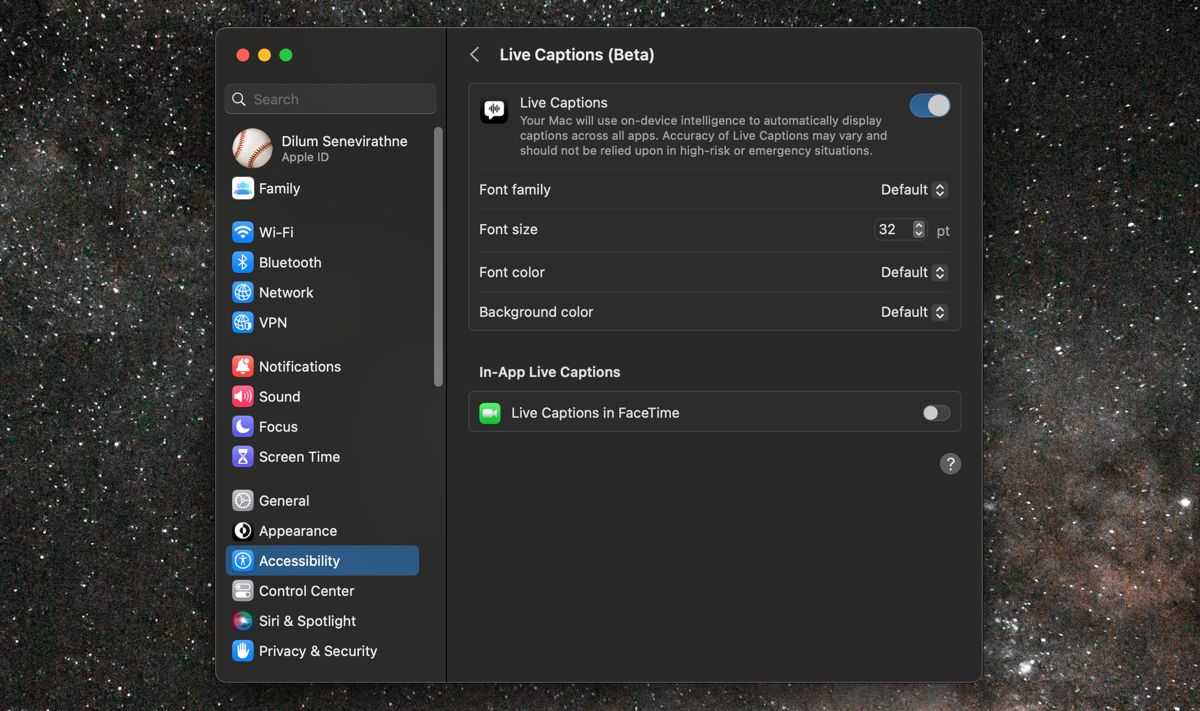
- Use the menus next to Font Family, Font Size, Font Color, and Background Color to customize the appearance of captions. You can come back and change them whenever you want.
- Turn on the switch next to Live Captions in FaceTime to receive additional visual cues like speaker attribution in FaceTime group calls.

How to Use Live Captions on Your Mac
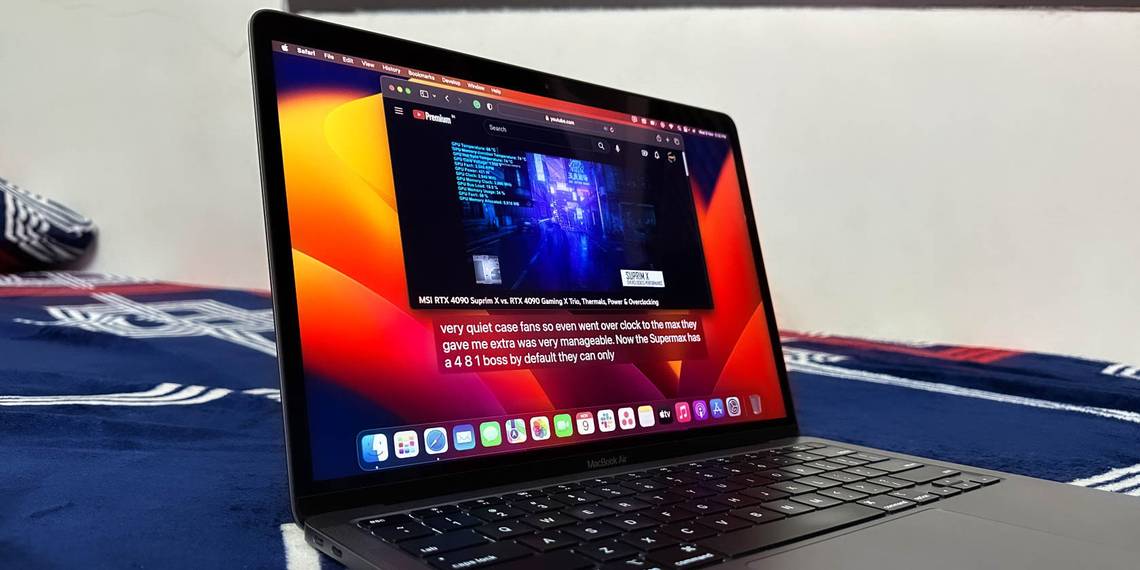
Live Captions automatically kicks into gear and generates captions at the bottom of the screen whenever you play a video or audio clip that contains speech. If you want, you can move or resize the Live Captions box around the screen.

Blue dotted lines under words and phrases indicate potential inaccuracies.
By default, Live Captions transcribes your Mac's system audio. Select the Microphone icon on the Live Captions box if you want to switch it for microphone input. Additionally, choose Pause/Resume to pause and resume Live Captions.
Additionally, you can use the Live Captions status icon on the menu bar to manage how the feature works.

- Start/Stop Live Captions: Pause and resume Live Captions.
- Computer Audio: Set your computer's audio as the transcription source.
- Microphone: Set microphone input as the transcription source.
- Keep Onscreen: Keep the Live Captions box visible, even when paused.
- Type to Speak: Activate Type to Speak mode. Live Captions will speak whatever you type into the box and transcribe audio from the microphone, allowing for real-time conversations if you have verbal communication issues.
- Restore Default Position: Restore the default position and size of the Live Captions box.
Live Captions Is Far From Perfect
Live Captions on the Mac works well, but expect frequent transcription errors if the audio source is unclear or has lots of background noise. Don't forget that the feature is still in beta.
So, if an application or website has dedicated caption or subtitle support, it's best to use that instead. For example, the Apple TV app supports closed captions for all its original content.