
Headers and footers are simple to use in Microsoft Word, but there is much more to them than catches the eye. Learn how to get more out of headers and footers in Word.
What Are Headers and Footers?
In Microsoft Word, the top margin of a page is called its header, and the bottom margin is called the footer. Headers and footers are especially useful for including information that you want to display on every page, or specific pages. This information could be the page number, the chapter title, or anything else.
How to Use Headers and Footers in Word
The main difference between a header and a footer is where they're positioned in the document. So, what works for the header also works for the footer. That being said, let's start with inserting something to the header in Word.
- Go to the Insert tab.
-
Select Header. This will bring up a dropdown menu with some options in it. These are all presets for the header, provided by Microsoft. For now, select the first option which is Blank. This will take you to the header and also activate the Header & Footer Tools in the Design tab.


If you've more than a single page in your document, you'll notice that once you add something in the header, it's going to appear on top of every page in your document. This makes the header an excellent location to place document info.
A quicker way to access the header is to double-click on the top margin of the page. Double-clicking the bottom margin will bring up the footer.
The Header & Footer Tools
The Header & Footer Tools tab activates whenever you're editing the header or the footer of a page. This tab allows you to change options related to the header and also insert components other than plain text to it.
Different First Page
So far, anything that you add to the header will appear on every other page but what if you don't want the header on your first page to appear on every page in the document? You might want to have other content in the header of other pages or anything else. This can effortlessly be resolved:
- Double-click on the header.
- In the Header & Footer Tools tab, in the Options section, check Different First Page.
Once you check this option, the stuff you put in the header of the first page won't appear on other pages and conversely, if you change the header of any other page it won't affect the first page.
Different Odd and Even Pages
You probably have seen this one in different documents and even books. As a familiar example, you could have the document title in the odd page header and the heading title on the even pages. You need to check only one option to have different headers on odd & even pages:
- Double-click on the header.
- In the Header & Footer Tools tab, check Different Odd & Even Pages.
Now, when you edit the header of an odd page it will apply to all odd pages but it won't affect the even pages. This also works the other way around.

Different Headers for Different Sections
You can also have different headers for different sections. To do this, you need to create sections in your document first. To create sections:
- Select where you want to create a section by placing your cursor there.
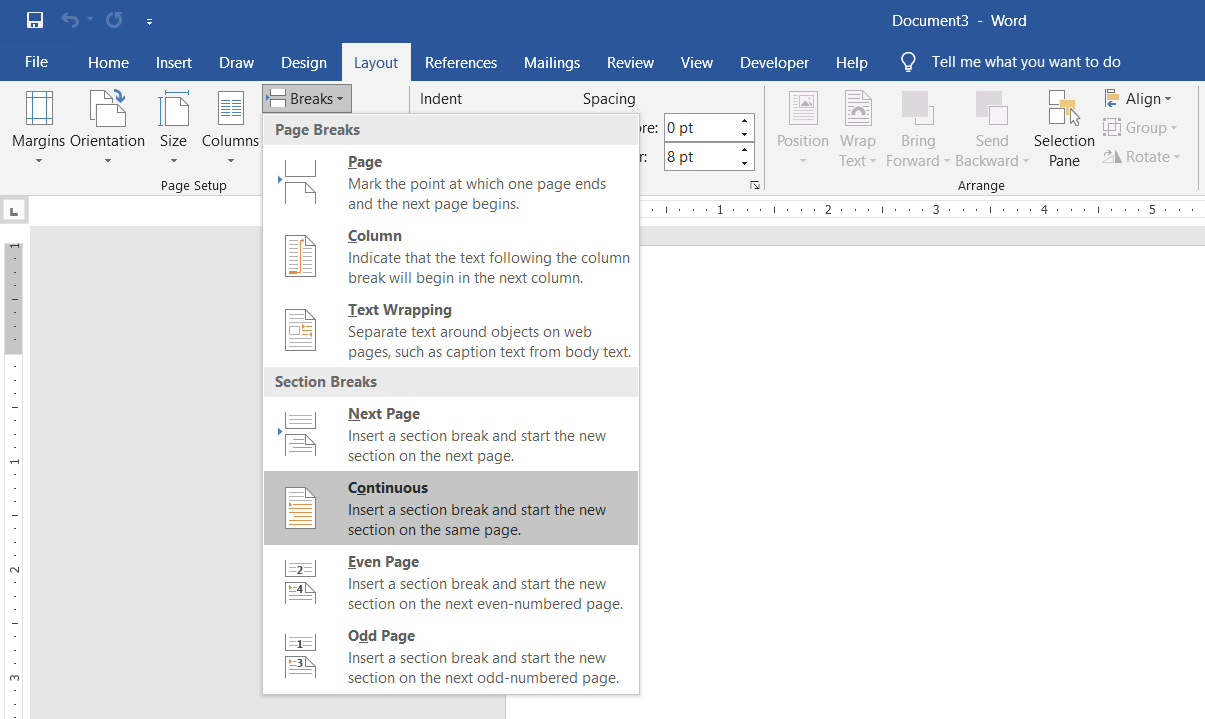
- Go to the Layout tab and then click on Breaks.
- In the bottom half of the menu, you can see the Section Breaks.
-
Select Continous from the menu. This will create a Section Break right where you had placed the cursor.

Once you create sections in your document, you can have different headers for each section. You can read our article on creating and removing page breaks to learn more about breaks.
To have different headers for a section:
- Double-click on the header and go to the Header & Footer Tools tab.
- Click on Link to Previous and disable it. Keeping this option enabled will use the same header and footer as the previous one for this section.
There you have it! With these, you can have unique headers for any page in your document.
Numbering Pages in Word
Headers and footers in Word provide a display area for page numbers in your document. Adding page numbers to longer documents makes them easier to navigate for readers. To add page numbers:
- Go to the Insert tab.
- In the Header & Footer section click Page Number.
-
In the menu, you will have four choices for the location. Choose one and then select the styling you want.
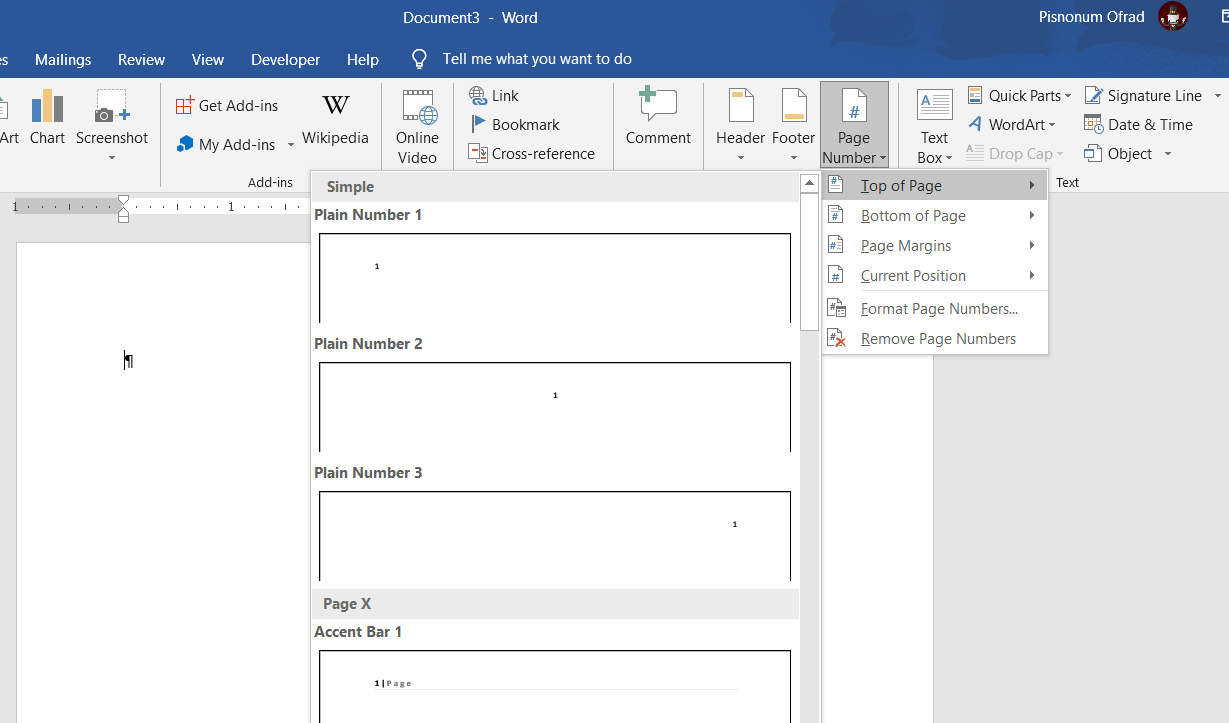

Top of Page and Bottom of Page will display the page number in the header and the footer respectively, but you can show the page number in areas other than these two.
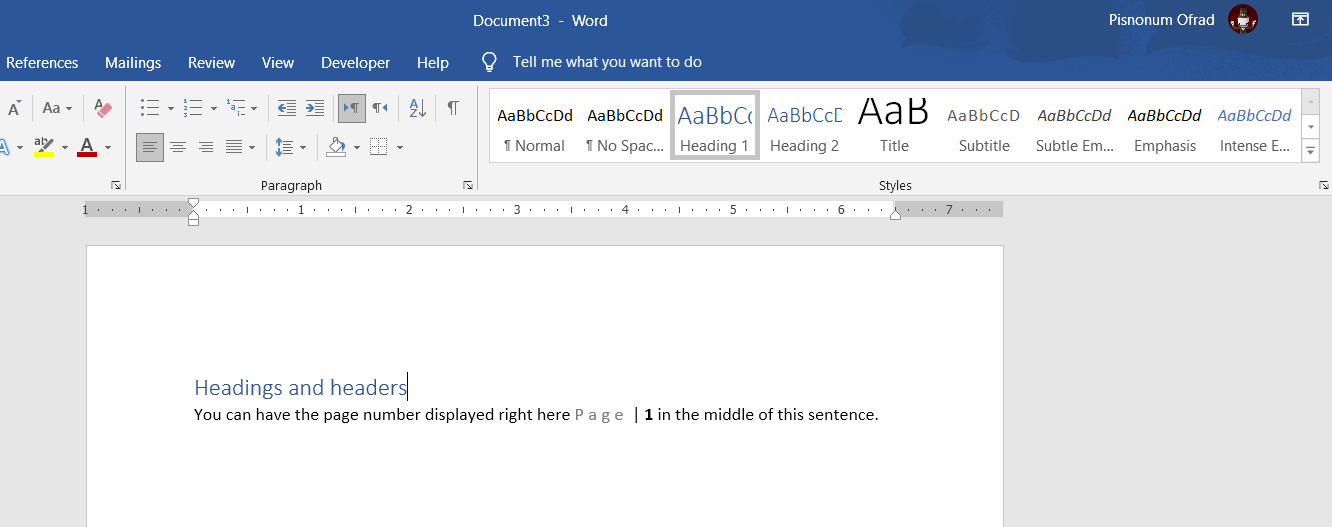
Selecting Page Margins will display the page number on the right or left side of the page. What's more, is that you can show the page number anywhere within the page. To do this:
- Place your cursor where you want to display the page number.
- Go to Insert and then select Page Number.
-
From the menu, select Current Position then select a style.
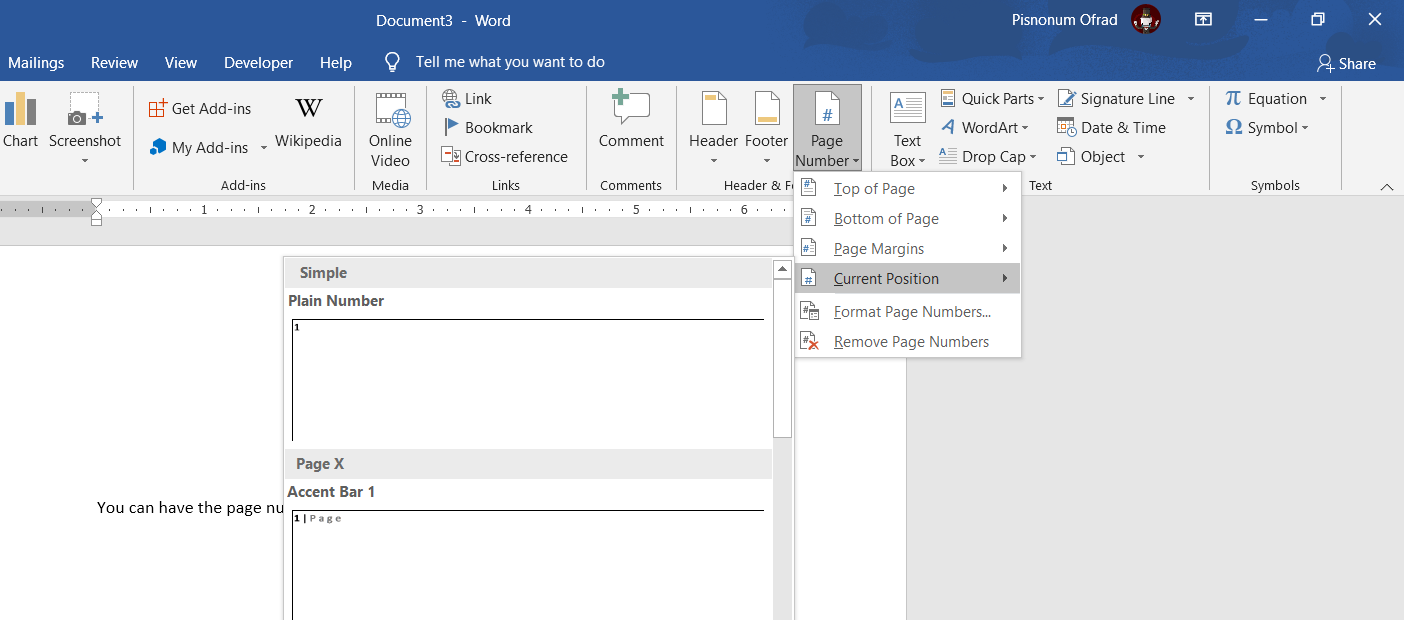

This will add the page number right where your cursor was. Keep in mind that this won't show the page number on every page, it will appear only where the cursor was.
For an in-depth guide on numbering pages in Word documents, read our article on how to number your Word document.
Using Fields to Customize Headers and Footers
You can make your document more dynamic by utilizing Fields in Microsoft Word. Fields are dynamic components that add auto-updating variables to your document. For example, you could insert a field in your header to display a heading on every page. This way you don't have to type the heading on top of each page.
Note: Headers and headings are similar in name, but they're different in nature. A header is the top margin of the document while a heading is a document element that allows you to define different sections and build a table of content for your document.)
Let's work on the example we mentioned to add the heading to the top of each page. To do this, you've to first create some headings for your document.
- Go to the Home tab.
- In the Styles section, select a heading. For now, let's go with Heading 1.
-
Next, type something in your heading so that it's not blank.

Once you've your headings set out, it's time to display their names in the header.
- Double-click the header and then go to the Header & Footer Tools tab.
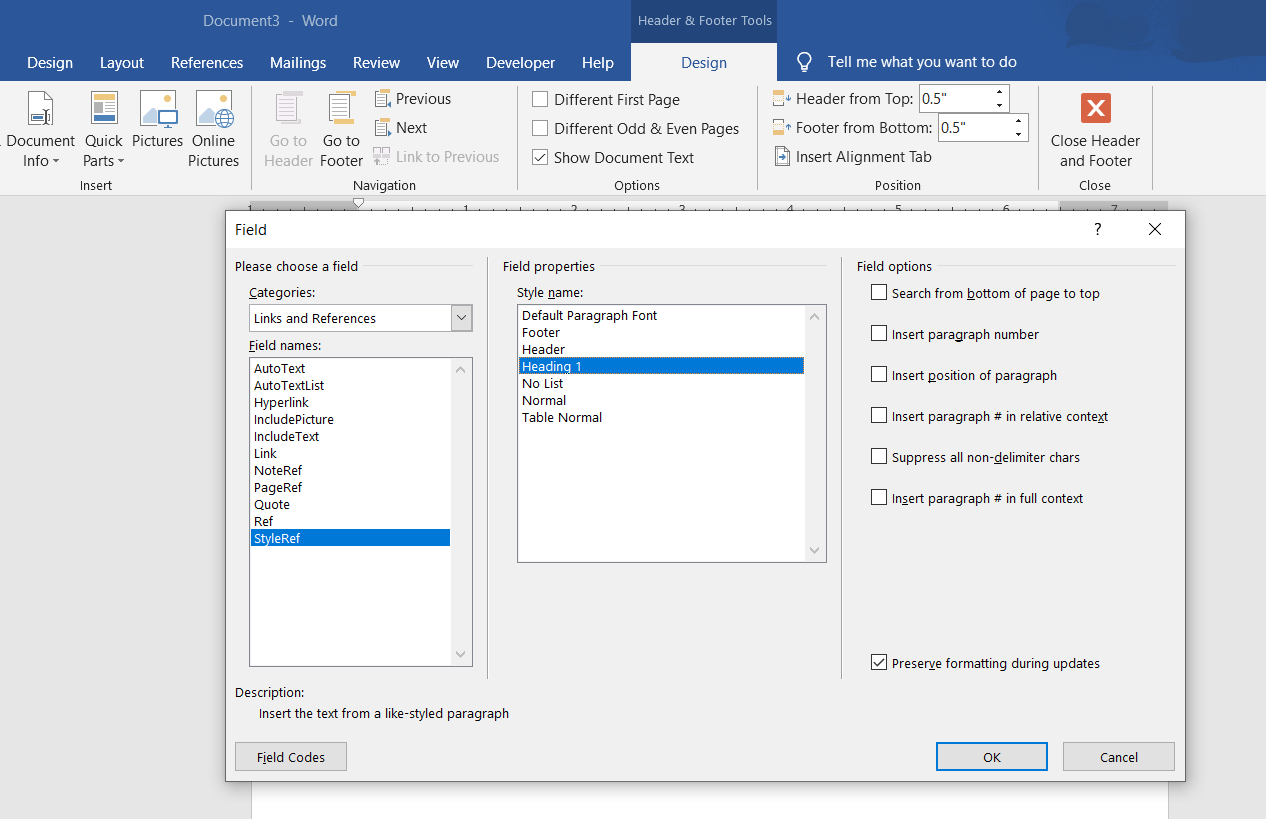
- Click on Quick Parts and then select Field... . Here you can see the various fields you can add to the header.
- From the Categories menu, select Links and References.
- In the Field names select StyleRef.
- Finally, in the Style name box, select Heading 1.
-
Check the additional options that you might want in Field options and once you're done, click OK.

Now you can see the headings displayed in the header of the page. It will show the same heading until a new heading is used on a page.

There are many fields that you can use in your document. Fields aren't exclusive to the header or the footer and you can use them anywhere else in your document as well. You can access fields from the Insert tab:
- Go to the Insert tab.
-
On the right side, click Quick Parts and then select Fields.


Get More Out of Your Headers and Footers
Now that you've read through all these, you can achieve a lot more from the top and bottom margins of your document. However, this is just one of the many things you can do to improve your document.