Thanks to Apple Pay, we're one step closer to leaving the wallet at home for good. The contactless payment system, available on a wide variety of Apple products, makes paying for everyday items a breeze.
We'll highlight more about how to use Apple Pay, getting the feature set up, and how the payment system works in stores and online.
What Is Apple Pay?

Apple Pay is a digital wallet. That means instead of having to carry a wallet full of credit or debit cards, all of the payment information exists safely and securely on your iPhone, iPad, Apple Watch, or Mac.
There are two different ways to use the feature—in a brick-and-mortar store or online.
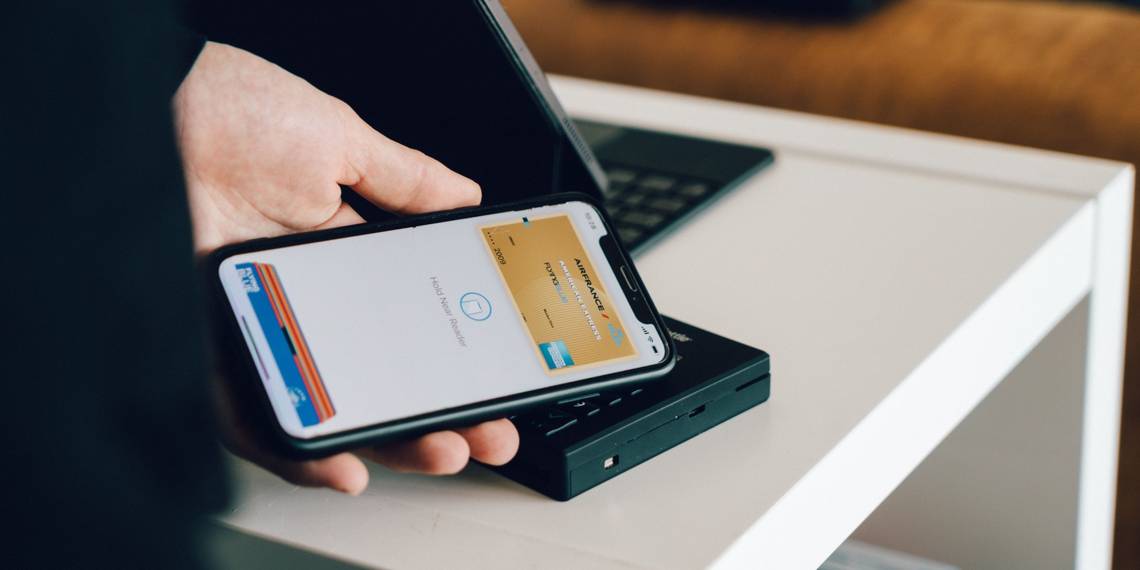
When it's time to check out at a physical store, you'll only be able to use an iPhone or Apple Watch, the two products with built-in NFC communications technology.
The wireless technology is how Apple Pay works. Also known as near-field communication, it is a short-range and industry-standard communication protocol.
Designed to only work short distances, you’ll need to first authenticate yourself with Face ID, Touch ID, or a passcode. After that, encrypted data is sent between the device and payment to authenticate and complete the transaction.
Apple or your device doesn’t your actual payment to the terminal. Before the transaction is approved, your bank will verify the data sent by your device and checking a dynamic security code.
When using Apple Pay online, you'll need an iPhone, iPad, or Mac. When making a purchase at a site compatible with Apple Pay, there's no need to spend time creating an account and adding your address and other information.
You'll also need to take advantage of Apple Pay to use the company's peer-to-peer payment system Apple Pay Cash.
How to Set Up Apple Pay
The first major question to ask when trying to add your card information to Apple Pay is if your card supports the feature. Your bank or card issuer has to support Apple Pay to use the contactless payment feature.
To see if your card is compatible, take a look at the complete list on the Apple website. The number of supported card issuers varies widely depending on your country.
When you've confirmed that your card is supported, open up the Wallet app on an iPhone. Make sure you're signed in with an Apple ID. Then follow these steps:
- Tap the plus (+) icon in the upper right-hand corner.
- Choose the type of card to add to Apple Pay. Along with a credit or debit card, you can also add some types of transit cards.
- Place the card on a flat surface and then use the iPhone camera to automatically scan and import the information. Alternatively, you can also add the card number and expiration date manually.
- After your card issuer verifies the card information, it will be added to the Wallet app.
Even after adding your card information to an iPhone, you'll have to enter it again on an Apple Watch for additional security. To do that, open up the companion Watch app and locate Wallet & Apple Pay in the My Watch tab. Then select Add Card.
To add a card on your iPad, head to Settings > Wallet & Apple Pay and select Add Card. The rest of the process is just like on the iPhone.
Setting up Apple Pay on the Mac is a similar process, where you'll enter the credit or debit card information to use for online payment.
Where Can I Find a Store That Accepts Apple Pay?
The second part of the Apple Pay equation is finding a brick-and-mortar or online shop that accepts the payment method.
An easy way to find a store that accepts Apple Pay is to open Apple Maps. Find the specific store you're looking for and then select the name.
You'll see more information, like hours and address. Scroll down to the Useful to Know section. If Apple Pay is accepted, you'll see the Apple Pay logo.
With this feature, you should be able to easily find a wide variety of different stores that accept Apple Pay, like gas stations, restaurants, and more.
And Siri can even help you locate a store that accepts Apple Pay. Just say, for example, "Hey Siri, show me a coffee shop that accepts Apple Pay," and the virtual assistant will provide options on your screen. Just select an option to see more information.


If you know exactly what you're looking for you can even say something like "Hey Siri, show the nearest McDonald's that accepts Apple Pay."
When out and about, you can also look to see if a store has posted the Apple Pay logo near its entrance to show that it accepts Apple's contactless payment system.
How to Use Apple Pay
With your payment card information added to the Wallet app, it's time to start using Apple Pay. The most popular way is at a brick-and-mortar store.

At checkout, look for the payment terminal and pull out your iPhone. The next step depends on your iPhone model.
On an iPhone with Face ID, double-click the Side button, even if the handset is locked. On the screen, you'll see the default payment card, or you can select what card you'd like to use. You can then glance at the screen or enter the phone passcode to authenticate the payment.
On an iPhone with Touch ID, double-click the Home button instead. Then use Touch ID to authenticate the payment.
Hold your iPhone near the payment terminal until you see Done and a checkmark on the iPhone display.
You can also pay with an Apple Watch. To use the default card, double-click the Side button. That brings up the default card. You can also change the card if you'd like. Place the Apple Watch display near the reader until you feel a gentle tap. The payment is then complete.
Since your watch is paired with your iPhone, there's no need to enter a passcode or other authentication method.
With either option, depending on the store and payment amount, you might have to enter a PIN or sign a receipt.

Using Apple Pay online is a bit different. Only available on the Mac, iPhone, and iPad, you'll see the Apple Pay logo during the checkout process in an app or Safari. Select that and you'll see a dialog box with your default credit card and shipping information. You can quickly switch to another card, if necessary.
When ready to confirm the payment on an iPhone or iPad with Face ID, double-click the Side button and then use Face ID or passcode. On an iPhone or iPad without Face ID, use Touch ID or enter the device's passcode.
Using a Mac with Touch ID, you'll use that security method to confirm a purchase. On a Mac without Touch ID, you can enter your passcode.
If you ever have issues with the feature, make sure to take a look at our roundup of easy ways to fix common Apple Pay problems.
Say Goodbye to the Wallet With Apple Pay
Whether you're making a purchase at a brick-and-mortar store or online, Apple Pay provides a fast and secure way to pay.
And if you ever happen to lose your iPhone or Apple Watch, there's no need to worry about someone else making a purchase with your Apple Pay information as it's easy to remotely disable the feature.