Like other Apple devices, Apple's AirPods receive firmware updates for better performance and bug fixes. If you haven’t updated your AirPods in a long time, it's a good idea to update them now.
In this guide, you’ll learn how AirPods updates work and how you can update your AirPods to the newest firmware version.
How AirPods Are Updated
Apple doesn’t update AirPods with an explicit prompt like it does with other devices. AirPods updates happen in the background and most users don’t even know if or when they occur.
Basically, when you connect your AirPods to your iPhone or iPad, that device automatically downloads and installs the latest firmware version on your AirPods when needed. There are no notifications or success messages; everything gets done in the background.
This is the case for the regular AirPods, as well as the AirPods Pro.
Check the Firmware Version of Your AirPods
Since your AirPods don’t notify you of new firmware versions, you can check your firmware version now. Then later, review it again after some time to see if the updates are happening successfully.
Keep in mind that AirPods updates are pretty rare. Apple only pushes them around once a year or so.
To check the current firmware version of your AirPods:
- Bring your AirPods out of the charging case and connect the AirPods with your iPhone or iPad.
- On your iPhone or iPad, open Settings and tap General.
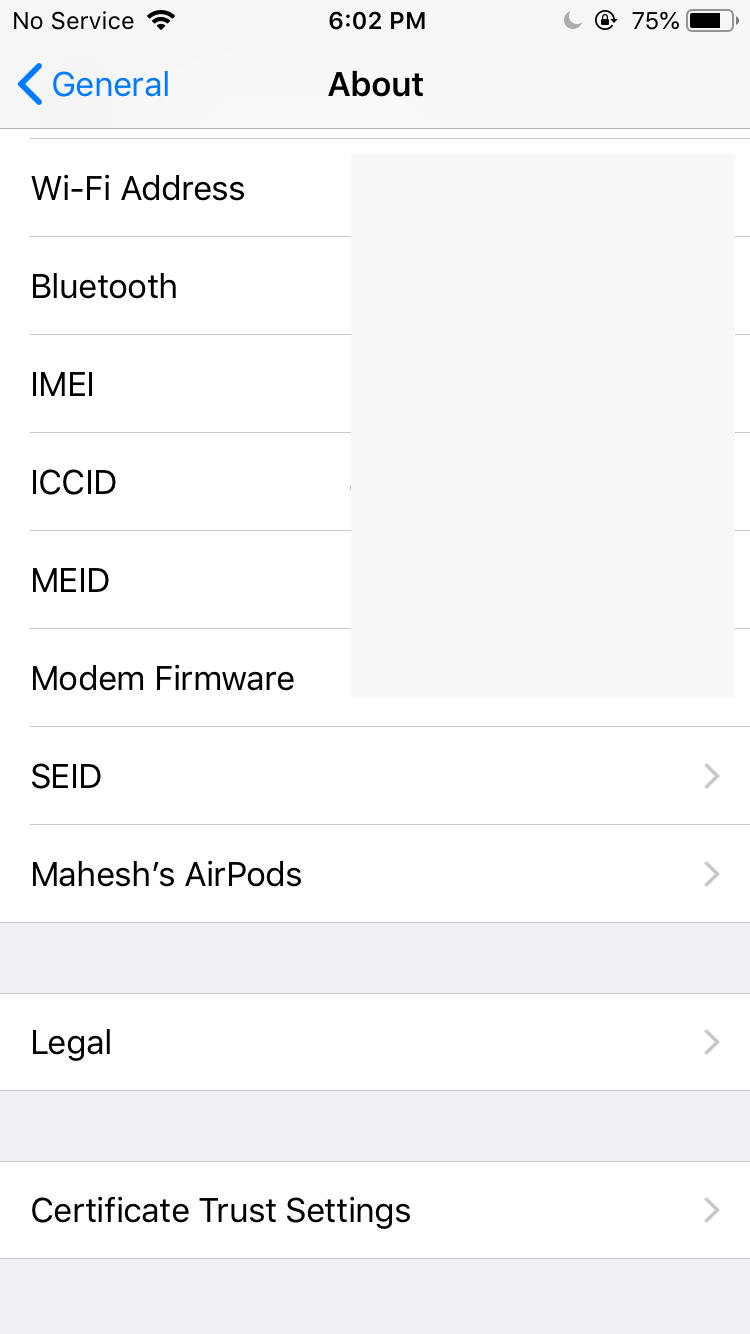
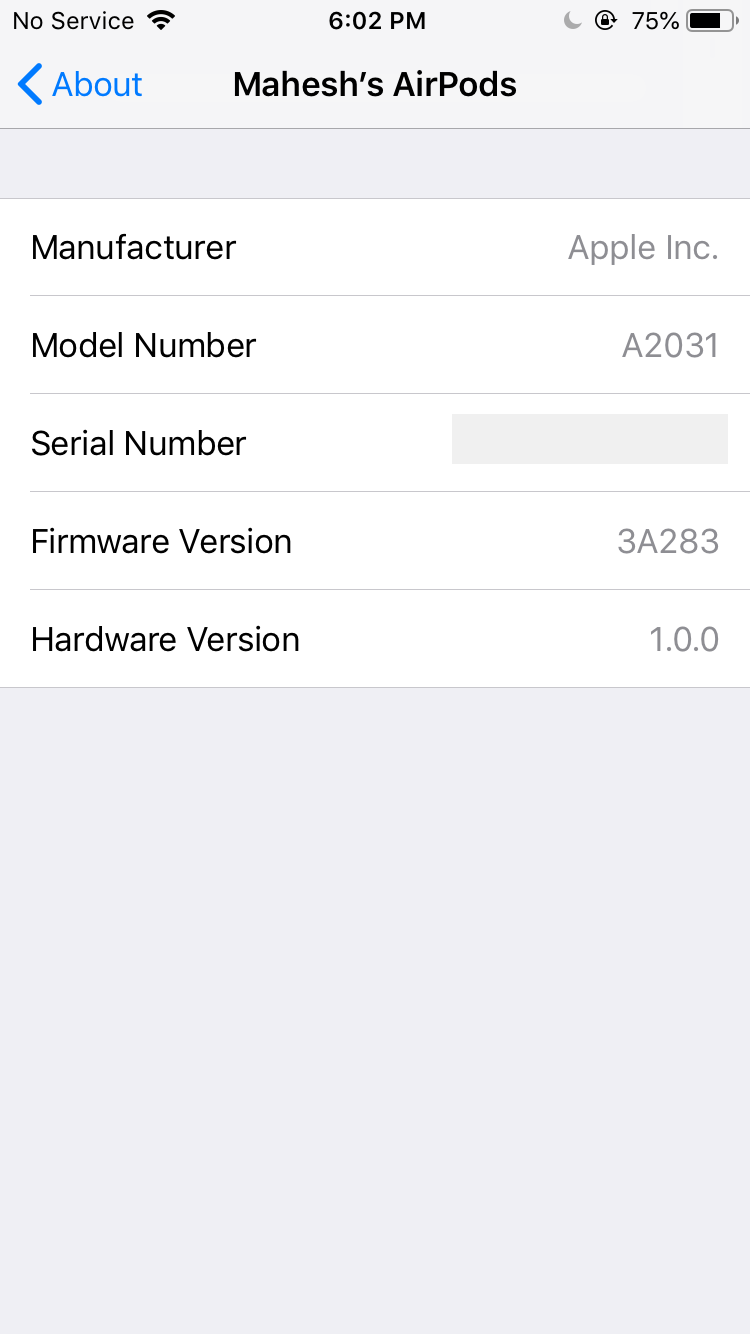
- Tap About, scroll down the following screen, and select User’s AirPods (where User is your name).
- The value next to Firmware Version is your AirPods’ current firmware.


How to Update Your Apple AirPods
You can update your AirPods, or AirPods Pro, without having to connect them to your iPhone or iPad. Your AirPods can stay in their charging case and still get updated with the latest firmware version.
To update your AirPods:
- Put both your AirPods into the charging case.
- Connect the charging case to a power socket. If you have a wireless charging case, place it on a Qi wireless charger.
- Make sure your iPhone or iPad has an active internet connection.
- Bring your iPhone or iPad closer to your AirPods charging case.
Your iPhone or iPad will automatically check for a newer AirPods firmware version. If one is available, your device will automatically install it on your AirPods.
Wait a while when you do this and your AirPods will be updated.
Troubleshooting AirPods Update Issues
Does your friend have the exact same AirPods and they are on a higher firmware version? Do your AirPods not update even when you place them close to your iPhone or iPad?
Make sure the following are all in place to ensure your AirPods update without any issues.
First, make sure your iPhone or iPad is connected to the internet when you update your AirPods. Without a connection, you can’t download the AirPods firmware.
Second, ensure your AirPods are being charged when you update them. If you don’t do this, your AirPods won’t install the newer firmware. Confirm that the cable is inserted correctly on both ends, or that the AirPods case is correctly in the middle of the wireless charger.
Also, keep in mind that Apple only rarely pushes out AirPods updates. Therefore, only attempt to update your AirPods every few months or so. You don't need to check every week or anything like that.
Keep Your AirPods Up to Date With the Latest Firmware
Keeping your AirPods up to date with the latest firmware versions ensures that you always get the highest-quality performance out of your earbuds. The method above taught you how to update your AirPods, so that you’re always on the newest firmware version.
There are some other methods that you can use to improve your AirPods’ performance. These include changing the sound quality in your music app, modifying the equalizer, and so on.

