Windows Defender (now known as Microsoft Defender) is the built-in antivirus for Windows 10 and comes enabled out of the box. In most cases, you should keep it active to protect your system.
But at times, you may need to disable Windows Defender. Whether it's interfering with one of your apps or you need to test something without it, here's how to turn off Windows Defender in Windows 10.
How to Disable Windows Defender Temporarily
If you only need to disable Windows Defender for a short time, such as installing an app, you can do so temporarily through the Windows Security app.
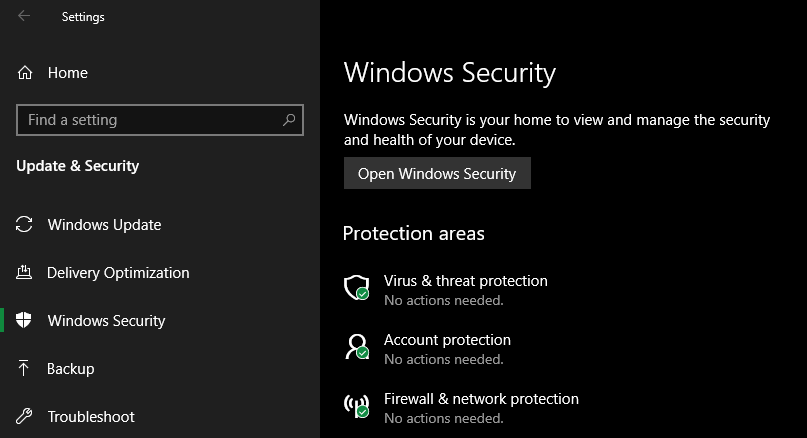
To launch it, open the Settings app from your Start menu or by pressing Win + I. There, select the Update & Security section. On the left side, click Windows Security. Clicking Open Windows Security on this page will open the app of the same name, which is where Microsoft Defender lives.
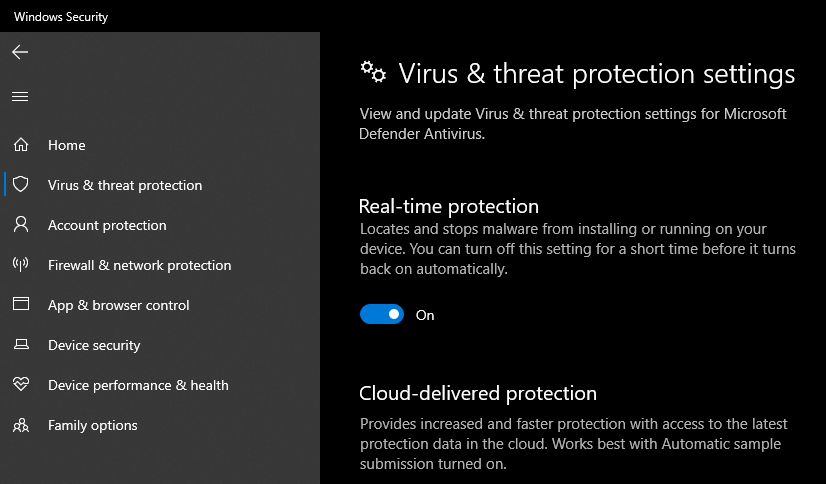
In the Windows Security app, you can open the various features of Microsoft Defender. Select Virus & threat protection to open the antivirus module. Under Virus & threat protection settings, click Manage settings.
On the resulting page, disable the slider for Real-time protection, which is the main protection service for Microsoft Defender. This will require you to accept a UAC prompt, so make sure you're an admin on your computer.
Once you do this, you'll see the Real-time protection is off message. Protection will stay off "for a short time"—this is until the next scheduled scan or when you reboot your device.
Disable Windows Defender by Installing Another Antivirus
While Microsoft Defender is the default antivirus in Windows 10, it's far from your only option. There are plenty of other antivirus tools for Windows 10 that do a similar job.
If you prefer to use one of these, just install it, and Windows Defender will turn itself off once the antivirus is all set up. After you've confirmed that the new antivirus is working properly, reboot to make sure it's taken full effect.
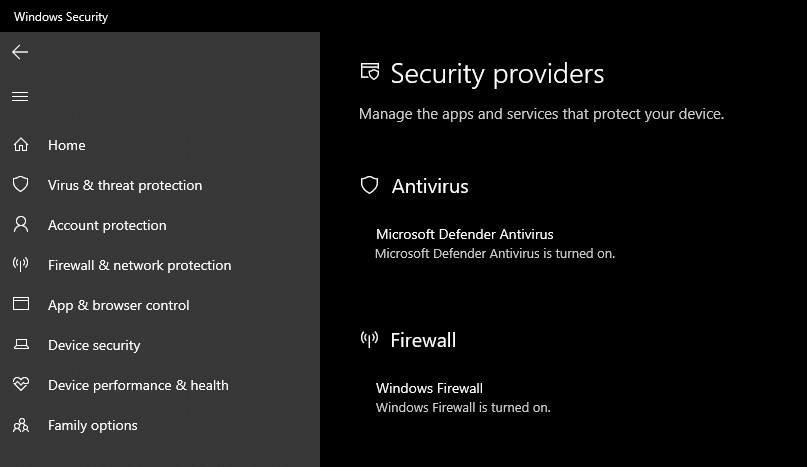
From there, open the Windows Security app again, then click the Settings gear at the bottom of the left sidebar. On the Settings page, you'll see a Security providers section. Click Manage providers to see all the available security apps installed on your computer.
You should see the name of your third-party antivirus here and can confirm it's turned on. You'll see that Microsoft Defender Antivirus is turned off if everything worked properly.
How to Disable Windows Defender Permanently
If you want to turn off Windows Defender for good without installing another antivirus app, you can use another method. Keep in mind that we do not recommend doing this, as it leaves your PC without any antivirus protection. You should only do this if you have a specific problem with Microsoft Defender that you need to fix.
The primary way to do this is through the Group Policy Editor, which is normally only available in Windows 10 Pro.
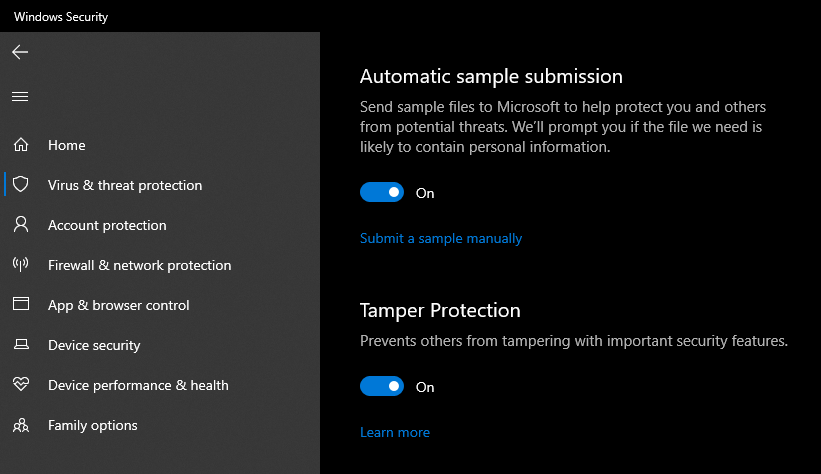
However, before you change a Group Policy option to disable Windows Defender, you need to make sure you have Tamper Protection turned off. This is a feature of Windows Defender that prevents outside apps from making changes to it.
It's designed to protect you from malware turning off important security protections. But in this case, you need to disable it yourself, or the tweak won't take effect properly.
Open the Windows Security app again and go to Virus & threat protection, then click Manage settings under Virus & threat protection settings. Scroll down to Tamper Protection and turn the slider off if it's enabled. Again, you'll need to provide administrator permission to do this.
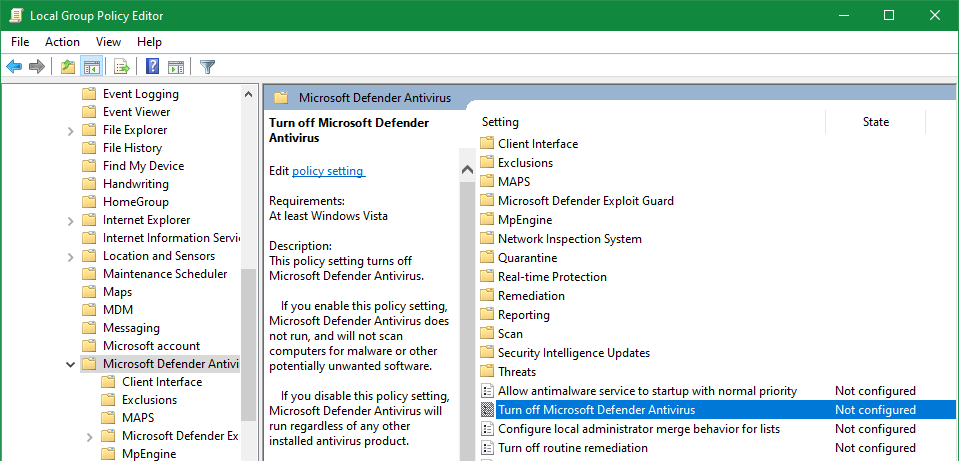
Once this is done, open the Group Policy Editor by typing gpedit.msc into the Start menu. Browse to Computer Configuration > Administrative Templates > Windows Components > Microsoft Defender Antivirus. Inside this folder, find the Turn off Microsoft Defender Antivirus option.
Double-click to open the toggle, then set it to Enabled and hit OK. You should then restart your computer.
Turning on this option will disable Windows Defender under all circumstances. Once you're done, it's a good idea to turn Tamper Protection back on using the same slider as above. If you ever want to set Microsoft Defender back to the way it was, change that Group Policy key back to Not Configured.
See how to access the Group Policy Editor on Windows 10 Home if you're on that edition.
How to Permanently Disable Windows Defender on Windows 10 Home
If you can't or don't want to use the Group Policy method on Windows 10 Home, you can effectively disable Windows Defender by adding your entire storage drive as an exclusion. Again, we don't recommend doing this unless you need to for a specific reason since it removes all antivirus protection from your machine.
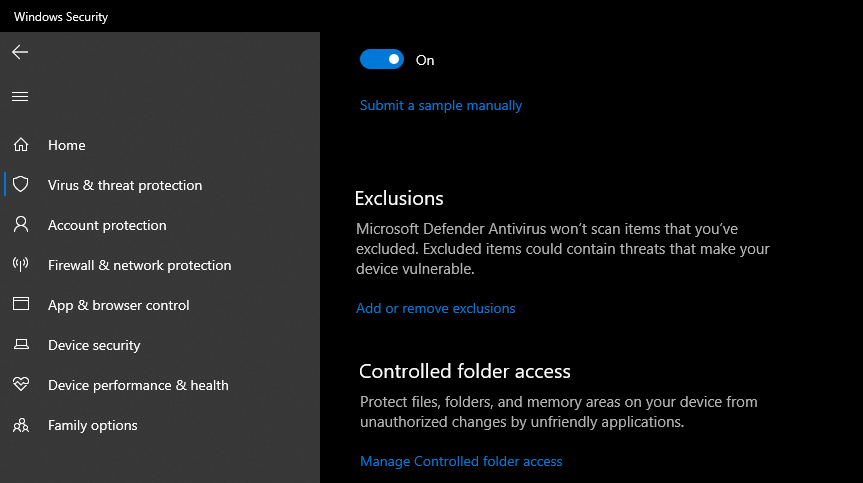
On Windows 10 Home, open the Windows Security app, go to Virus & threat protection, and click Manage settings under Virus & threat protection settings. Scroll down to find Exclusions and click Add or remove exclusions.
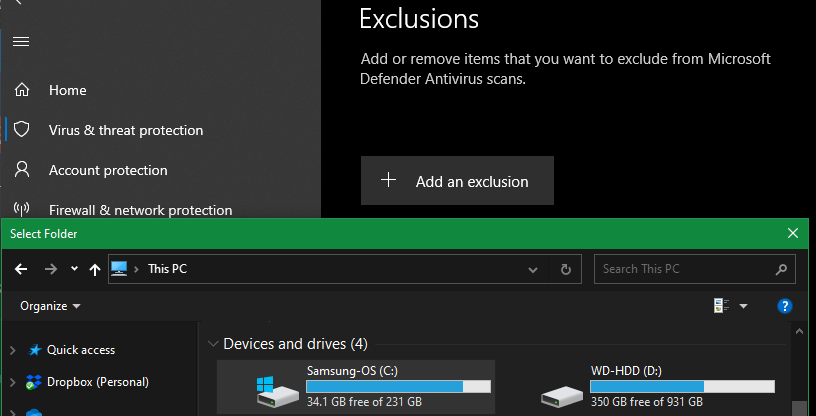
Here, click Add an exclusion and choose Folder. Select This PC from the left sidebar and click your C: drive (or whatever your main hard drive is), followed by Select Folder.
Approve it with the UAC prompt, and you've set your entire hard drive as an exclusion. Repeat these steps to also exclude any other drives, if applicable.
Once you've done this, Microsoft Defender's antivirus portion is effectively disabled, since it won't scan your computer at all.
How to Turn Off Windows Defender Firewall
So far, we've looked only at disabling Windows Defender's antivirus functionality. However, the Windows Security app also contains options for the built-in Windows Firewall. You can turn this off, though, for security, we recommend keeping it on unless you have a specific reason to disable it.
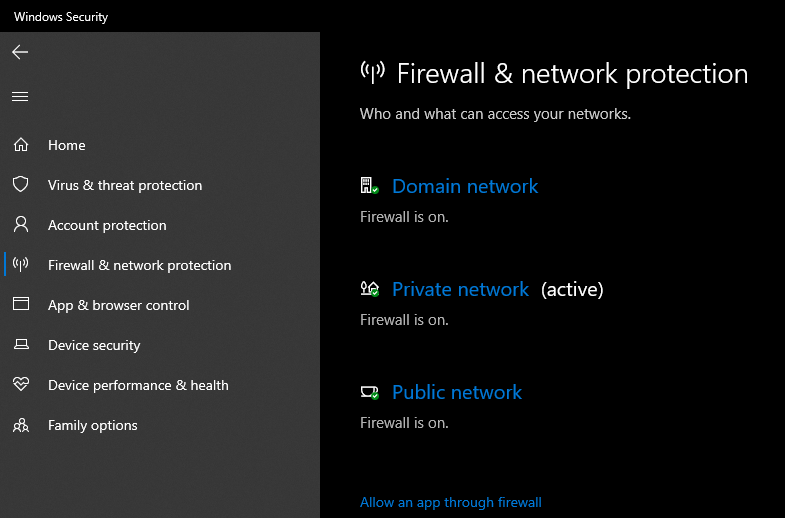
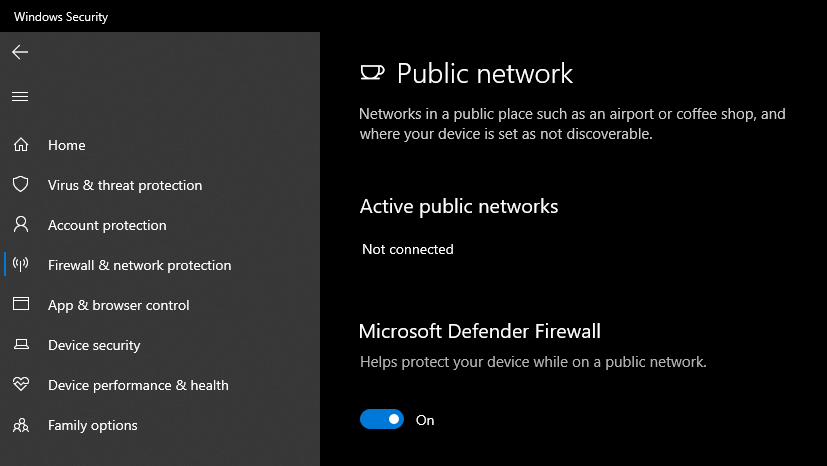
If you'd like to turn off the Windows Firewall, open the Windows Security app and click Firewall & network protection. There, you'll see whether the firewall is turned on for the three network types Windows uses: Domain (corporate environments), Private (trusted home networks), and Public (open networks like those at airports). You'll see (active) next to your current network type if you're not sure.
Click the option for the firewall you'd like to turn off. To disable Windows Firewall on those types of networks, just turn off the slider under Microsoft Defender Firewall. This requires you to approve a security prompt as an administrator.
Once you do this, Windows Firewall is turned off for these types of networks, and it will not filter any traffic. If you only want to turn off the firewall because one program isn't working, you should instead allow that program through the firewall instead of disabling it entirely.
Disable Windows Defender Only When Needed
We've shown you all the different ways to turn off Windows Defender. As mentioned, you should only do this if you need to for a specific reason. In general, we recommend sticking with Microsoft Defender; it's a solid antivirus and doesn't nag you to pay for a premium version or include a bunch of junk you don't need.
And with a few tweaks, you can actually make Microsoft Defender even better.
Image Credit: Khakimullin Aleksandr/Shutterstock


