Almost everyone has made a to-do list for themselves at some point in time. This is especially true for groups, like people living in the same home, colleagues working on a task, or students grouped for a project. In these cases, it’s useful to be able to share a to-do list across everyone in the group.There are tons of collaboration tools you can download and try for this. But why download third-party tools when you have one built into your device? Read on to learn how to share, collaborate, and split your tasks using Reminders on Mac.
Who Can Send and Share Reminders Lists?
Before anything else, you need two things to be able to use the feature:
iCloud
Your Mac uses iCloud to share your to-do lists through the Reminders app. This means that you can only share them and collaborate with friends using iCloud.
You can edit and create upgraded reminders from any device running on macOS Catalina, iOS 13, iPadOS 13, or later, as long as you’re signed in to iCloud on the same Apple ID across all your devices.
Upgraded Reminders
Moreover, since this capability is part of the upgraded features of the Reminders app, you and the people you wish to collaborate with need to upgrade Reminders on your iCloud account to use it.
To upgrade Reminders, just update your OS. When you open the app for the first time, you’ll be welcomed by a window that tells you to upgrade your Reminders. Click Upgrade.
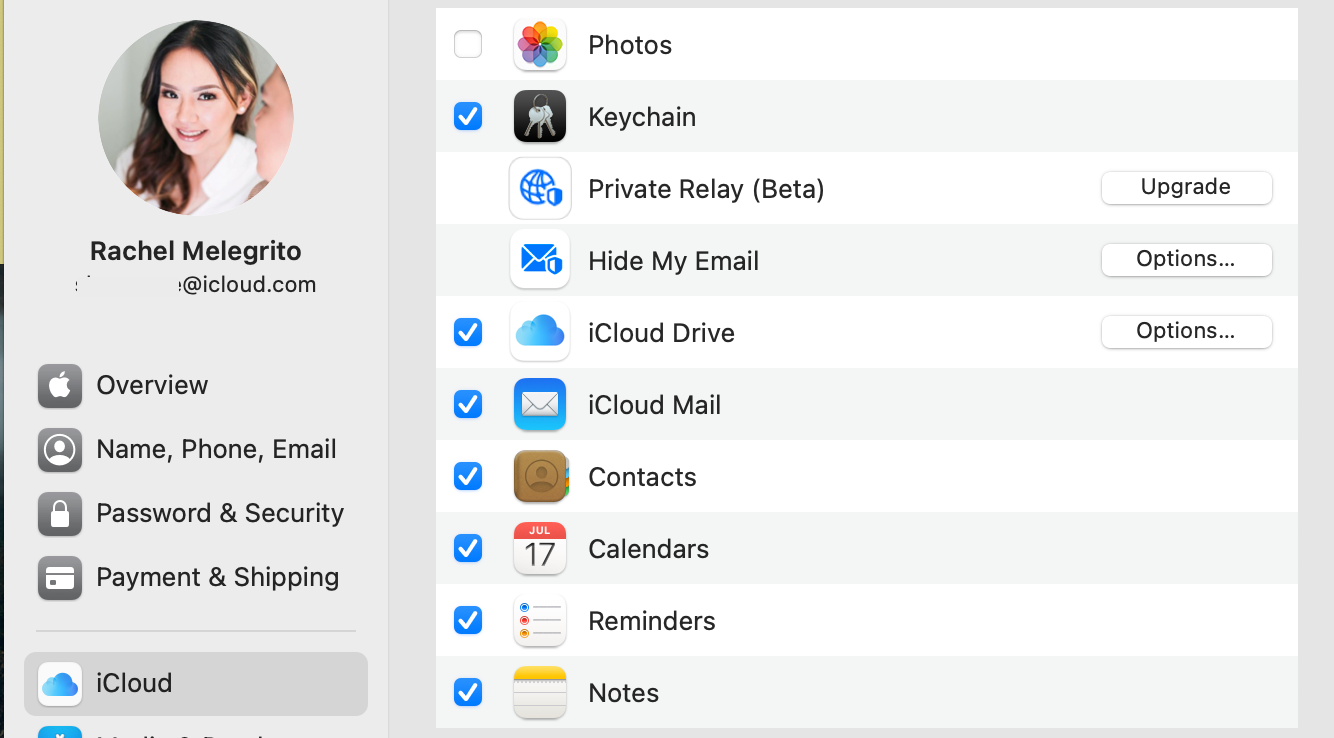
If you don’t see this, head to System Preferences > Apple ID, click the iCloud tab in the sidebar, then make sure that Reminders is ticked.
Upgraded tasks are not backwards compatible with earlier versions. This means that once you upgrade, you can now share your lists with others who have also upgraded their reminders, but you can’t revert to the old version of Reminders.
In the same way, you won’t be able to see lists shared with you unless the sharer upgrades first.
How to Share Reminders on a Mac
Now that you have all you need to share a Reminders list, here’s how to do it:
- Go to Reminders.
- Select a reminders list from the sidebar, then click the Share button. This is the person icon that appears when you hover the cursor over a reminder list. If the icon permanently appears, it means that list is already being shared.
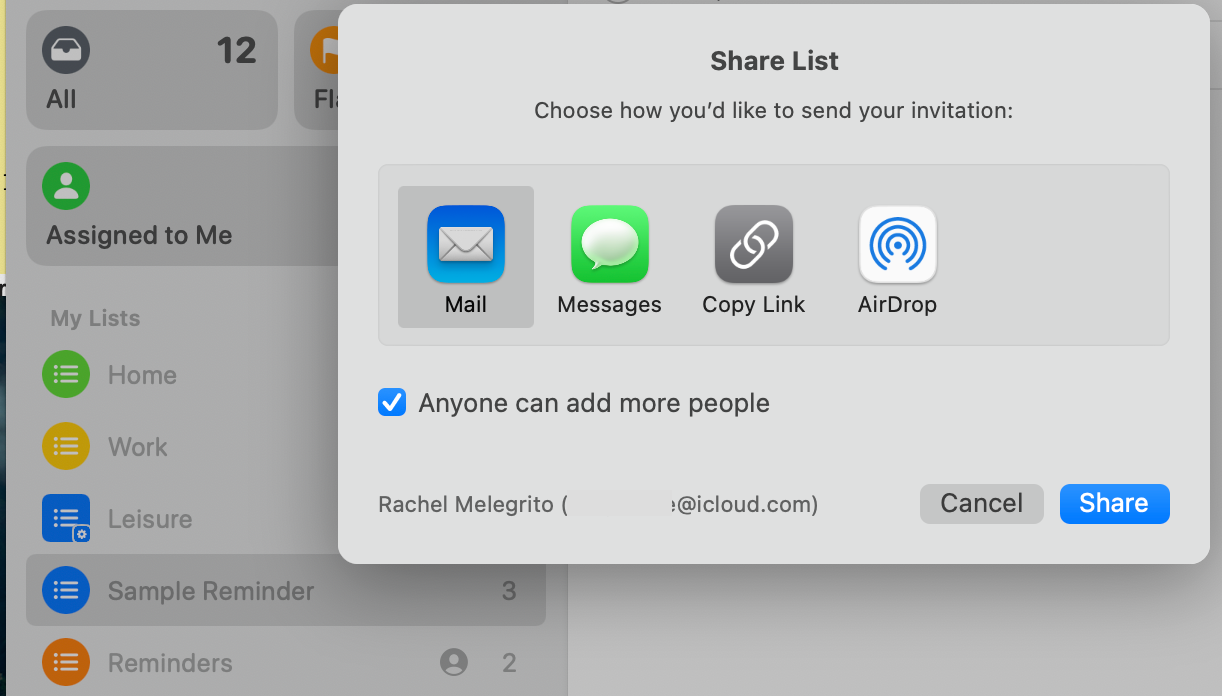
- Select how you’d want to send your invite.
- Tick the box beside Anyone can add more people if you want to allow your invitees to invite others to join your reminders list.
- Hit Share.
Once the list is accepted, your invitees will be able to share and edit the reminders list themselves.
How to Add People to a Shared List
Don’t worry if you missed a few people upon setup; you can always add more. Here’s how:
- Head to Reminders, select the shared list, then click the Share button.
- Click Add people at the bottom of the window.
- Choose how you want to send your invite and allow or disallow people from inviting others to the list.
- Click Share.
How to Customize Access to Your Shared Reminders List
If you are the list owner, you can manage who can share the list with others.
Allow Everybody or Nobody to Invite Others
As mentioned, ticking the Anyone can add people option gives your invitees the freedom to invite other people. Untick this box if you don’t want anybody except yourself to add people to the list.
Allow Specific People to Invite Others
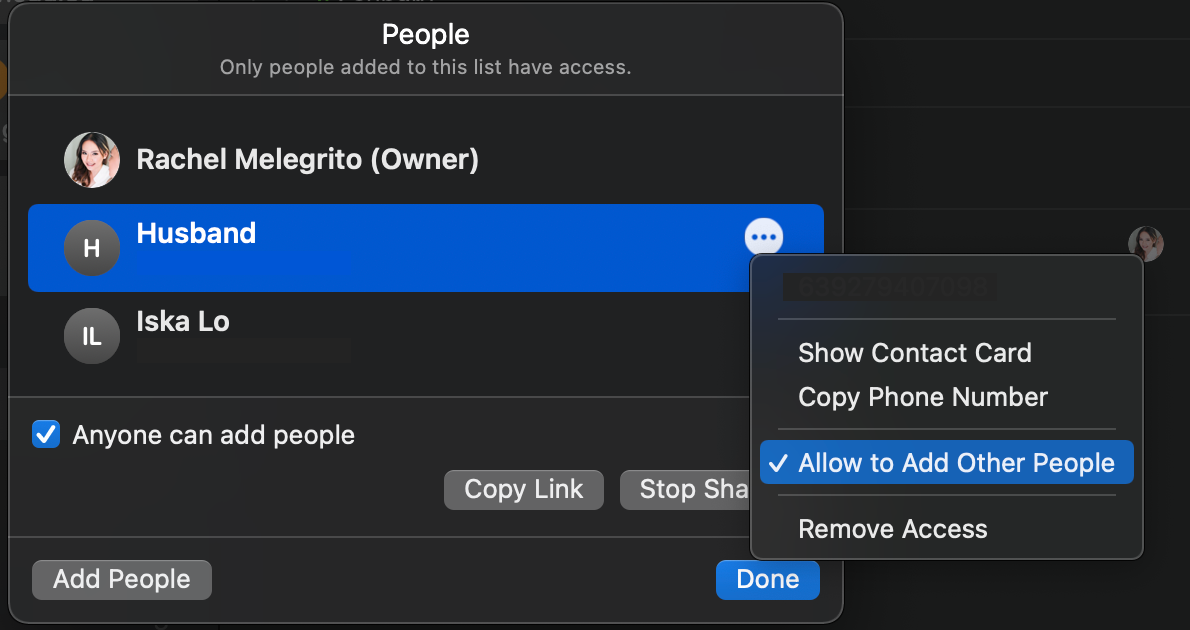
If you only want to give certain people the ability to invite others, go to the People window on your reminder list. Select the person you want to allow, click the Options (…) button, then click Allow to Add Other People. A checkmark should appear beside the option.
Uncheck this option for the people you don’t want to be able to invite others.
How to Stop Sharing a Reminders List
As the list owner, you have the freedom to remove people from your Reminders list at any time. Just head to the People window, then click Stop Sharing. A prompt will appear; click Continue. Doing this removes the list from everyone else’s devices.
How to Remove Access to a Shared List
Alternatively, you can remove individual people who you don’t want to share the list with anymore. Just follow these steps:
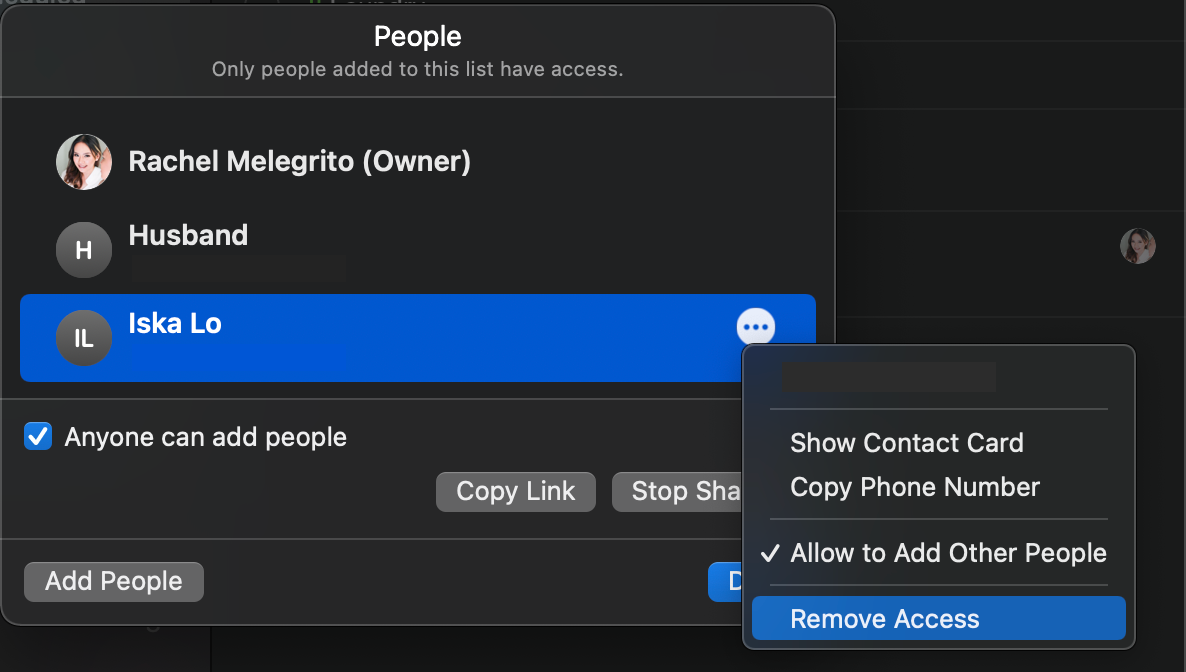
- Head back to the People window of the shared list.
- Select the person you want to remove.
- Click the Options (…) button, then click Remove Access. This will immediately remove the person from the list.
Share Your Reminders Lists and Delegate Some Tasks
With the Reminders app, you can easily share your to-do lists to allow smoother collaboration. You can also couple this with Apple Notes, which you can also use for collaboration, as well as brainstorming and research.


