While Amazon's Alexa alone can do plenty of amazing things, its lack of integration with certain apps or smart home devices can be frustrating. That’s where IFFTT (If This Then That) comes in.
With IFTTT Applets, it’s now possible to link almost anything with your Echo device. These Applets can do nearly everything you wish Alexa would already do, from closing your garage door to parking your automated lawnmower.
We'll cover exactly how you can get set up on IFTTT and start enabling Applets within minutes.
Key IFTTT Terminology
Before you begin unlocking the next level of smart home automation with IFTTT, it’s vital to cover a few terms you’ll need to know to clear up any potential confusion.
IFTTT
IFTTT stands for If This Then That. It uses the same logic as If statements in software development: if a condition is met, then an action is performed.
Applet
An Applet simply links two or more apps or devices together that wouldn’t be able to link together on their own. Here's an example that will sync your Amazon Alexa to-dos with iOS reminders.
Service
A Service is an app, device, or software compatible with IFTTT, like Alexa, Nest, Roomba, and even SMS. There are currently more 700 services that link with IFTTT.
Triggers
A Trigger is exactly as its name suggests: an action performed or change made that prompts an Applet to run. In other words, a condition that has been met.
Action
If a Trigger is a precursor to an Applet running, then an Action is the function that an Applet performs when it runs.
Query
A Query is a way for IFTTT to request additional data if a Trigger doesn’t provide it. Every Applet uses at least one Query.
Putting It All Together
Using the terms above, we can now explain how an Applet works. Let’s use this Applet: Ask Alexa what's on your shopping list and she'll text it to you as an example.
The Trigger is you asking Alexa what’s on your shopping list. The Query is IFTTT checking with Alexa what’s on your shopping list; the Action is using the SMS service to text your shopping list to you.
There are other, more advanced terms, but they aren’t essential to learn right now. You can always check out the full glossary on IFTTT’s website if you see something you don’t understand.
Step 1: Install IFTTT On Your Phone
To get started, install the IFTTT app (available on iOS and Android). Installing the app will let you manage all of your Applets straight from your phone without needing to use the IFTTT website. It's also not necessary to install any Alexa skills to use IFTTT.
- Once downloaded, open the app.
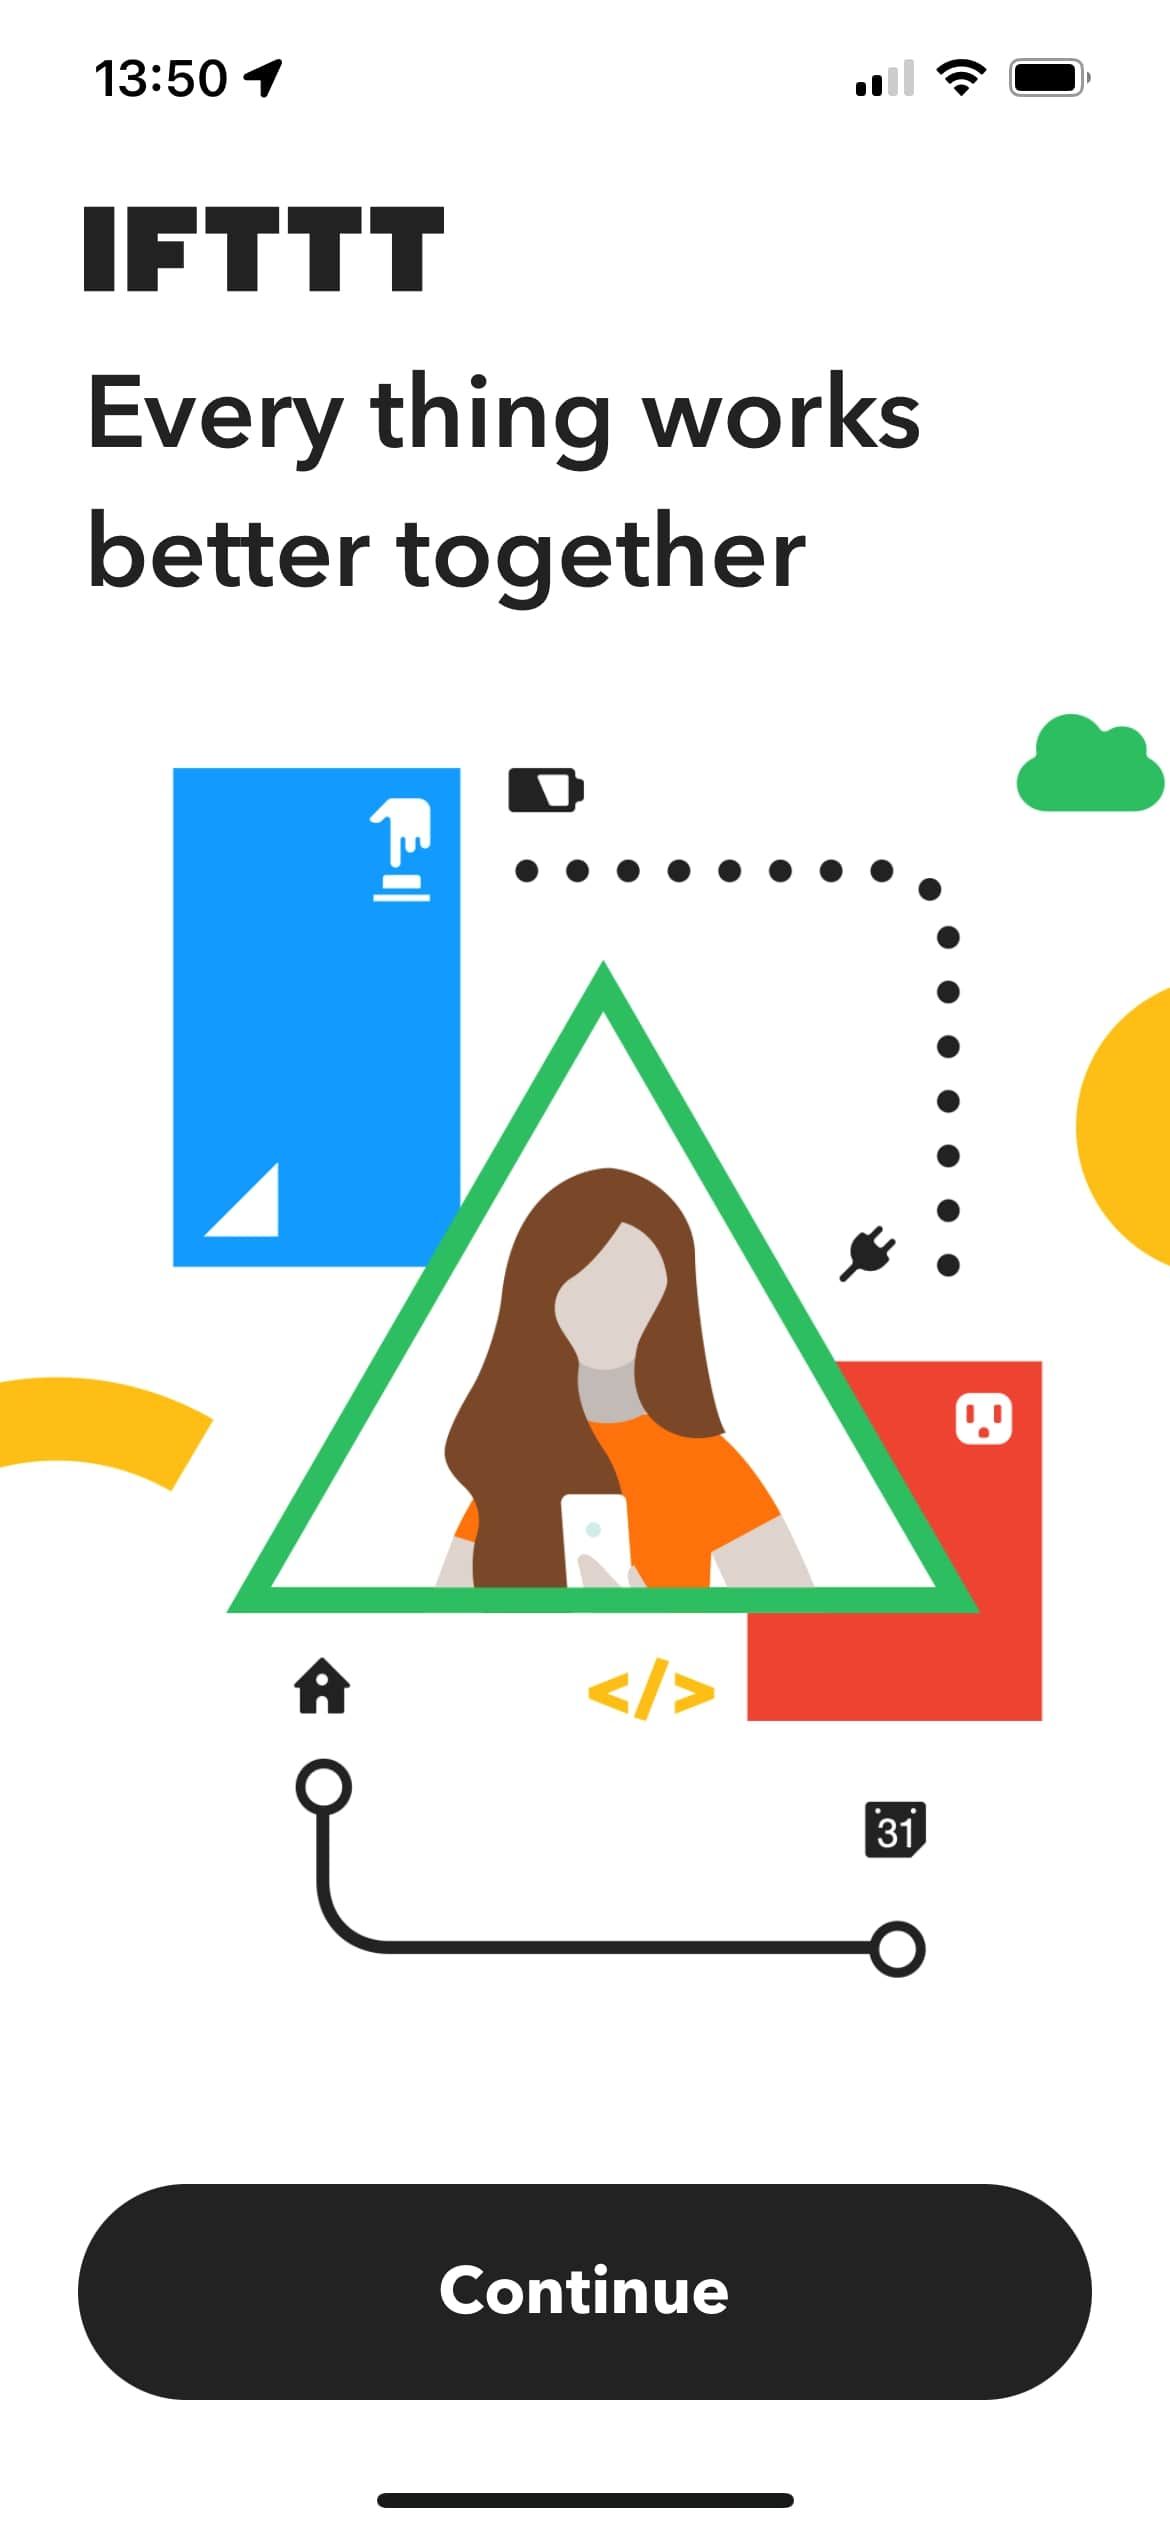
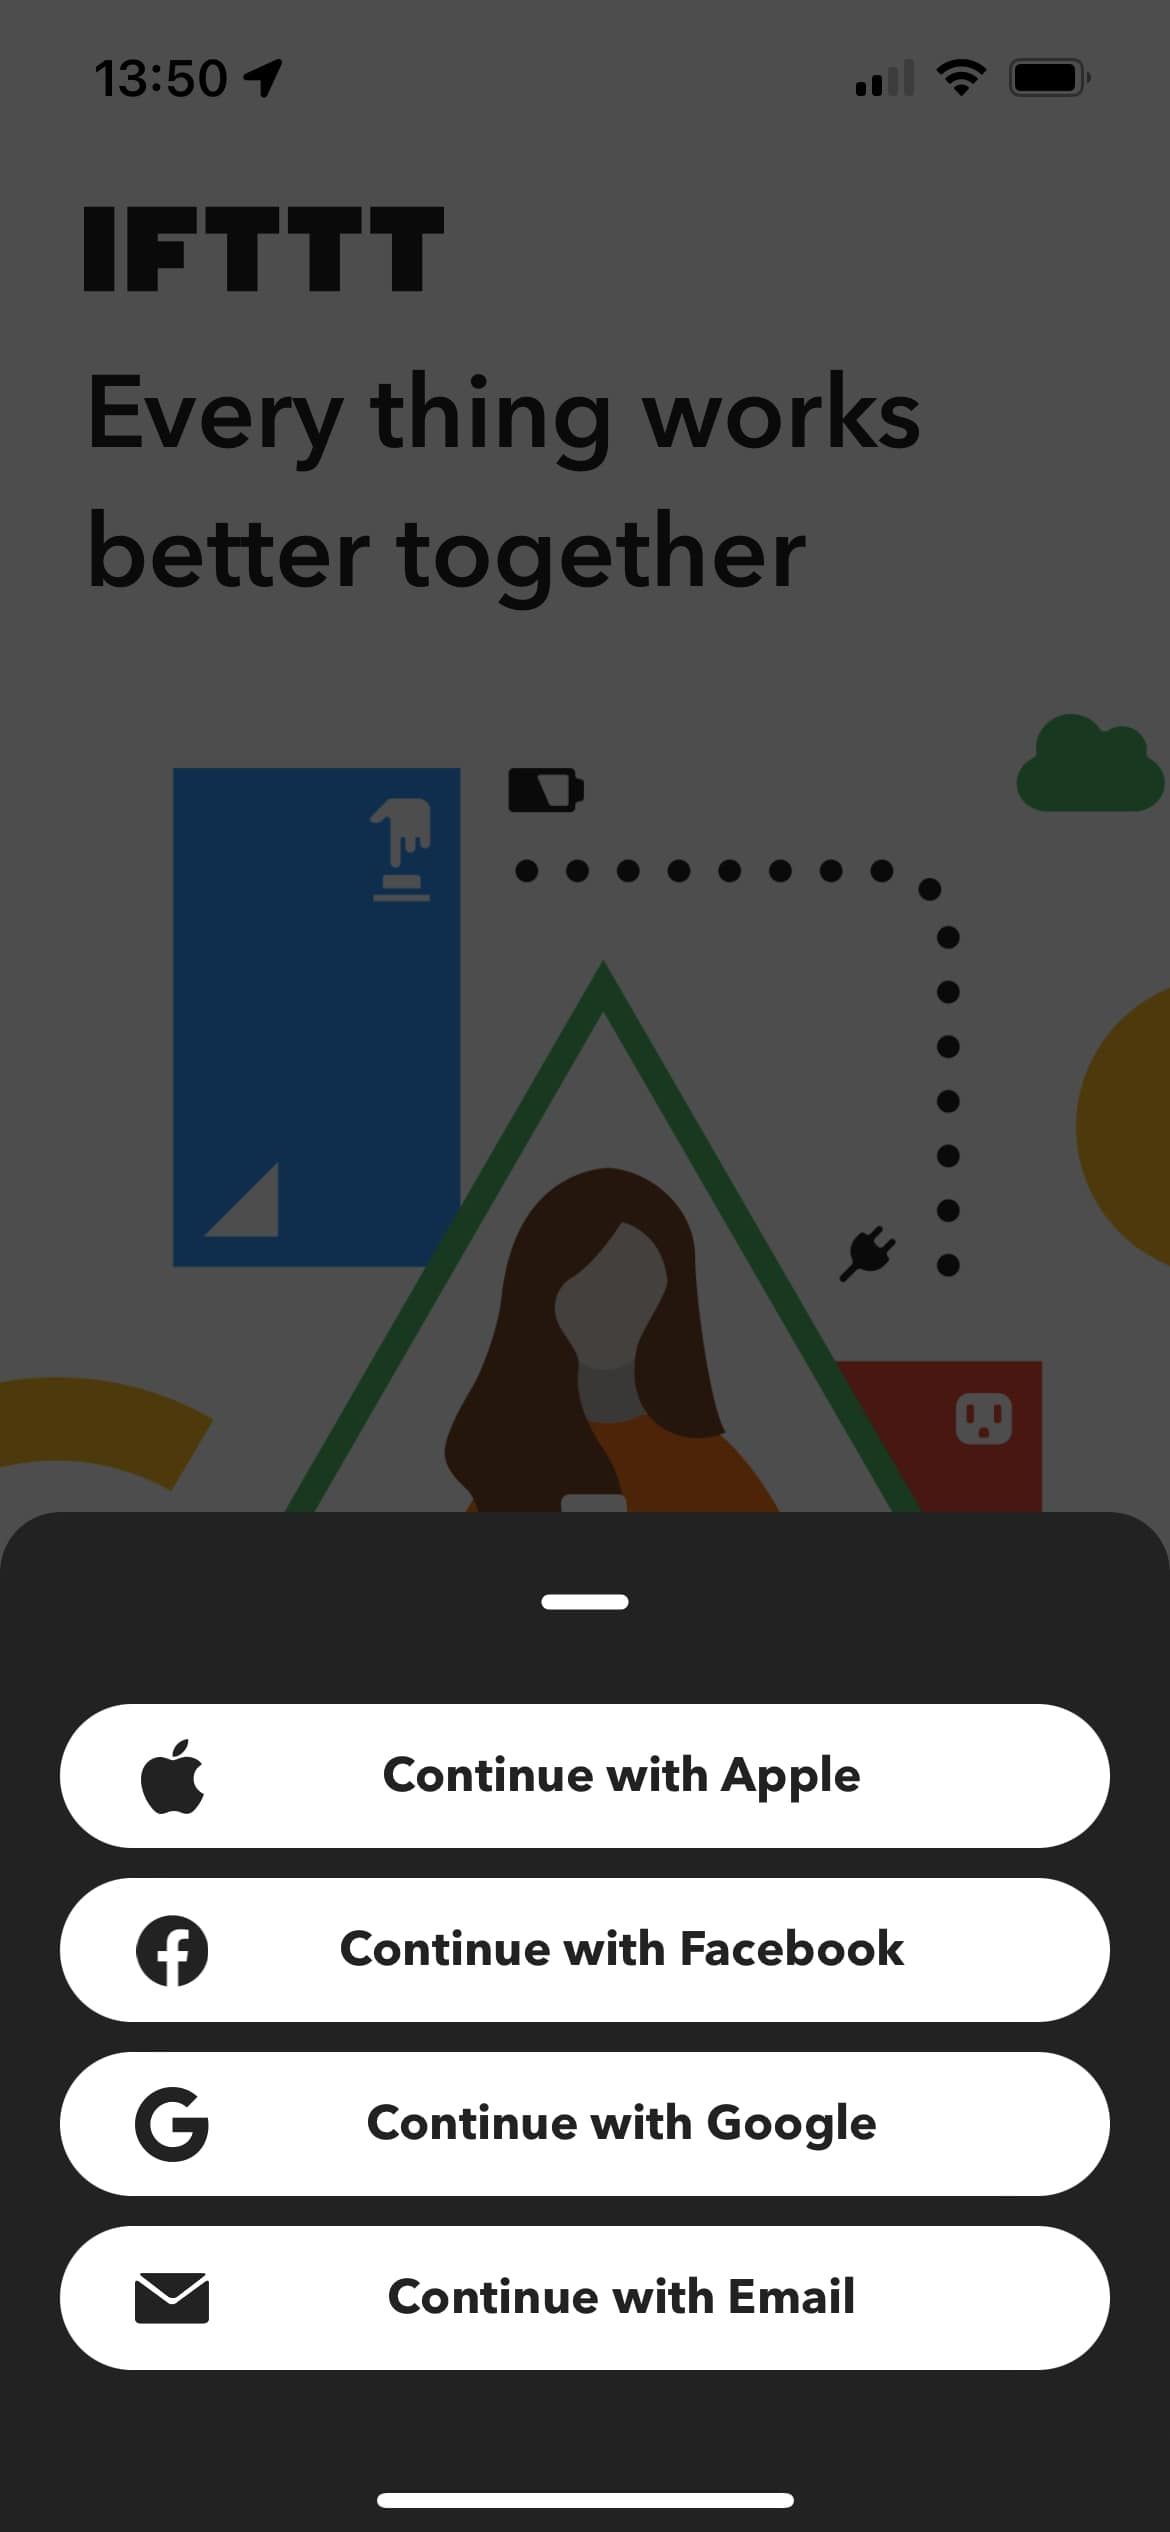
- Tap Continue, and then choose how you’d like to sign up.
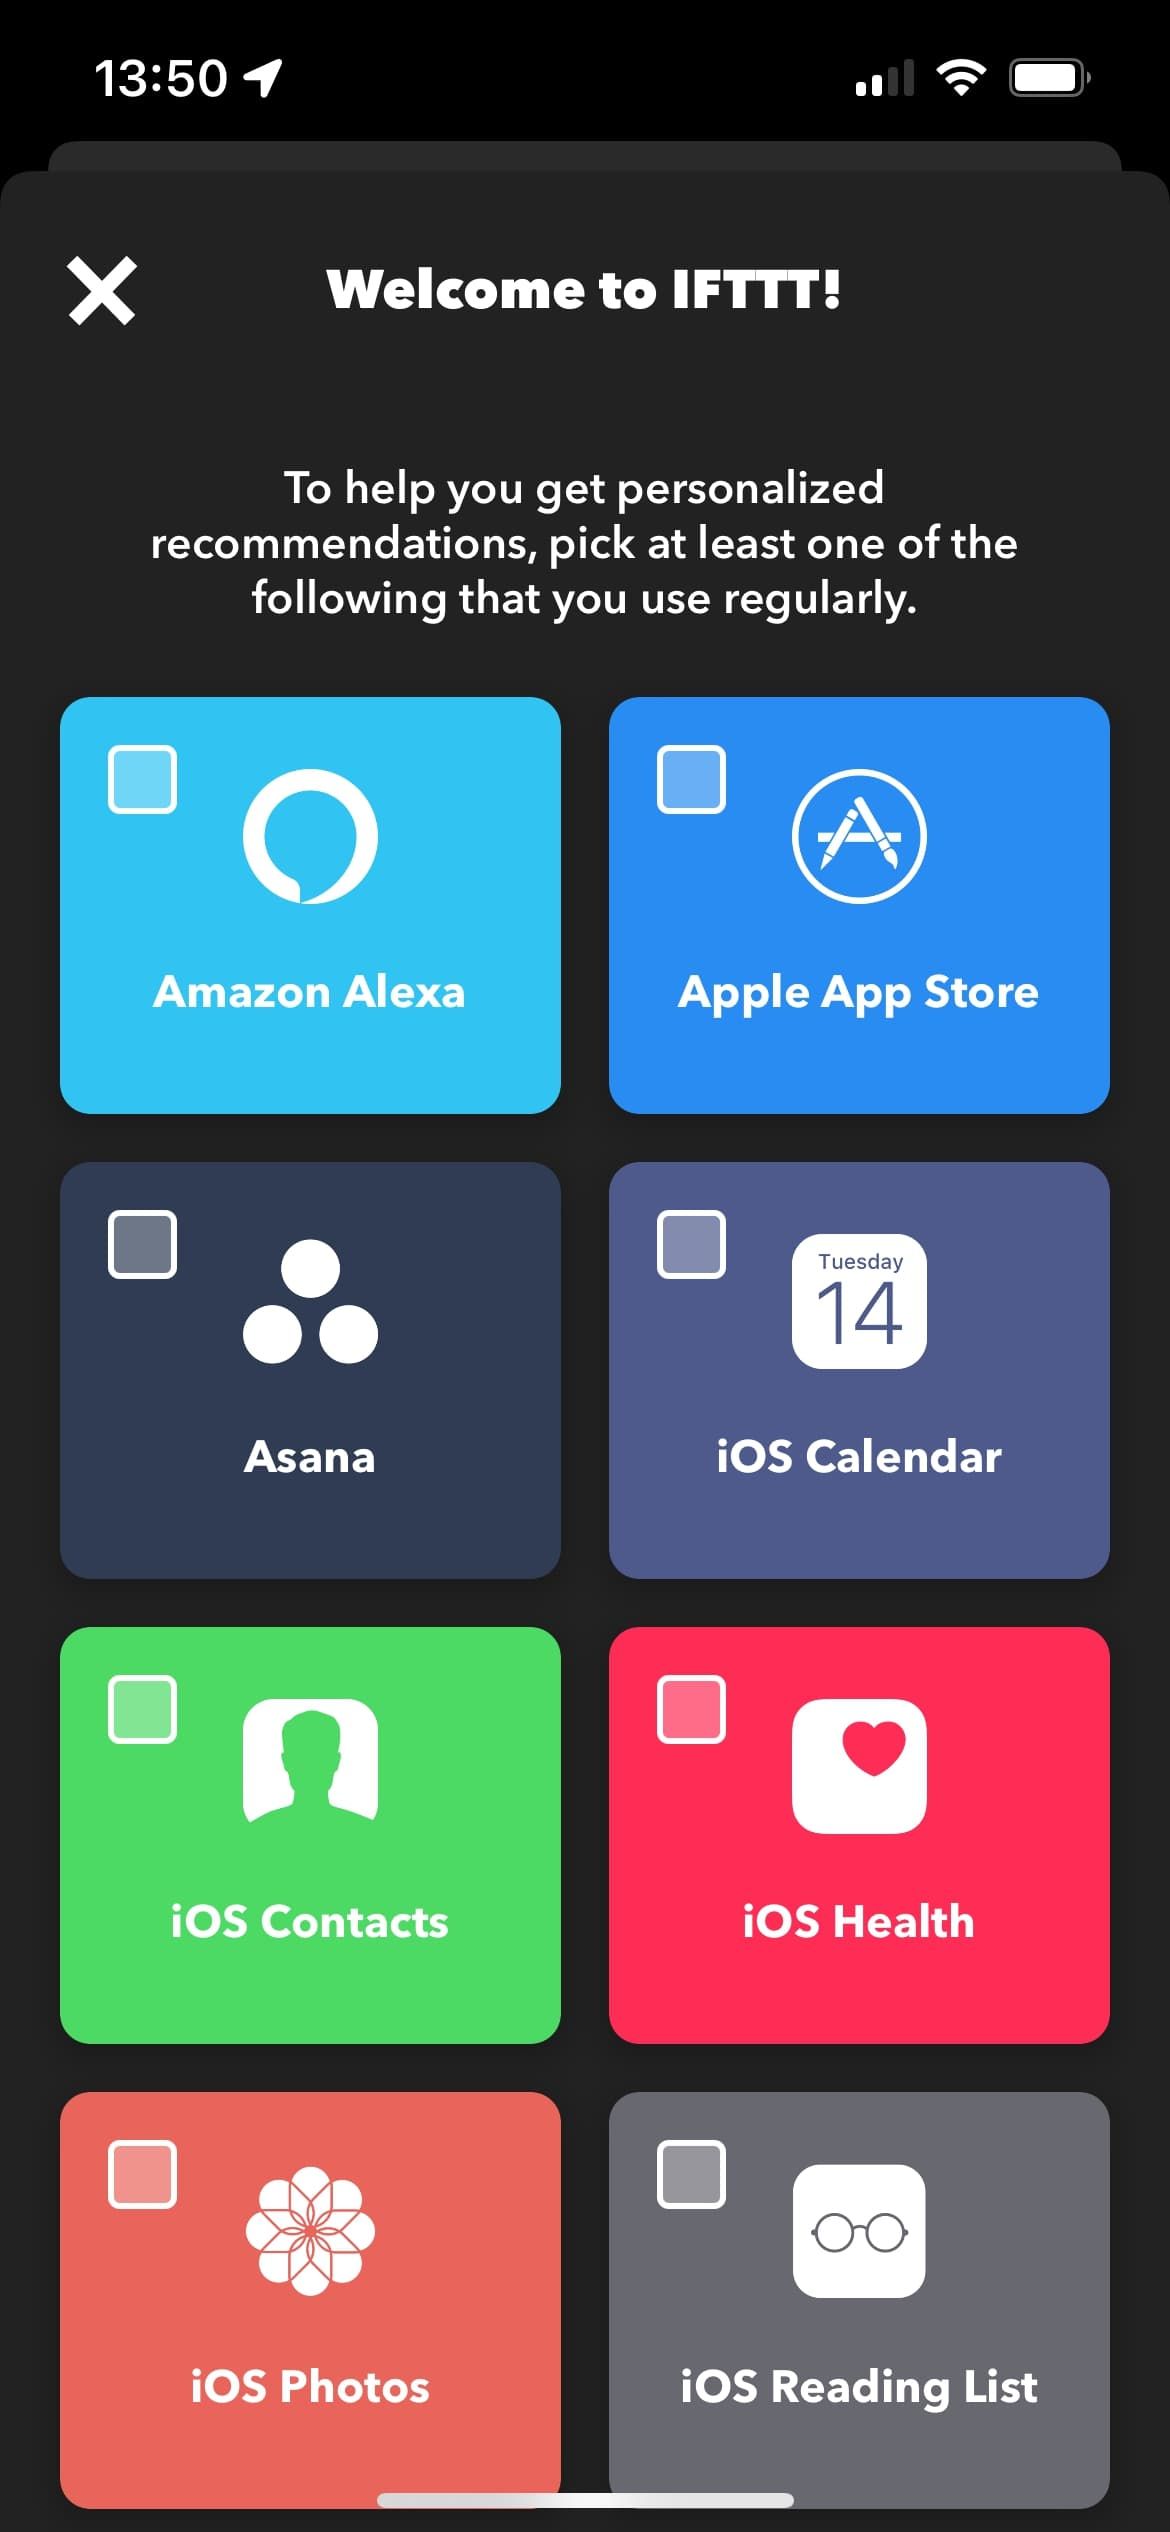
- After you’ve entered your email address and password, IFTTT will ask you to select a few services you regularly use for personalized recommendations. If you’re not interested, tap the X in the top left corner.
The app is now ready for syncing with your Amazon account.
Step 2: Link IFTTT With Your Amazon Account
To link IFTTT with your Amazon account, you’ll need to find the Amazon Alexa page. Note that you can search services like Alexa and view a results page, but each service also has a dedicated page with much more detail. That’s what we’re looking for.
Here’s how to find it:
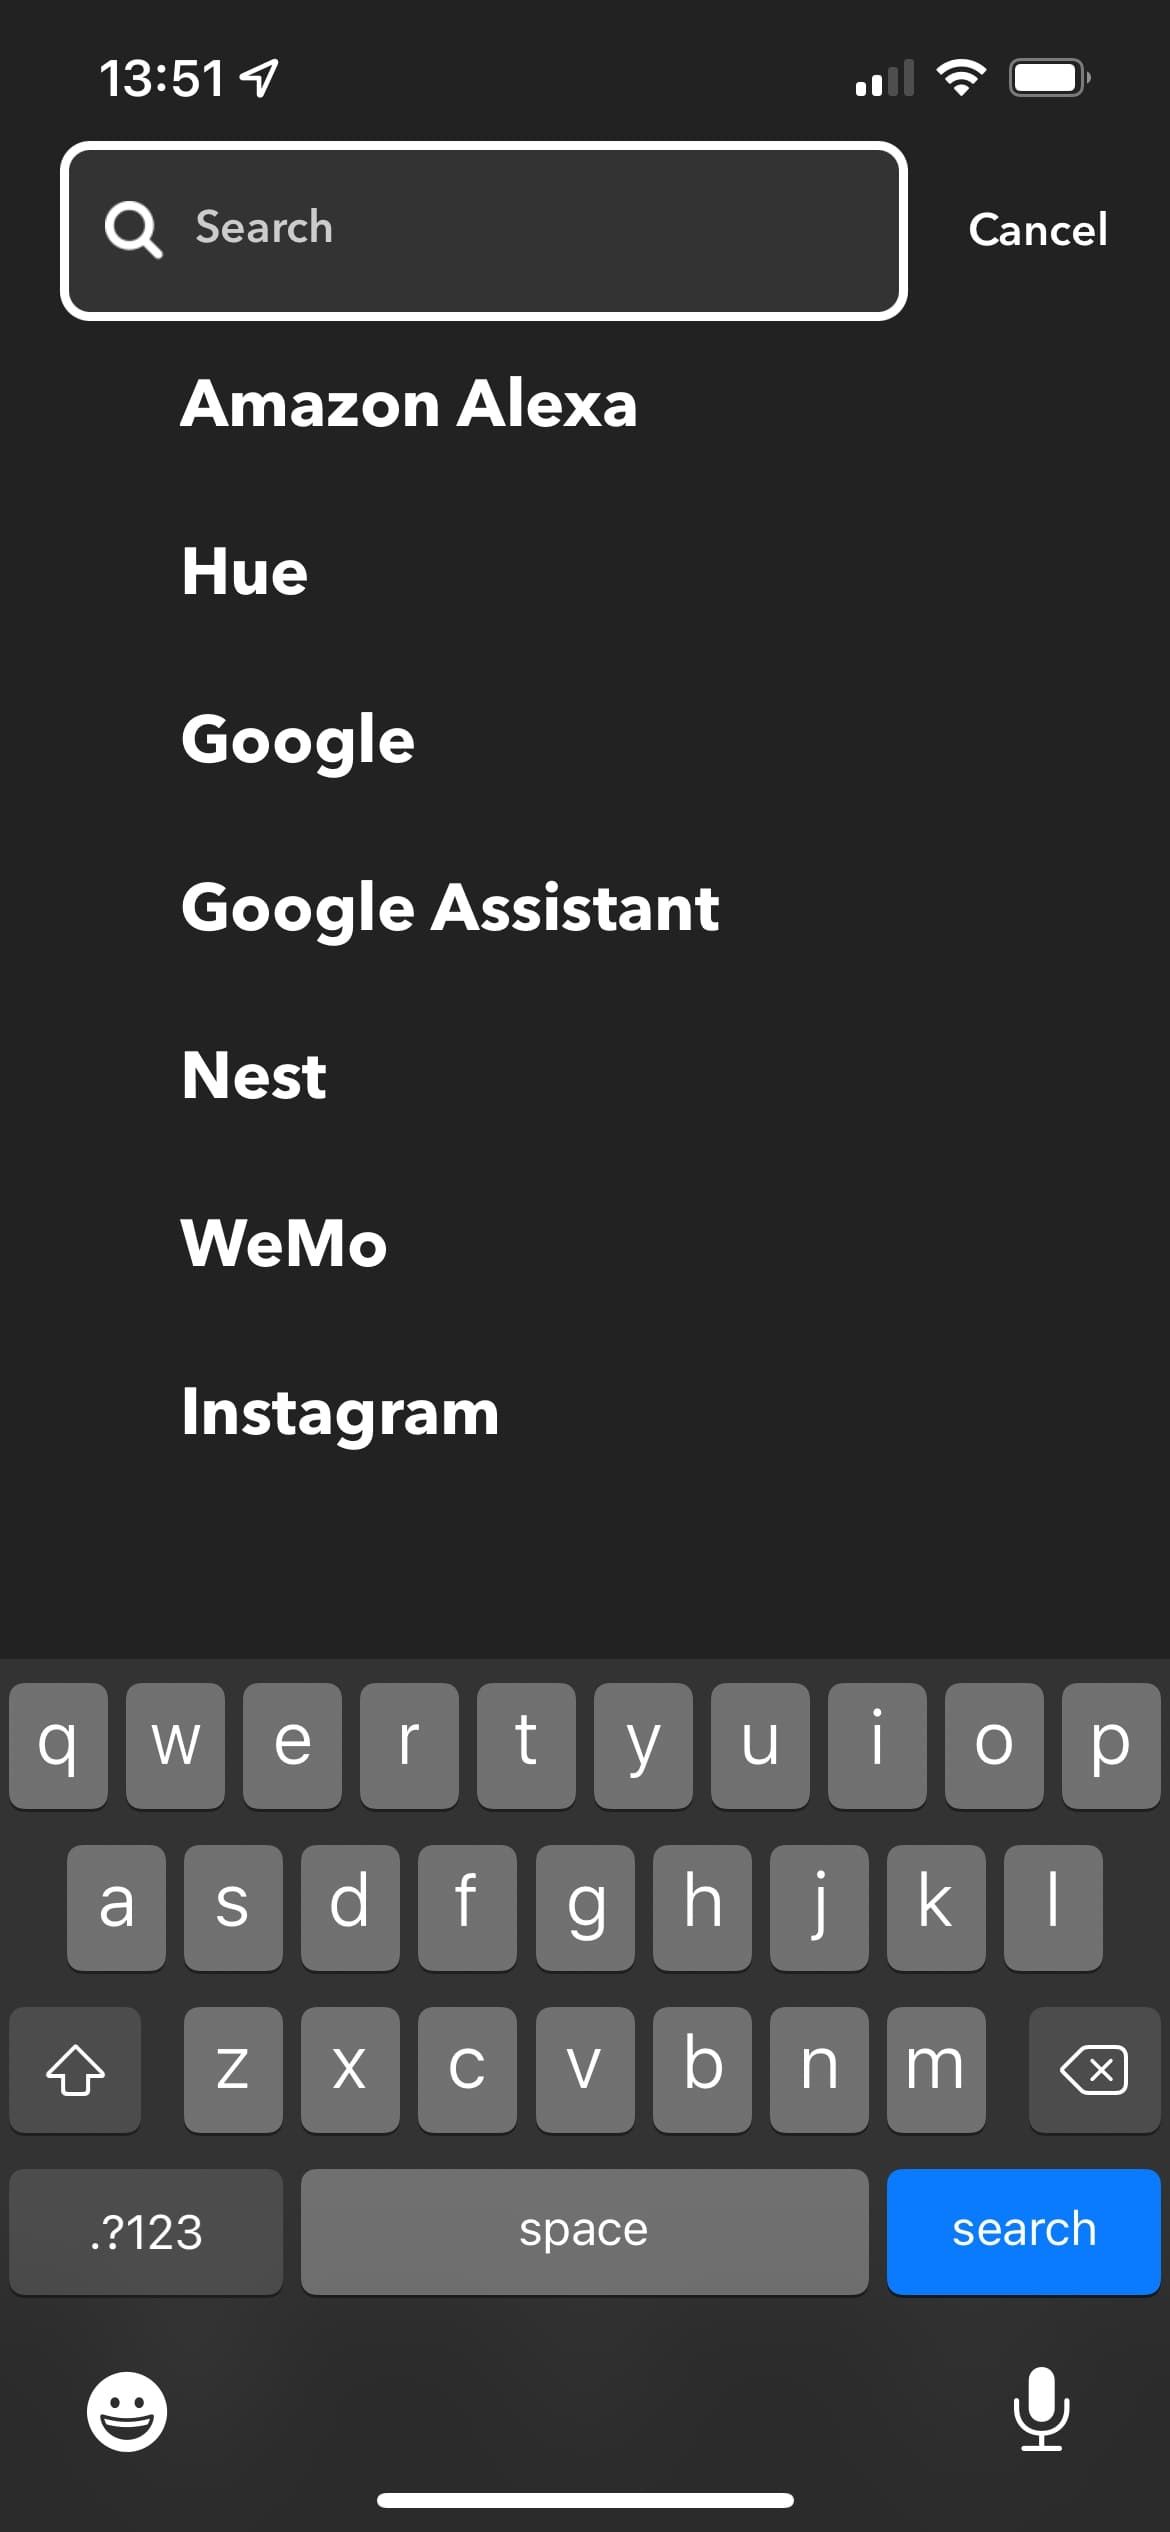
- On the Explore page, tap Search.
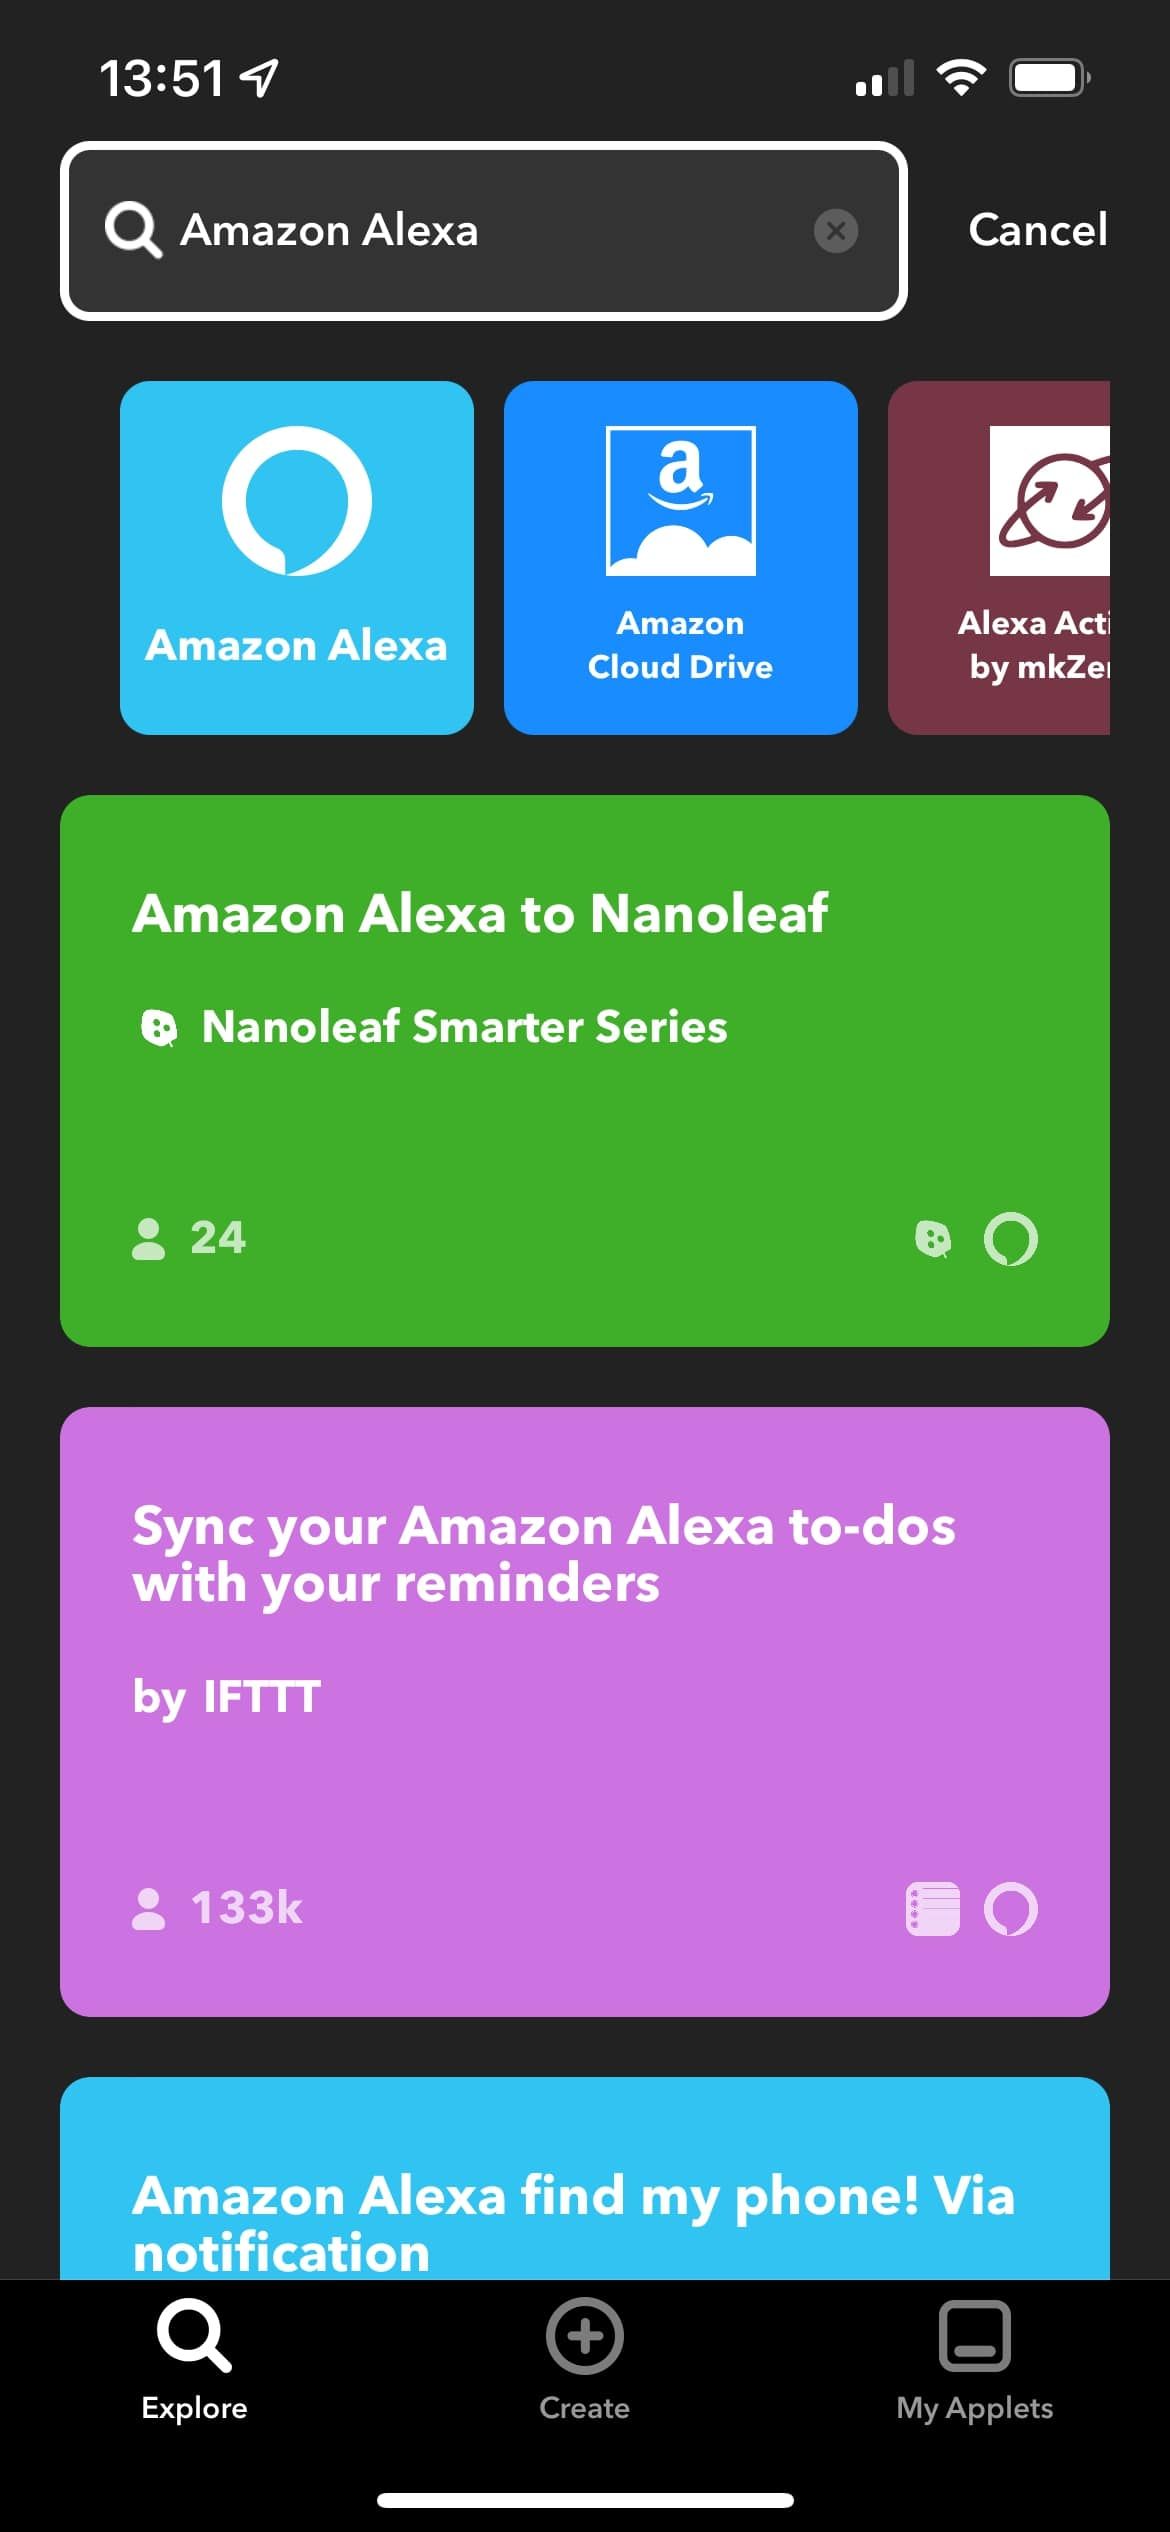
- Select Amazon Alexa.
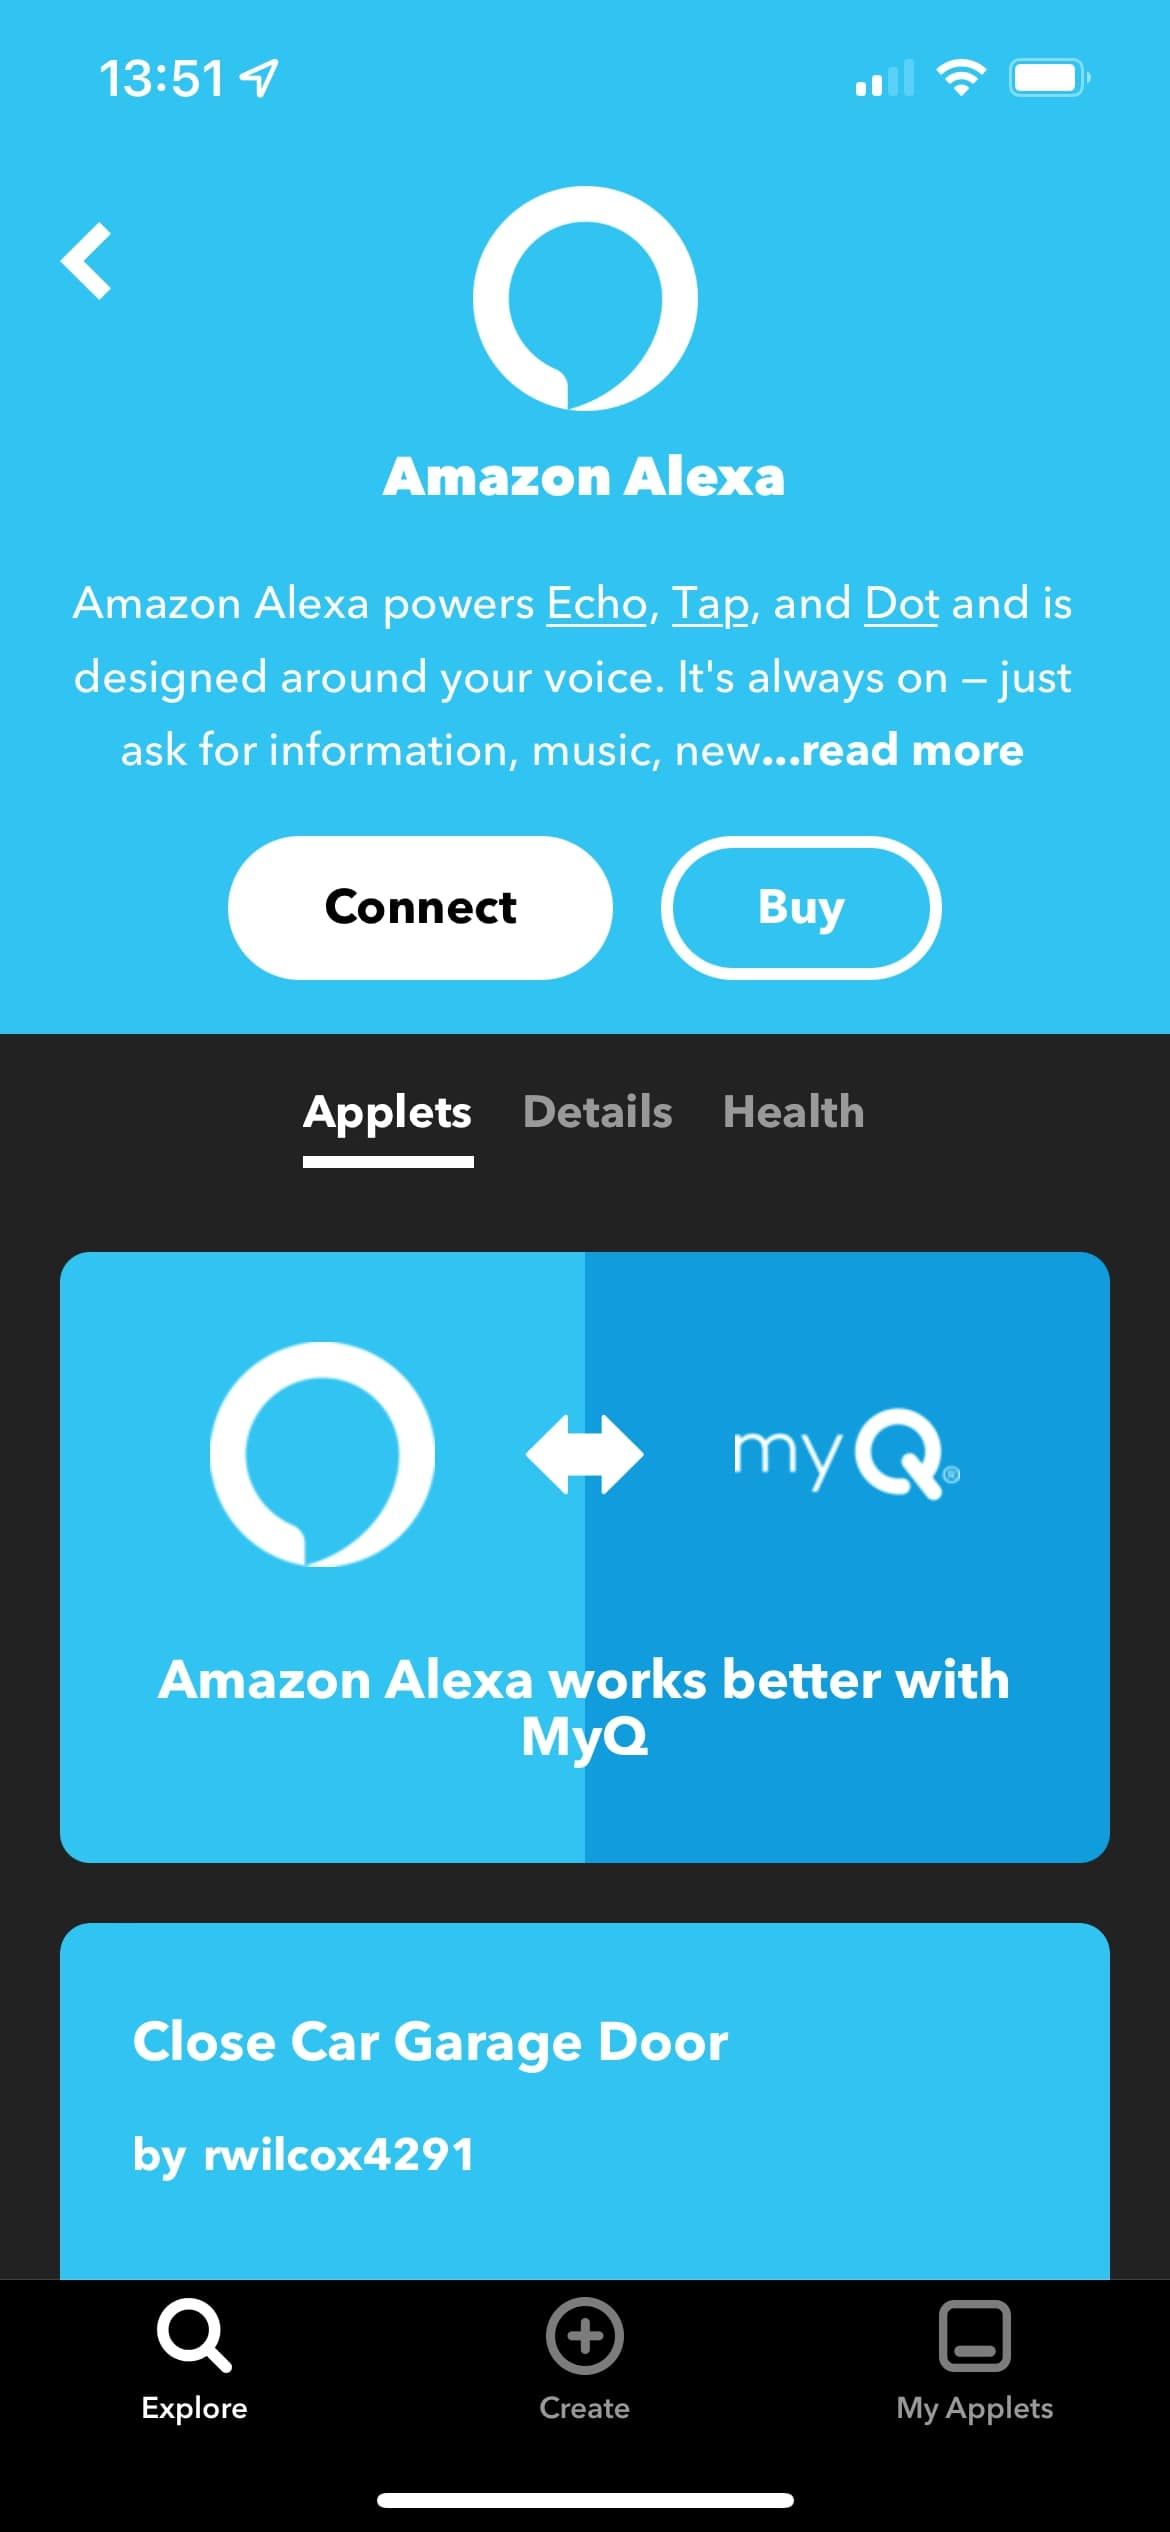
- Tap the Amazon Alexa square, denoted by the Alexa symbol.
- Tap Connect, and then Continue.
- Log in with your Amazon account details.
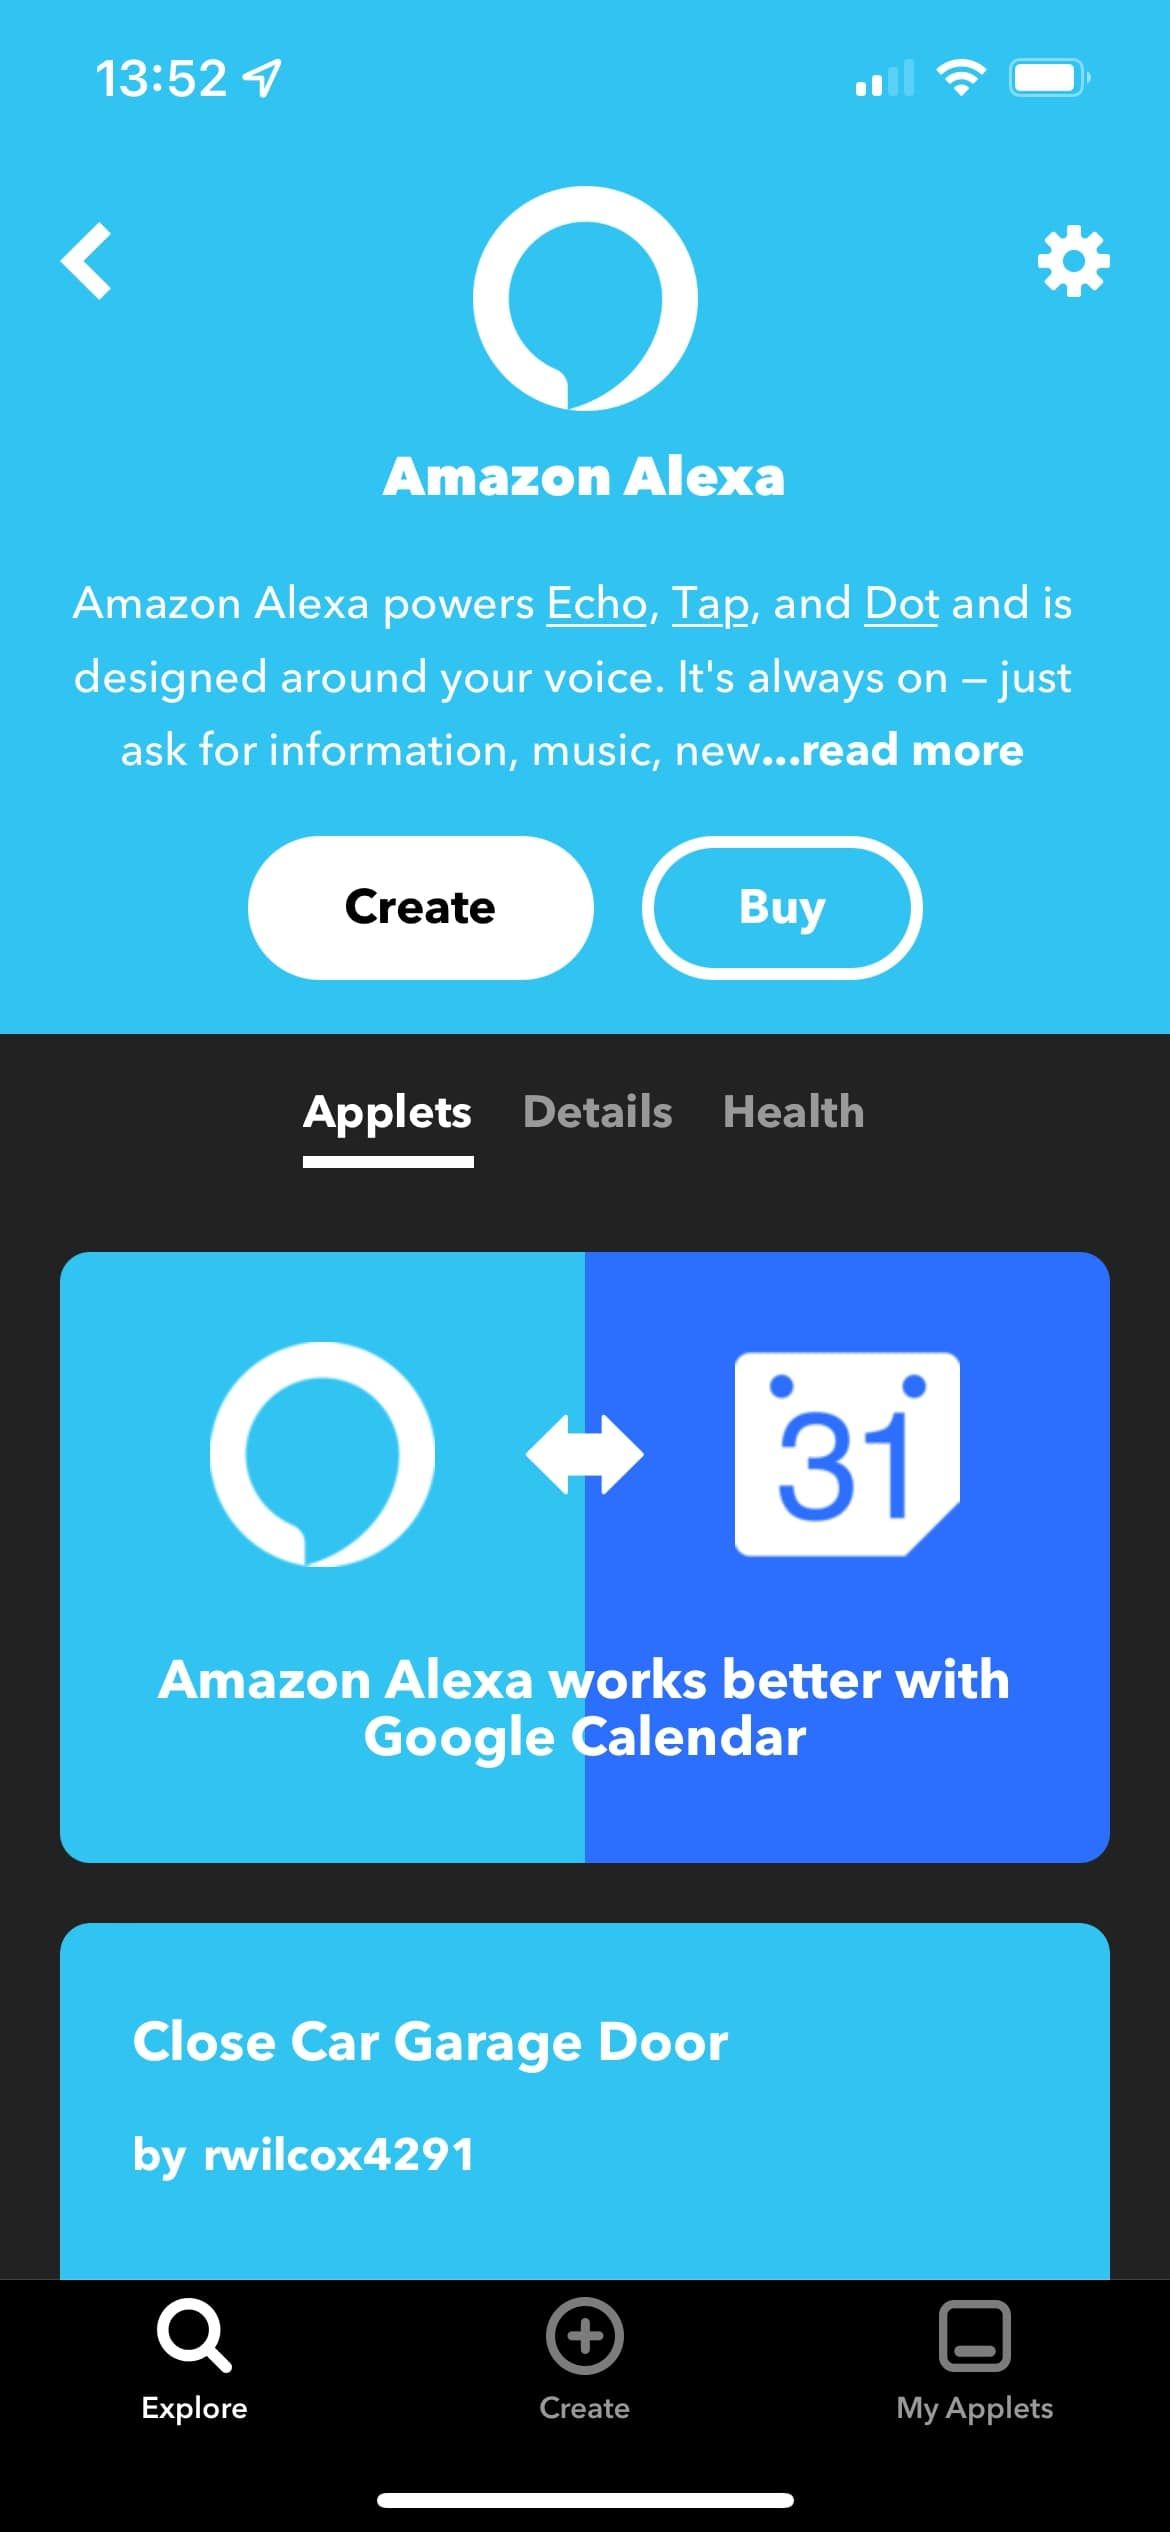
- To confirm that you’re logged in correctly, check that the Connect button now says Create.
That’s it! Now, you can start enabling Applets and explore the endless possibilities of advanced Alexa automation in your home. You can also replicate these steps for any other services you’d like to link.
Step 3: Enable Applets
The process to enable an Applet is relatively straightforward. Note that with a free IFTTT account, you can only have five Applets under My Applets, even if they’re inactive.
To activate your first Applet, follow these steps:
- Navigate to the dedicated Amazon Alexa page.
-
Search the list for an Applet you’d like to enable.
- Alternatively, if you have an idea of what you’d like to try, return to the Explore page and search “Amazon Alexa (your idea).” For example, “Amazon Alexa calendar.”
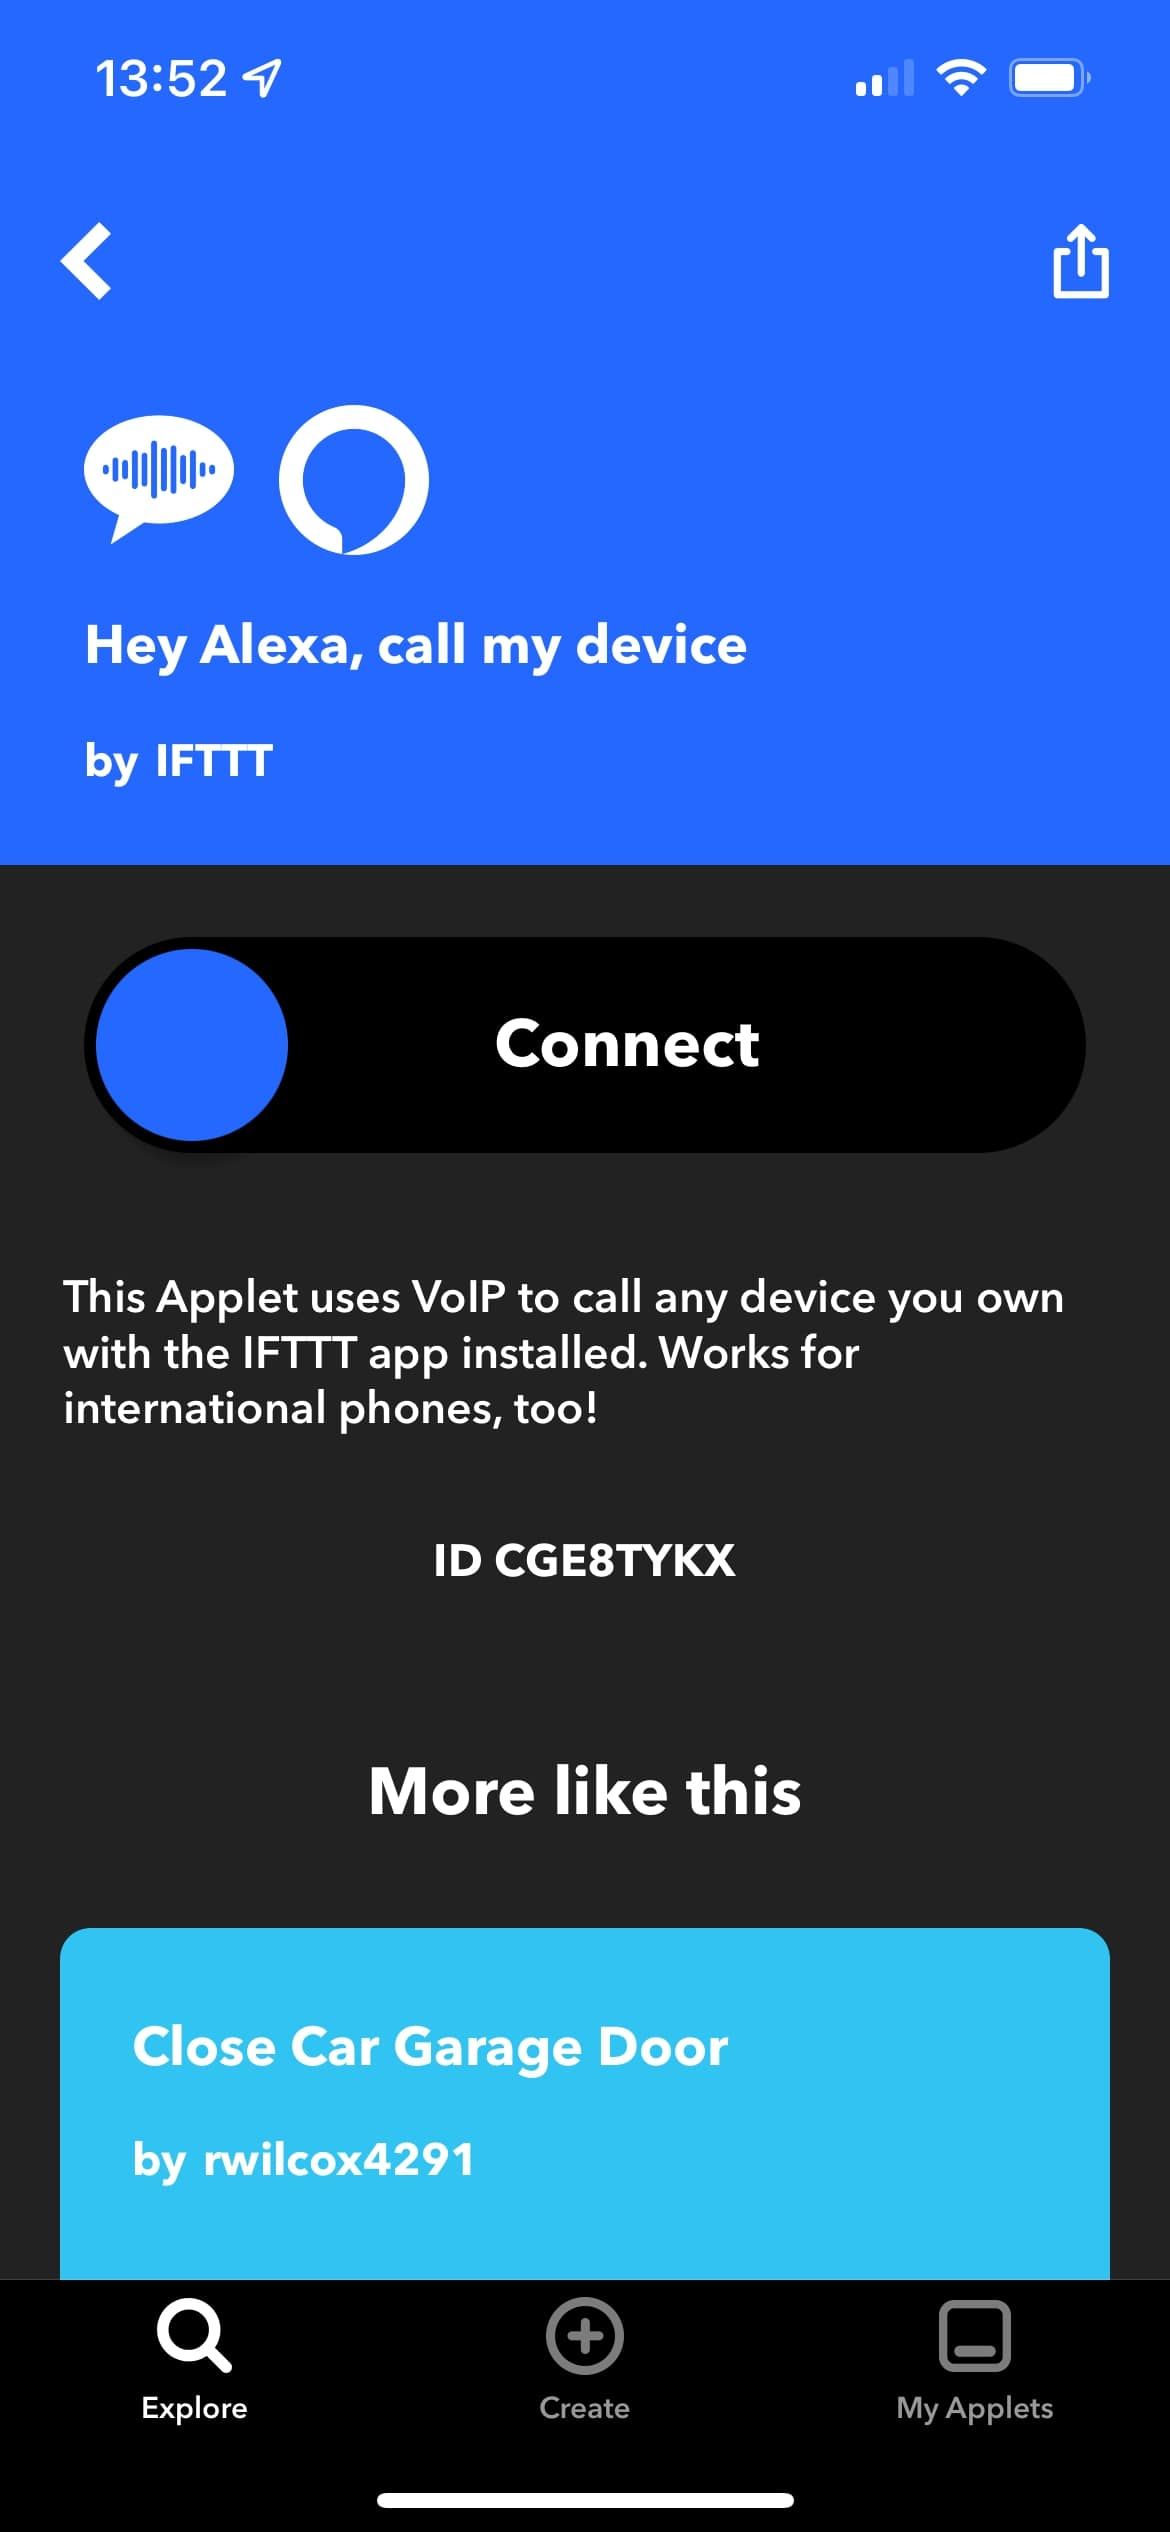
- Tap the Applet once you've found one that looks interesting.
- Press Connect. If it’s your first time using a new service, you’ll be prompted to log in and link your account.
-
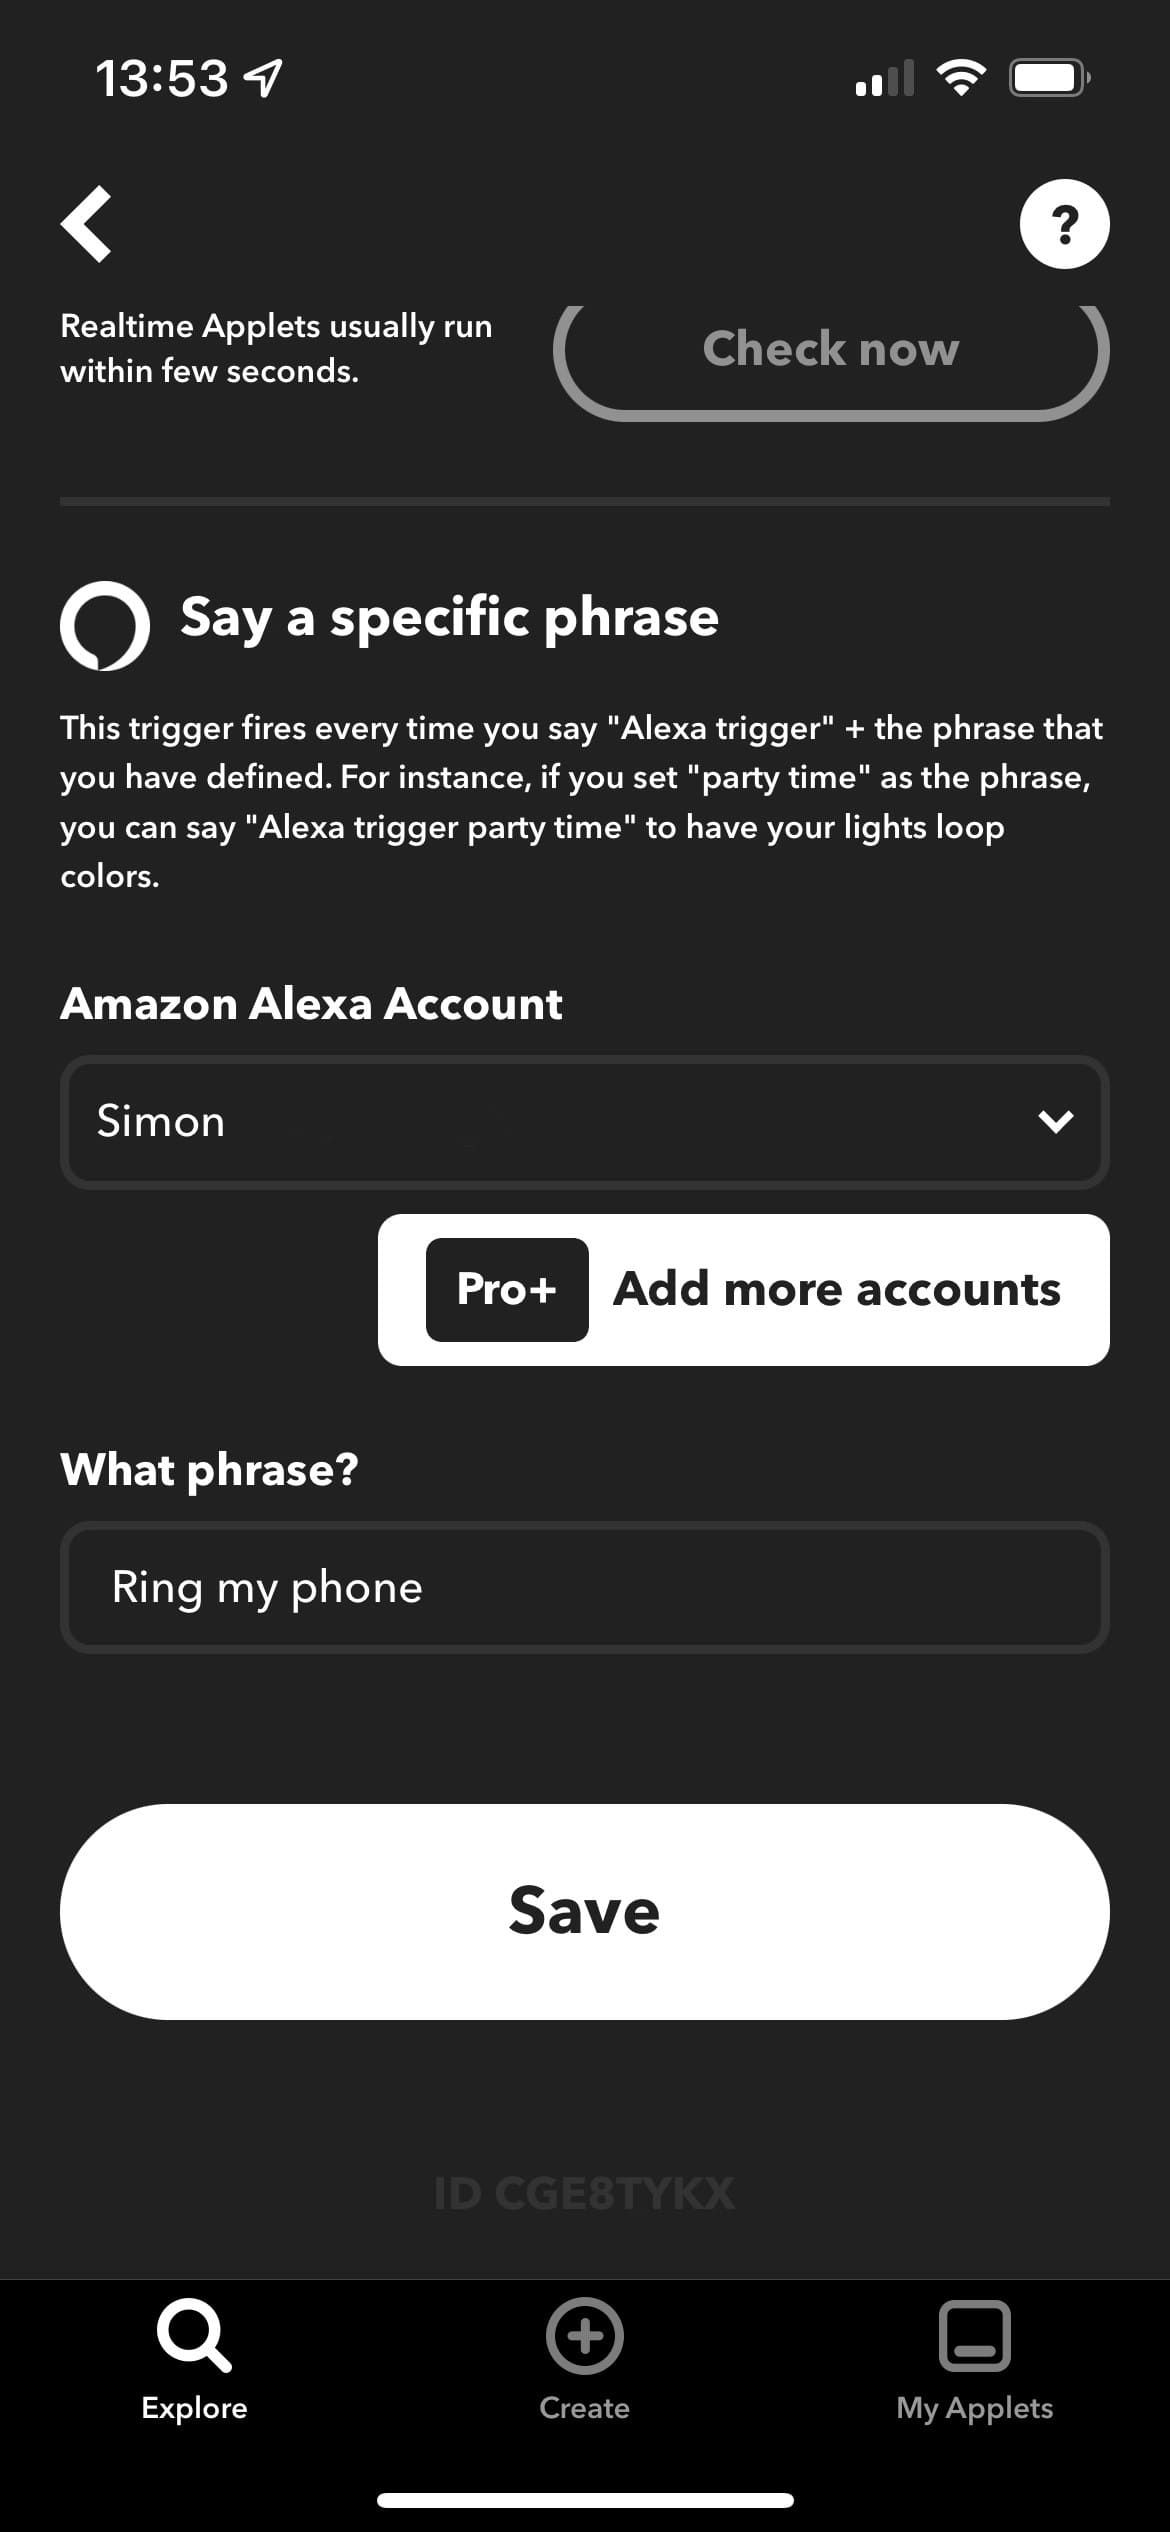
The app will then take you to the Applet setup page. Fill out the required details.
- This page looks complex, but it’s self-explanatory. What you’ll see is highly dependent on the Applet you enable. Some will ask what phrase you’d like to use to trigger the Applet. Others will ask what list you’d like to add a reminder to or what you’d like a repeated calendar entry to say, for example.
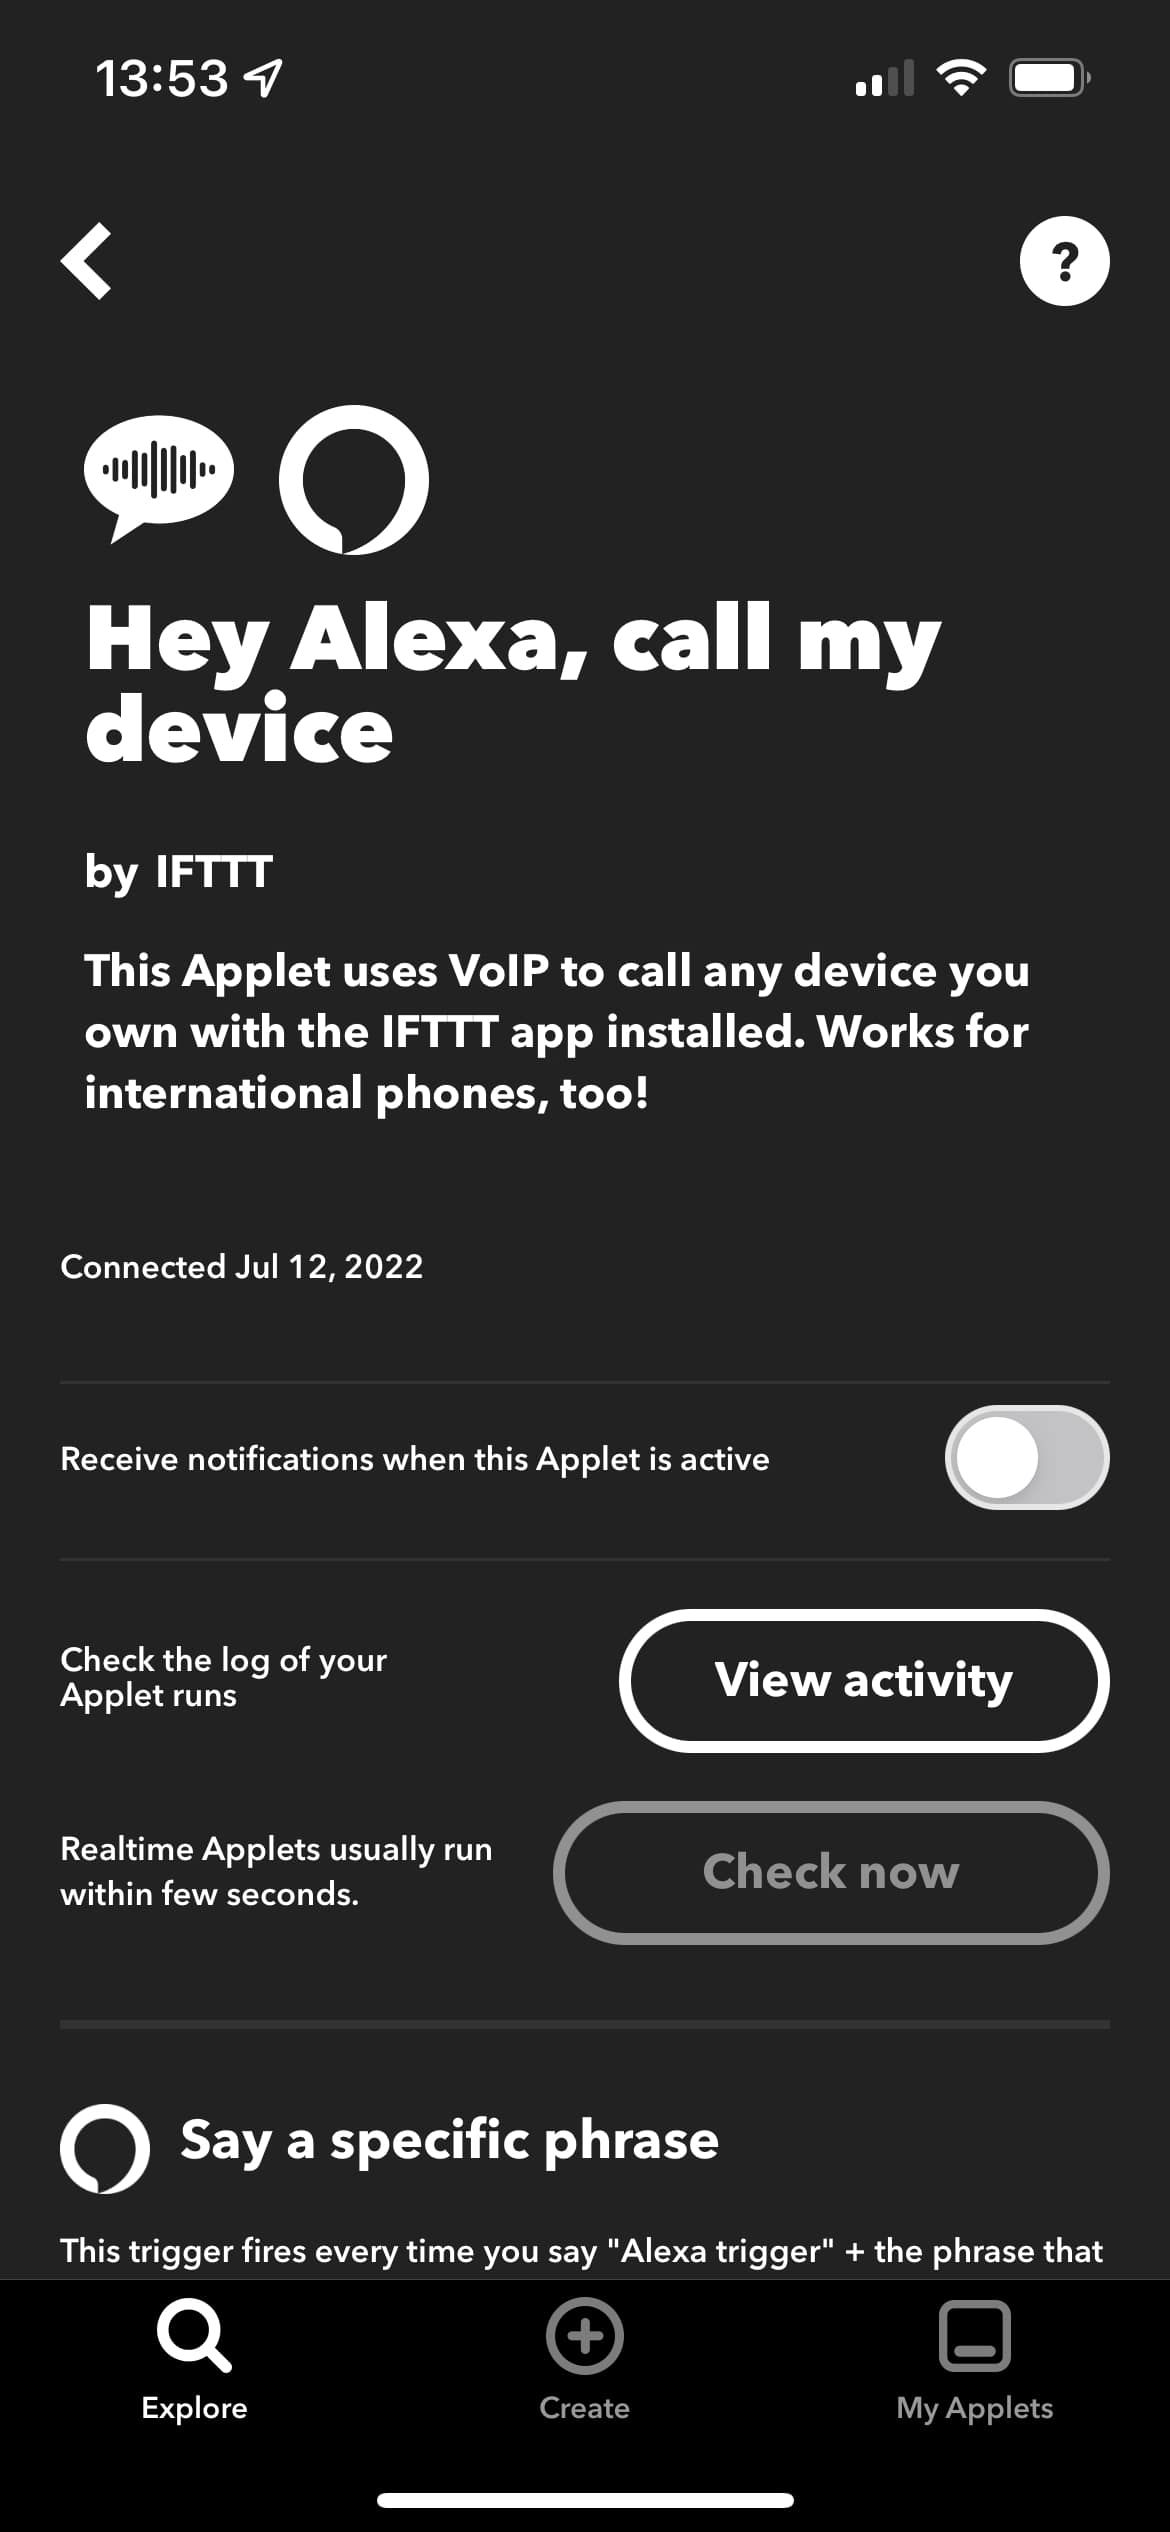
- Enable notifications when the Applet runs and view activity logs here, if desired. These features are useful for debugging when an Applet isn’t working as expected.
- If you’re happy with how everything looks, tap Save.
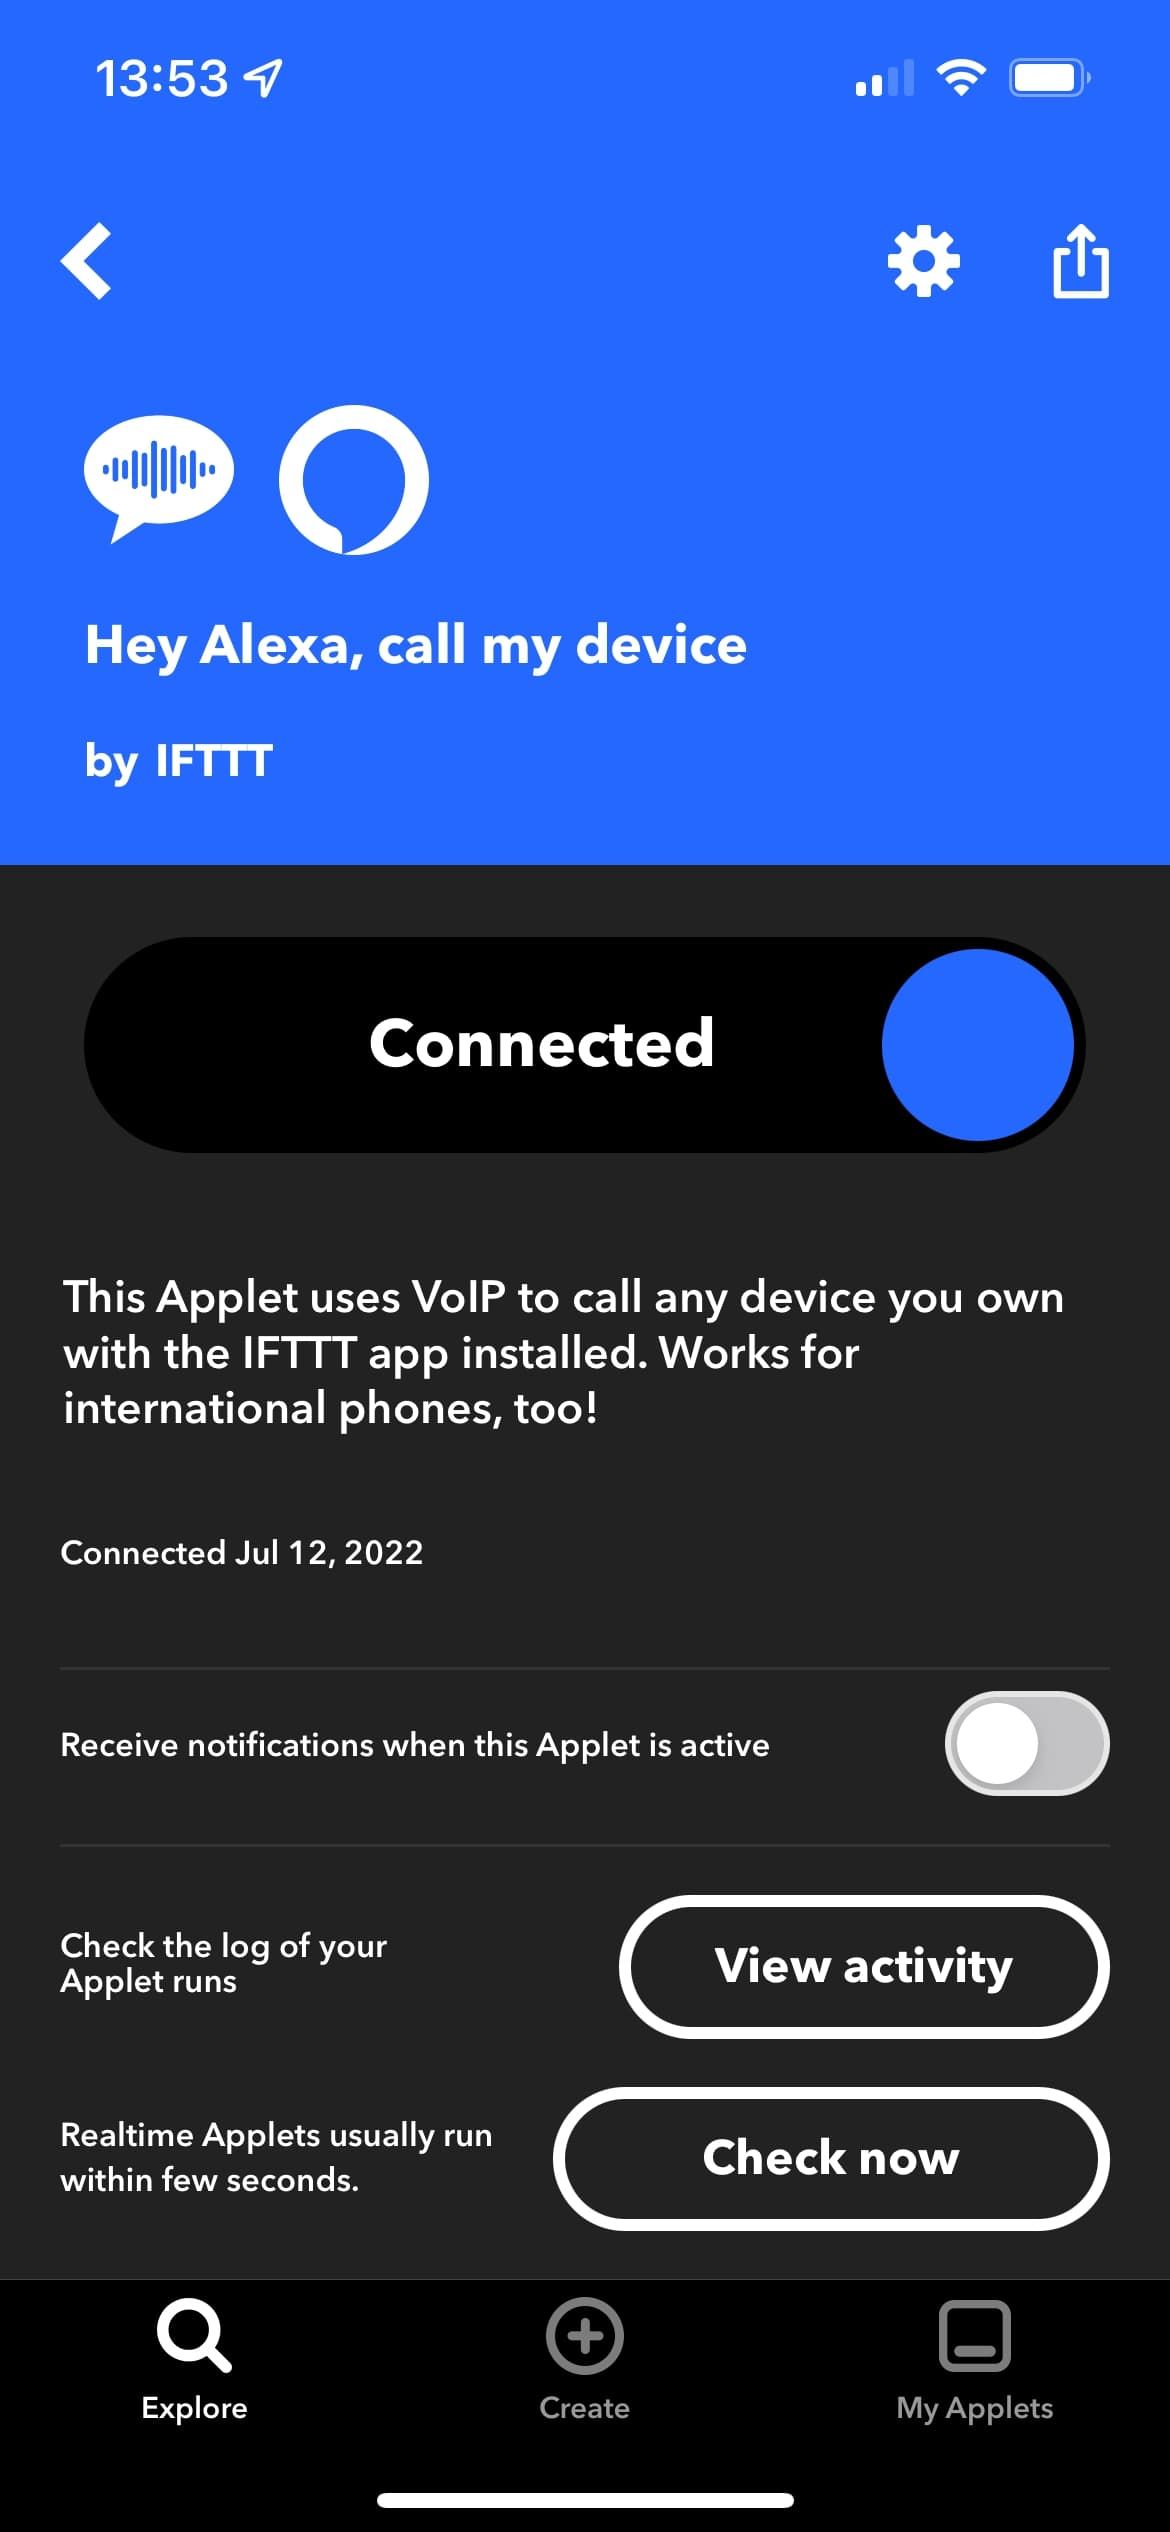
Now, test that your Applet works by triggering it. If it works, great! Feel free to explore the rest of the IFTTT ecosystem. If it doesn’t, check out the next section for some troubleshooting advice.
If you've had a look around the app and found IFTTT interesting, check out our article on other apps that can help you automate repetitive tasks.
Troubleshooting Applets
One of the downsides of IFTTT’s endless capabilities is that sometimes things won’t work, and it can be tricky to pin down the issue. But, there are a few steps you can try before you delete the Applet.
Reconnect the Service
To do this, tap My Applets, then your email address in the top right. Press My services, and tap the relevant service. Select the Settings cog in the top right, then Reconnect. Follow the prompts to log in again.
Remove the Service
Press Remove service to the left of Reconnect on the service’s Settings page. You’ll then need to follow the setup process for your Applet again. Be aware that this will also remove any other Applets associated with the service.
View Activity
Try triggering the Applet, then tapping View Activity on the Applet’s page. To find this, tap My Applets and then the Applet you’re trying to troubleshoot. If your Trigger is working correctly, you should see Applet ran, and the time it ran. If you can’t see it after 30 seconds, you can assume there’s an issue with your trigger.
Confirm Trigger and Action Configuration
On the Applet’s page, tap the Settings cog in the top right. Press the If or Then section, then Configure. Confirm whether the Applet is set up correctly.
If you’re still having issues, take a look at IFTTT's troubleshooting page.
What to Do if You Hit Your Applet Limit
If you’ve reached your five Applet limit, you have two options: delete an Applet, or upgrade your IFTTT account. The former is annoying if the Applet’s setup is complex, but it’s worthwhile if you find something you’ll get more value from.
The latter is worth it if you see yourself using IFTTT for a long time. The Pro plan costs $2.50/month and puts the limit up to 20 Applets. If you choose Pro+ for $5/month, you can have unlimited Applets. Both come with other benefits, like faster execution speeds and customer support.
Take Alexa’s Abilities to the Next Level
When using IFTTT, the possibilities of what Alexa can do are endless. If pre-built Applets aren’t cutting it, you can create your own to suit your needs and share them with the IFTTT community.
Once you get to grips with IFTTT, it becomes incredibly satisfying to implement that feature you wish Alexa had. If you can imagine it, IFTTT can probably do it.


