With companies around the globe increasing their efforts towards building a more inclusive and accessible tech world, it is no surprise that Microsoft, too, is playing its part. The redesigned Windows 11 OS is said to be the most inclusive Windows ever.
Windows 11 comes with a significant overhaul of its user interface. Microsoft’s commitment to tackling the “disability divide” is apparent due to the improved accessibility features that empower people to achieve more. Read on as we discuss everything you need to know about setting up accessibility options on Windows 11.
What’s New In Windows 11?
Windows 11 is redesigned to have a modern and clean design that caters to creativity, ease of use, and productivity. Users across the disability spectrum will find the latest version of Windows to be much more inclusive and easier to use.
If you were previously using Windows 10, you're likely already familiar with assistive tools like the Magnifier, Narrator, Closed Captions, and so on. Fortunately, these tools are not only still in Windows 11, but they're also much easier to use.
There are new sound configurations in Windows 11 that include different start-up and other system sounds, depending on the current PC theme (Light or Dark theme).
There is also a redesigned High Contrast Theme that users can customize with different color combinations to improve readability for different apps. Even the new Closed Caption feature is improved, making it easier to read content throughout Windows 11.
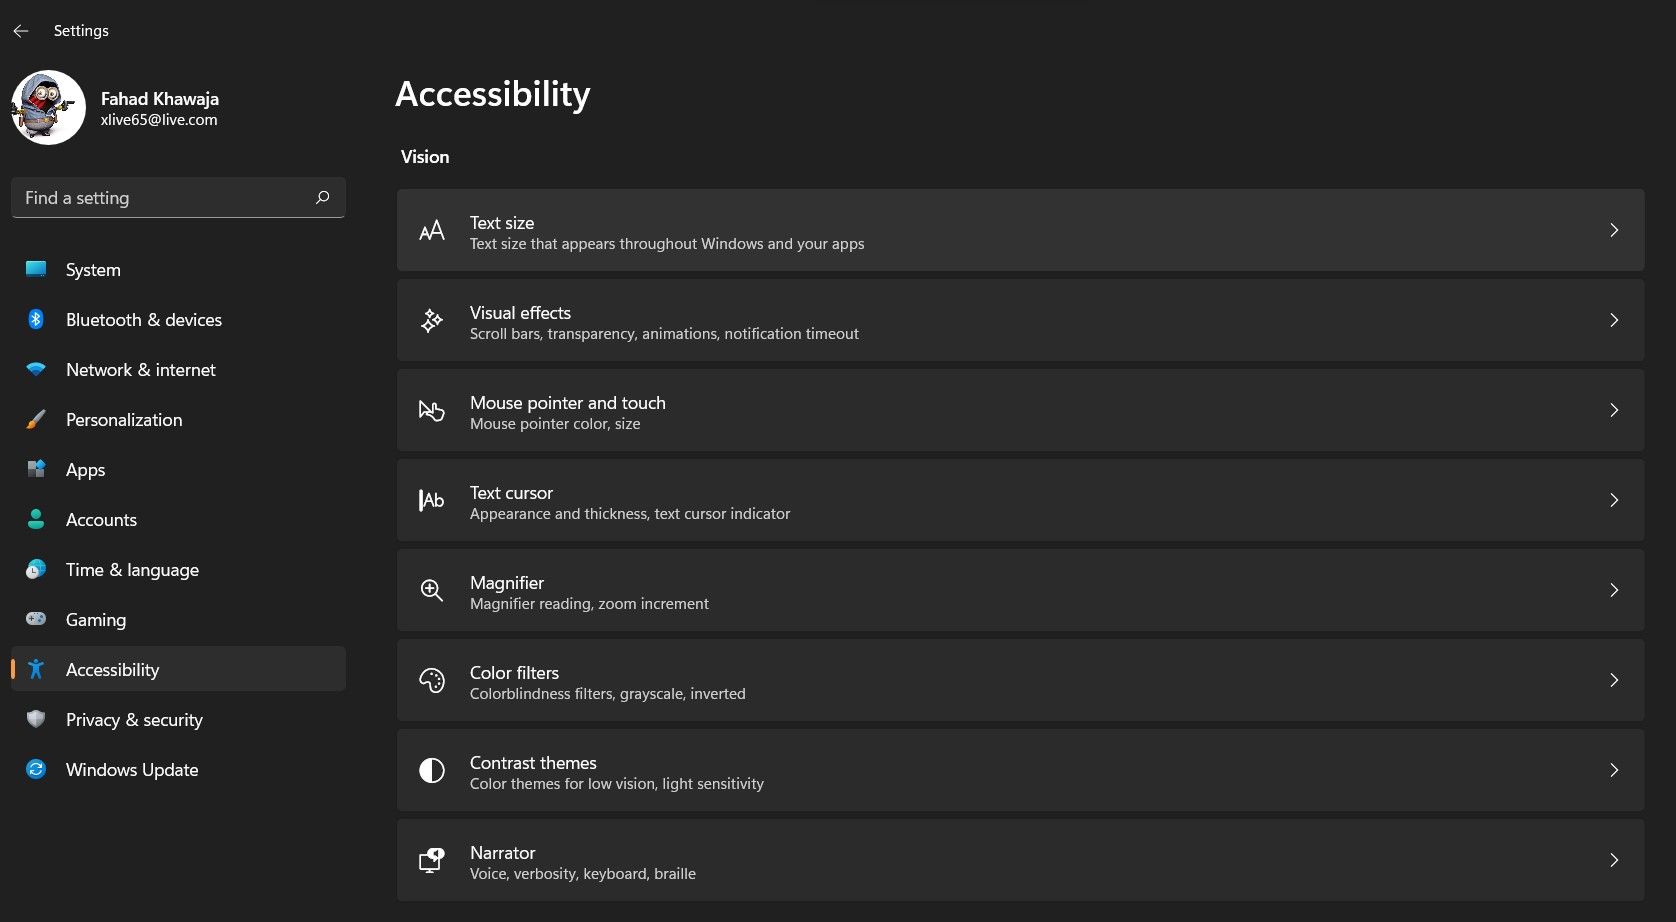
The new Settings app rebrands “Ease of Access” (previously in Windows 10) to Accessibility making it easier to find and configure your accessibility settings. More importantly, the accessibility features of Windows 11 support more applications now. Windows applications such as Office and Windows Subsystem for Linux (WSL) have been redesigned to be more accessible.
Set Up Vision Accessibility on Windows 11
On Windows 11, you can utilize a range of features to help overcome visibility issues.
Increase Text Size on Windows 11
If you want to increase the text size that’s used throughout Windows:
- Launch the Settings app from the Start menu and then navigate to Accessibility > Text size.
- Use the Text size slider to adjust the font size as required
Configure Visual Effects on Windows 11
Changing the visual effects on your PC can also improve visibility. To set up Visual effects on Windows 11:
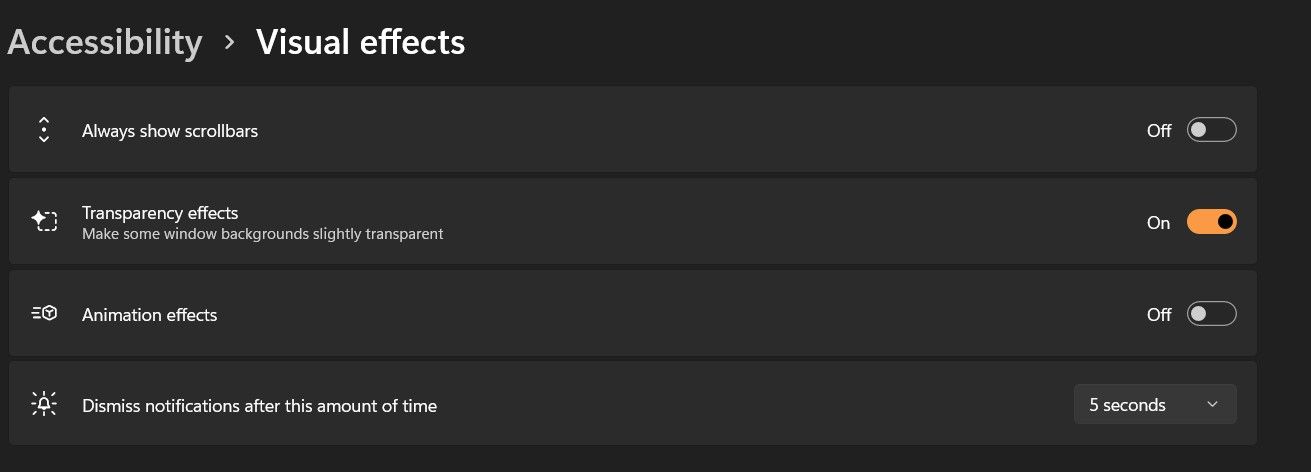
- Navigate to Settings > Accessibility > Visual effects.
- If you want to always show scrollbars on the side of your screen, toggle the Always show scrollbars toggle button on.
- You can even turn on/off Transparency effects and Animation effects from the same page.
In case you find notifications annoying, you can reduce their timespan to dismiss them quicker. To do that, click on the Dismiss notifications after this amount of time dropdown and choose the required option.
Change Mouse Pointer and Touch Settings on Windows 11
It is very easy to change mouse and touch settings thanks to the new accessibility menu.
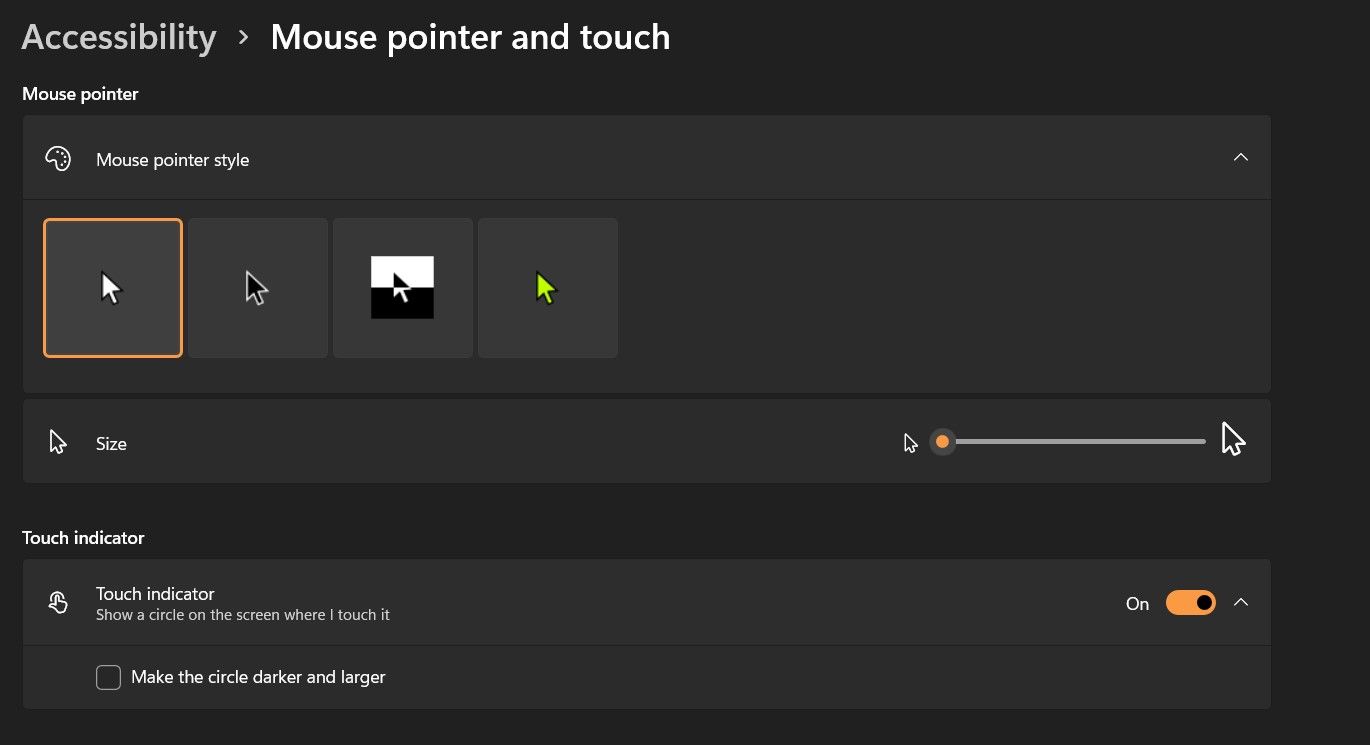
- Navigate to Settings > Accessibility > Mouse pointer and touch.
- To change the mouse pointer style/icon, expand the Mouse pointer style group and select an appropriate icon.
- You can also change the size of the mouse pointer by adjusting the Size slider.
- If you have a touch display, you can turn on the Touch indicator toggle button to see a circle at the point where you touch on the screen.
- Check the Make the circle darker and larger checkbox to improve visibility further.
Set up Text Cursor Accessibility Options on Windows 11
Another important accessibility feature in Windows 11 is the text cursor customization menu. Here’s how you can make the most out of it:
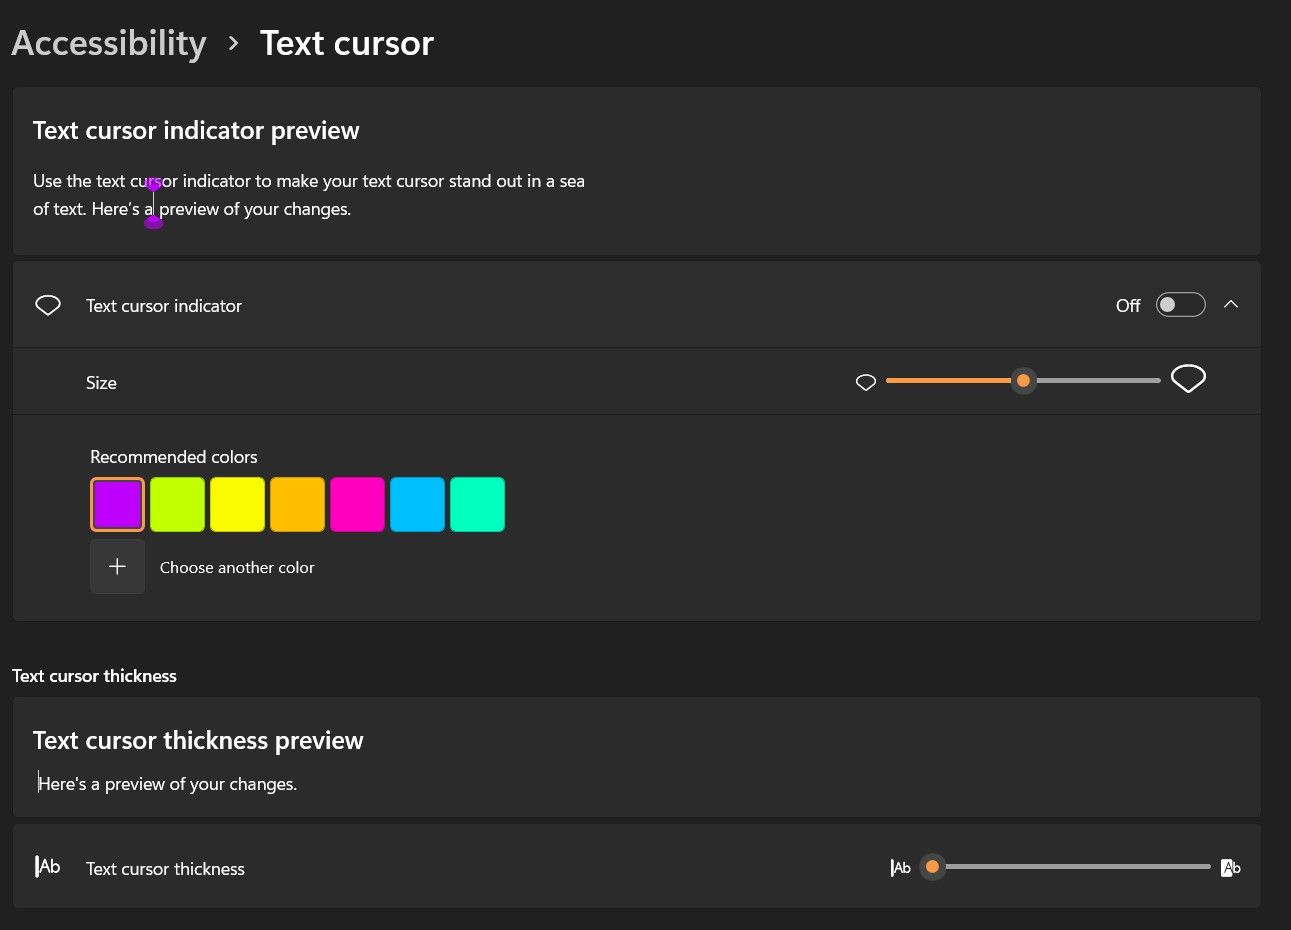
- Launch the Settings app from the Start menu and then navigate to Accessibility > Text cursor.
- If you have difficulty locating the text cursor while using the PC, you can turn on the Text cursor indicator toggle button. Once turned on, you can further customize the color and size of the text cursor.
- Change the cursor indicator size using the Size slider.
- It might also be a good idea to thicken the text cursor to make it easier to view on the screen. You can adjust the cursor thickness through the Text cursor thickness slider.
However, if you thicken the text cursor too much, you will not see letters as you type them.
Set up Magnifier on Windows 11
The magnifier settings on Windows 11 are pretty straightforward to set up.
- To turn on Magnifier on Windows 11, navigate to Settings > Accessibility > Magnifier.
- Turn on the Magnifier toggle button and choose the required Zoom level by adjusting the “+” and “-“ buttons.
- Select the required magnifier View from the dropdown (Docked, Fullscreen, or Lens).
You can also set up a Reading shortcut and an Invert colors shortcut from the same screen.
Enable Color Filters on Windows 11
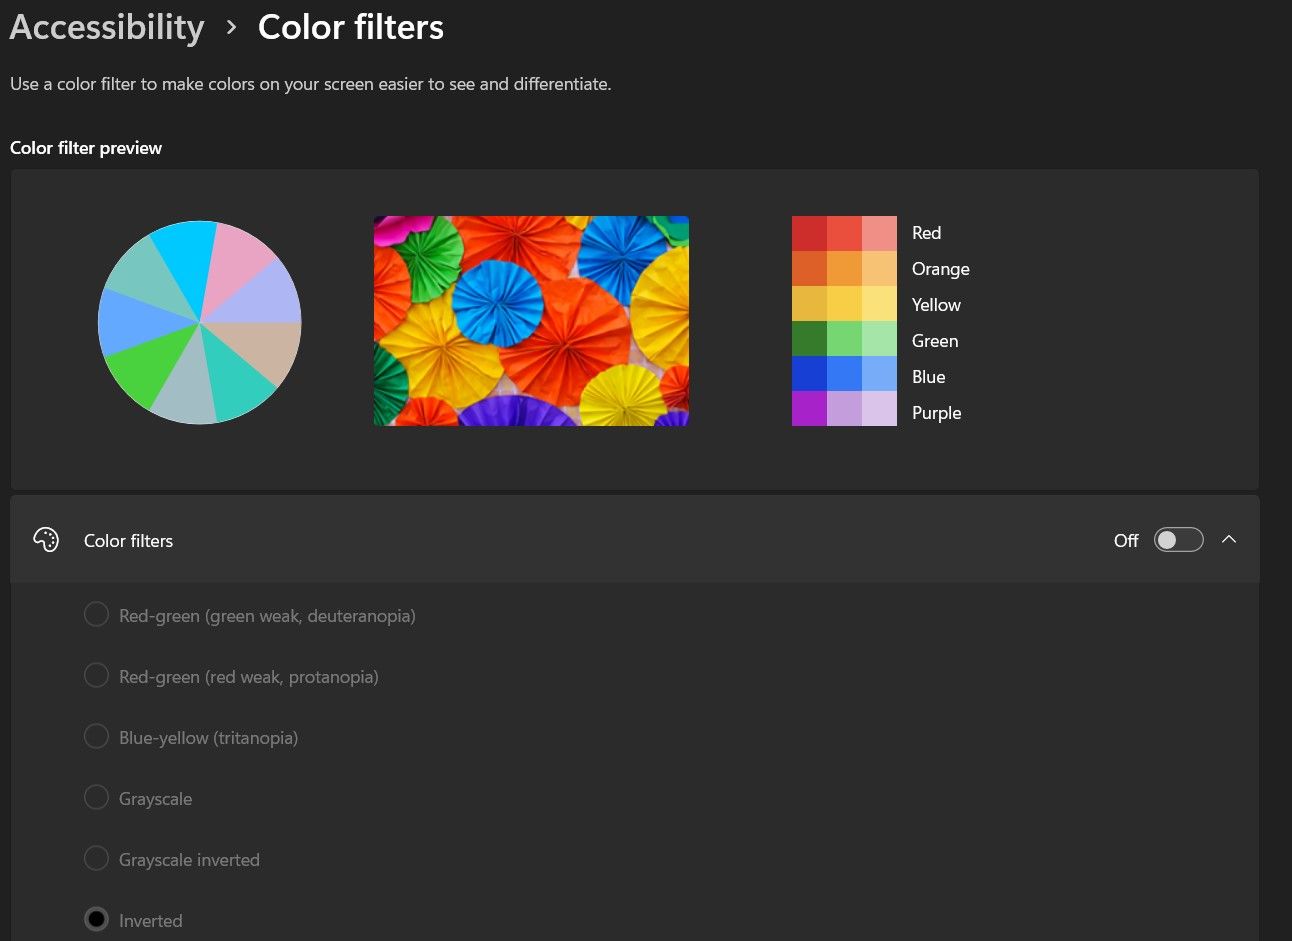
Color filters can be beneficial to users with color blindness. Here’s how you can set up Color filters in Windows 11:
- Navigate to Settings > Accessibility > Color filters.
- Enable the Color filters toggle button, and then select the required scheme by expanding the group.
- You can also turn on keyboard shortcuts to quickly enable Color filters. To do so, turn on the Keyboard shortcut for the color filters toggle button. You will now be able to use Win + Ctrl + C to turn on color filters quickly.
Turn on Contrast Themes on Windows 11
Here’s how you can enable contrast themes on Windows 11:
- Navigate to Settings > Accessibility > Contrast themes.
- From the Contrast themes dropdown, choose the required theme and click on Apply.
Set up the Narrator on Windows 11
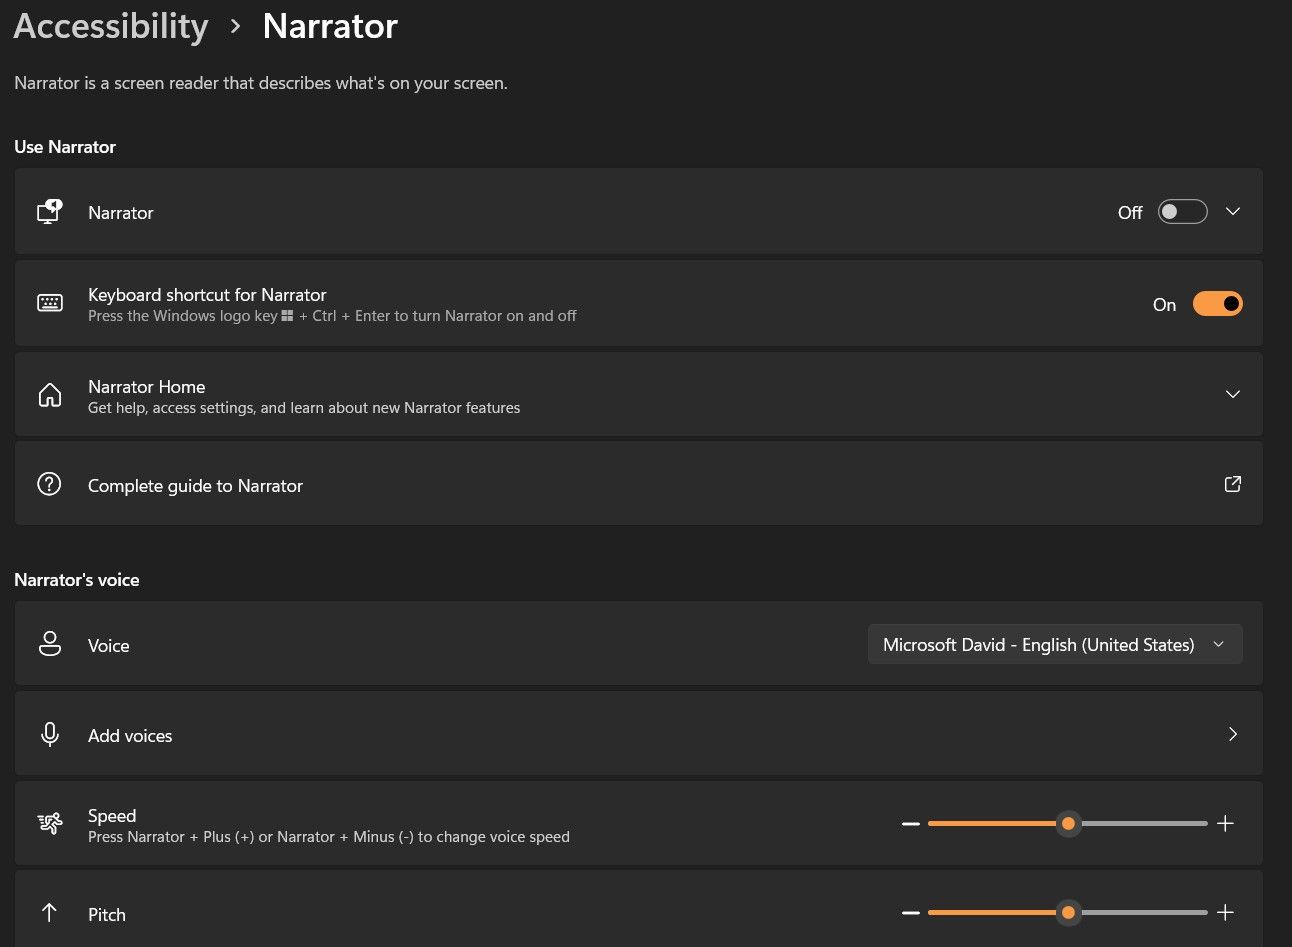
The Windows narrator can be set up as follows:
- Navigate to Settings > Accessibility > Narrator.
- Enable the Windows narrator by toggling the Narrator toggle button
- To change the narration voice, select the preferred narration style from the Voice dropdown. You can also add a custom narration voice using Add voices.
- You can adjust the Pitch, Volume and, Speed of narration using the sliders.
- To change the Verbosity level of the narration, use the Verbosity level dropdown menu.
- If you want to use a braille display with the PC, click on Use a braille display with Narrator and follow the on-screen steps.
How to Set up Mono Audio and Captions on Windows 11
Windows 11 users can enable dedicated hearing accessibility options to improve their user experience. Here’s how you can set up Captions and Mono audio:
- Navigate to Settings > Accessibility > Audio.
- Enable the Mono audio toggle button to combine the left and right audio channels into a single channel.
- To enable captions on Windows 11, select Captions from the Accessibility settings and then choose the required Caption style. You can further customize the style by clicking on Edit.
How to Enable Speech Recognition and Voice Typing on Windows 11
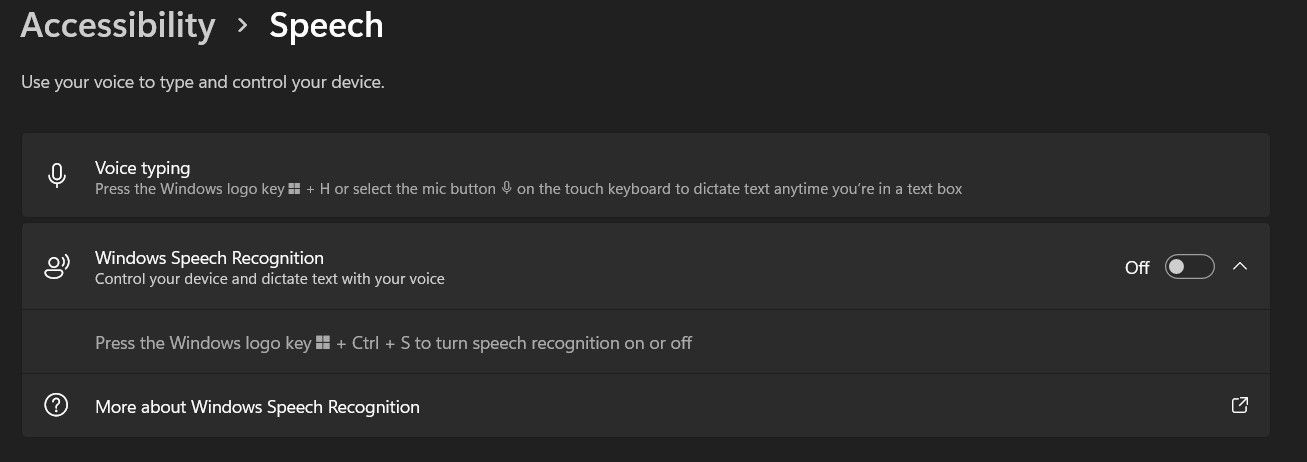
To set up speech recognition on Windows 11:
- Navigate to Settings > Accessibility > Speech.
- To control your PC using speech, enable the Windows Speech Recognition toggle button.
You can enable voice typing on Windows 11 by pressing Win + H whenever you’re in a text box.
Windows 11 Is More Accessible Than Ever
Windows 11 is redesigned for the better, and thanks to the improved accessibility features, users facing disabilities can make the most out of their Windows PC. And best of all, Windows 11 comes with a whole range of new settings, so you can truly customize it to your heart's content.


