Much of our work, rest, and play now rely on reliable and seamless connections to the internet. Whether you are watching Netflix or using Remote Desktop Services to work from home, there is a good chance that all that traffic flows through one device—your laptop's Wi-Fi adapter.
But what happens when that adapter fails, and you lose 90% of your laptop's functionality? One simple choice is to plug in a USB adapter. But this has drawbacks and replacing your internal Wi-Fi adapter might be easier than you think.
This guide looks at how to replace your laptop's internal Wi-Fi adapter.
Wi-Fi Down? It Could Be Hardware
Not all Wi-Fi problems are a result of hardware failure. So, before your rush out and buy a new adapter, it is necessary to establish just where the problem lies. There are some steps that you can take to check whether your hardware is at fault.
It is worth taking the time to run through several steps you can take to troubleshoot your network connection. This will establish if the problem lies somewhere else. However, once you worked through all the necessary troubleshooting and there are still problems there is a very good possibility your Wi-Fi adapter has failed.
Once you have reached this stage it is time to look at your options.
Internal Wi-Fi Adapters vs. USB: Why Internal Wi-Fi Is Best

When your Wi-Fi adapter fails it is easy to opt for the simplest solution and order a USB Wi-Fi adapter. This option is definitely convenient, but it can come at a cost. There are many problems you can run into while using USB Wi-Fi adapters. A few of the major limitations are listed below:
- Interference: USB Wireless adapters are often more susceptible to interference from other wireless devices.
- Limited Range: Size constraints limit the signal strength of USB adapters. This may result in you being unable to connect to more distant networks.
- Portability: They might not be large or bulky, but USB wireless adapters are another thing to forget when setting off for a critical business meeting (or gaming session!)
- Inconvenient: The most obvious inconvenience is that it ties up a USB port. But additionally, having something permanently plugged into a USB port is also a pain. Furthermore, this makes the adapter and the port more susceptible to damage.
Internal Wi-Fi adapters suffer from none of these drawbacks. And depending on the model of your laptop, installation could be achievable armed with nothing more than a screwdriver.
How to Replace Your Internal Wi-Fi Adapter
The first thing to check is whether there is easy access to your internal Wi-Fi adapter. This may not be a deal-breaker. But unless you are comfortable stripping laptops down to the component level, this is not a practical option. This is a scenario that lies beyond the scope of this guide.
The following steps walk you through the process of changing your internal Wi-Fi adapter.
-
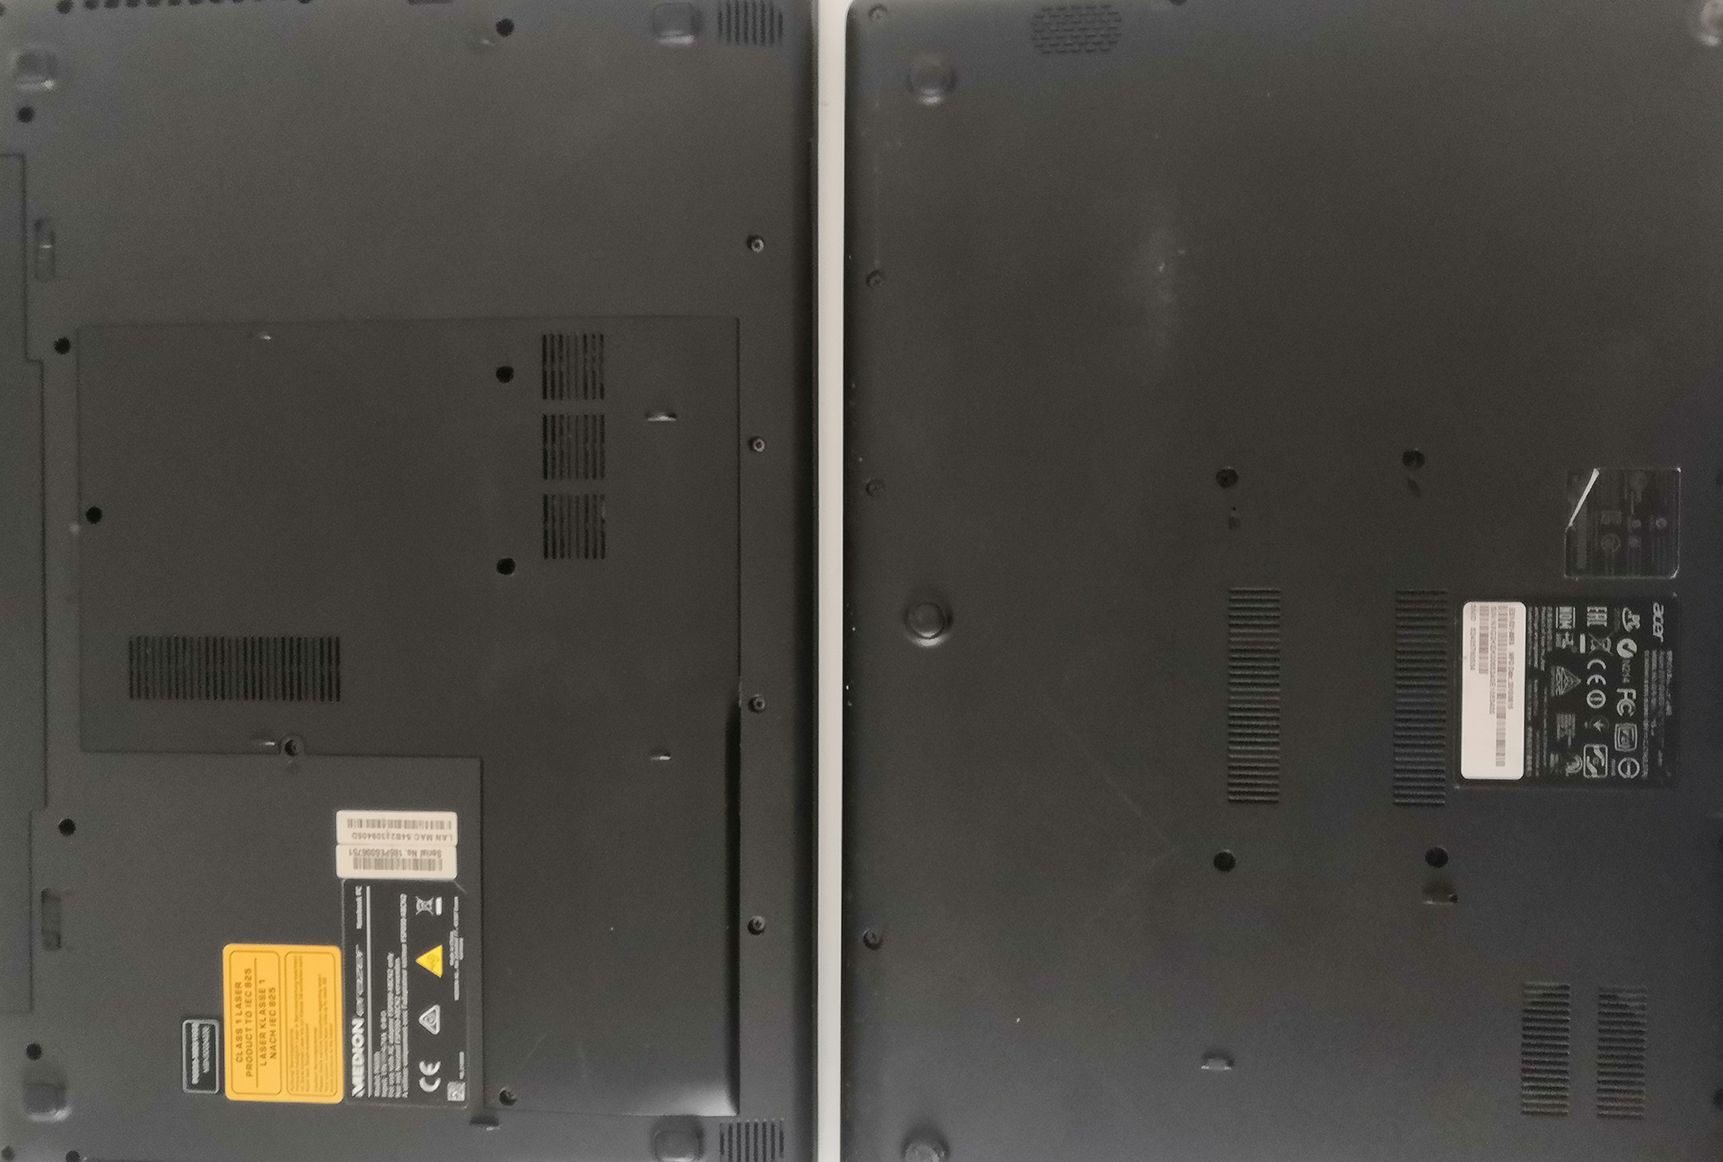
Check for access: Checking you have access is the first step to take. This is a simple visual test. Check underneath your laptop to see if there is an access panel. This should be clearly visible. The photograph below shows two laptops: one with an access panel and one without.
-
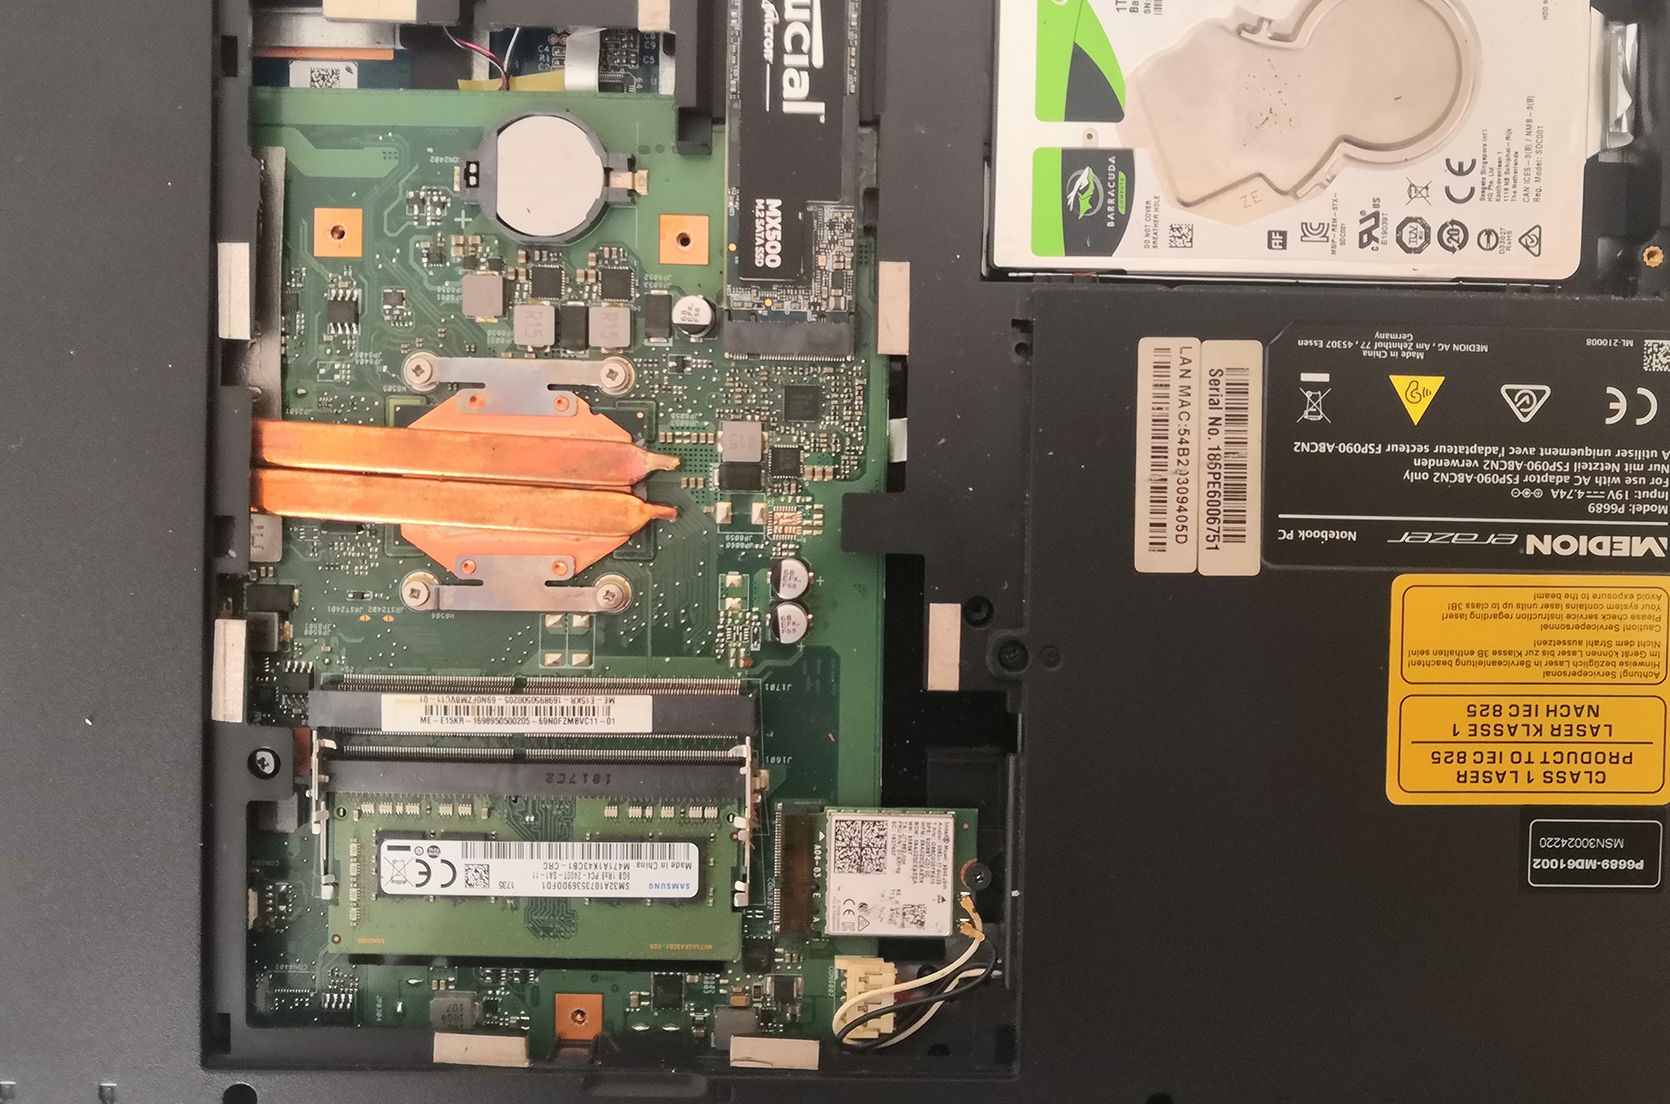
Remove the access panel: There are usually several screws securing the panel. Carefully remove these and the panel should pry up. Be careful when lifting the panel as some need to be lifted from a certain point. Look for indentations or arrows that could denote where to lift it from.
-
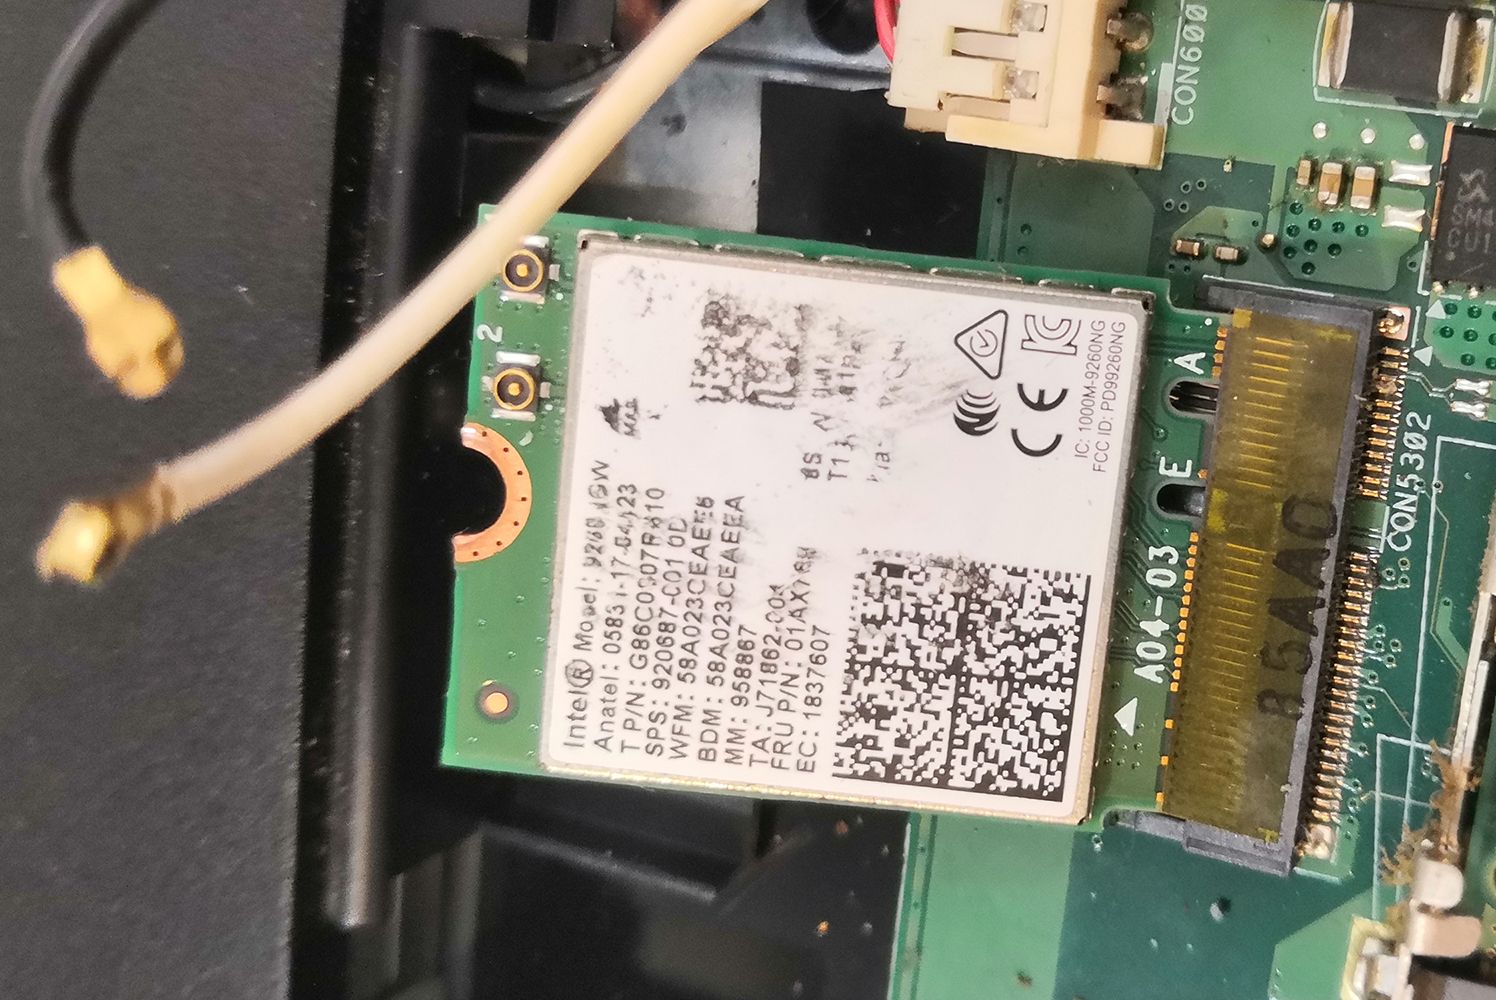
Identify your Wi-Fi Adapter: Your internal Wi-Fi adapter is easily identifiable. It is similar in size to an SD memory card and will have two thin cables attached to it. These are antennae cables and are usually terminated with gold-plated plugs. The photo below shows what to look for.
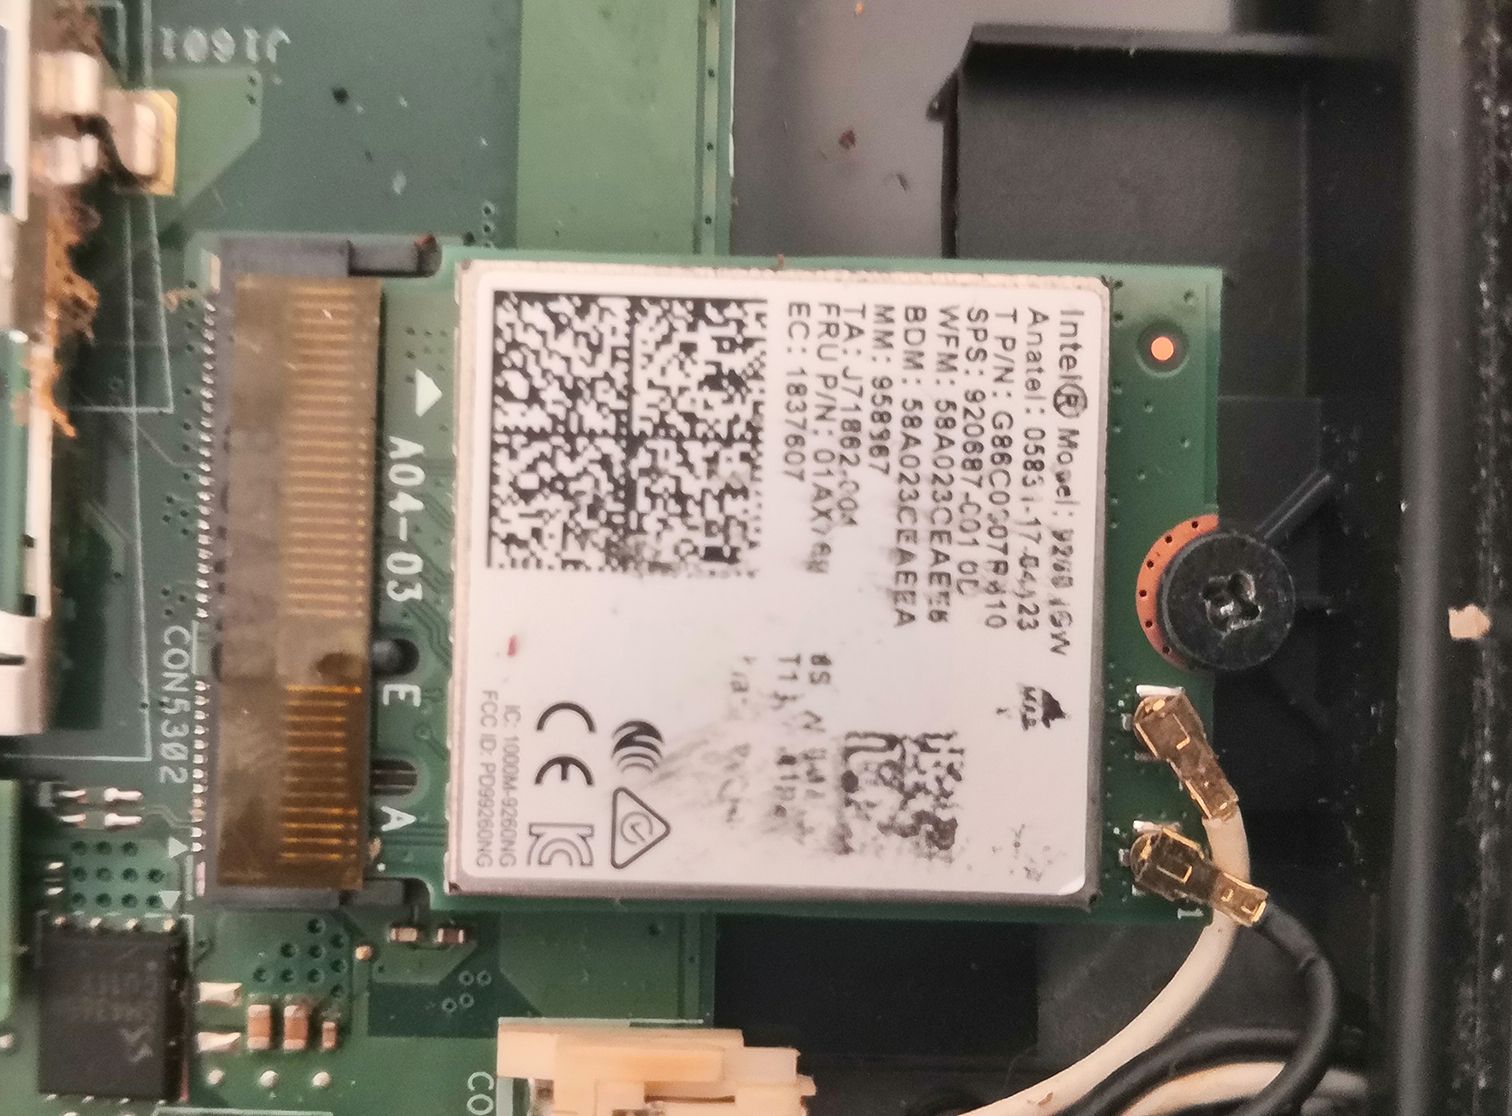
- Remove the antennae cables: A little care is required here because these are quite delicate. The first thing to do is to note where the antennae cables go. It is important that they are replaced the same way. Taking a photo beforehand is good practice. Once noted, gently prise these from their sockets. Fingernails work quite well. In the absence of these, a small flat-headed screwdriver will do the trick.
-
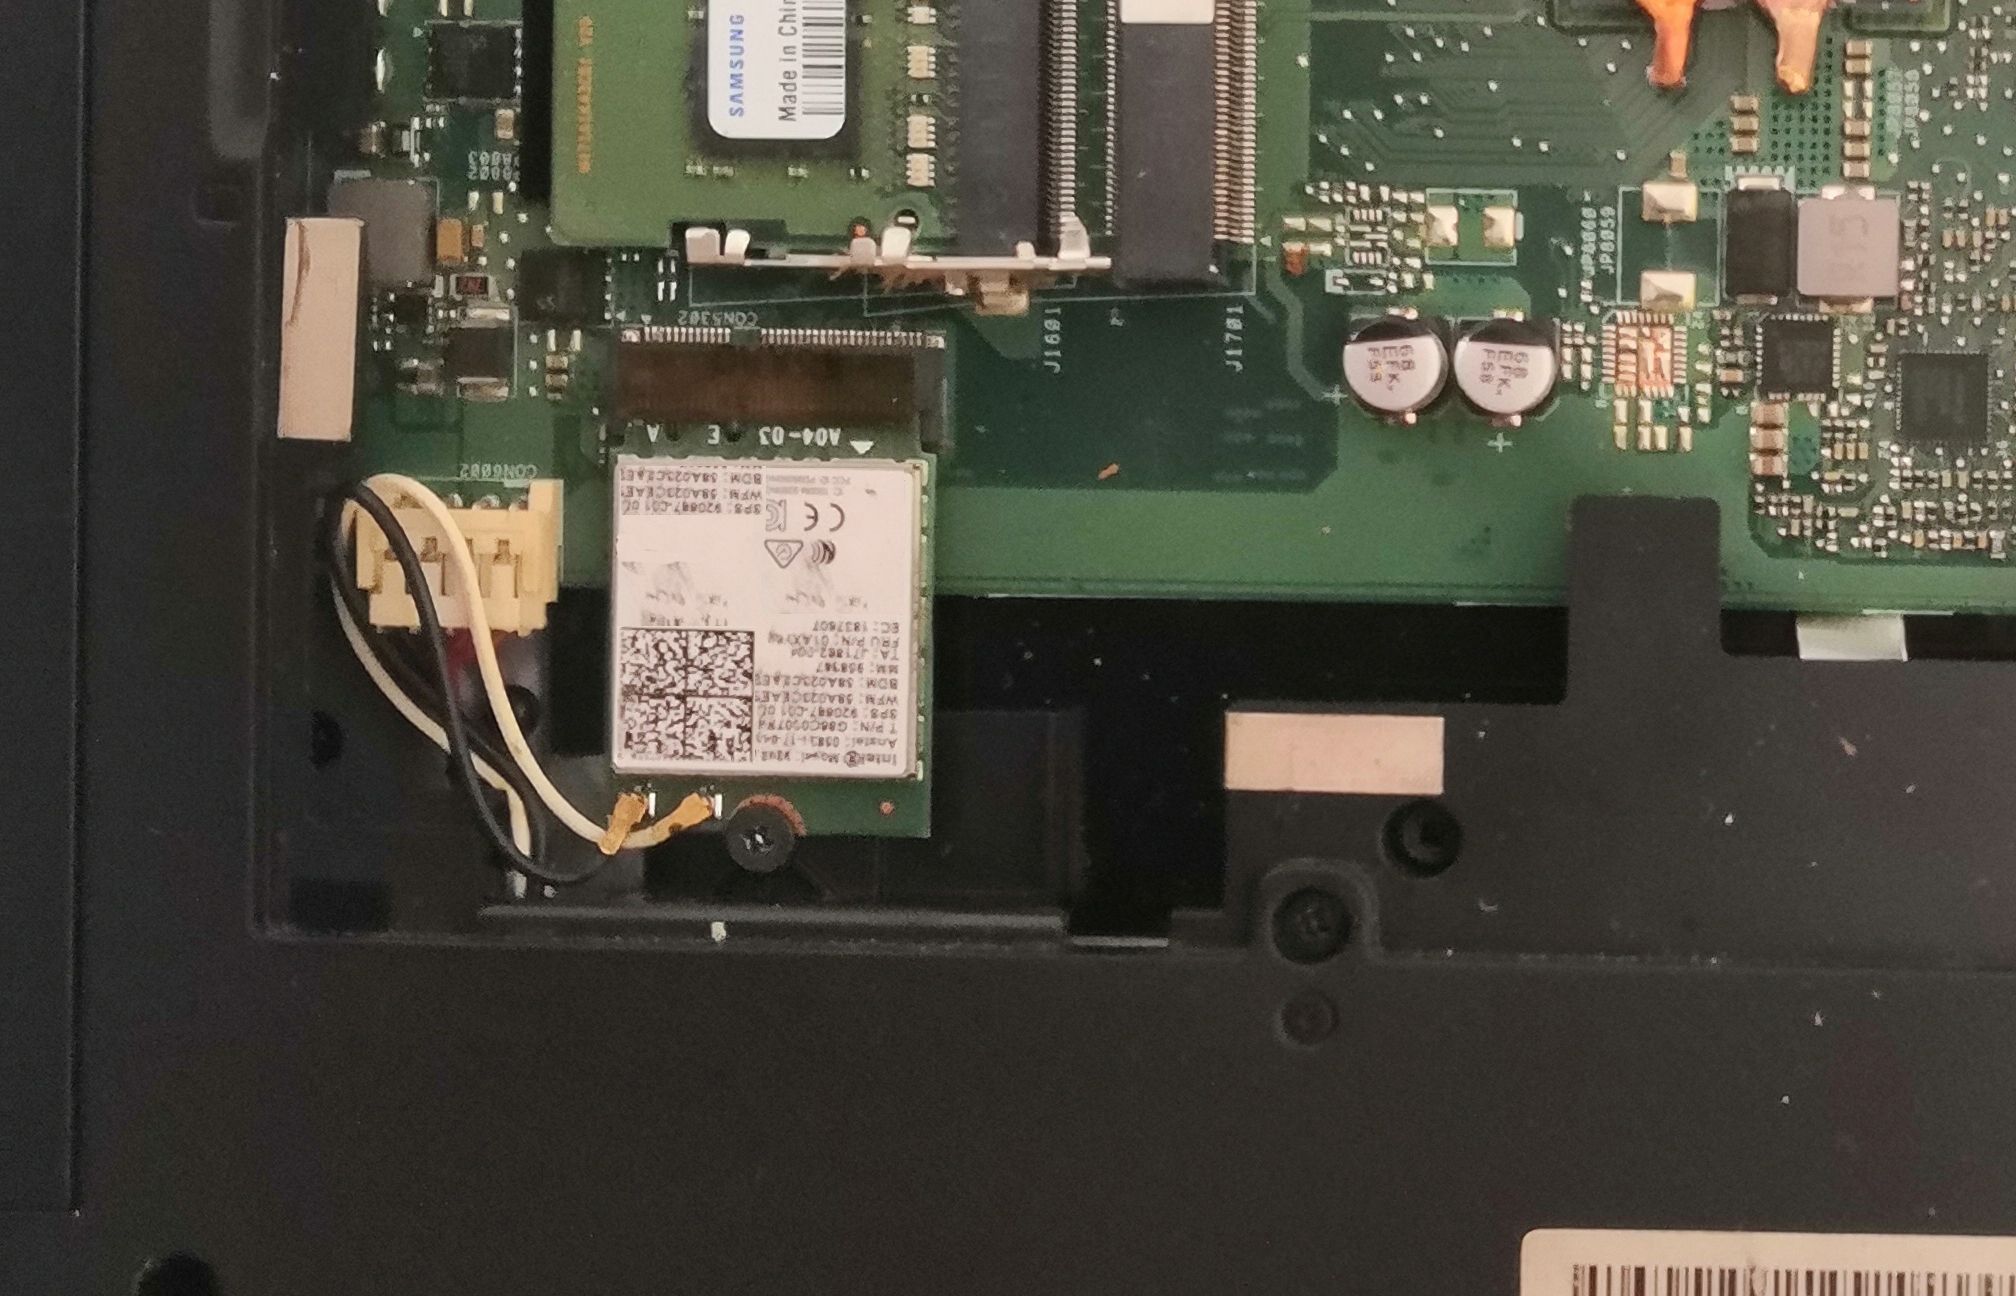
Remove the retaining screw: The next step is to unscrew the small retaining screw. This also needs to be done carefully; the last thing you want is a loose screw rattling about the innards of your laptop. It is okay to use a slightly magnetized screwdriver but take care to avoid touching circuitry and connectors. The Wi-Fi adapter can now be removed from the laptop.
- Insert the new Wi-Fi adapter: Now you can install the new adapter. The connectors should slide easily into the vacated slot, then use the retaining screw to secure it in place.
-
Reattach the antenna cables: This is the trickiest part of the whole operation. Care and patience are the most important tools here. The cables will clip into place easily if they are lined up properly, but never force them—that will probably end up damaging the cable or the adapter. Gently work them until they click into place. Of course, always make sure you connect them the right way around. One thing to note here is that is often easier to attach the antennas before the Wi-Fi adapter is secured in place.
- Close the access panel: If the panel sits securely without the screws, then a clever idea is not to secure the panel until you are sure that the adapter is installed correctly. But it is always good practice to have it in situ when switching on your laptop.
-
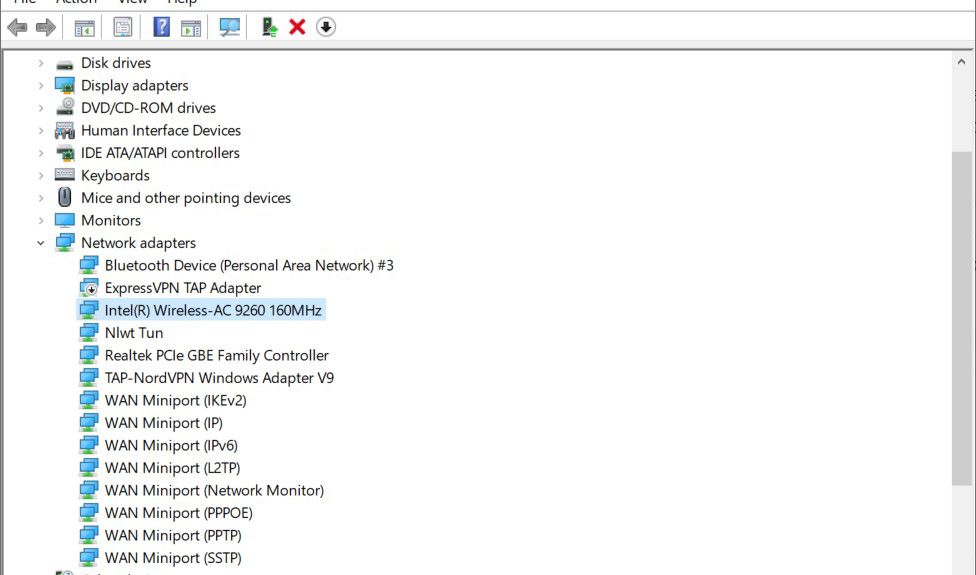
Switch on your laptop and check the device manager: Boot your laptop and use the Device Manager to verify that the adapter has been successfully installed. To do this, type Device Manager into the Windows Search Box. Once it is opened expand the Network adapters listing, you should see the adapter listed among the network devices.


If all has gone well, your laptop should now be back in the land of the connected and restored to fully functional.
Laptop's Wi-Fi Not Working? An Internal Adapter Is the Best Fix
For a task that will take less than 15 minutes, fitting an internal Wi-Fi adapter is worth that little extra effort. An internal adapter does not suffer from the same drawbacks as USB adapters and is impossible to forget! If you have a laptop that allows easy access to the internal Wi-Fi adapter, then this is the route you should go.