
Have you ever seen a beautiful landscape image and wondered how the photographer captured such an amazing sky too? For dedicated professionals, this may not be by chance alone.
Professional photographers have been known to spend days or even weeks in the great outdoors waiting to take the perfect shot. But you may be surprised to learn that there are many photographers who routinely replace their skies in Photoshop instead. Which is a lot quicker and easier.
In this article, we will show you an easy way to replace the sky in any photo using Photoshop. To take it a step further, we’ll also show you how to easily edit the rest of your image quickly so that it matches your new sky.
How to Replace a Sky in Photoshop
-
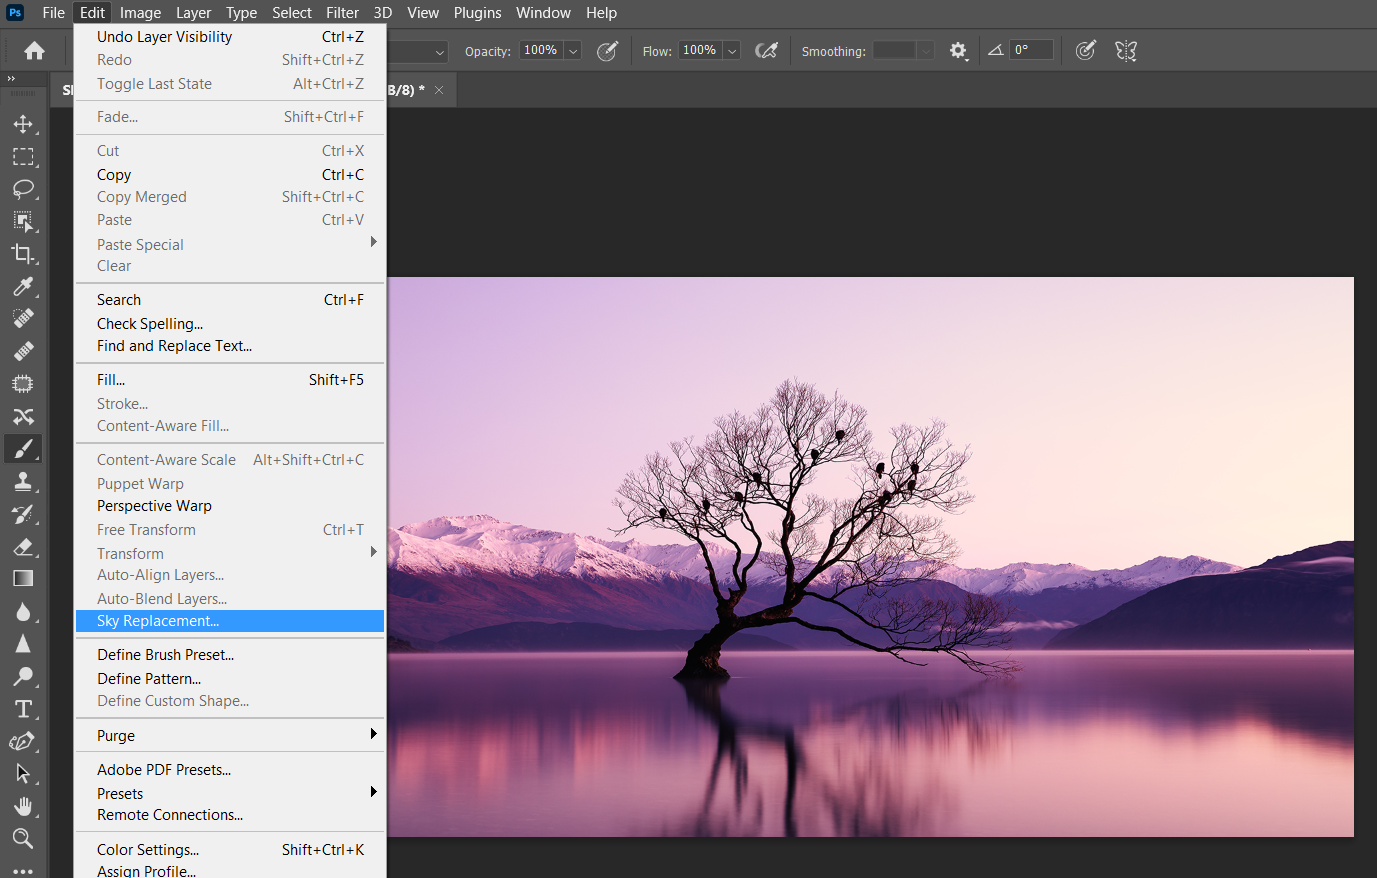
Launch Photoshop and import your image. Then select Edit > Sky Replacement.
-
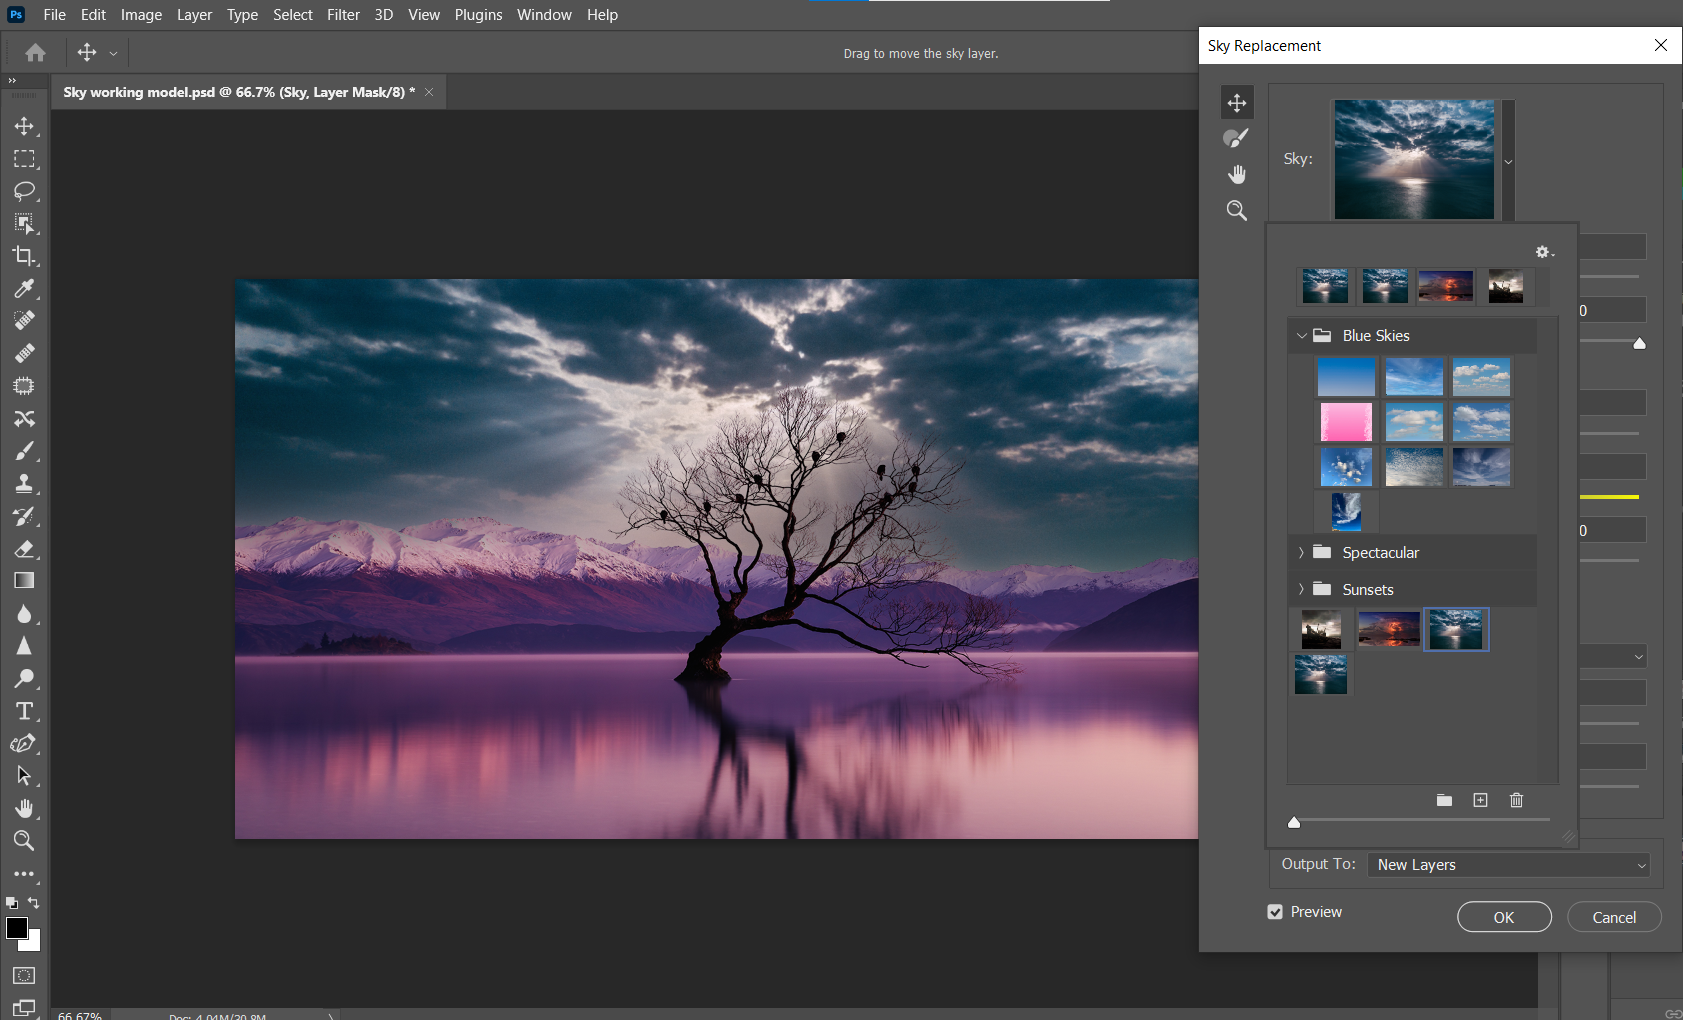
The sky replacement dialogue box will pop up. From the Sky thumbnail box at the top, click on the down arrow.
-
Another option box will open. Select the gear tool and New Sky.
-
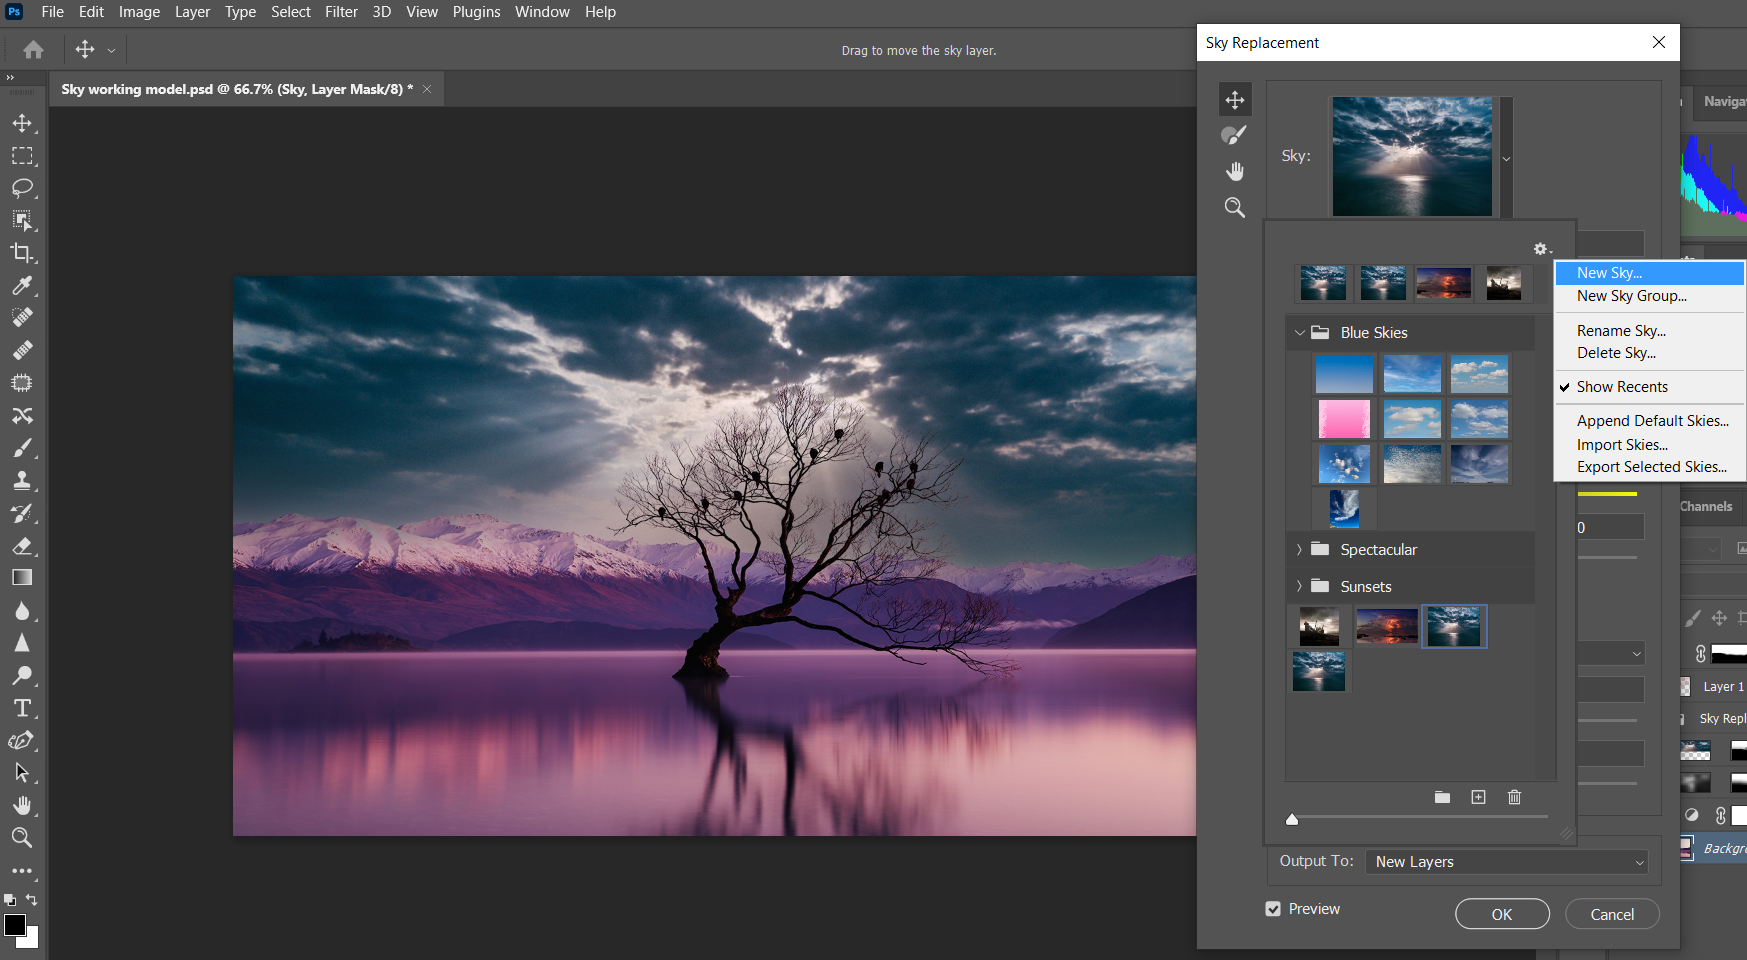
Photoshop will open your default downloads location box. Select the sky image that you want to use and click Open.
-
With your sky loaded in the preview box, all the Sky Replacement controls will be available to help blend the two images together. Adjust each slider to your tastes. Then click OK.
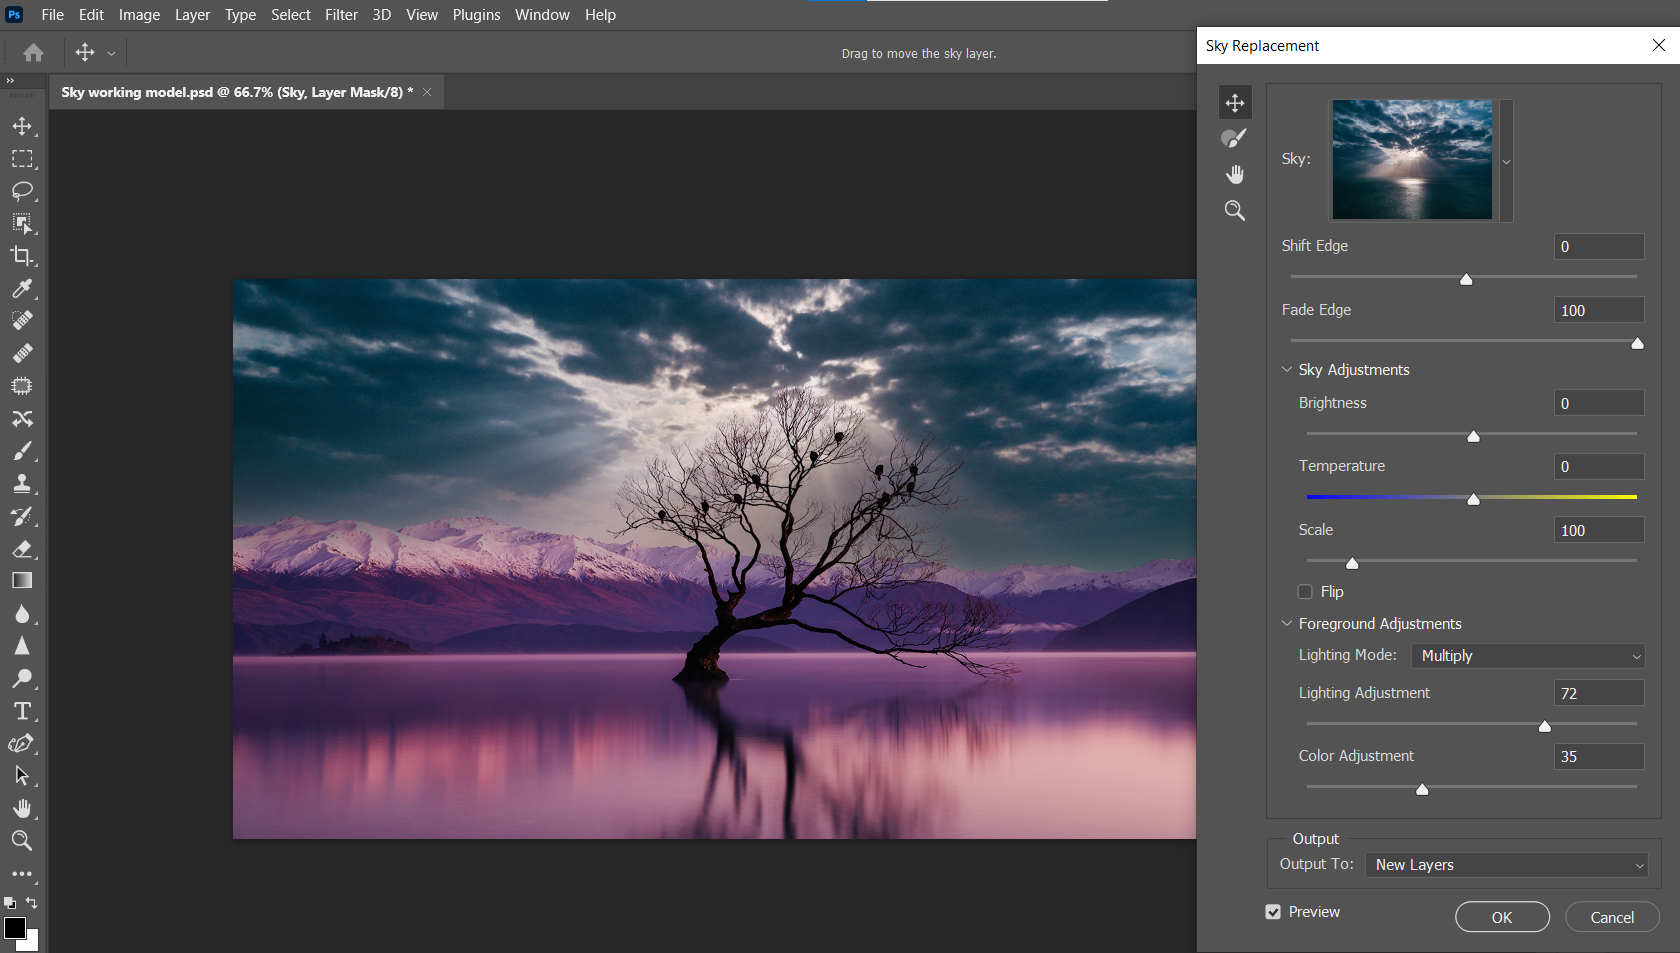


Most images will require their own unique adjustments. We recommend you experiment with each slider to see how Photoshop will render each adjustment.
Before we move onto the next step, here are brief explanations of each adjustment option found in Step 5.
- Shift Edge will shift the horizon line of your new sky up or down by way of a gradient.
- Fade Edge is a much more subtle adjustment for transitioning your main image with your new sky.
- Sky Adjustments is a drop-down menu with three options to consider: Brightness, Temperature, and Scale. If you check the Flip box, your sky will flip horizontally to give you a different look.
- Foreground Adjustments is another drop-down menu containing Lighting Mode, Lighting Adjustment, and Color Adjustment options. These controls will further enhance the transition zone of your main image and new sky.
- Output tells Photoshop how to render your new sky in the layer stack. The default option is New Layers, which is usually the best way to further enhance your image later on.
Editing Your Image to Match Your New Sky
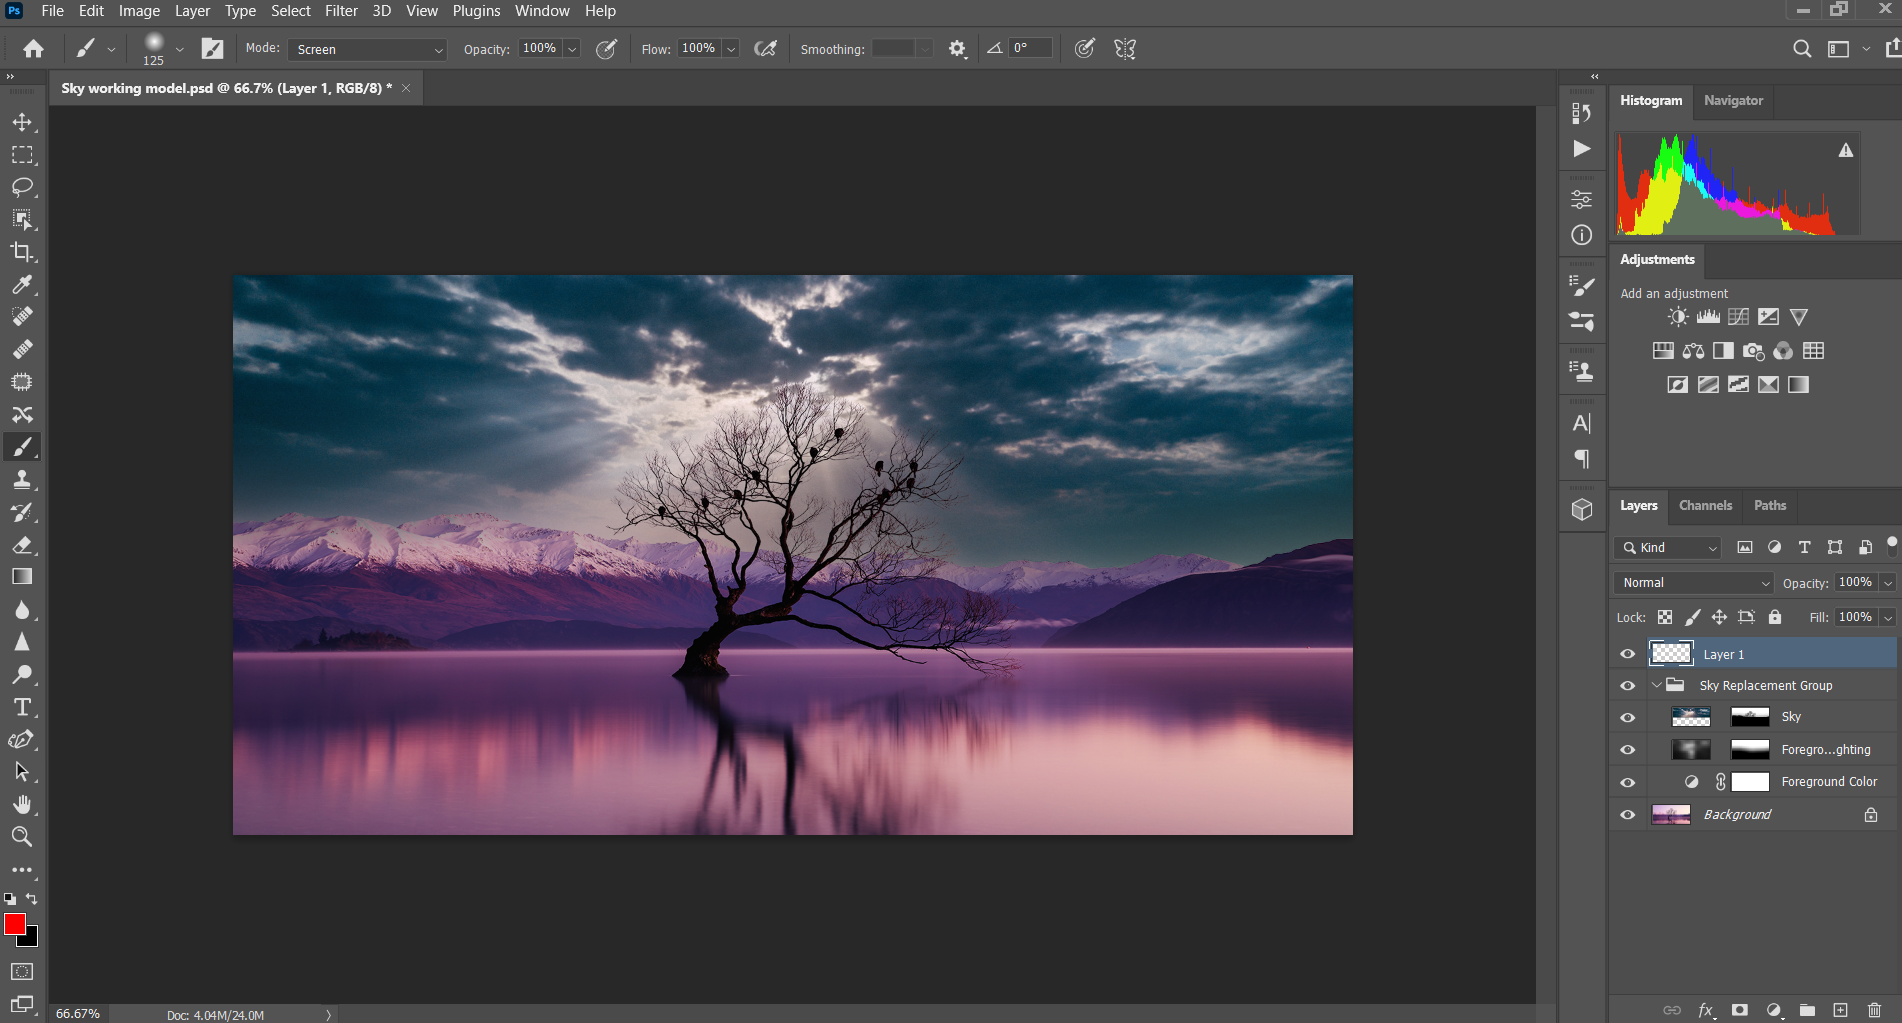
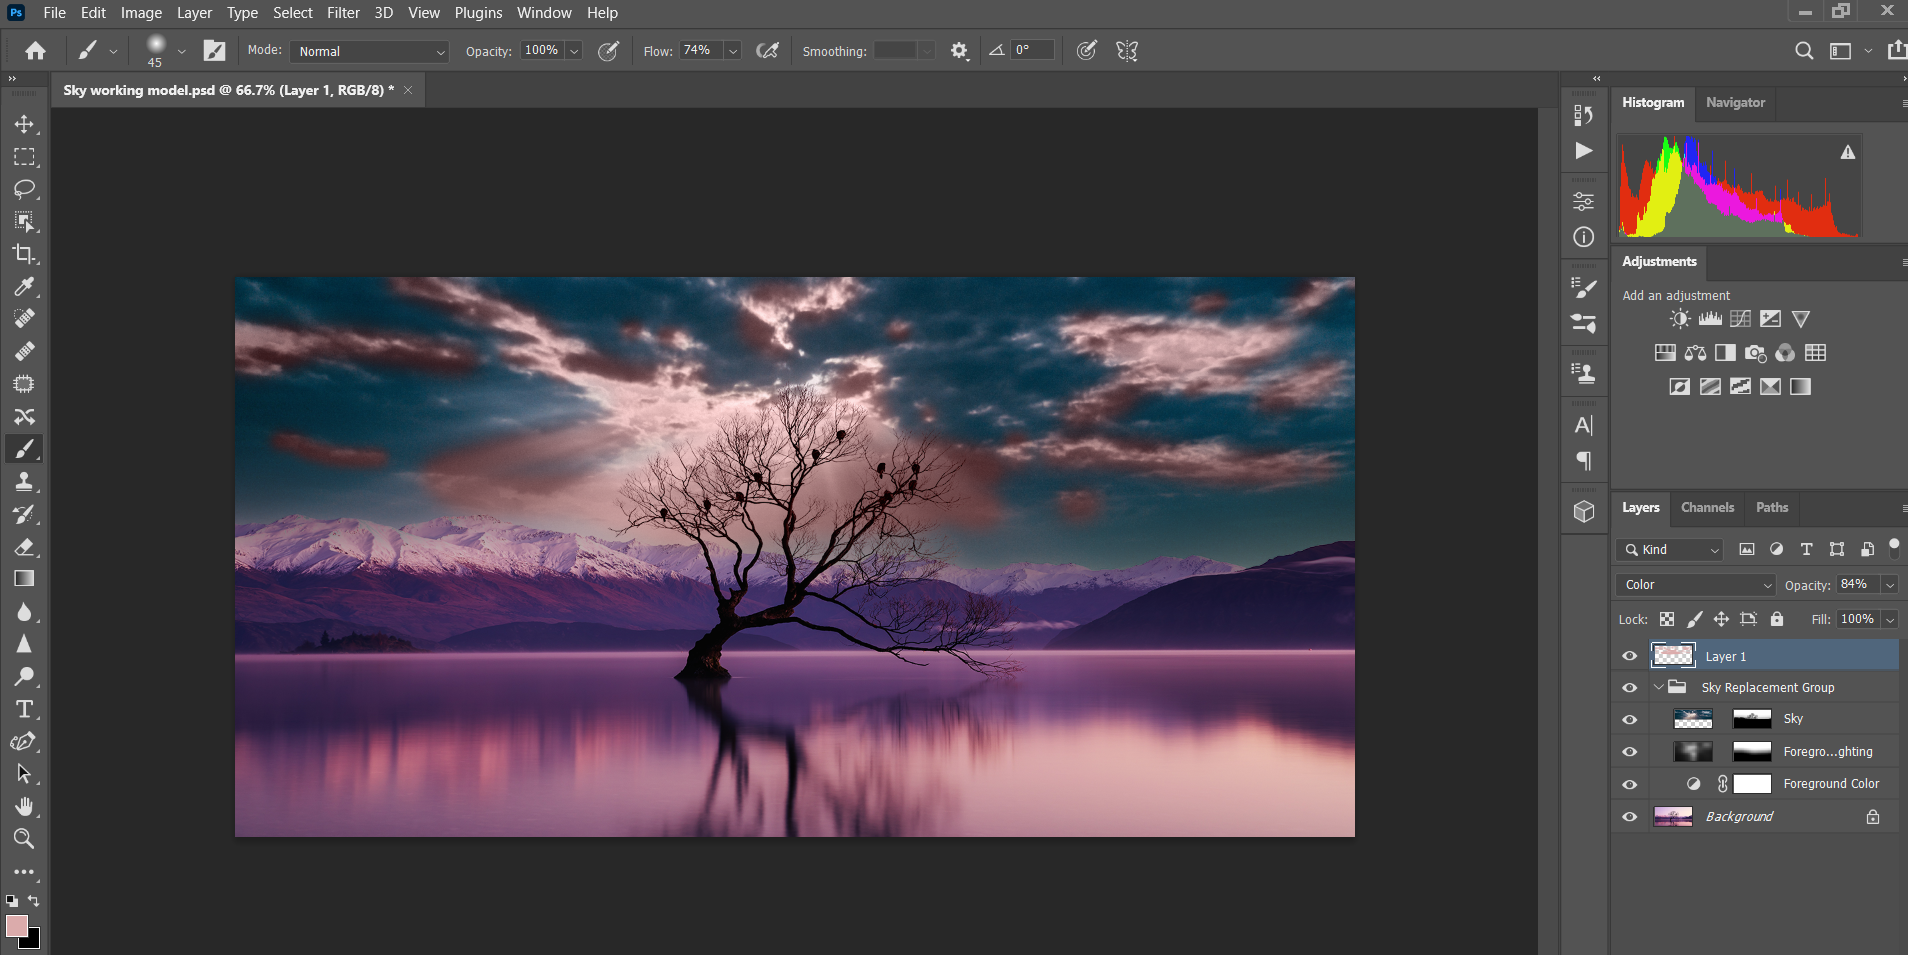
Photoshop will group these adjustment layers together as Sky Replacement Group directly above your Backgroundimage.
There will be either three or four different layers, depending on if you changed the brightness in Step 5. If so, this layer will be on top labeled as Sky Brightness, followed by Sky, Foreground Lighting, and Foreground Color layers.
While Photoshop usually does an amazing job compositing a new sky into your photo, the result at this stage may appear unrealistic depending on how different the colors are in each image.
In this example, it doesn’t look quite right. While the foreground mountains and lake are bathed in beautiful shades of magenta, it’s hard to imagine that kind of lighting being produced by a largely black-and-white sky photo. Additional changes are required.

How far you decide to go to creatively enhance your image is up to you. You could spend up to an hour or more trying to achieve a highly artistic look. But for strictly sky replacement purposes, we recommend creating two additional layers to pull off a successful sky replacement before moving onto more advanced methods.
For the first layer, we will be using this quick Photoshop trick to change colors in images.
Layer 1
-
Collapse the Sky Replacement Group layer by clicking the down arrow. Make sure this layer is highlighted. Select Create a new layer from the bottom right panel. A blank layer named "Layer 1" should now appear above the Sky Replacement Group layer.
-
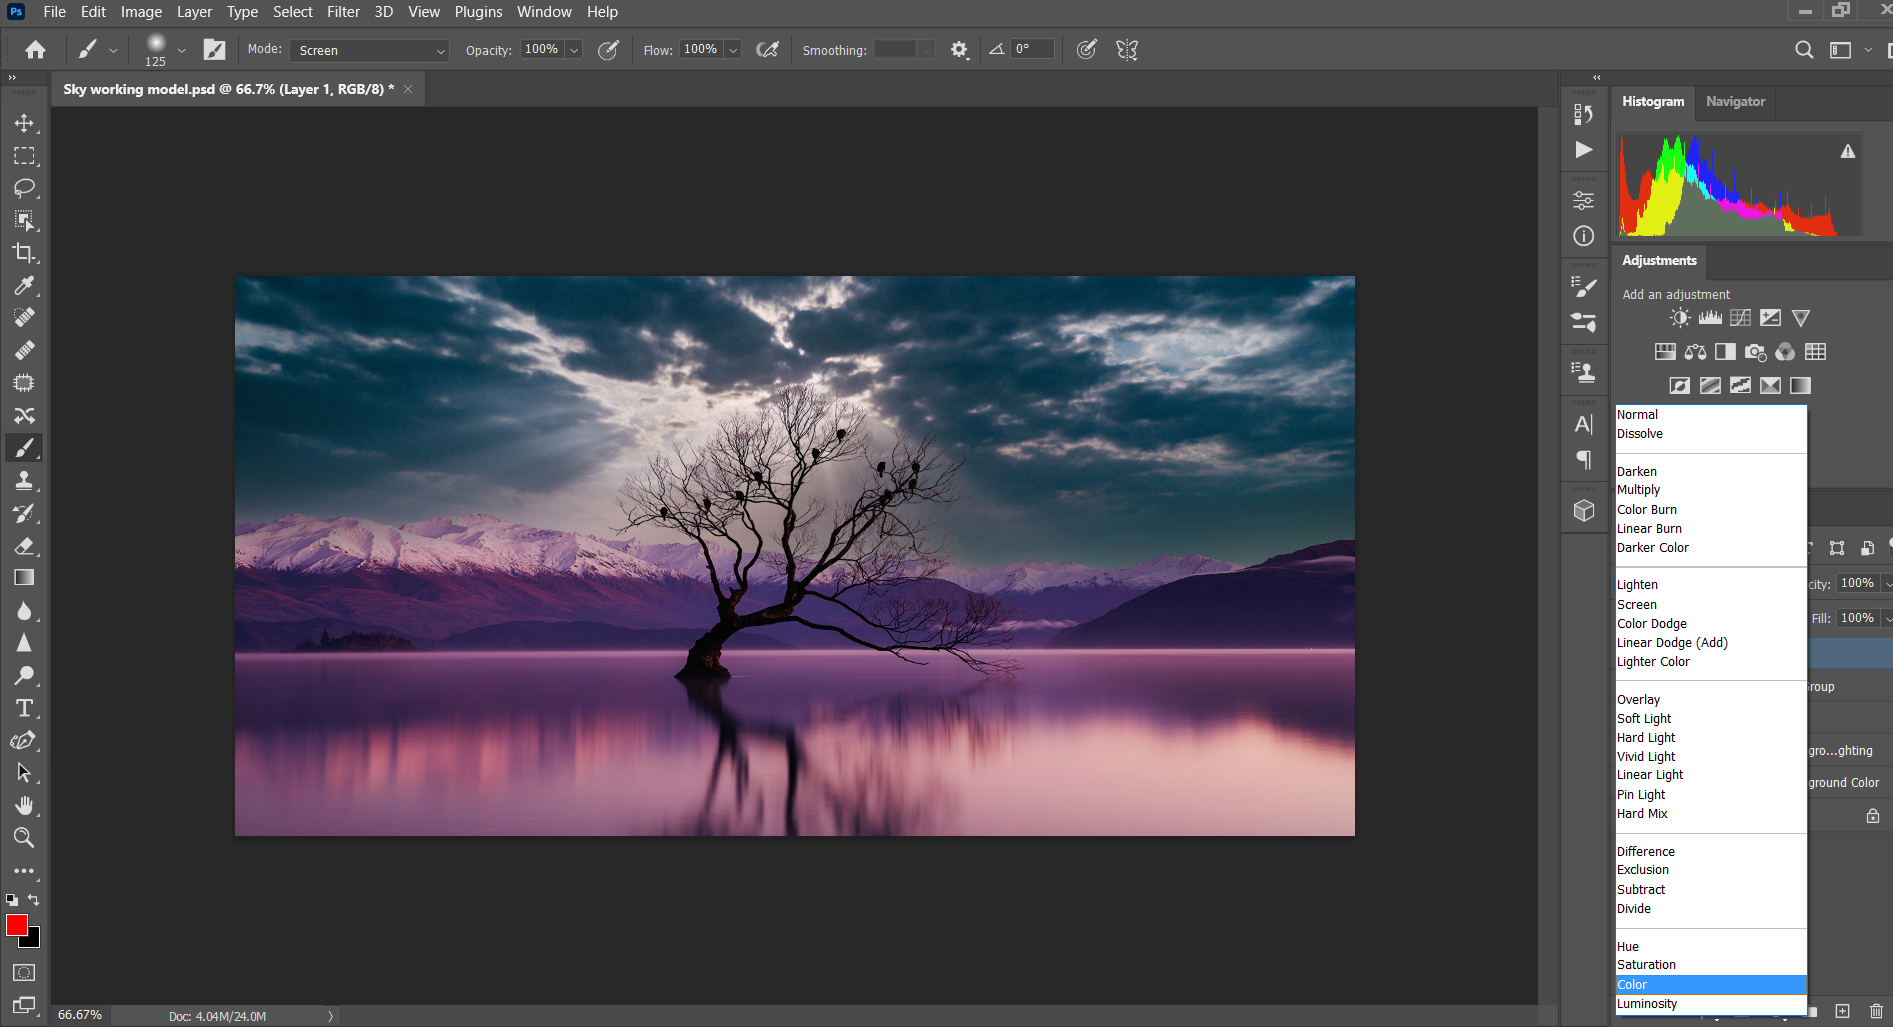
Change the blending mode from Normal to Color.
-
Choose the Eyedropper tool and click on the colored region of your photo that you’d like to see in your sky (they should match somewhat to appear realistic!) The foreground box should reflect the color you chose.
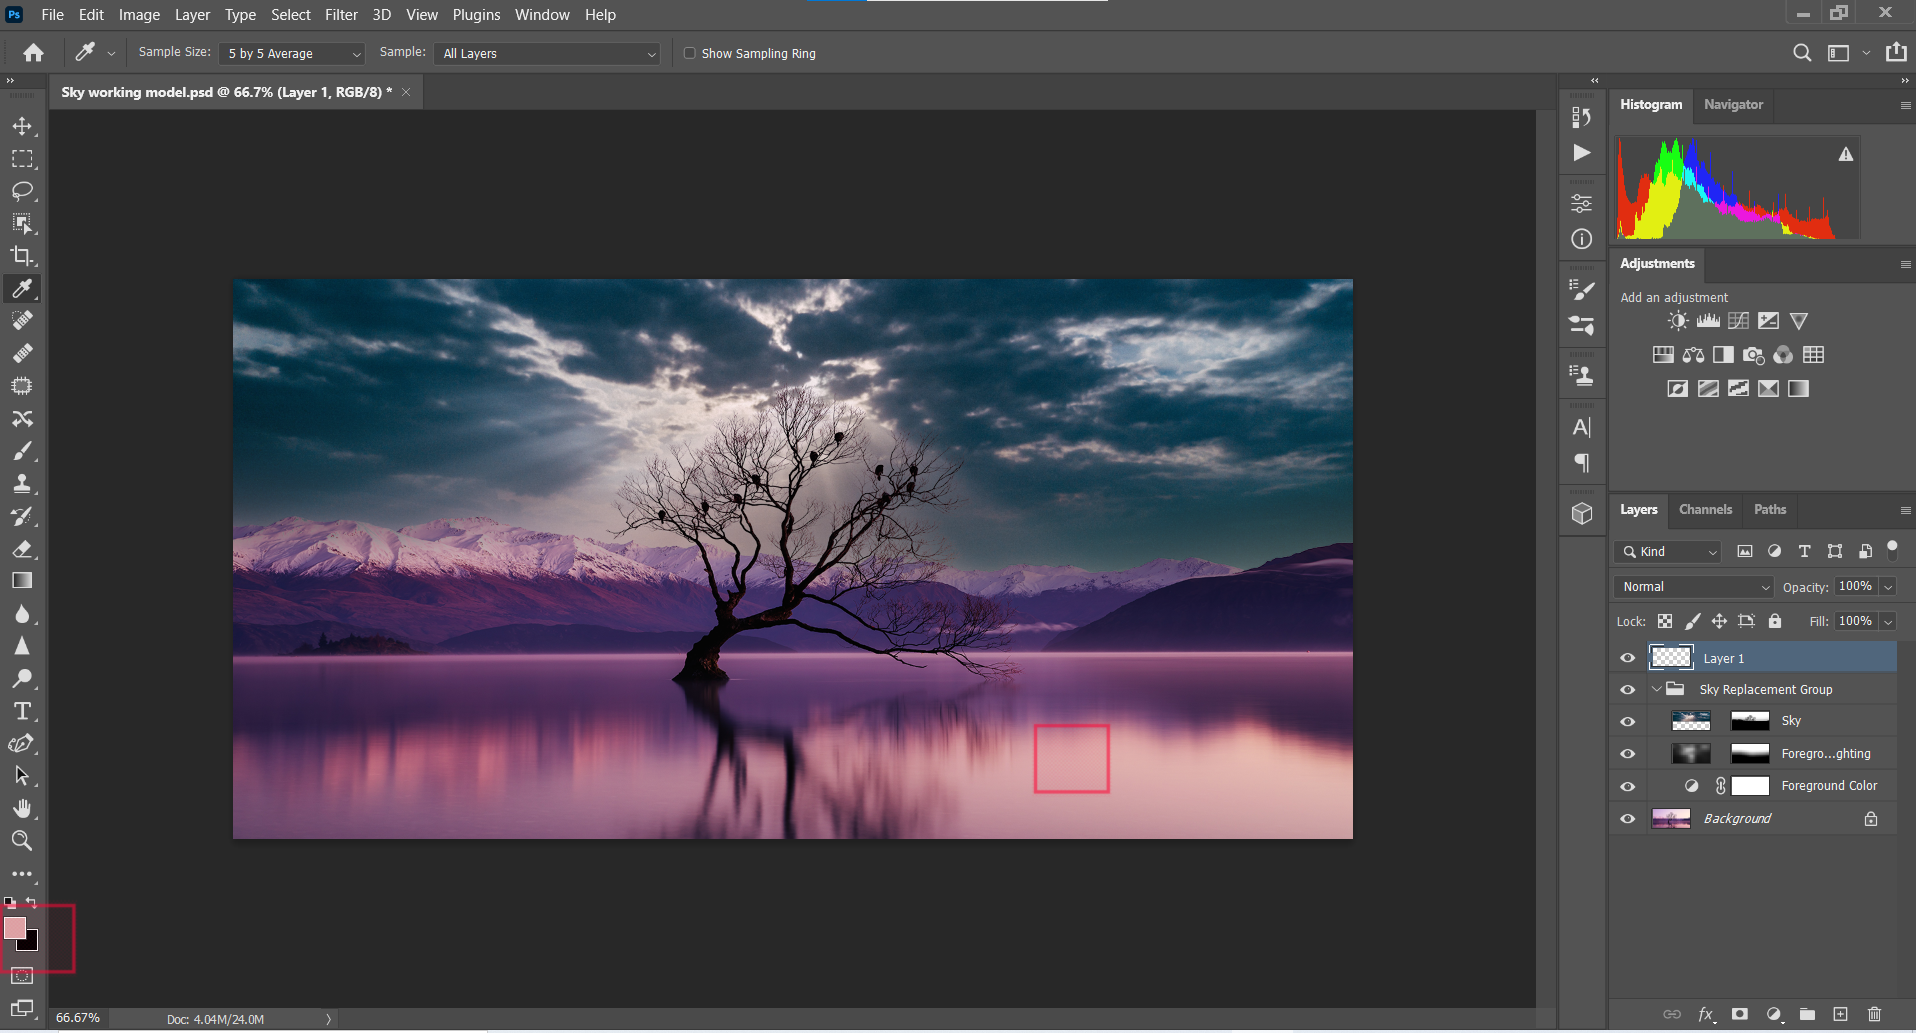
- Click B for the Brush tool. This is just one of a number of helpful Photoshop keyboard shortcuts.
-
Select a Soft Round brush from General Brushes.

- Paint the highlighted areas of your clouds with the selected color. In this example, it’s a shade of magenta. Note that you may want to adjust the Flow down from 100% if the effect is too strong. Also, you may adjust the brush size using the bracket keys "[ ]".
-
If necessary, adjust the layer Opacity to fine-tune the effect.


Color Balance Layer
Adding a Color Balance layer is the icing on the cake. Making use of additional shadows, highlights, and midtones adjustments will make your new sky come to life and complete the sky replacement process.
-
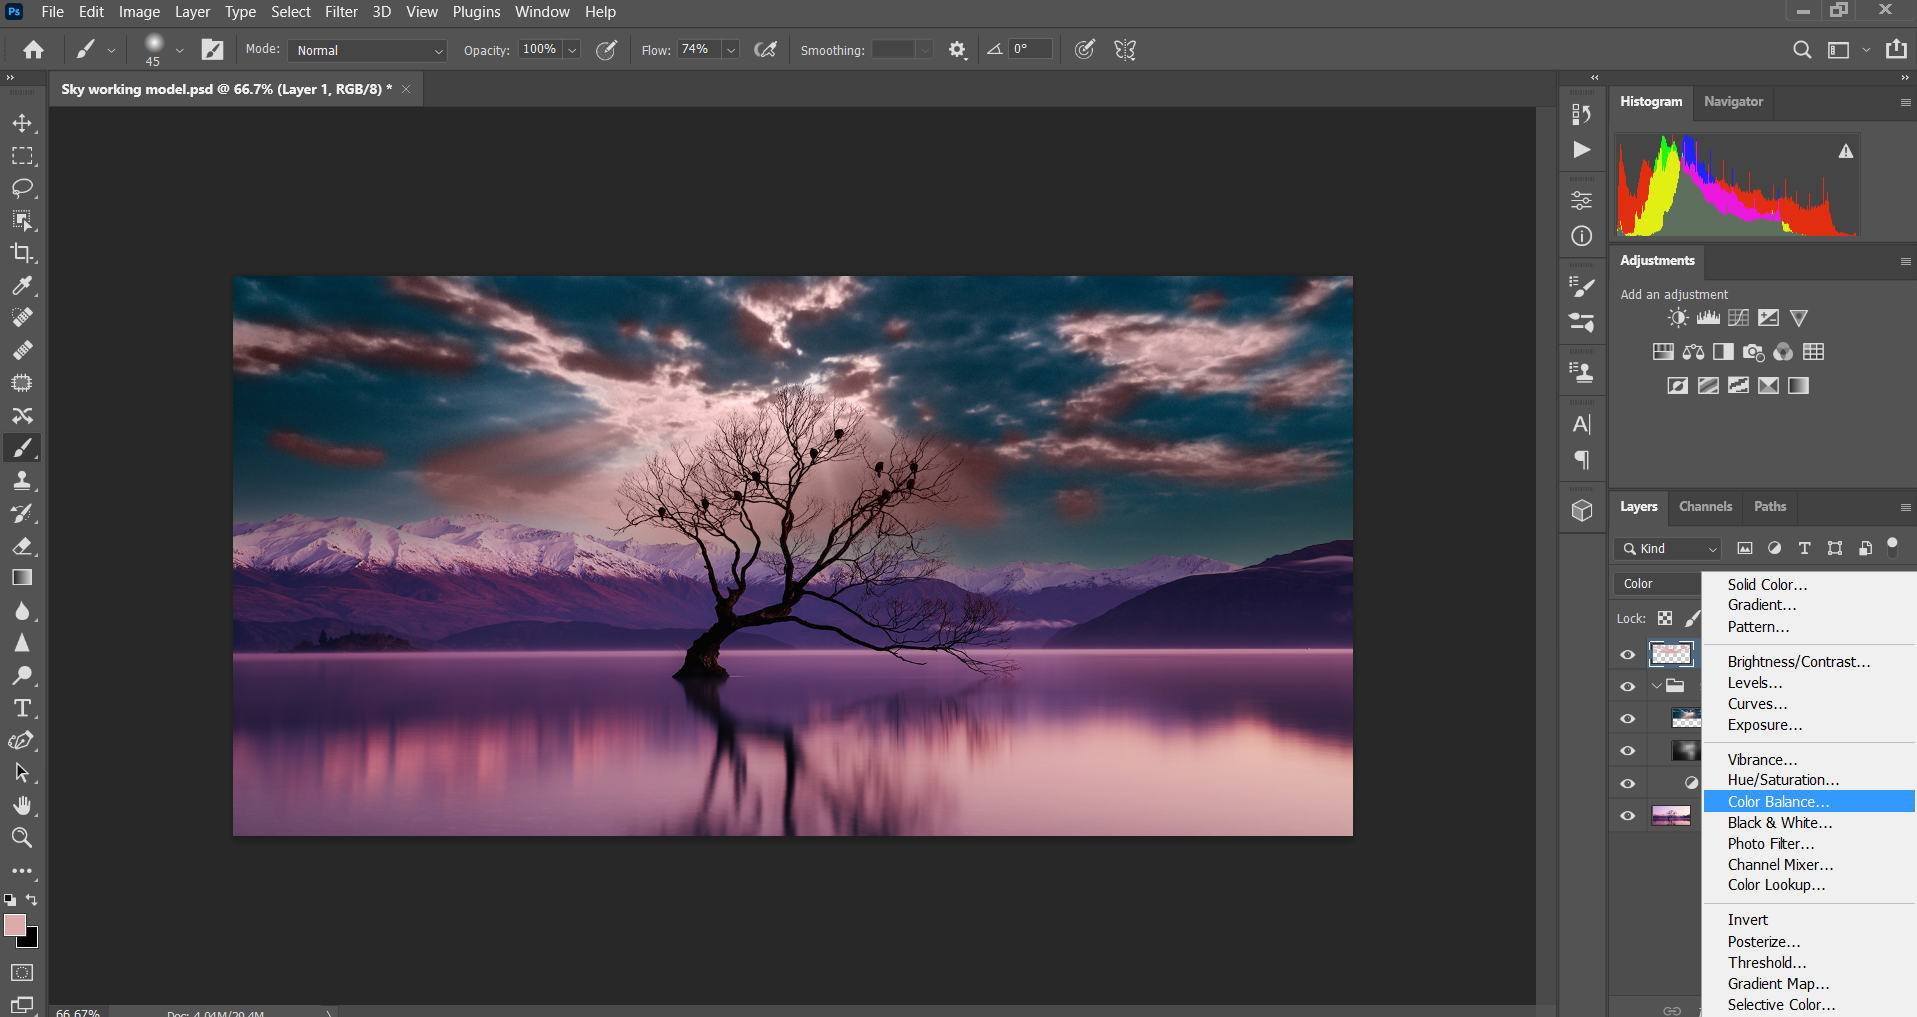
Select the fill-adjustment layer icon at the bottom right and click Color Balance. An options box should open. If not, double-click on the Color Balance layer thumbnail.
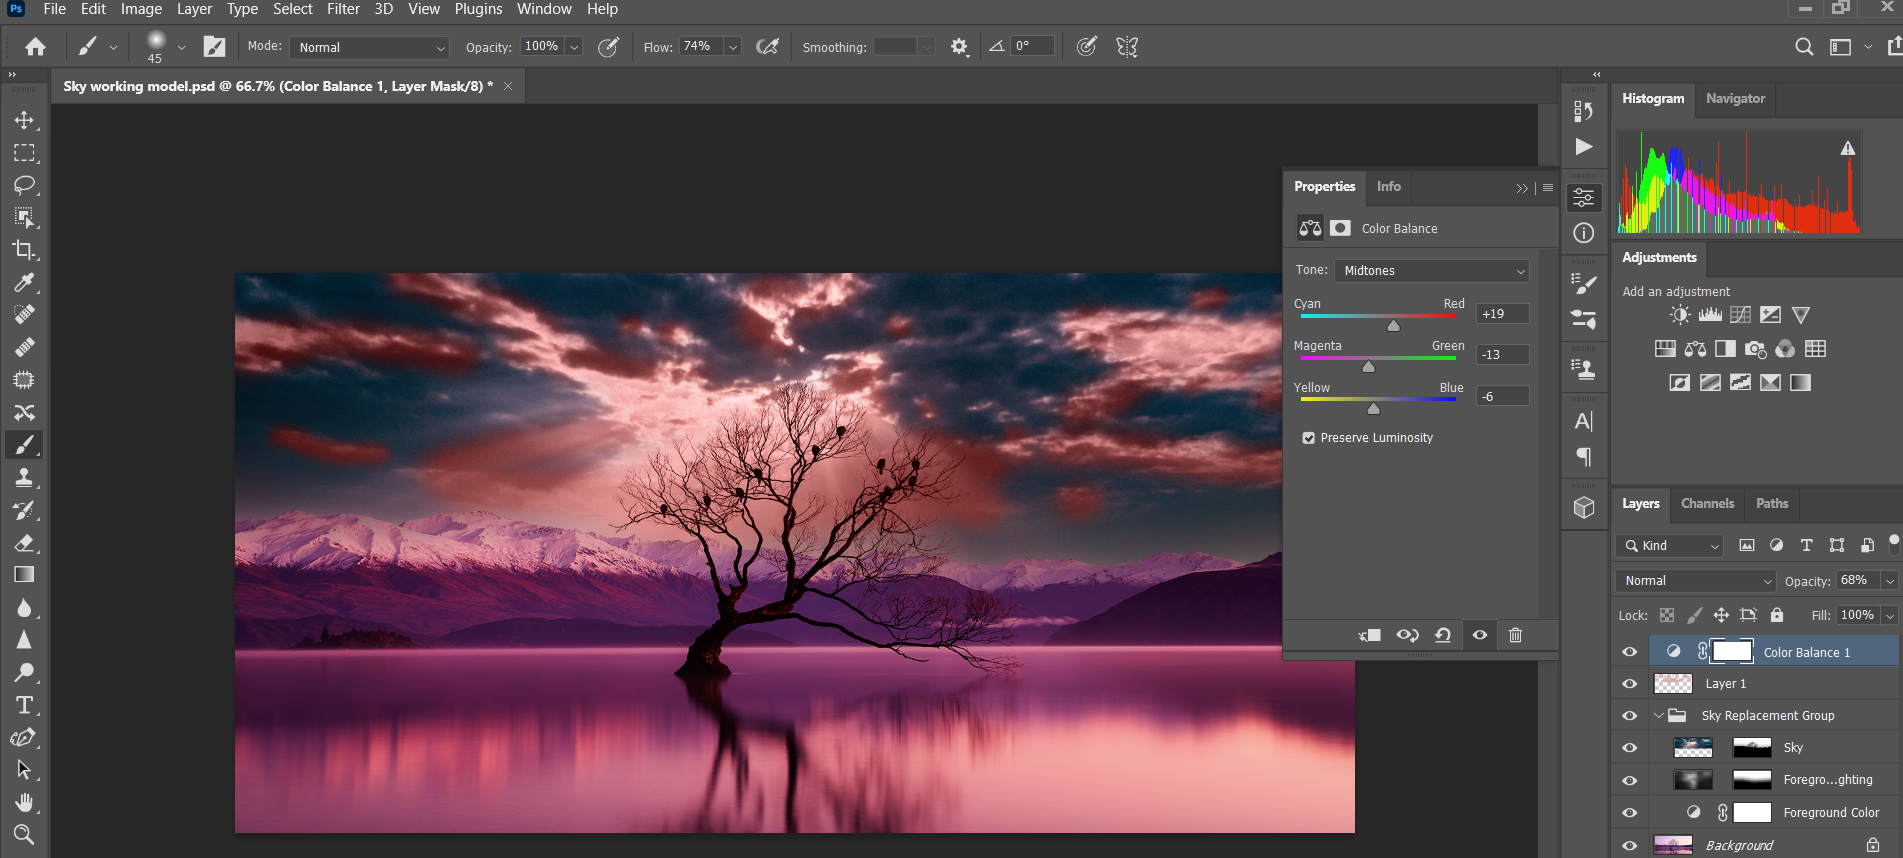
- Adjust the Midtones sliders to taste. Do the same for Highlights and Shadows.
-
If necessary, adjust the layer Opacity to fine-tune the effect.
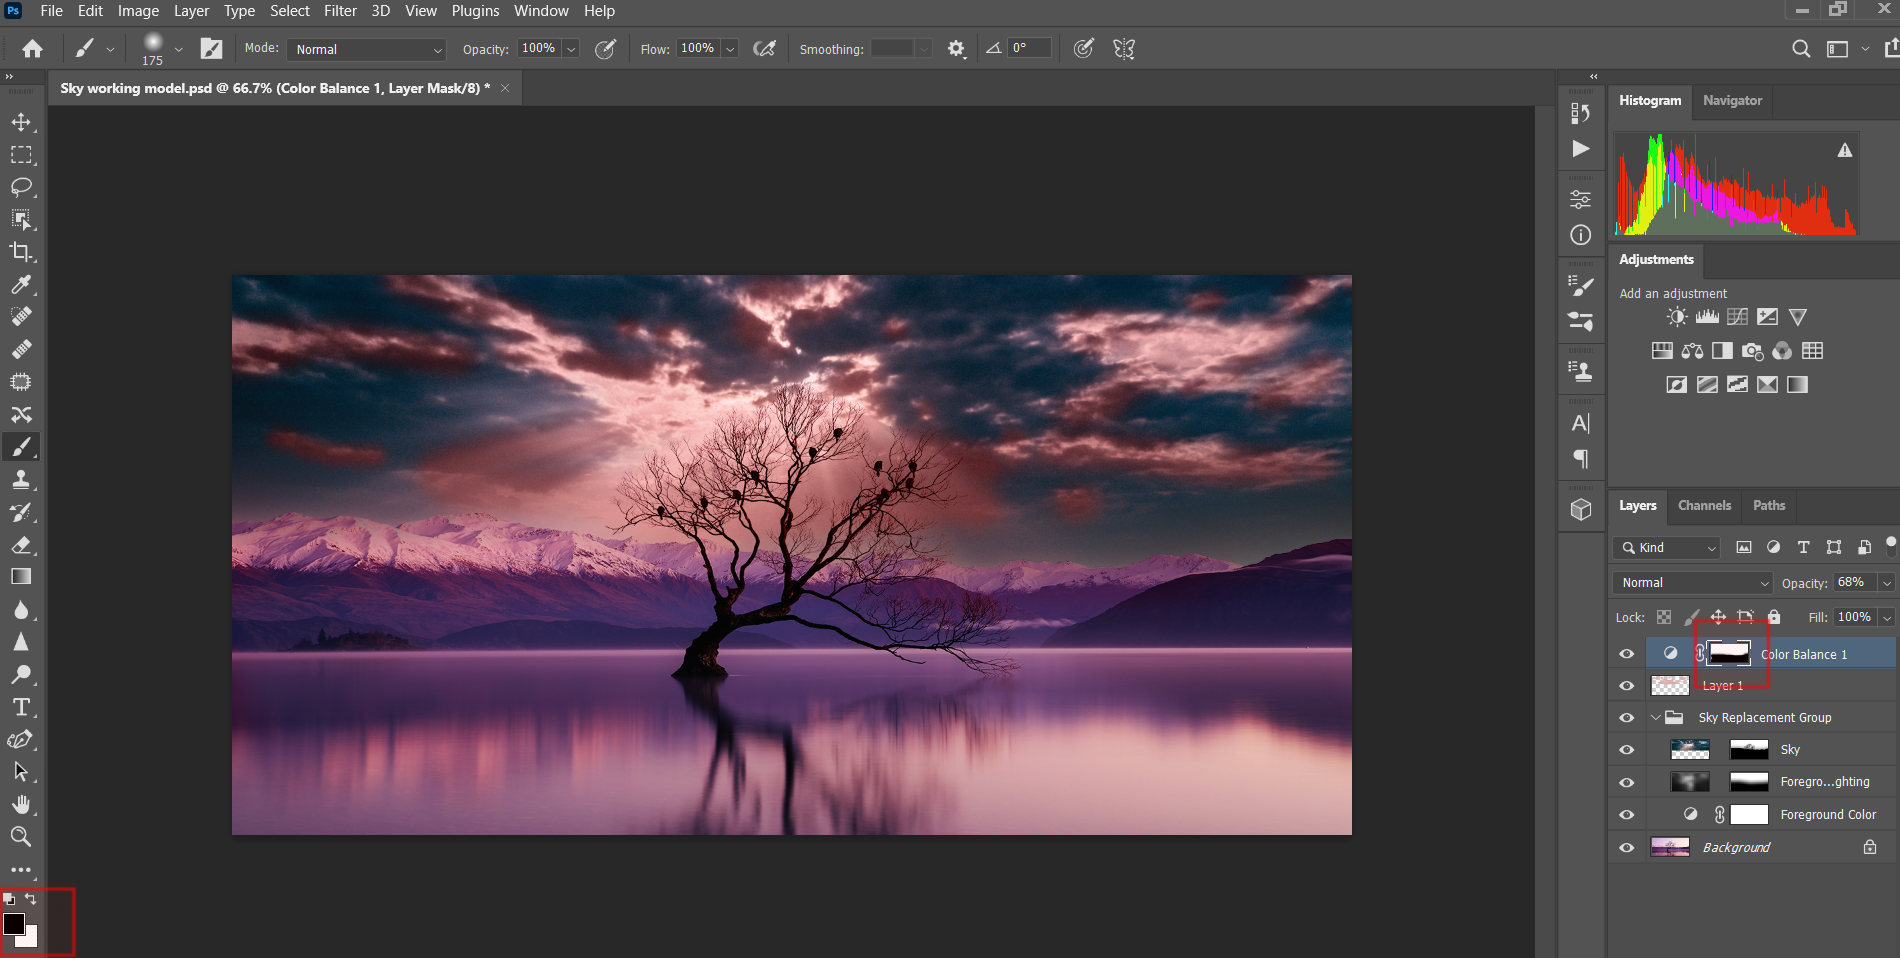
- Select the ready-made Mask of the Color Balance layer. Then Click B for Brush.
- Toggle the X key to select Black as Foreground Color.
-
Using the Brush tool, paint away the Color Balance effect from your image until the sky and original image blend well together. At this point, you can go back to your individual layers and make opacity and other adjustments to fine-tune your image.


That's it! You could either stop at this point or choose to make additional adjustments to make your image more artistic.
Making It Easier to Replace Skies in Photoshop
Not all photos of skies are created equal. Which means that it’s important to examine your image prior to finding your replacement sky, paying close attention to the colors and the quality of light.
In this example, the shot was a long-exposure probably taken at sunrise. Locating an image with this kind of color scheme would be ideal, but as we just demonstrated, not always necessary.
Also, it’s important to determine how the clouds will look. Dark, heavy clouds will be more dramatic, while scattered and light clouds will reflect more of a serene vibe.
When it comes to photographing skies for possible use later on, it also doesn’t hurt to know how to keep noise out of your images to ensure a clean sky, if that’s the look you’re going for.
Image Credit: Kyle Roxas/Pexels