The Nintendo Switch Joy-Cons are each fitted with a reliable battery. But like anything else in life, they won't last forever. If something goes wrong with either of your Joy-Con batteries while they are under warranty, you can send them back to Nintendo to be fixed or replaced.
But if your Joy-Con batteries die after your warranty has run out, what are your options? You can either purchase a new pair of Joy-Cons or try to replace the battery yourself. While it's more convenient to do the former, the latter will save you money and even help reduce e-waste.
So, when should you replace your Joy-Con batteries? And how will you do that?
How to Know When to Replace the Batteries in Your Joy-Cons
The Nintendo Switch Joy-Cons feature rechargeable batteries. These are designed to be depleted and recharged many times throughout their lifespan, so you will not have to replace them often. But occasionally, the batteries can become damaged or worn out.

If your Joy-Cons won't turn on, won't hold a charge, or are depleting very fast, there might be something wrong with their batteries. If you are experiencing any of the above issues, a battery replacement might be all you need to get your controllers back in working order.
How to Replace Your Joy-Con Batteries
Replacing your Joy-Con battery is relatively easy to do and should only take around five to ten minutes to complete. Purchasing a battery replacement costs around $14.99 on iFixit, whereas replacing the controllers themselves will cost $79.99 on Amazon. So if you like the sound of those savings and prefer to do it yourself, here is how to replace the battery in your Nintendo Switch Joy-Cons.

Before you begin, you will require a 1.5mm tri-wing screwdriver, a plastic prying tool, and a replacement HAC-006 Li-Ion battery.
-
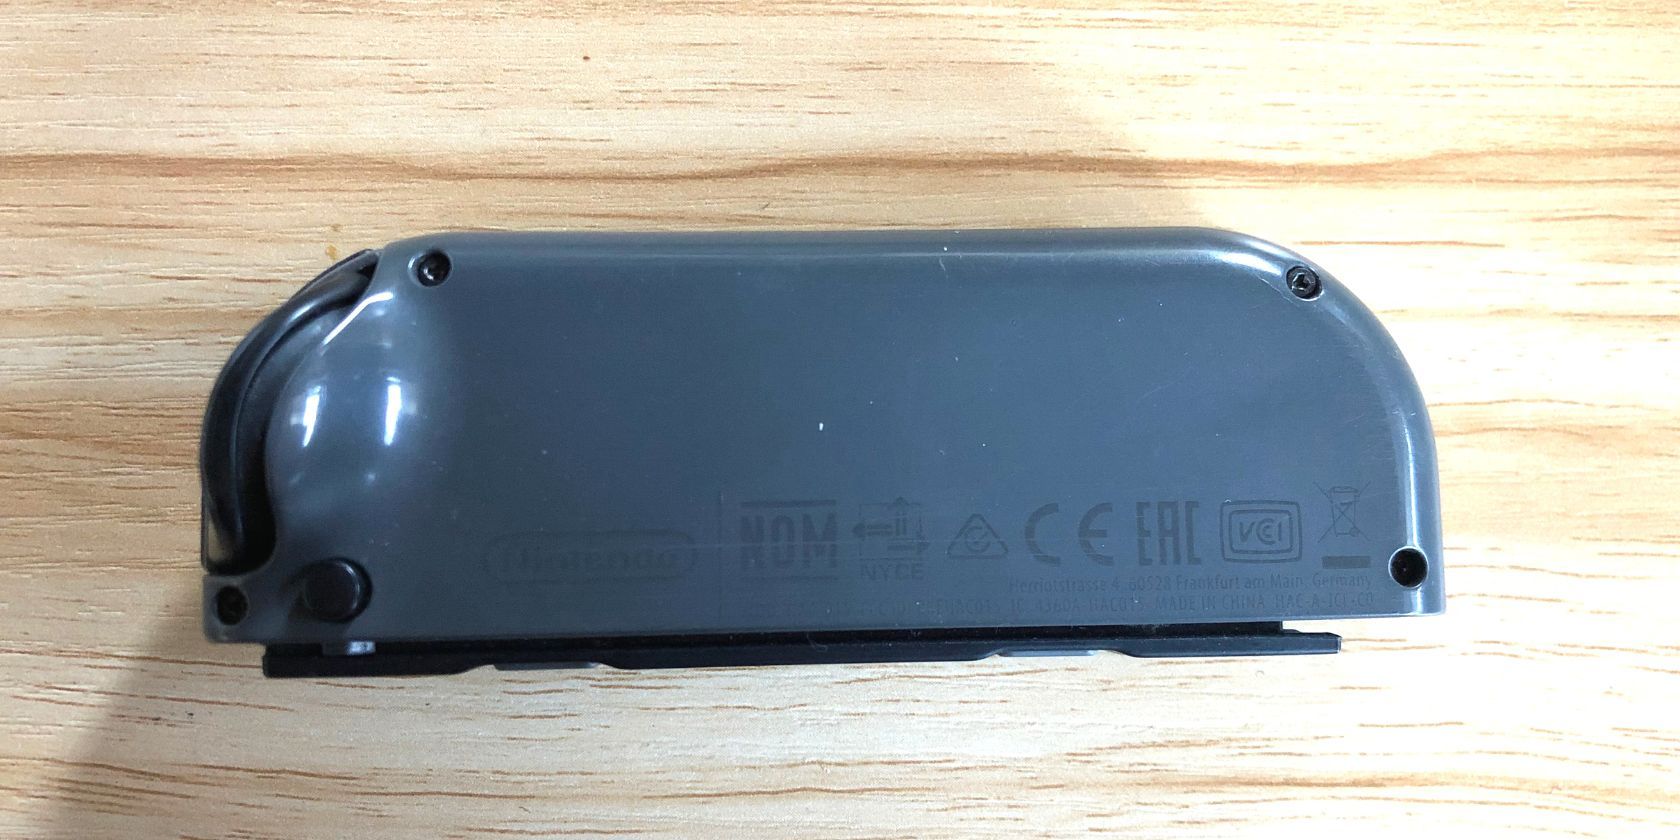
Open the Joy-Con by removing the four screws on the back with a 1.5mm tri-wing screwdriver. These screws are very tight and can easily strip, so ensure you apply adequate pressure to avoid this as you remove the screws.
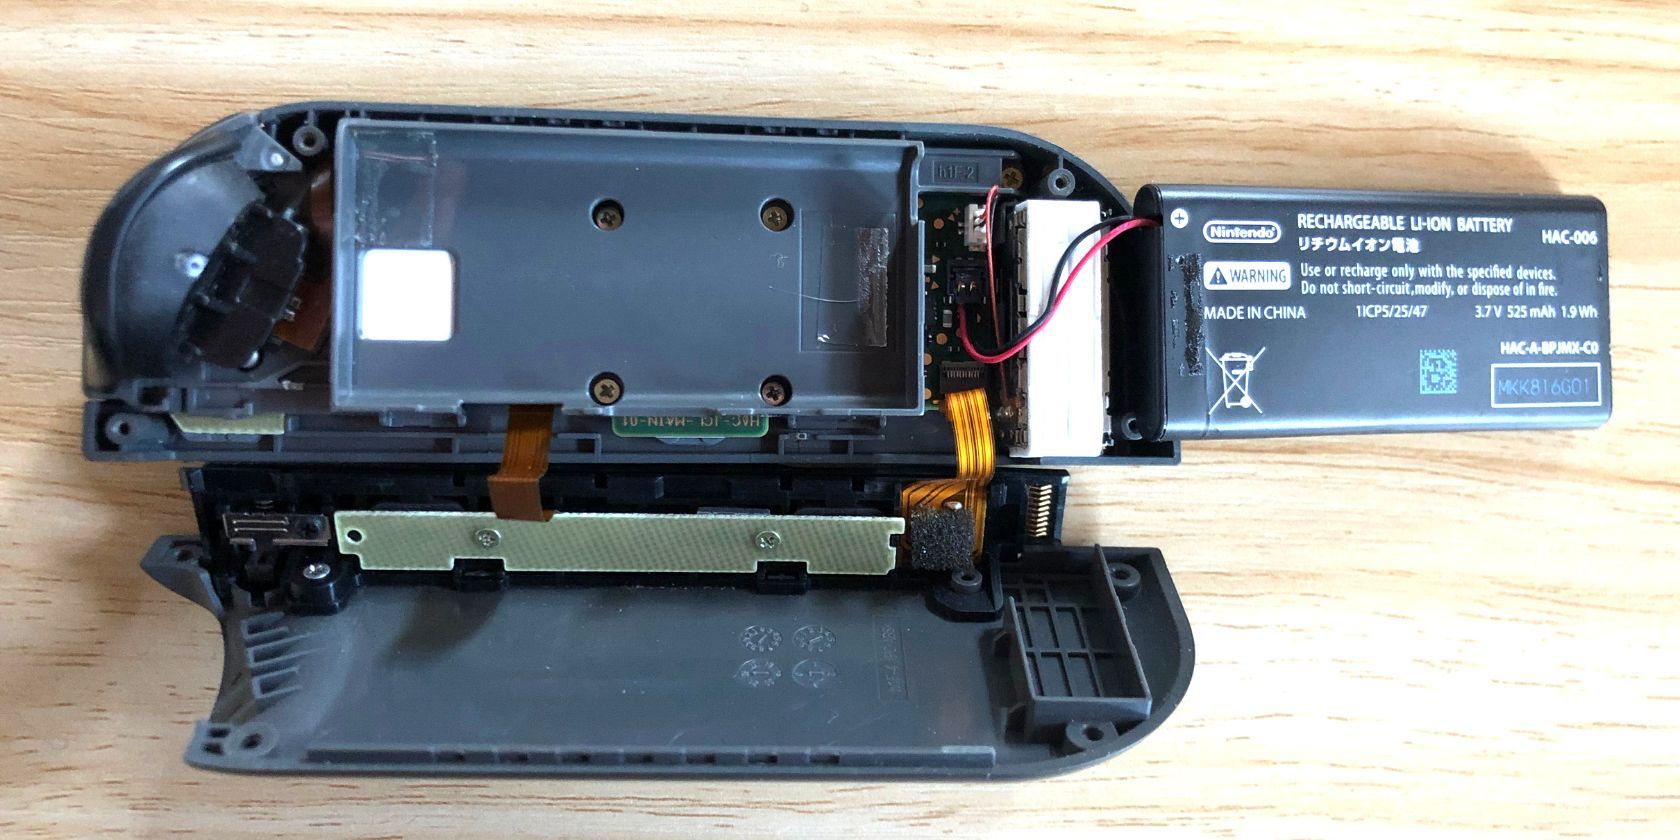
- Open the Joy-Con using a plastic prying tool to pry the plates apart gently.
-
Slide your plastic prying tool underneath the battery and lift it upwards. Removing the sticky pad that's holding the battery down can take some pressure—it is crucial that you do not use a metal tool for this step.
-
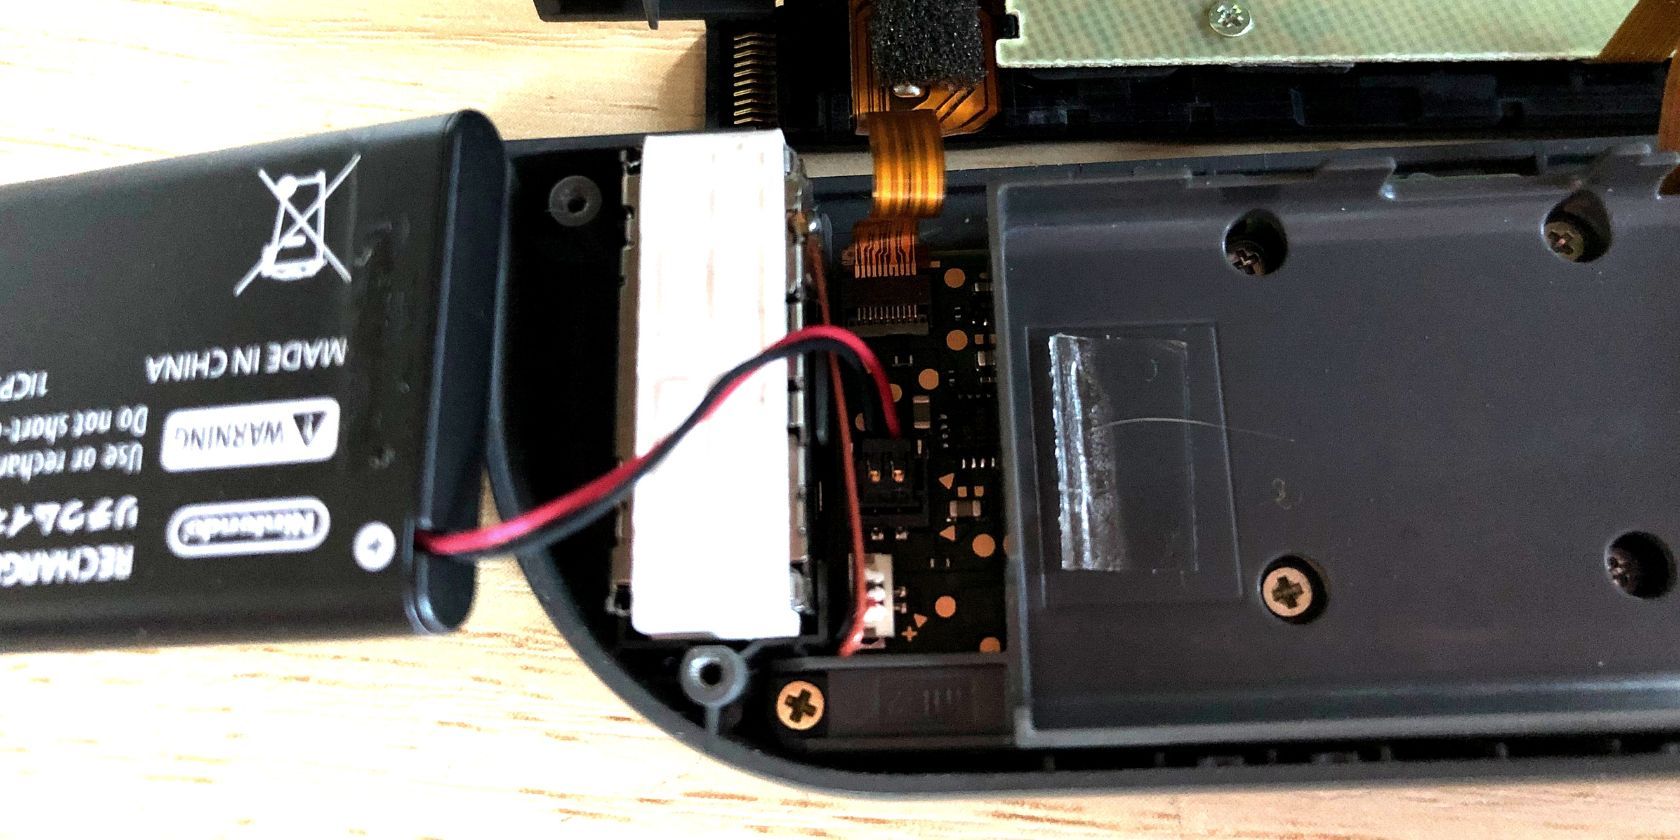
Unplug the battery by gently pulling the cord.


Now that you have removed the old battery, put the new battery in its place and repeat the same steps in reverse to reassemble your Joy-Con. These steps apply to both the left and the right Joy-Cons.
If you are also experiencing any drift with your Joy-Cons, now would be a great way to apply a fix. Check out our guide to learn about several ways to fix Joy-Con drift.
Save Money by Saving Your Nintendo Switch Joy-Cons
Replacing the battery in your Nintendo Switch Joy-Cons is easy, fast, and can save you a lot of money in replacements. It is extremely important to note, however, that opening your Joy-Con and replacing any parts voids your warranty. Replacing your battery yourself is only recommended if your warranty has already expired.