
Empty cells and entire blank rows in Microsoft Excel cause errors. Even if they didn’t, blank rows don’t make for consistent data in your spreadsheets. So let’s learn how to remove blank rows in Excel with the help of the different methods Excel gives you.
Your approach will depend on two things:
- Is the number of blank rows small or large?
- Is the entire row empty or are their cells with some data?
It’s easy to delete a small number of empty rows in Excel as the first method will show you. But you will need more automatic methods for a larger number of blank rows.
Remove Blank Rows Manually
If there are a small number of rows, the manual way to remove rows is the quickest.
- Select a row by clicking on the row number on the left side of the screen. To select multiple rows, press Ctrl and click on the row number.
- Right-click anywhere in the selected row and select Delete. The empty rows will disappear and the rows below the deleted ones will move up.

This method is the simplest way to remove rows and columns that aren’t blank.
The Quick Way to Remove Blank Rows in Excel
The Delete command may be the simplest but it is not the quickest when you have several empty rows in your spreadsheet. In this case, you should use the more targeted Find & Select command on the Ribbon.
Select the range of rows and columns that have the blank cells you would like to remove. In our example, we will select the data range that extends from Column A to Column G.
-
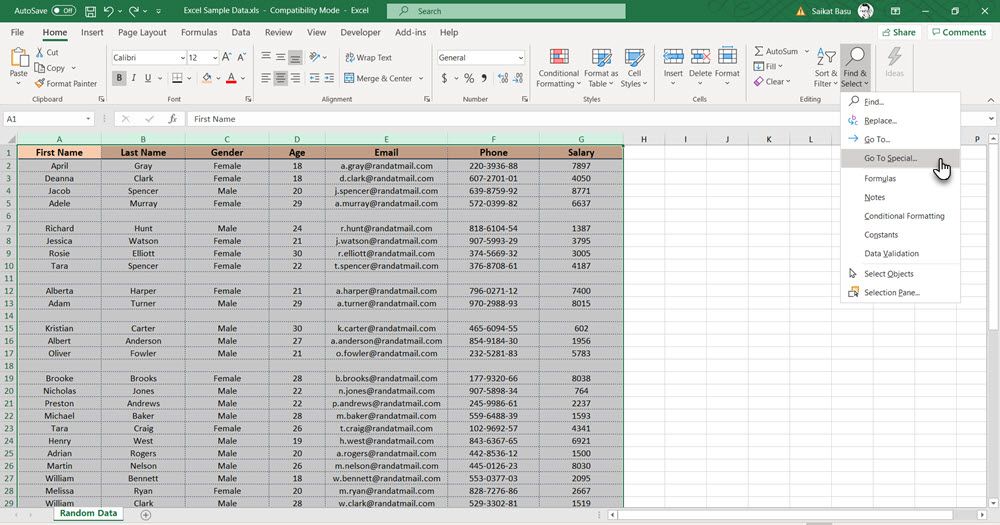
Go to Home > (Editing Group) Find & Select > Go To Special…
-
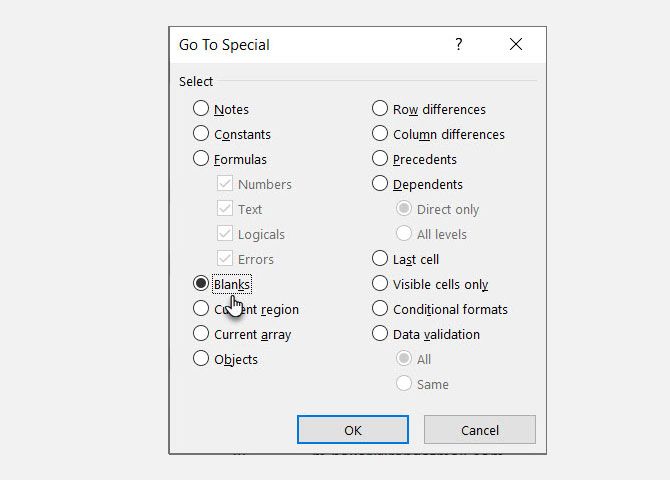
From the options available, select the radio button for Blanks. Click on OK.
-
All the blank rows in your spreadsheet get selected. Right click anywhere on these rows and select Delete like before. Excel will again display four options in a tiny dialog.
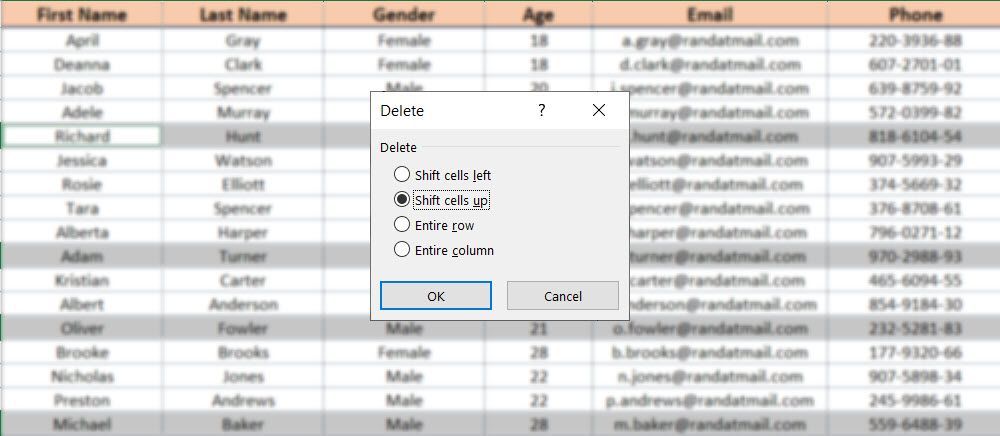
- In this case, as there is no cell data next to your selected range, you can select Entire row. If there is some data in the adjoining cells, opt for Shift cells up as you want the non-empty rows to move up.


Remove Blank Rows With Find And Replace
Find and Replace is a lot like the Go To Special command. As the name says, it will find all instances of cells without any value and give you a quick way to select and remove them.
Press Ctrl + F to bring up the Find and Replace dialog box. You can also go to Find & Select > Find… to open it.
- In the Find dialog, stay on the Find
- Keep the Find what field blank.
- Select the Match entire cell contents
- Search Within the Sheet. Search by Rows. Look in the Values.
- Click the Find All button to get all the blank cells.

With the blank rows are all selected, you can now use the same Delete method to remove them.
Remove Blank Rows in Excel With a Filter
It’s easy to remove blank rows in Excel with the above methods when the entire row does not carry any data. But in the real world, there are instances when few cells in the rows will be blank while others may have data.
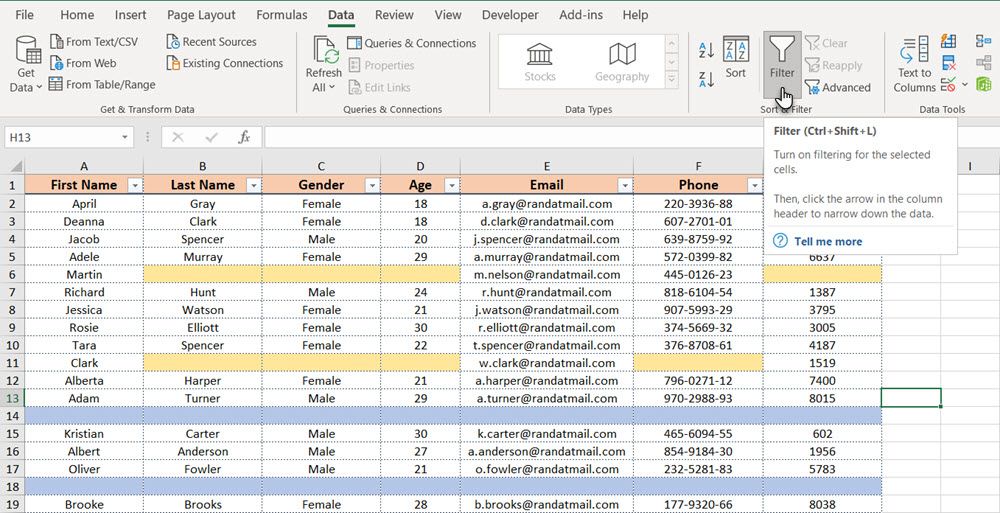
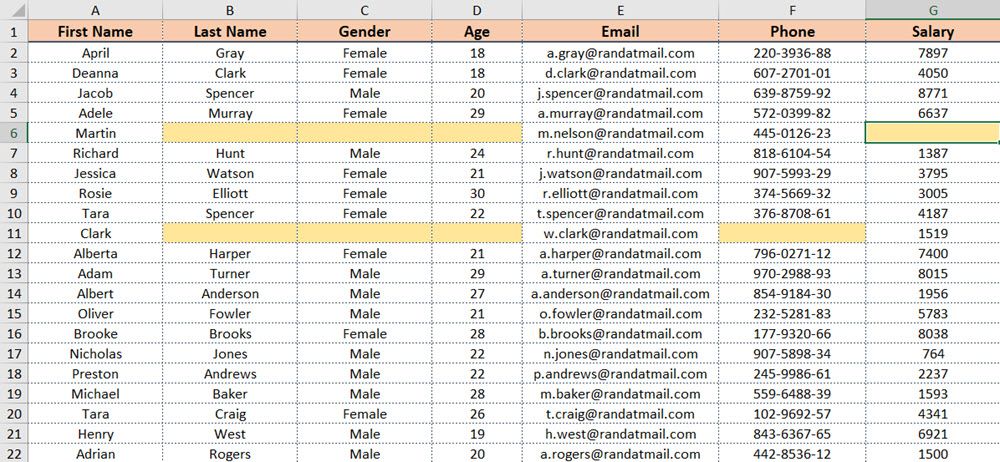
The above methods won’t discriminate between the two and will remove any row with blank cells. The data in the other cells will also vanish. For instance, in the screen below, Row 6 and Row 11 are not completely blank while Row 14 and Row 18 are.

You have to use a Filter to remove the rows with all blank cells only but preserve the rows which have a mix of data and blank cells. It is easy enough but takes a few steps more.
- Select all columns that hold your data range.
-
Go to Ribbon > Data tab > Sort & Filter Group > Filter.
-
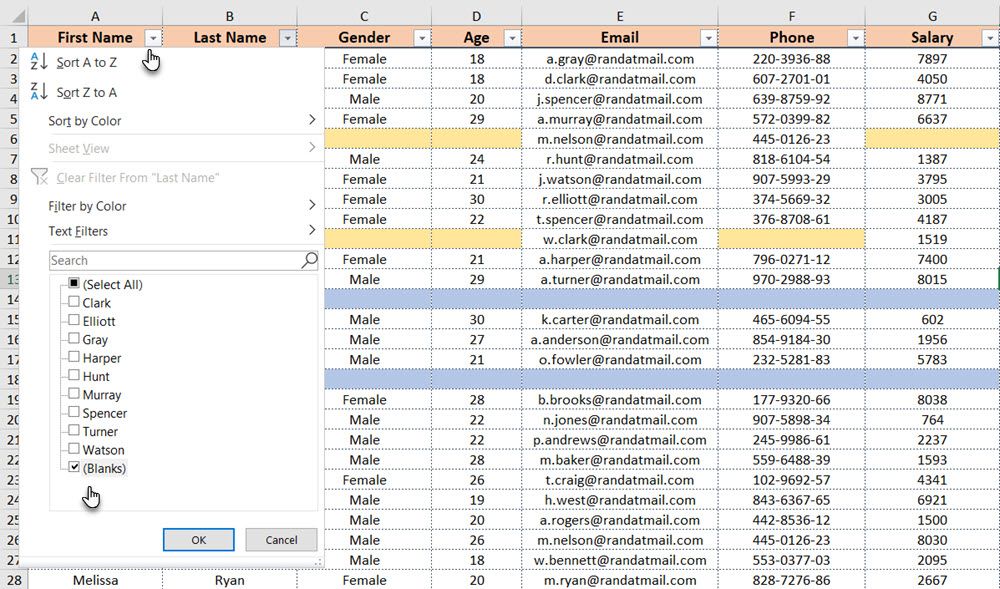
Start filtering for complete blank rows from columns that only have a few blank cells. Click the filter arrow in column B, uncheck (Select All), and select (Blanks) in the dropdown.
- Go across the other columns and repeat the filter for blanks in the other columns to selectively find those entire blank rows.
-
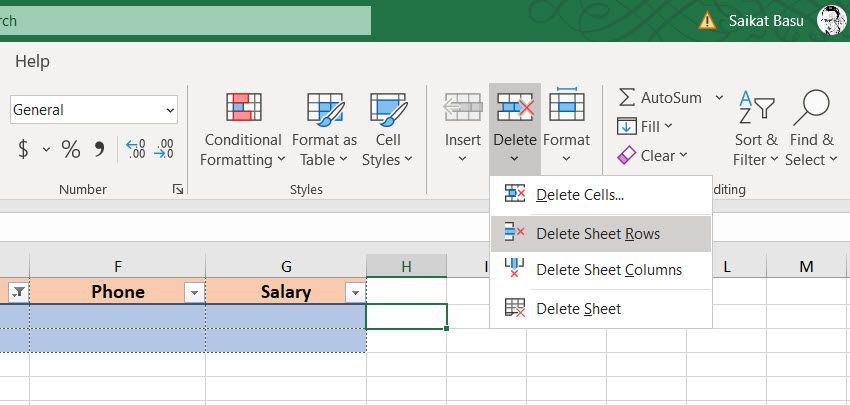
Select the filtered rows. Go to the Home tab and click Delete > Delete Sheet Rows.
-
Go back to the Data tab and switch off the Filter. The rows with a few blank cells will remain, but the entire blank rows are now gone.


Remove Blank Rows by Sorting Your Data
Don’t overlook the simple but useful sort feature to surface data you do not want. In this case, you can sort your data to reveal all the blank rows in one bunch and then delete them.
- Select the range of data.
- Go to the Data
- On the Sort & Filter group, you can click on either the Sort A to Z or Sort Z to A button for ascending or descending order of the sort. In both cases, the blank rows will be at the bottom of the selected range.
- Delete them as before.

You can also revert to the original order before the data. Add an Index (like a serial number) column before sorting. Then use the Sort dialog arrange the data according to the Cell values.
Blank rows are empty, so Excel will put them at the bottom of your data range. Delete the blank rows and sort the data again---this time based on the index values. You can remove the index column now if it’s not necessary.
If you haven't used the Sort feature before, use this Microsoft Office help page to familiarize yourself.

Learn the Basics of Excel
There are a few other ways to remove blank rows in Excel. You can tap into more powerful methods like a FILTER function or even use PowerQuery to manage huge spreadsheets.
But before that, try these simple methods and clean up your spreadsheet. The Find & Select method may be the fastest.
Blank rows can throw off your data. And it is something you will often have to deal with as you begin learning Excel.